

What this is
PromoteIQ is a batch destination: audience data flows out of Zeotap CDP towards PromoteIQ, and nothing flows back into the CDP. It is filed under Integrate > Destinations > Batch Integrations, so it attaches to an audience (segment) rather than to a journey. Unlike most destinations, the users in an audience are not delivered to PromoteIQ directly. Zeotap CDP creates the audience (segment) in PromoteIQ, and writes the matching user identifiers to an Amazon S3 bucket that you provision. You then transfer the segment list from that bucket into PromoteIQ to run relevant campaigns on your website. PromoteIQ is a platform that allows businesses to advertise to shoppers across the open web. By using retailers’ first-party data, PromoteIQ enables advertisers to target their ads to individual shoppers, regardless of where they are browsing. Integrated with Zeotap CDP, it can help businesses increase their reach and efficiency when promoting their products and services to potential customers. The integrations master list records PromoteIQ as a destination only, so there is no PromoteIQ source page to pair with this one. If you want audiences delivered to object storage and are not using PromoteIQ, use the Amazon S3 destination instead. The workflow diagram below illustrates the integration with the PromoteIQ Destination.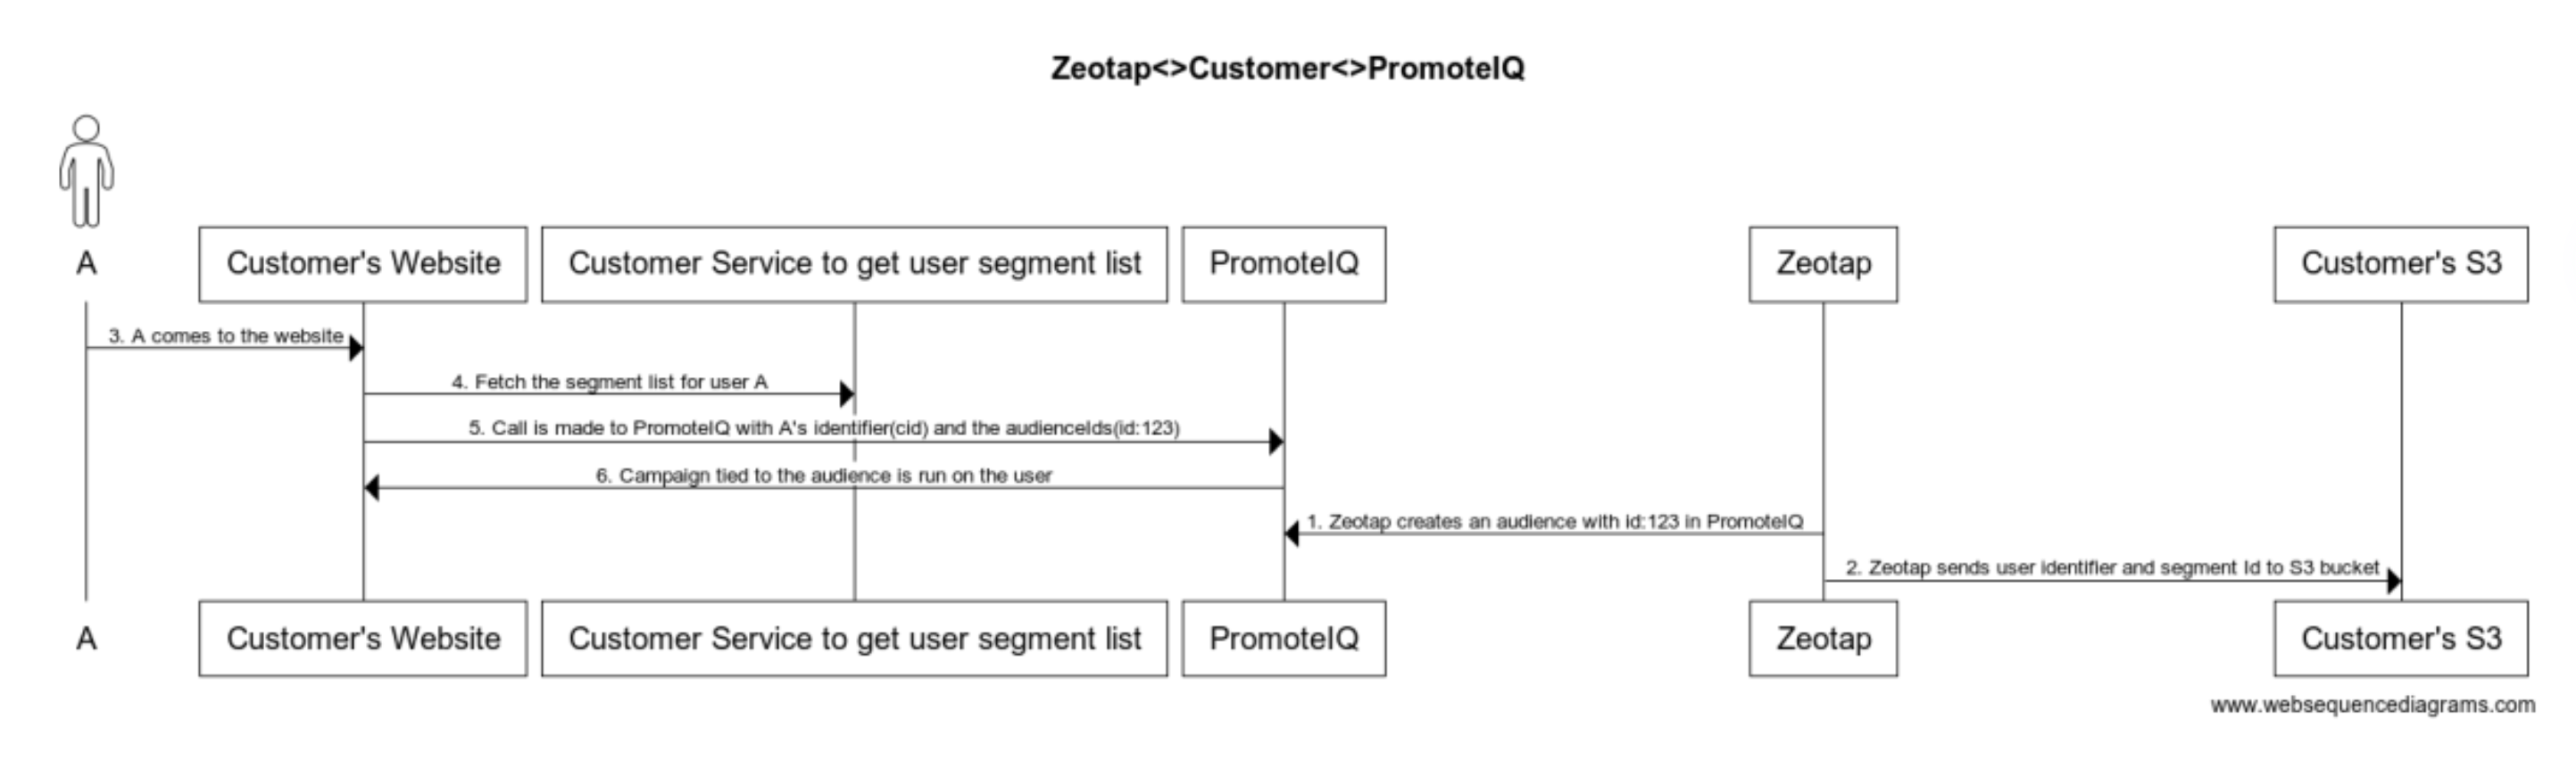
Supported identifiers and actions
This integration supports custom identifiers. In the mapping step you map a Catalogue attribute to the destination’s custom identifier field. The following table lists the available action types for the integration and the supported features for each action type:
Because none of the three features is supported, every refresh writes a full file rather than only the changes since the previous run.
Prerequisites
Before you create a PromoteIQ Destination, make sure you have:- A PromoteIQ account, and the API Key, API ID and API URL for it. Obtain these from your PromoteIQ point of contact.
- An Amazon S3 bucket that you have provisioned to receive the data files, along with its folder path, region, client ID and client secret.
- An audience in Zeotap CDP that you want to activate.
Gather the PromoteIQ and Amazon S3 details
Ensure that you have the following details available before creating a Destination:- API Key
- API ID
- API URL
- S3 Bucket
- S3 Folder
- S3 Client ID and Client Secret
- S3 Region
API key and API ID
An API key and API ID are two types of credentials used in PromoteIQ for authentication and authorisation purposes. PromoteIQ issues them as a single API Token, joined by a hyphen: the part before the hyphen is the API ID, and the part after it is the API Key. Example If your API Token is<api-id>-<api-key>, then:
<api-id>— the short numeric portion before the hyphen — is your API ID.<api-key>— the long hexadecimal portion after it — is your API Key.
API URL
API URL is the endpoint of your PromoteIQ APIs that you have created.S3 bucket
This is the name of your S3 bucket. You can obtain this information on your Amazon S3 account by navigating to Buckets. In the example shown below, test-adobe-s3-bucket is the bucket name.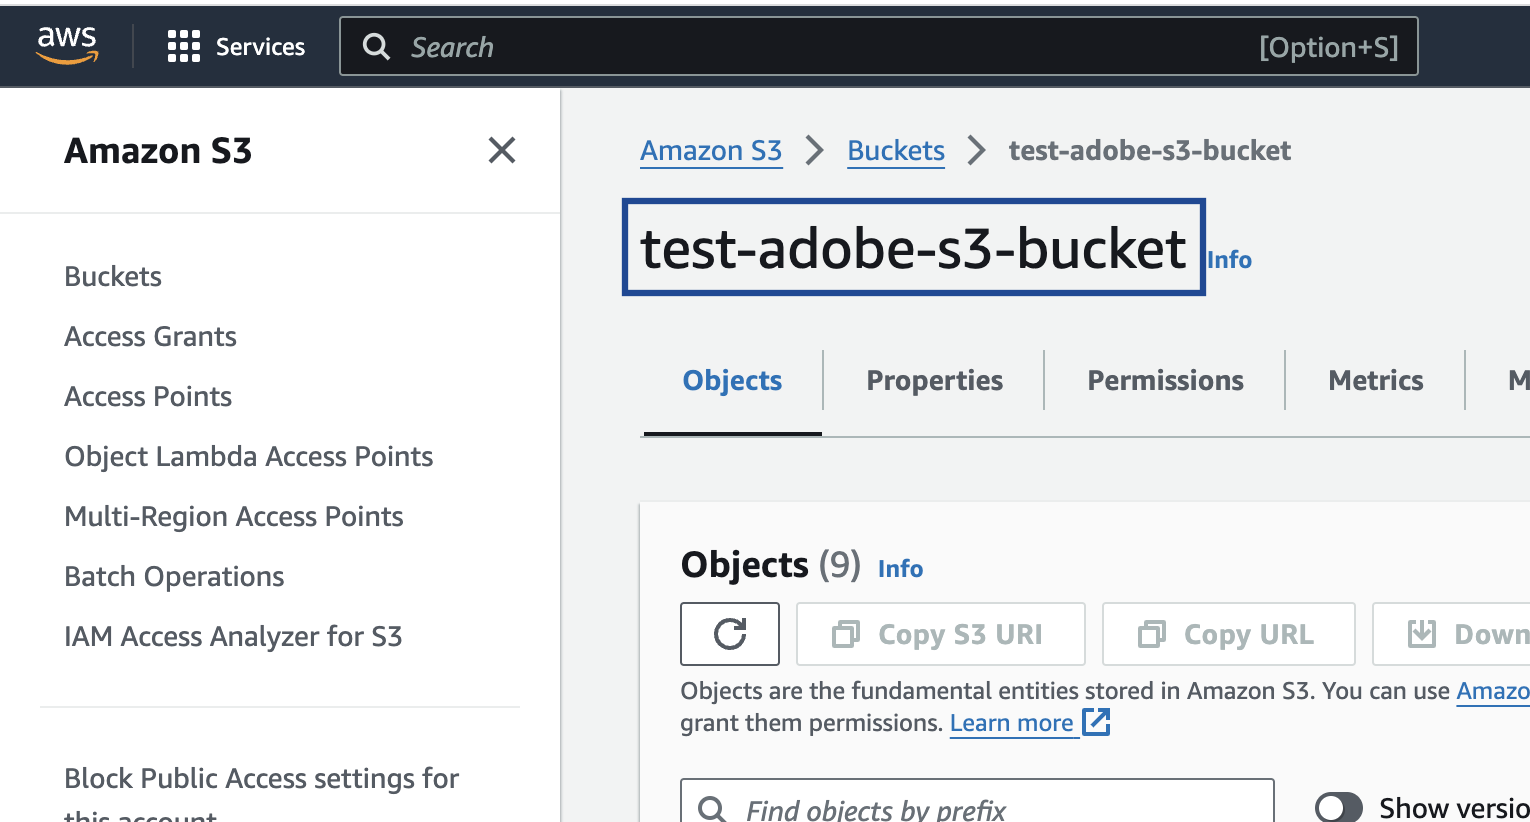
S3 folder
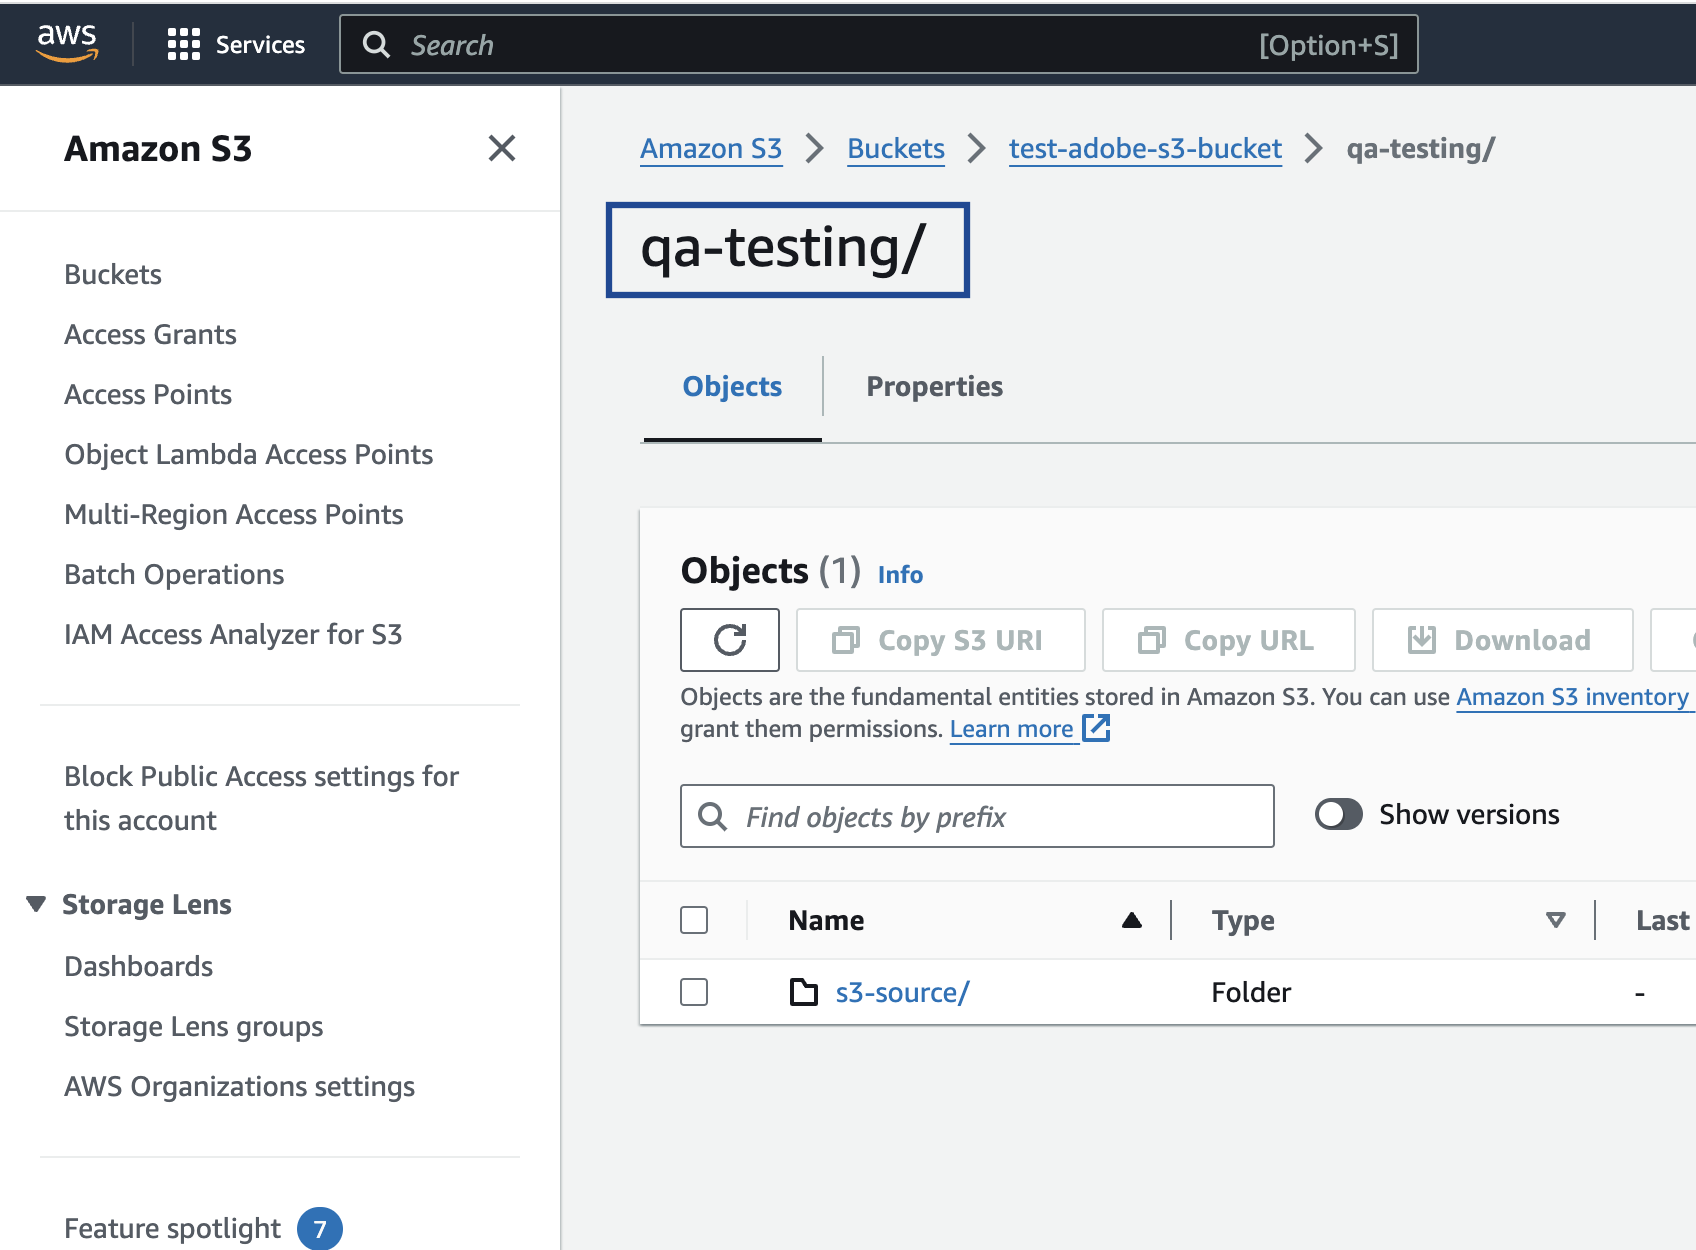
In Amazon S3, a folder serves as a logical container for organising stored objects within a bucket. In reality, there are no actual folders in Amazon S3. Instead, the folder concept is emulated by employing object key names containing slashes (”/”) to replicate a hierarchical arrangement. You can obtain this information from your Amazon S3 account by navigating to the Objects tab under the Amazon S3 bucket as shown in the image below. Ensure that you follow the folder structure shown below.folder_name/sub_folder_name/
S3 client ID and client secret
These are the security tokens that provide secure access to your Amazon S3 resources. You can obtain the Client ID and Secret by navigating to the AWS IAM Credentials tab under Security credentials in your Amazon S3 account.S3 region
This is the geographical location where the Amazon S3 storage is available. You can obtain this information by navigating to the Properties tab under the Amazon S3 bucket as shown in the image below.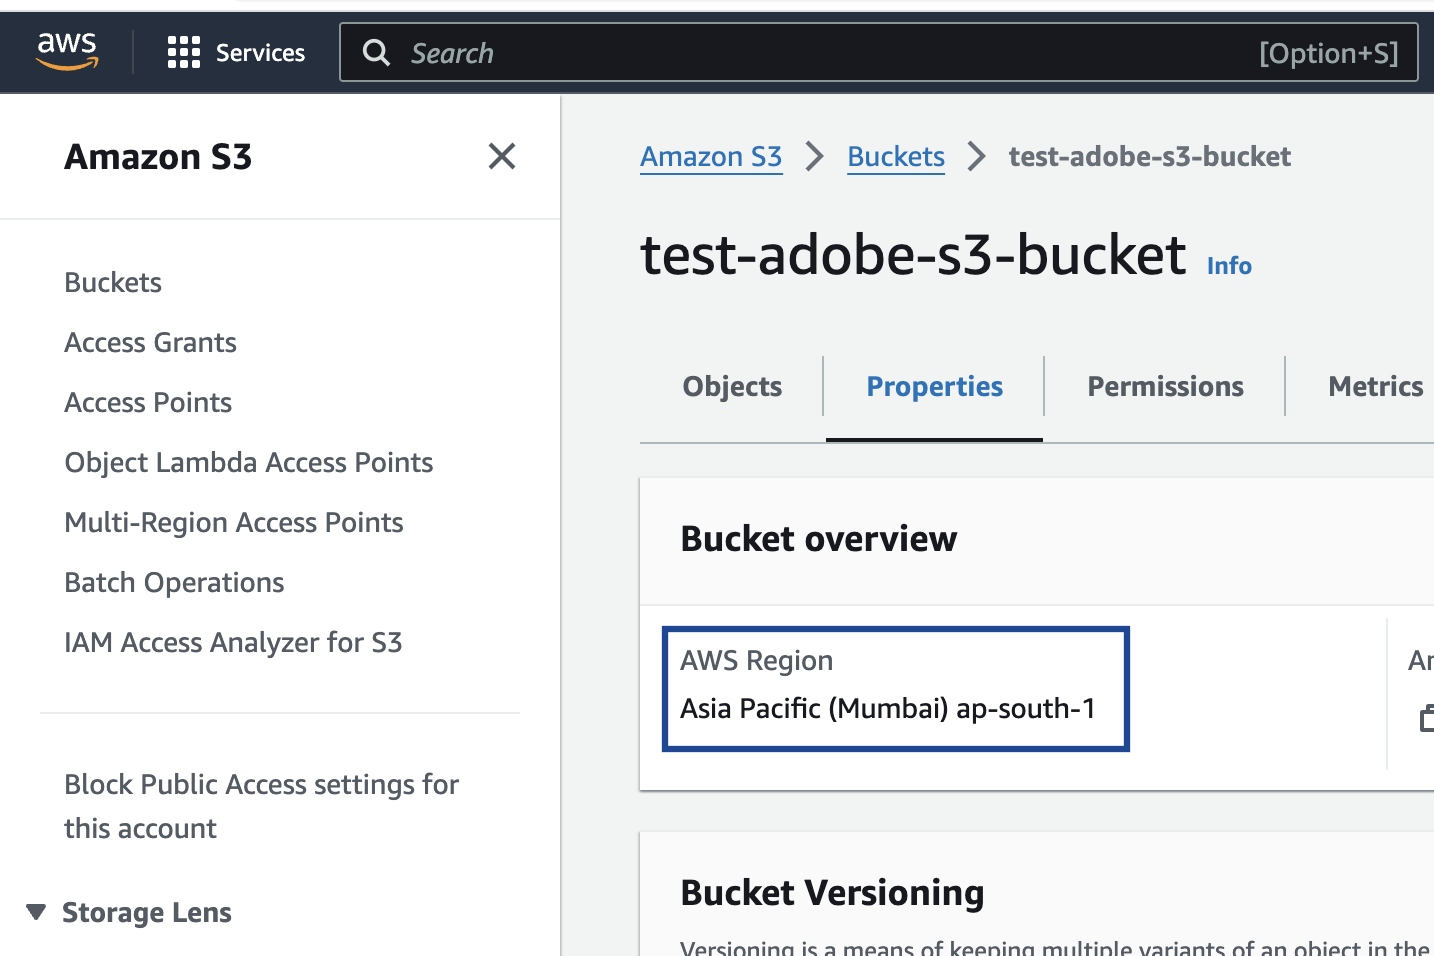
Create the PromoteIQ destination
Perform the following steps to create a Destination for PromoteIQ:1
Log in to the Zeotap CDP App and go to Integrate > Destinations.
2
Click + Create Destination.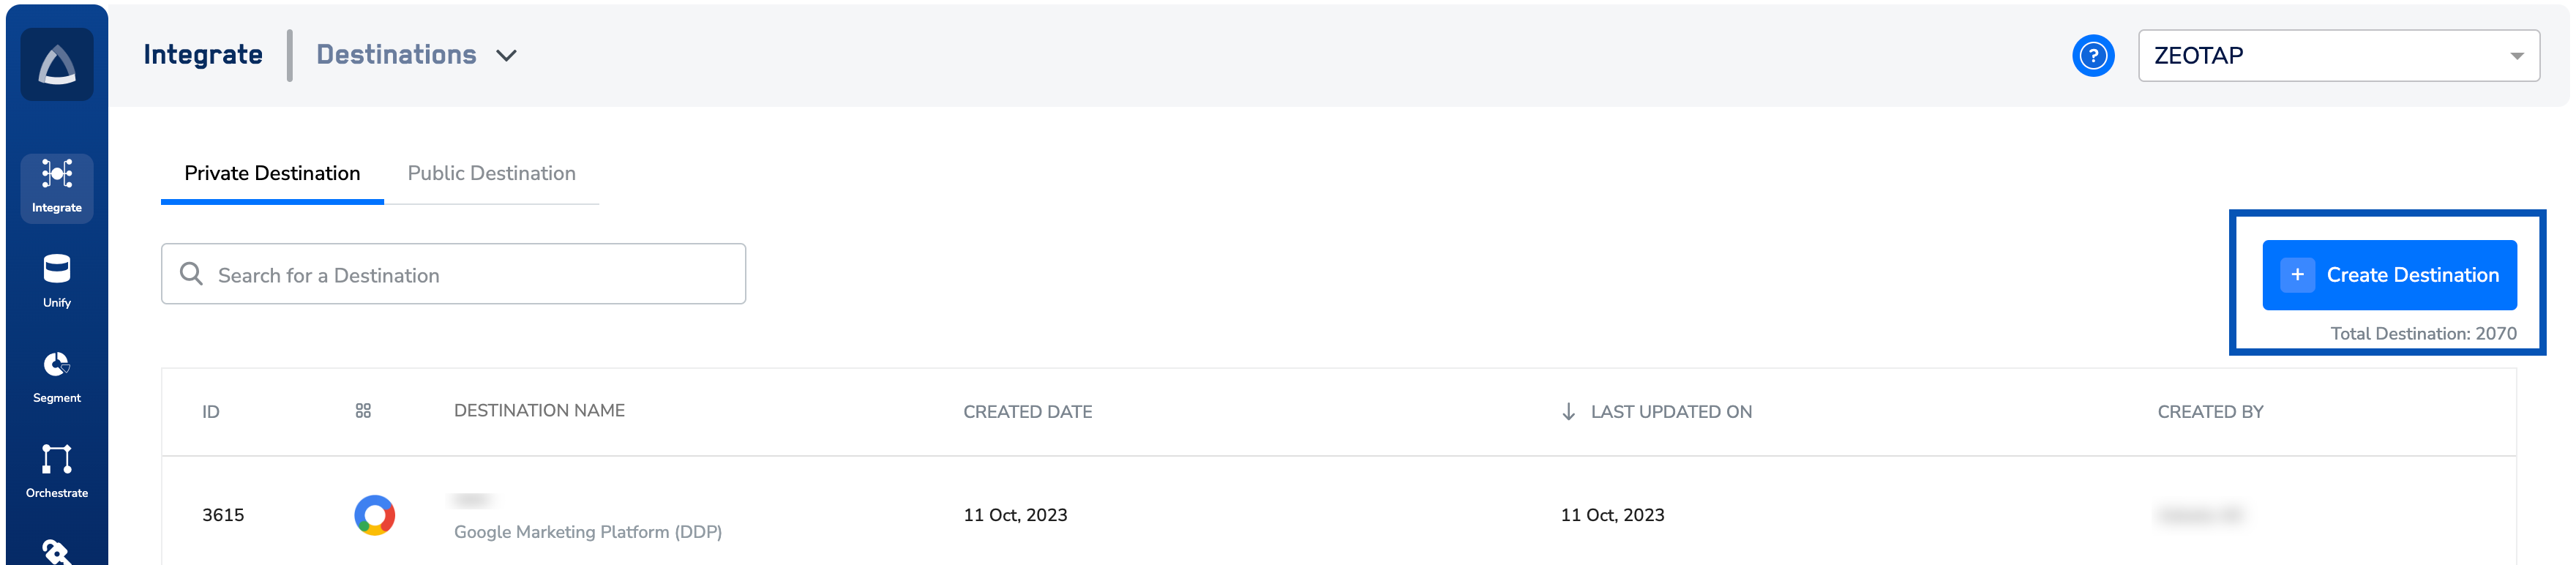
3
Under the All Destinations section, search for Promote IQ.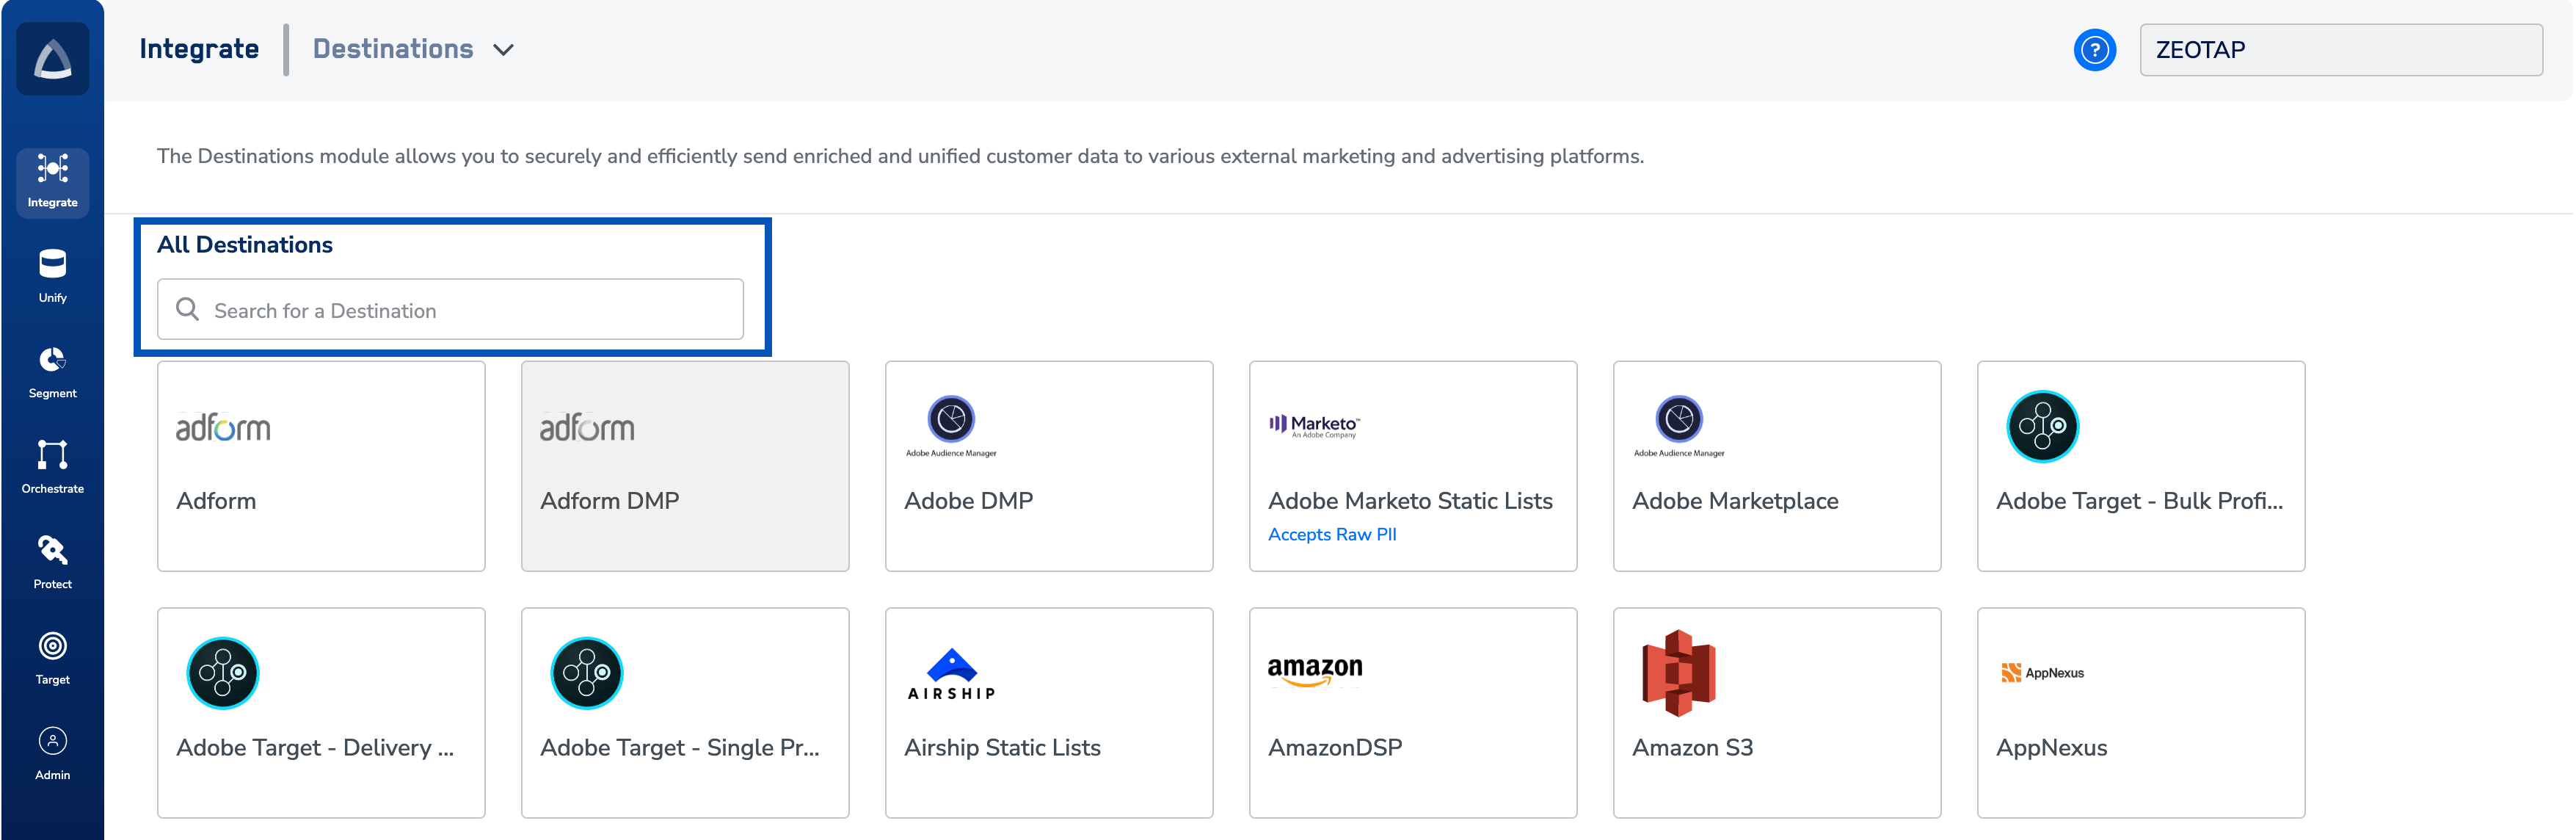
4
Click PromoteIQ. A screen appears displaying details about the particular destination towards the left. On the right-hand side of the screen find a list of fields that are required for the integration to be established. Enter the required details as mentioned in the following steps:a. Enter a name for the Destination.b. Enter the API Key, API Url and API ID obtained from your Promote IQ POC.c. In the S3 Bucket field, provide the name of the Amazon S3 Bucket.d. In the S3 Folder field, provide the folder path in your storage location where Zeotap CDP can store your exported data.e. Enter S3 Client ID and S3 Client Secret that you obtained from your Amazon S3 account.f. In the S3 Region field, choose the geographical region where your Amazon S3 bucket is available from the drop-down menu.g. Review all the values entered above and then click Next to proceed.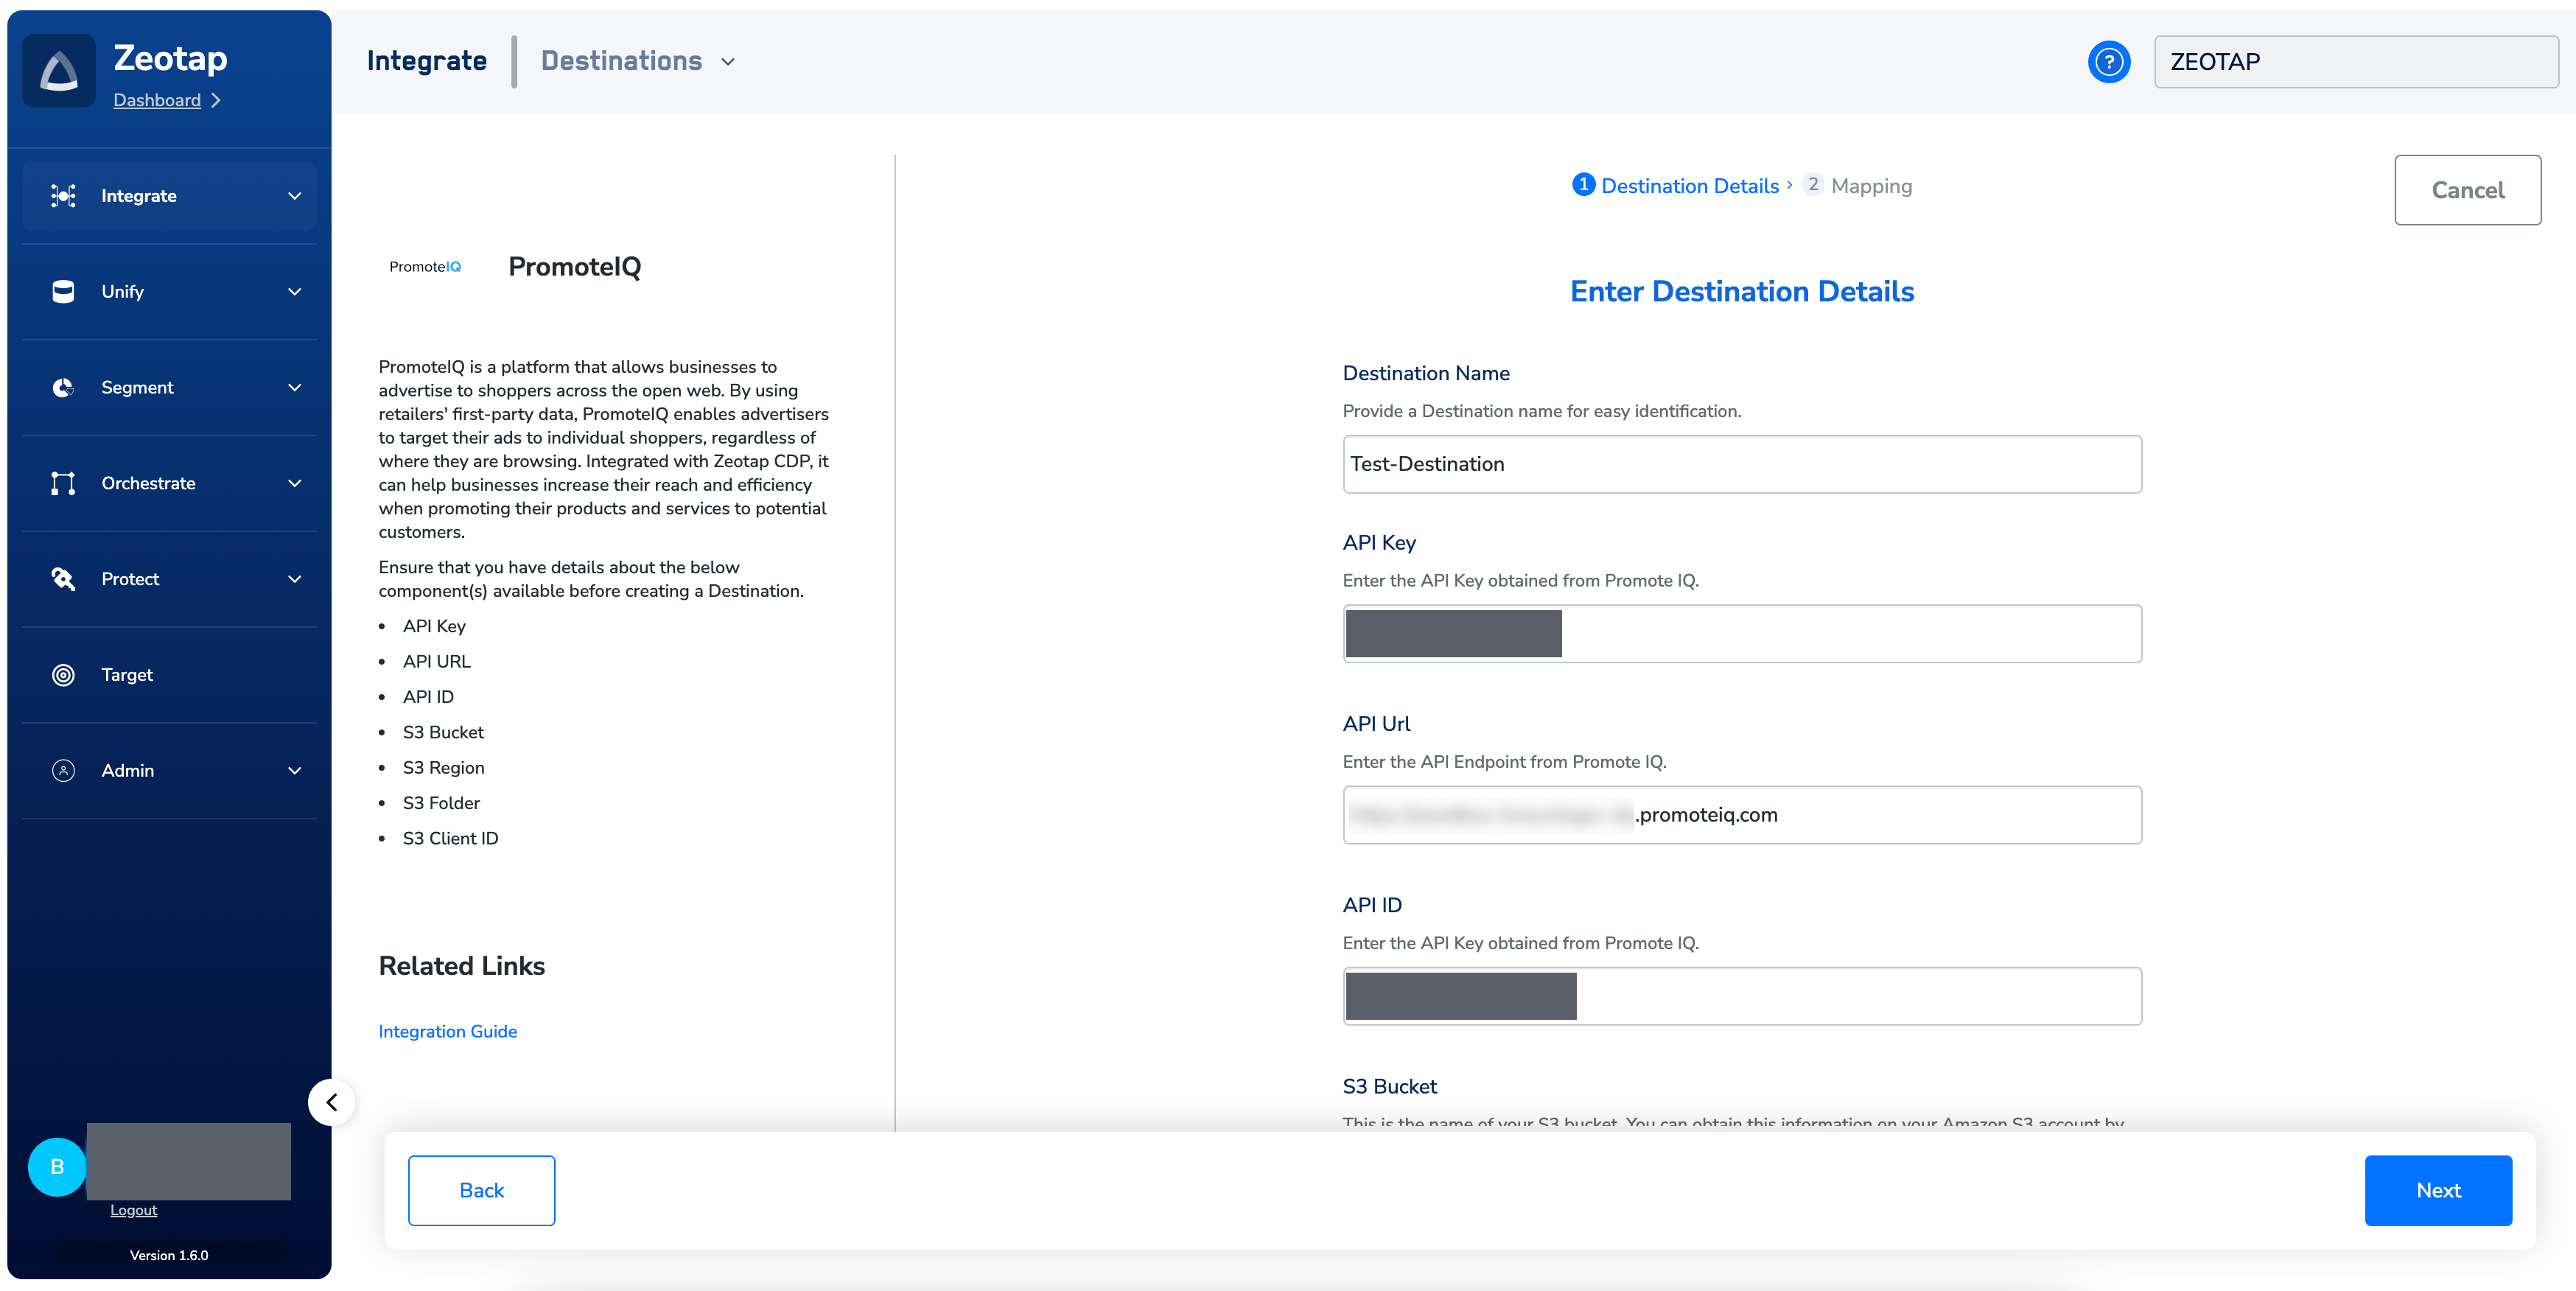
5
In the new screen that appears, under Choose your Action, select Send Identifiers to PromoteIQ as the action for activating your audience (segment). Under Map the Fields, you can map any custom identifier that you wish to send to Promote IQ.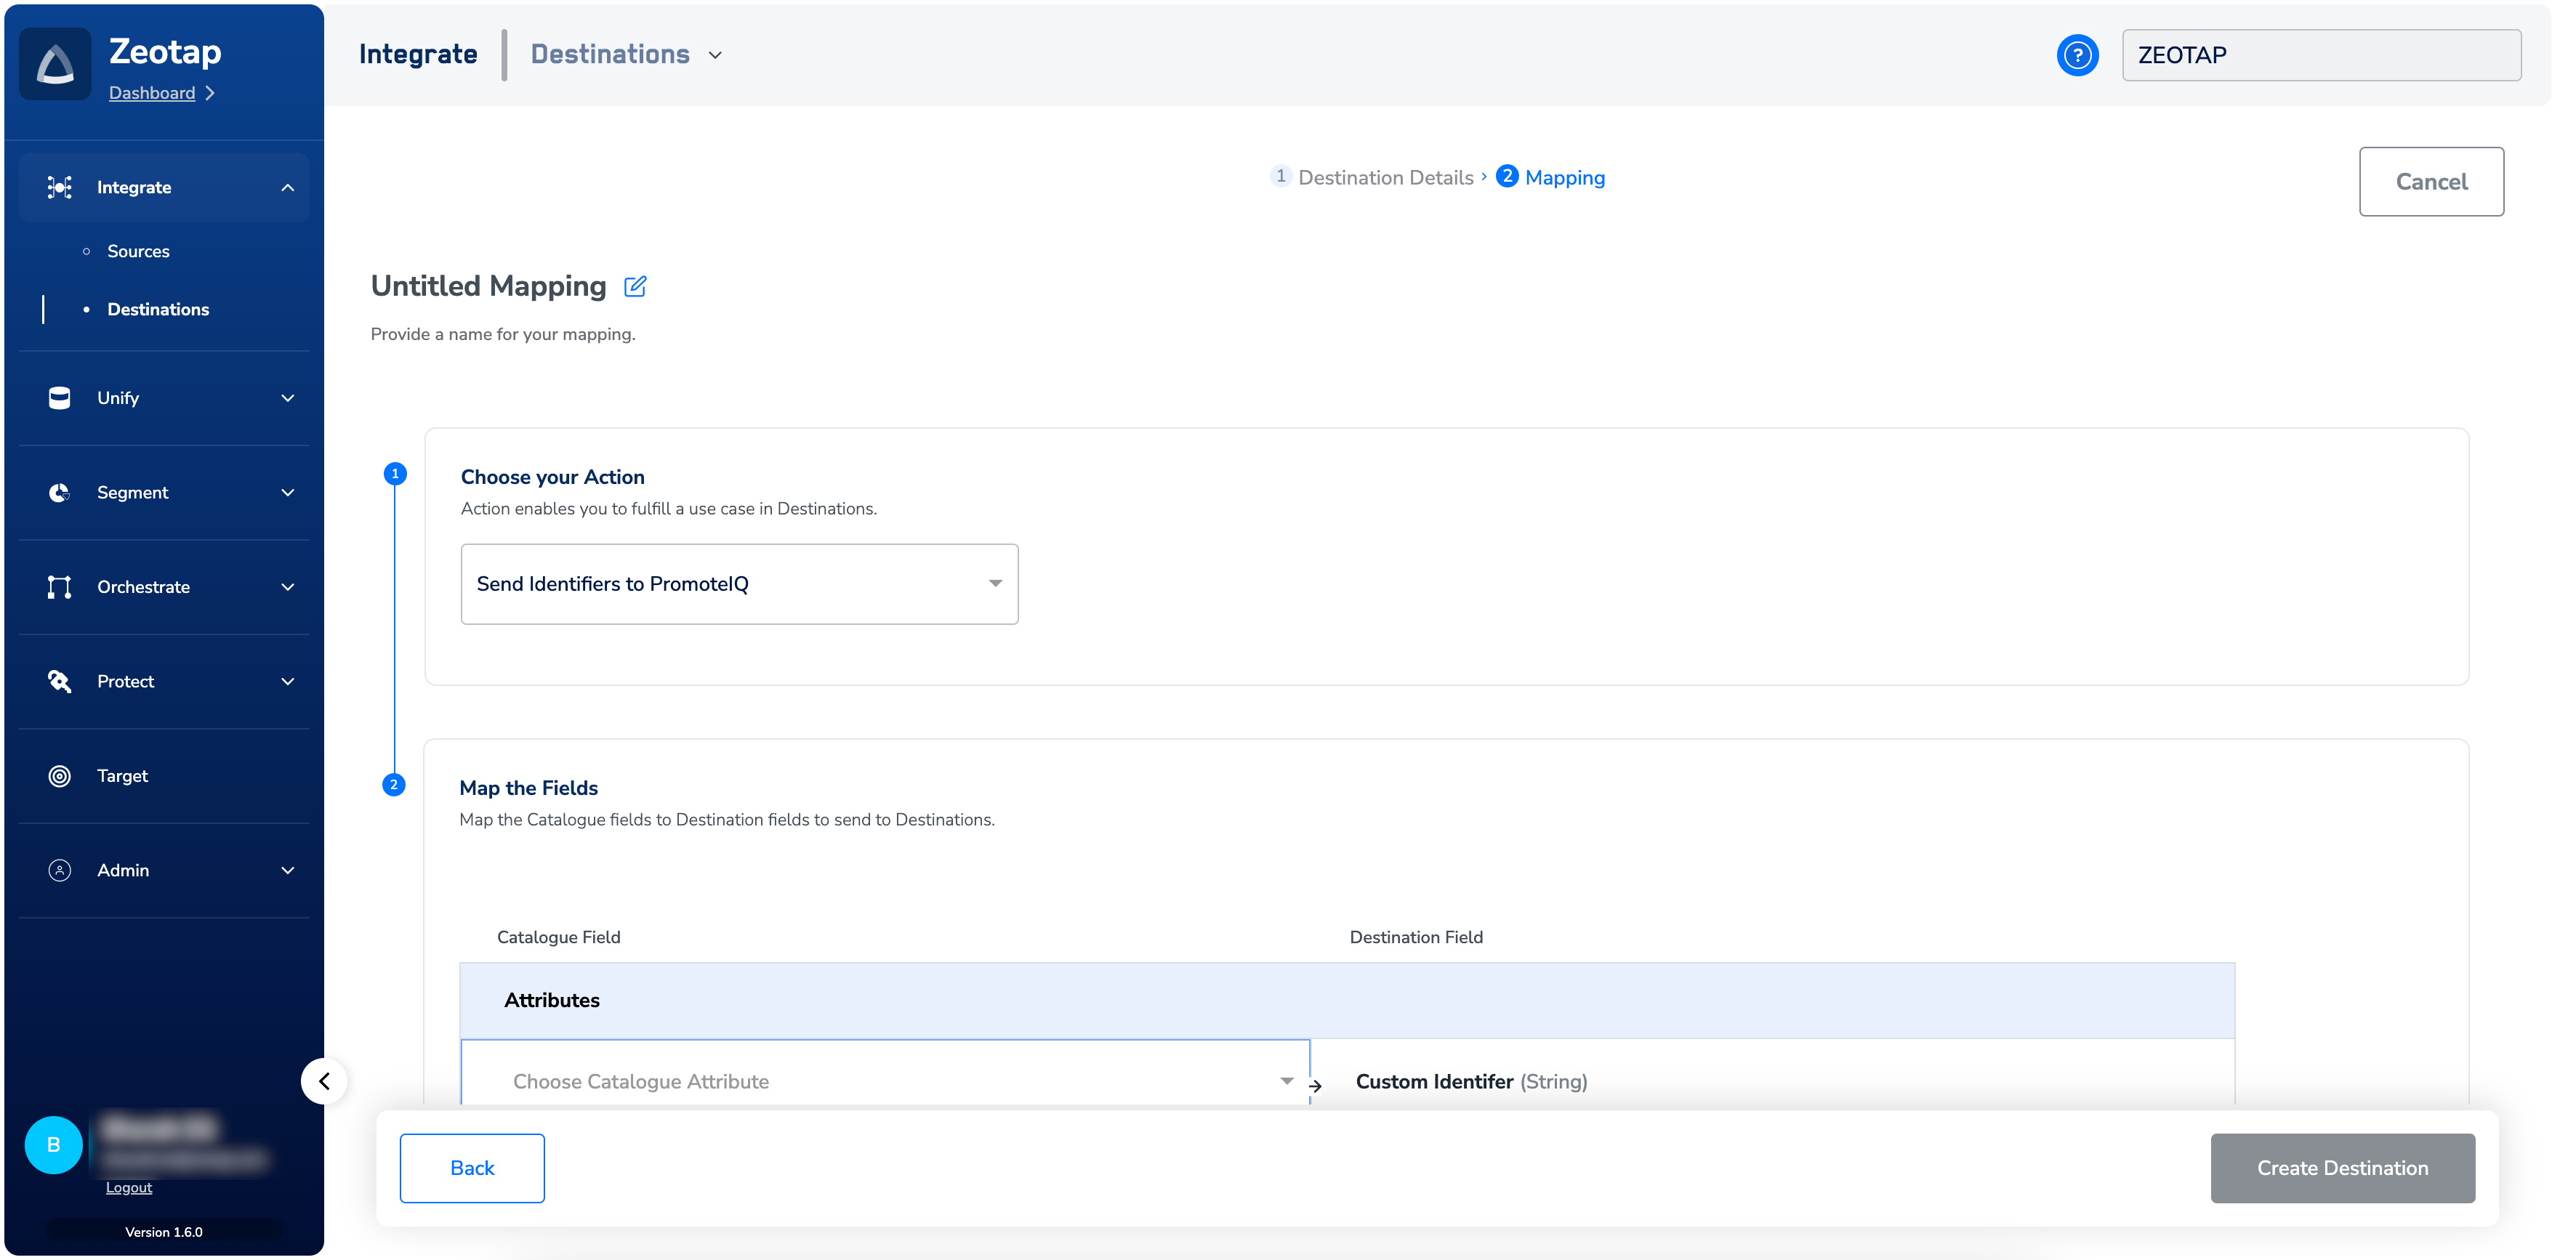
6
Click Create Destination. The created Destination gets listed in the Audiences application, which can be linked to an audience/segment.
Link an audience to the destination
For information about how to link an audience (segment) to the created Destination in the Audiences application, refer here. The refresh frequency you choose there controls how often Zeotap CDP writes a file to your S3 bucket.Note:The terms Audiences and Segments are used interchangeably to refer to customer cohorts belonging to a specific category.
Verify the delivery
Because the users are not sent to PromoteIQ directly, confirm the delivery in two places:- In Zeotap CDP — open the audience–destination pair and check its status. Linking the audience moves the Destination to In Progress, and it changes to Success once the IDs have been uploaded. See Verify the activation worked.
- In your S3 bucket — open the folder you configured and confirm a segment file has arrived for the refresh cycle.
Segment files in the S3 bucket
After an Audience is linked to a Destination, Zeotap CDP generates segment files in CSV format with the following naming convention:<segment_name>_<timestamp_in_yyyyMMdd-hhmmssSSS>.csv.gz
The file contains two columns (column 1: CID; column 2: Segment ID created in PromoteIQ) without any header. Here, the segment ID is your Audience ID designated to your audience (segment) that you created on Zeotap CDP. Note that these columns are comma-separated and the maximum file size limit for the Segment file is 5GB. If the file size is larger than 5GB, then they are split into different parts.
Note:Full refreshes will be sent to the S3 bucket as per the configured refresh frequency.
Troubleshoot the PromoteIQ destination
If the error recorded against the audience–destination pair does not match any row above, see When to contact support for what to include in the request.