Overview
LaunchDarkly is a feature management platform that empowers development teams to safely deliver, control and measure their software through feature flags. With LaunchDarkly, you can run experiments on any feature flag. Integrated with Zeotap CDP, this Destination allows you to send the segments created in Zeotap CDP to be used in LaunchDarkly feature flags. A feature flag, also known as a feature toggle or feature switch, is a technique used in software development to enable or disable certain features or functionalities of an application at runtime. It allows developers to control the availability of specific features to different users or groups of users without deploying new code.Supported Identifiers/Attributes
This integration supports Custom IDs, which can be any ID activated within LaunchDarkly. These IDs may include User IDs, CRM IDs, or any other IDs.Available Actions and Supported Features
The following table lists the available action types for the integration and the supported features for each action type:| Action Name | ID EXTENSION | DELETE | DELTA UPLOAD |
|---|---|---|---|
| Send Identifiers to Launch Darkly | - | - | - |
Components of LaunchDarkly
Ensure that you have the details about the below components of the LauchDarkly account before creating a Destination.Access Token
Client-side ID
Access Token
An Access token in LaunchDarkly is a unique identifier that allows you to authenticate and control access to your LaunchDarkly feature flags and experiments. Perform the following steps to obtain the API Access token: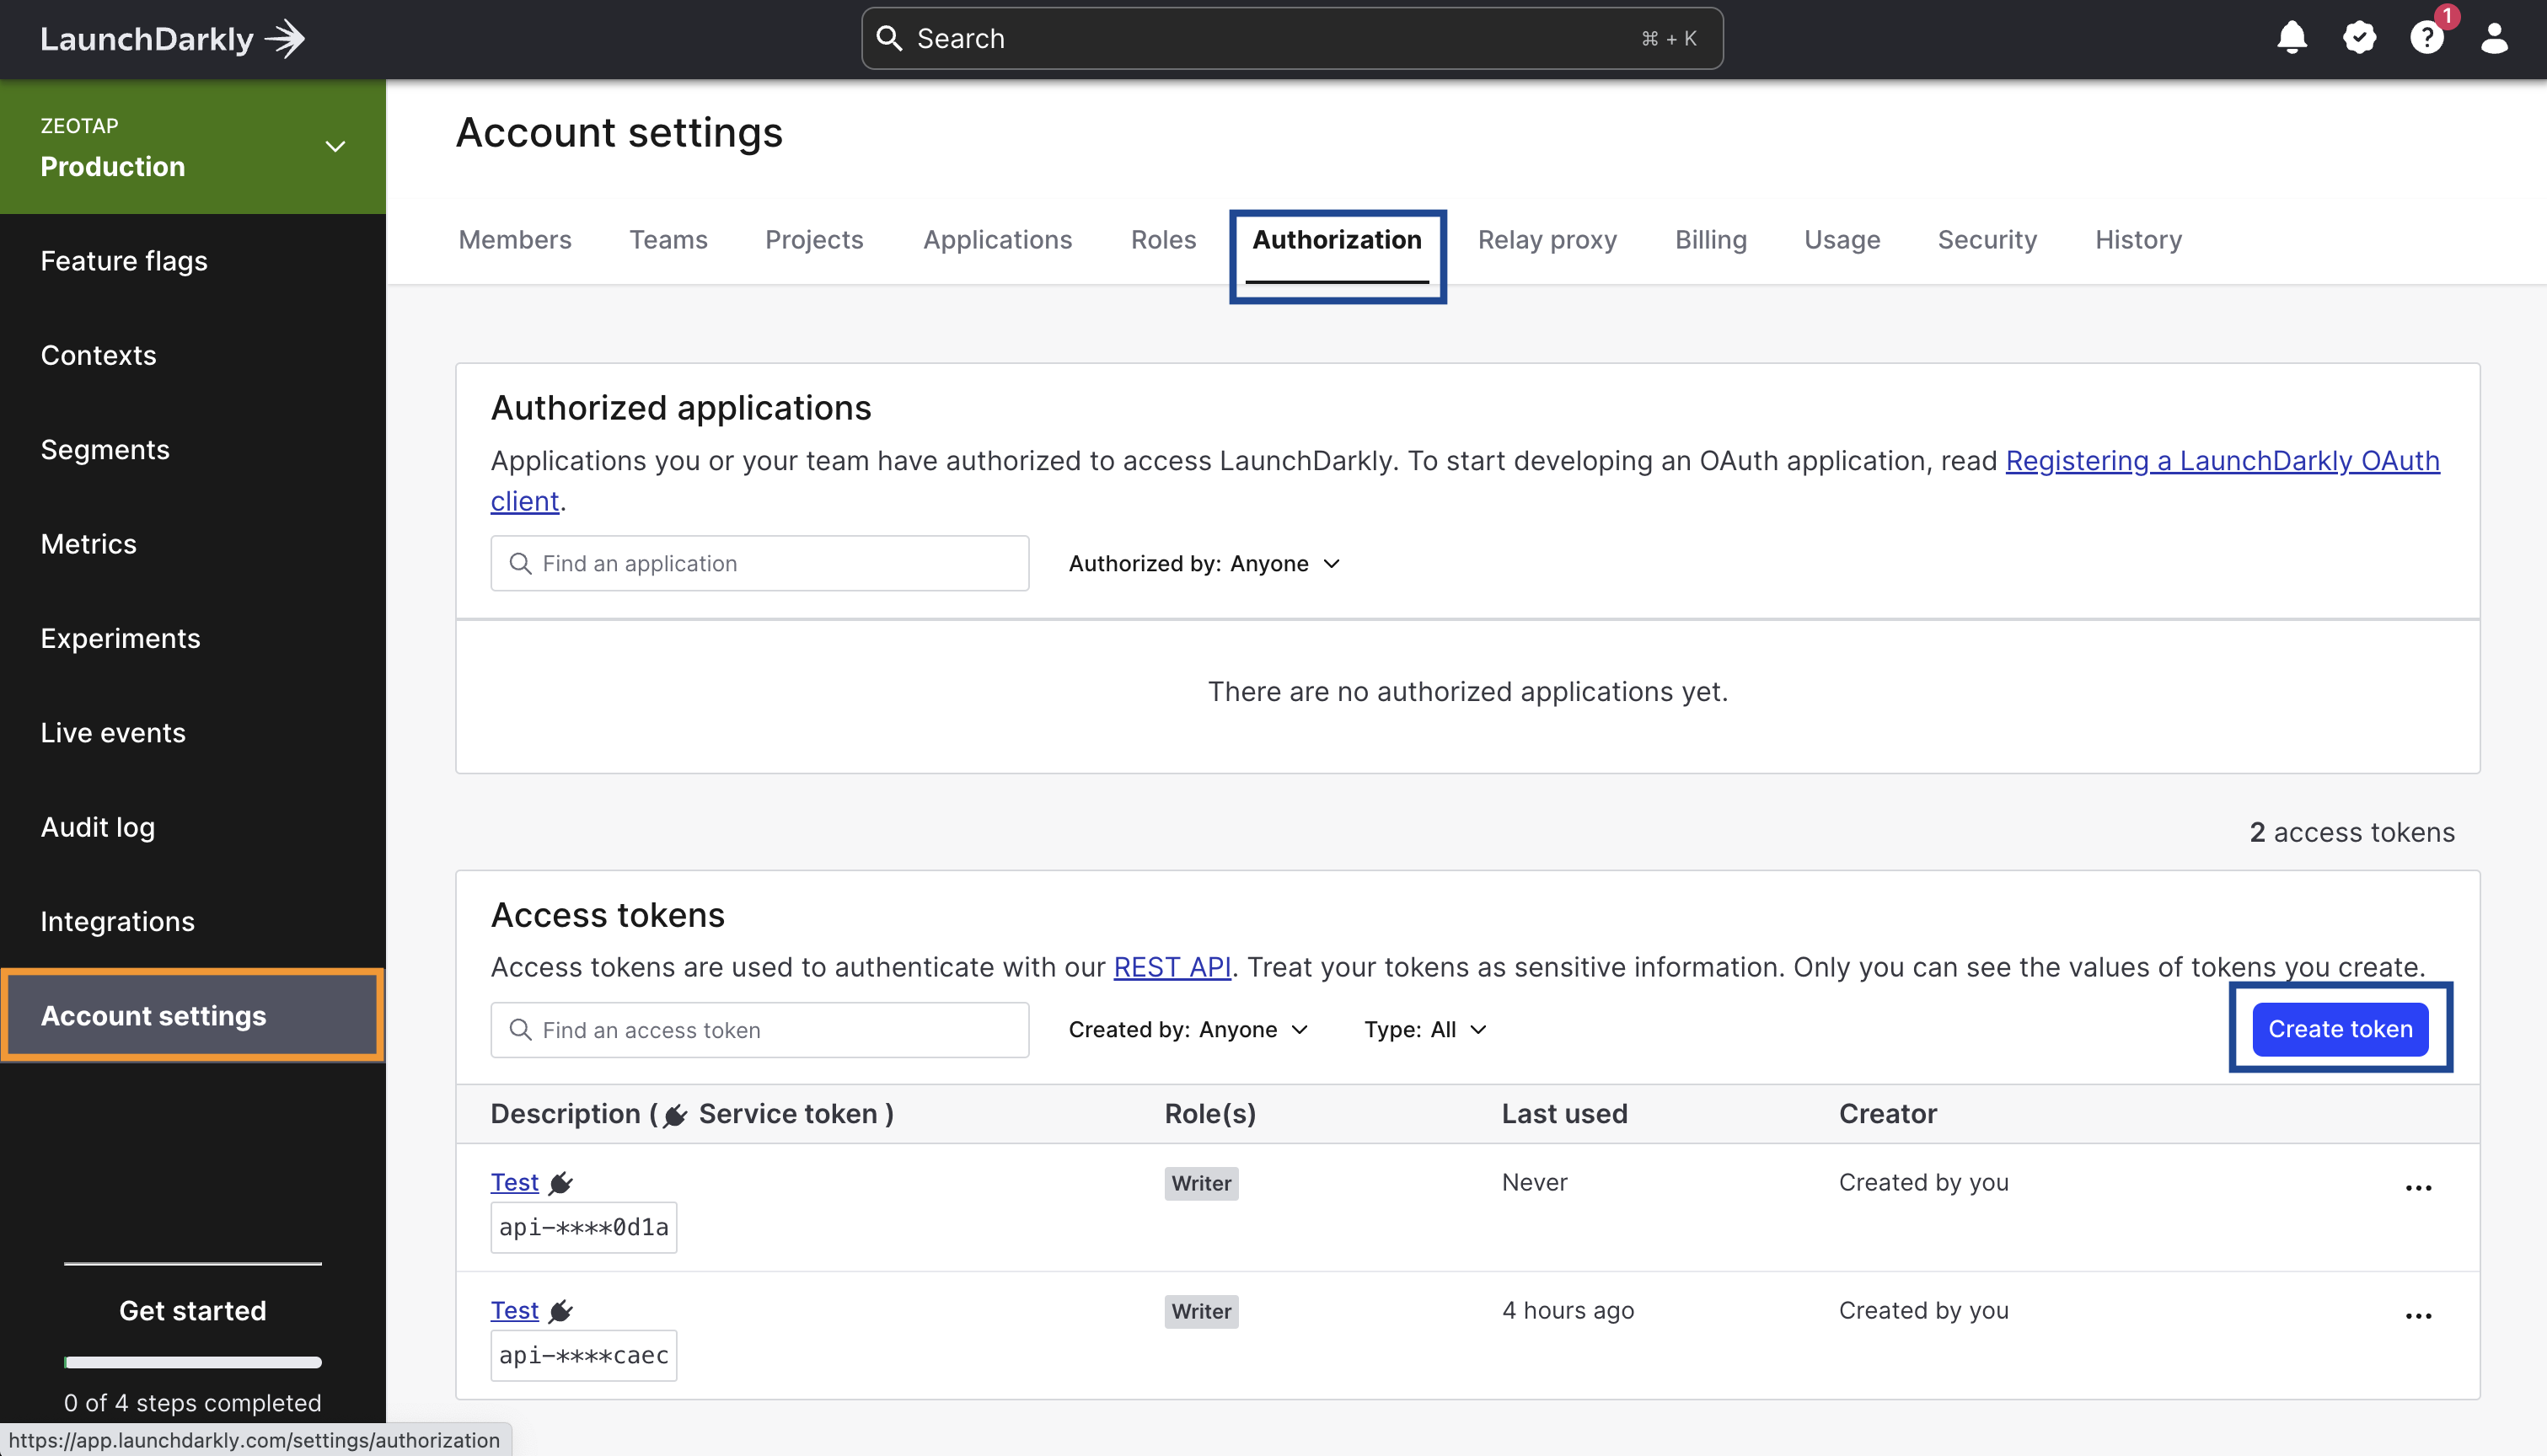
In the Create access token window that appears, provide the following details:a. Enter a Name for your access token.b. Choose the Role as Writer for your access token from the drop-down menu.c. Choose the API version for your token from the drop-down menu. By default, the API requests you send using this token will use this API version. For more information about how the API versioning works in LaunchDarkly, refer here.d. If you are an Enterprise customer, you can click This is a service token checkbox if you wish to create a service token.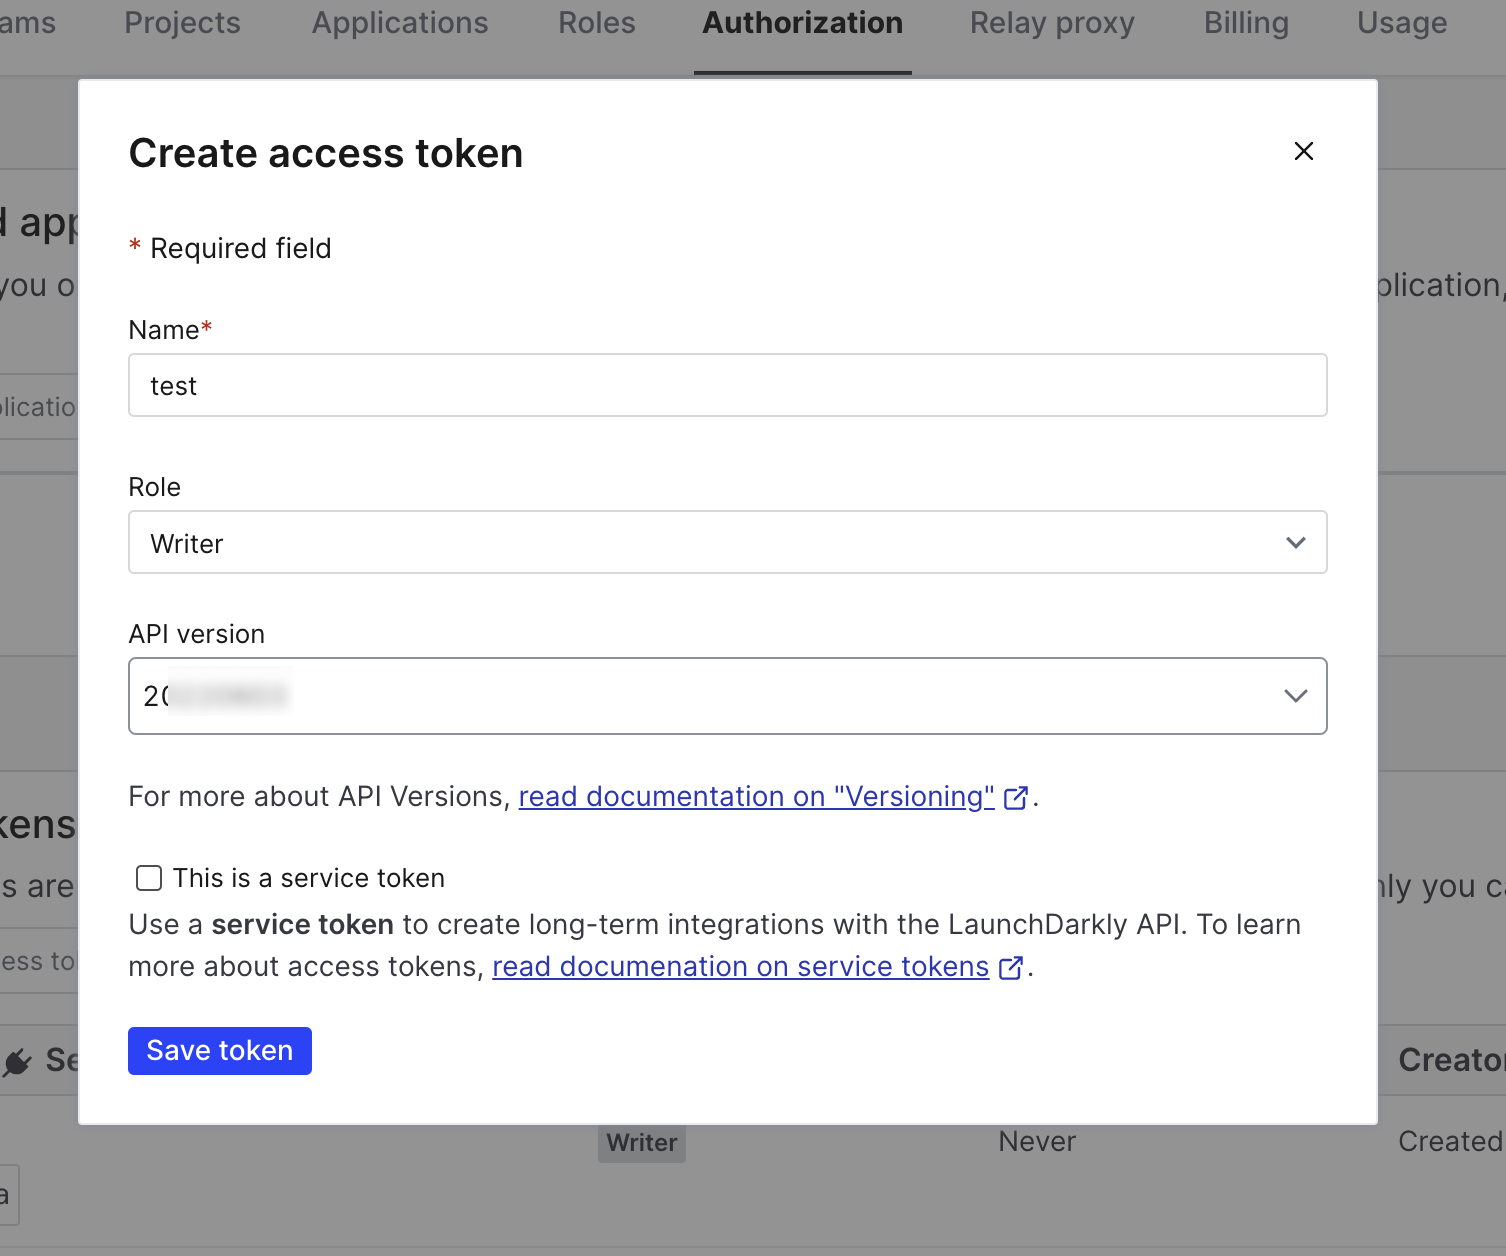
.png?fit=max&auto=format&n=N2x6le2iGwMeelJt&q=85&s=e643cfaed57d2abe61630b51e6049653)
Client-side ID
This is the Client-side ID of your LaunchDarkly account. Perform the following steps to obtain the Client-side ID:
.png?fit=max&auto=format&n=N2x6le2iGwMeelJt&q=85&s=06467d555f18bf53da89c72ed2e74886)
Create a Destination for LaunchDarkly
Perform the following steps to create a Destination for LauchDarkly:
Click LauchDarkly. A screen appears displaying details about the particular destination towards the left. On the right-hand side of the screen find a list of fields that are required for the integration to be established. Enter the required details as mentioned in the following steps:a. Enter a name for the Destination.b. Enter the Access Token obtained from your LauchDarkly account. For more information on how to obtain this information, refer to Components of LaunchDarkly section.c. Enter the Client Side ID of your LaunchDarkly account. For more information on how to obtain this information, refer to Components of LaunchDarkly section.d. Review all the values entered above and then click Next to proceed.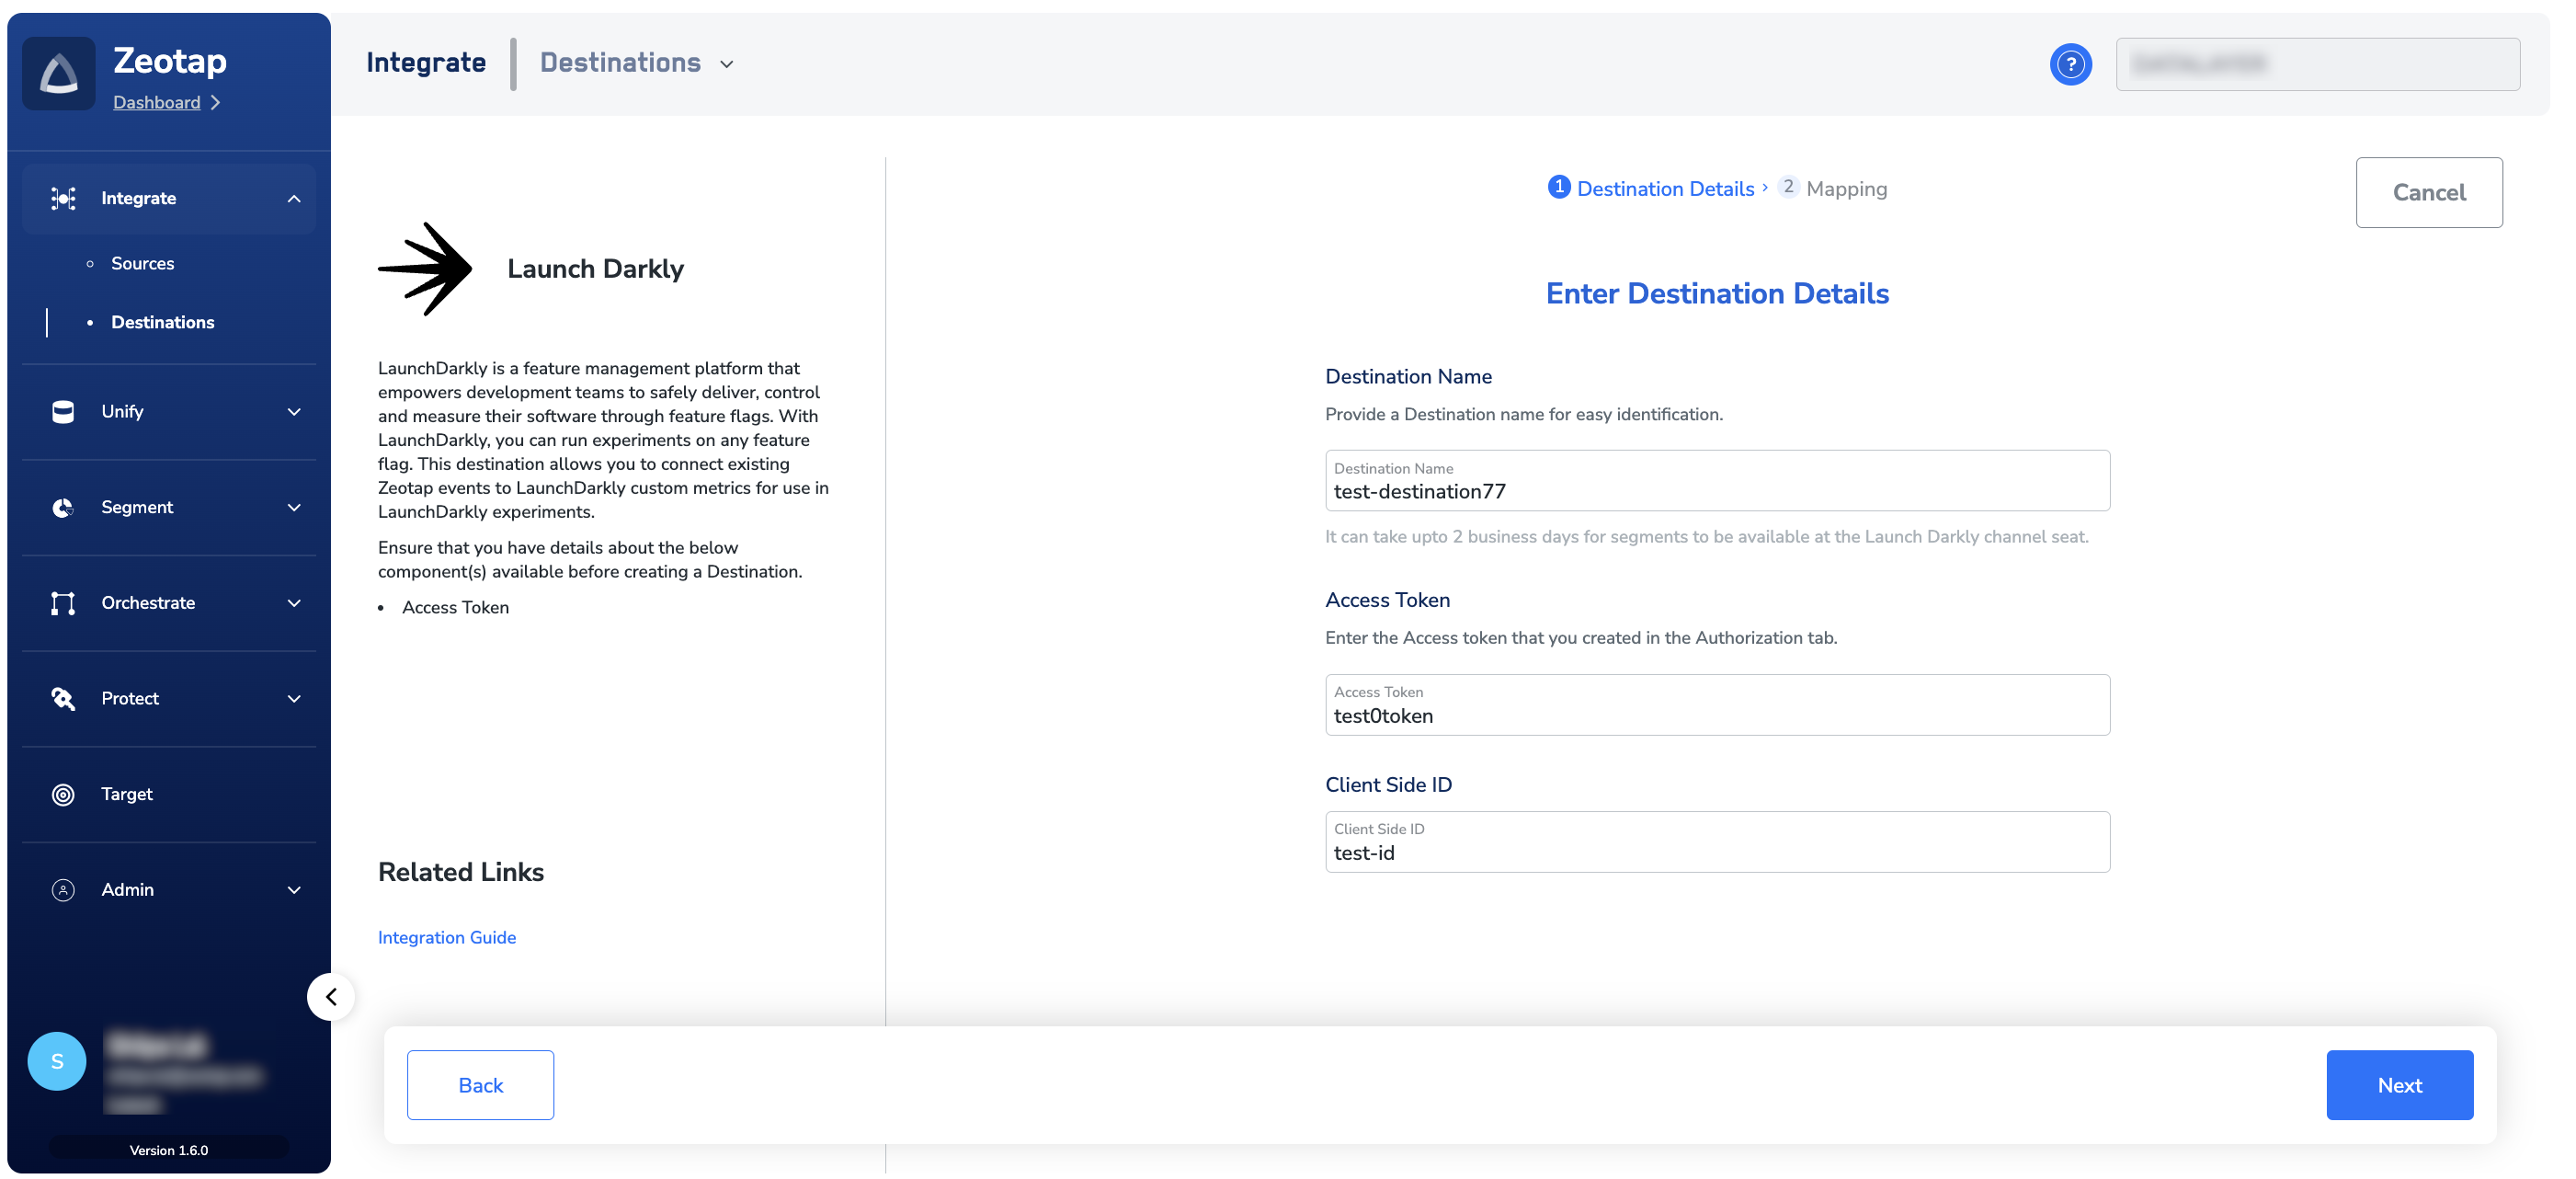
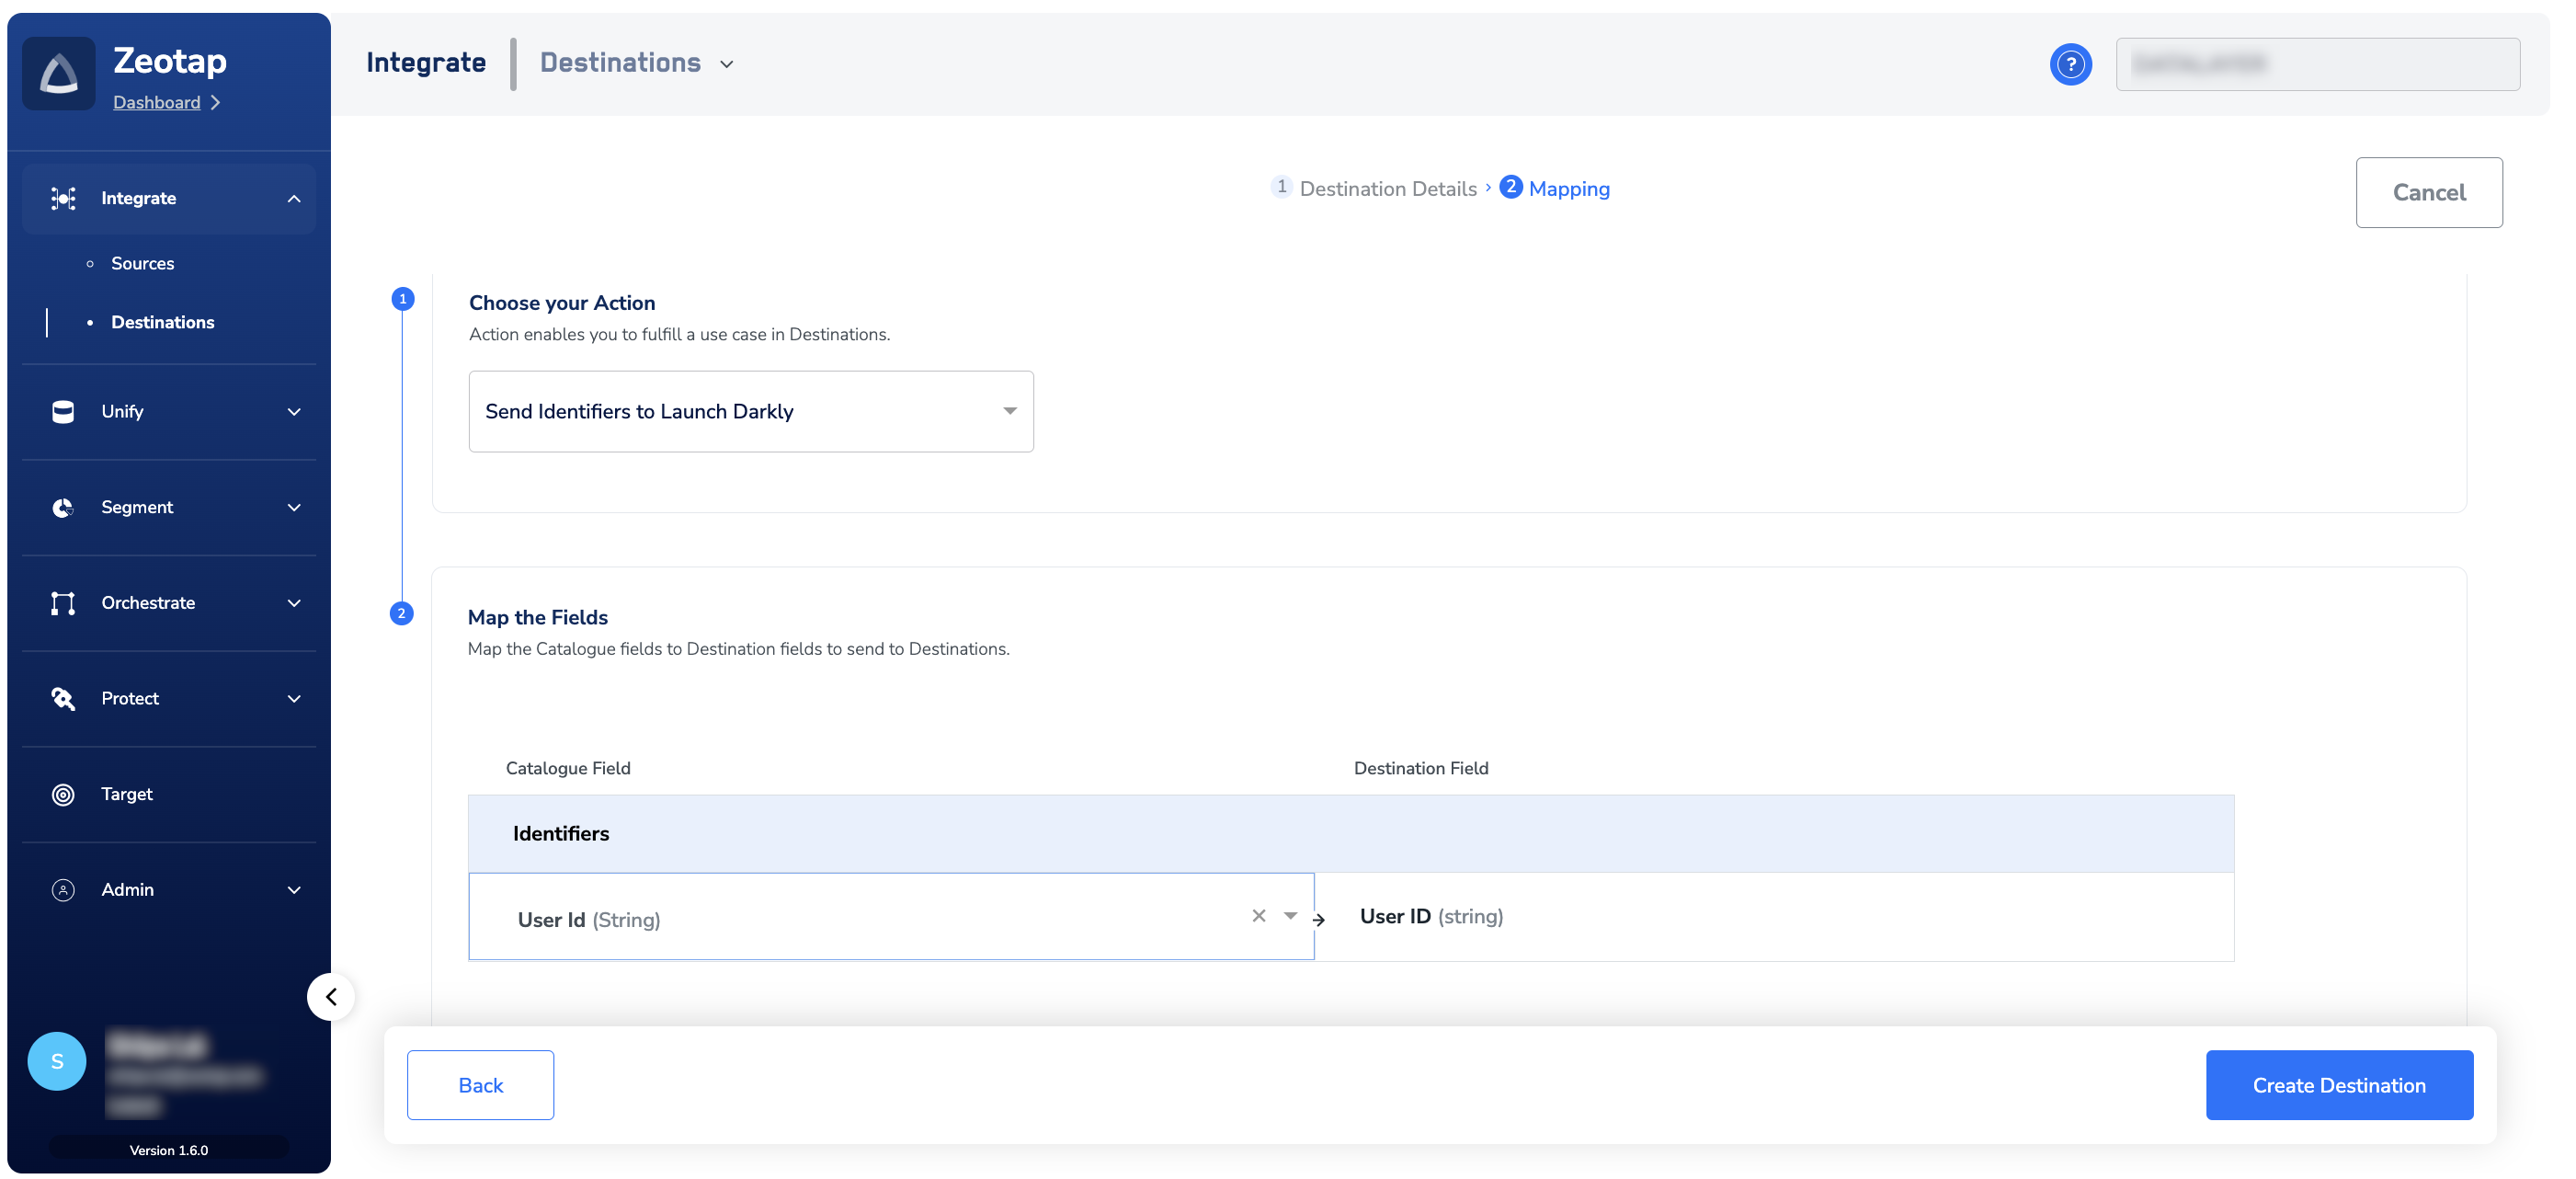
In the new screen that appears, choose the appropriate Action and Mapping as explained below.a. Choose the desired action under Choose your Action and then choose the corresponding identifiers under Map the Fields. By default, the Output Identifiers that are accepted by the platform such as, MAIDs, Cookies, email Ids and more are displayed. However, you can edit, add or remove an identifier from the list. To do so, refer here.
Link an Audience to the LaunchDarkly Destination
For information about how to link an audience to the created Destination in Audiences module, refer here.Note:The terms Audiences and Segments are used interchangeably to refer to customer cohorts belonging to a specific category. For example, an Audience or a segment could be a specific group of customers who are over 18 years of age and who have performed an
addToCart event within the last 30 days.View Segments on LaunchDarkly
Perform the following steps to view the Audiences that are pushed from Zeotap CDP to LaunchDarkly: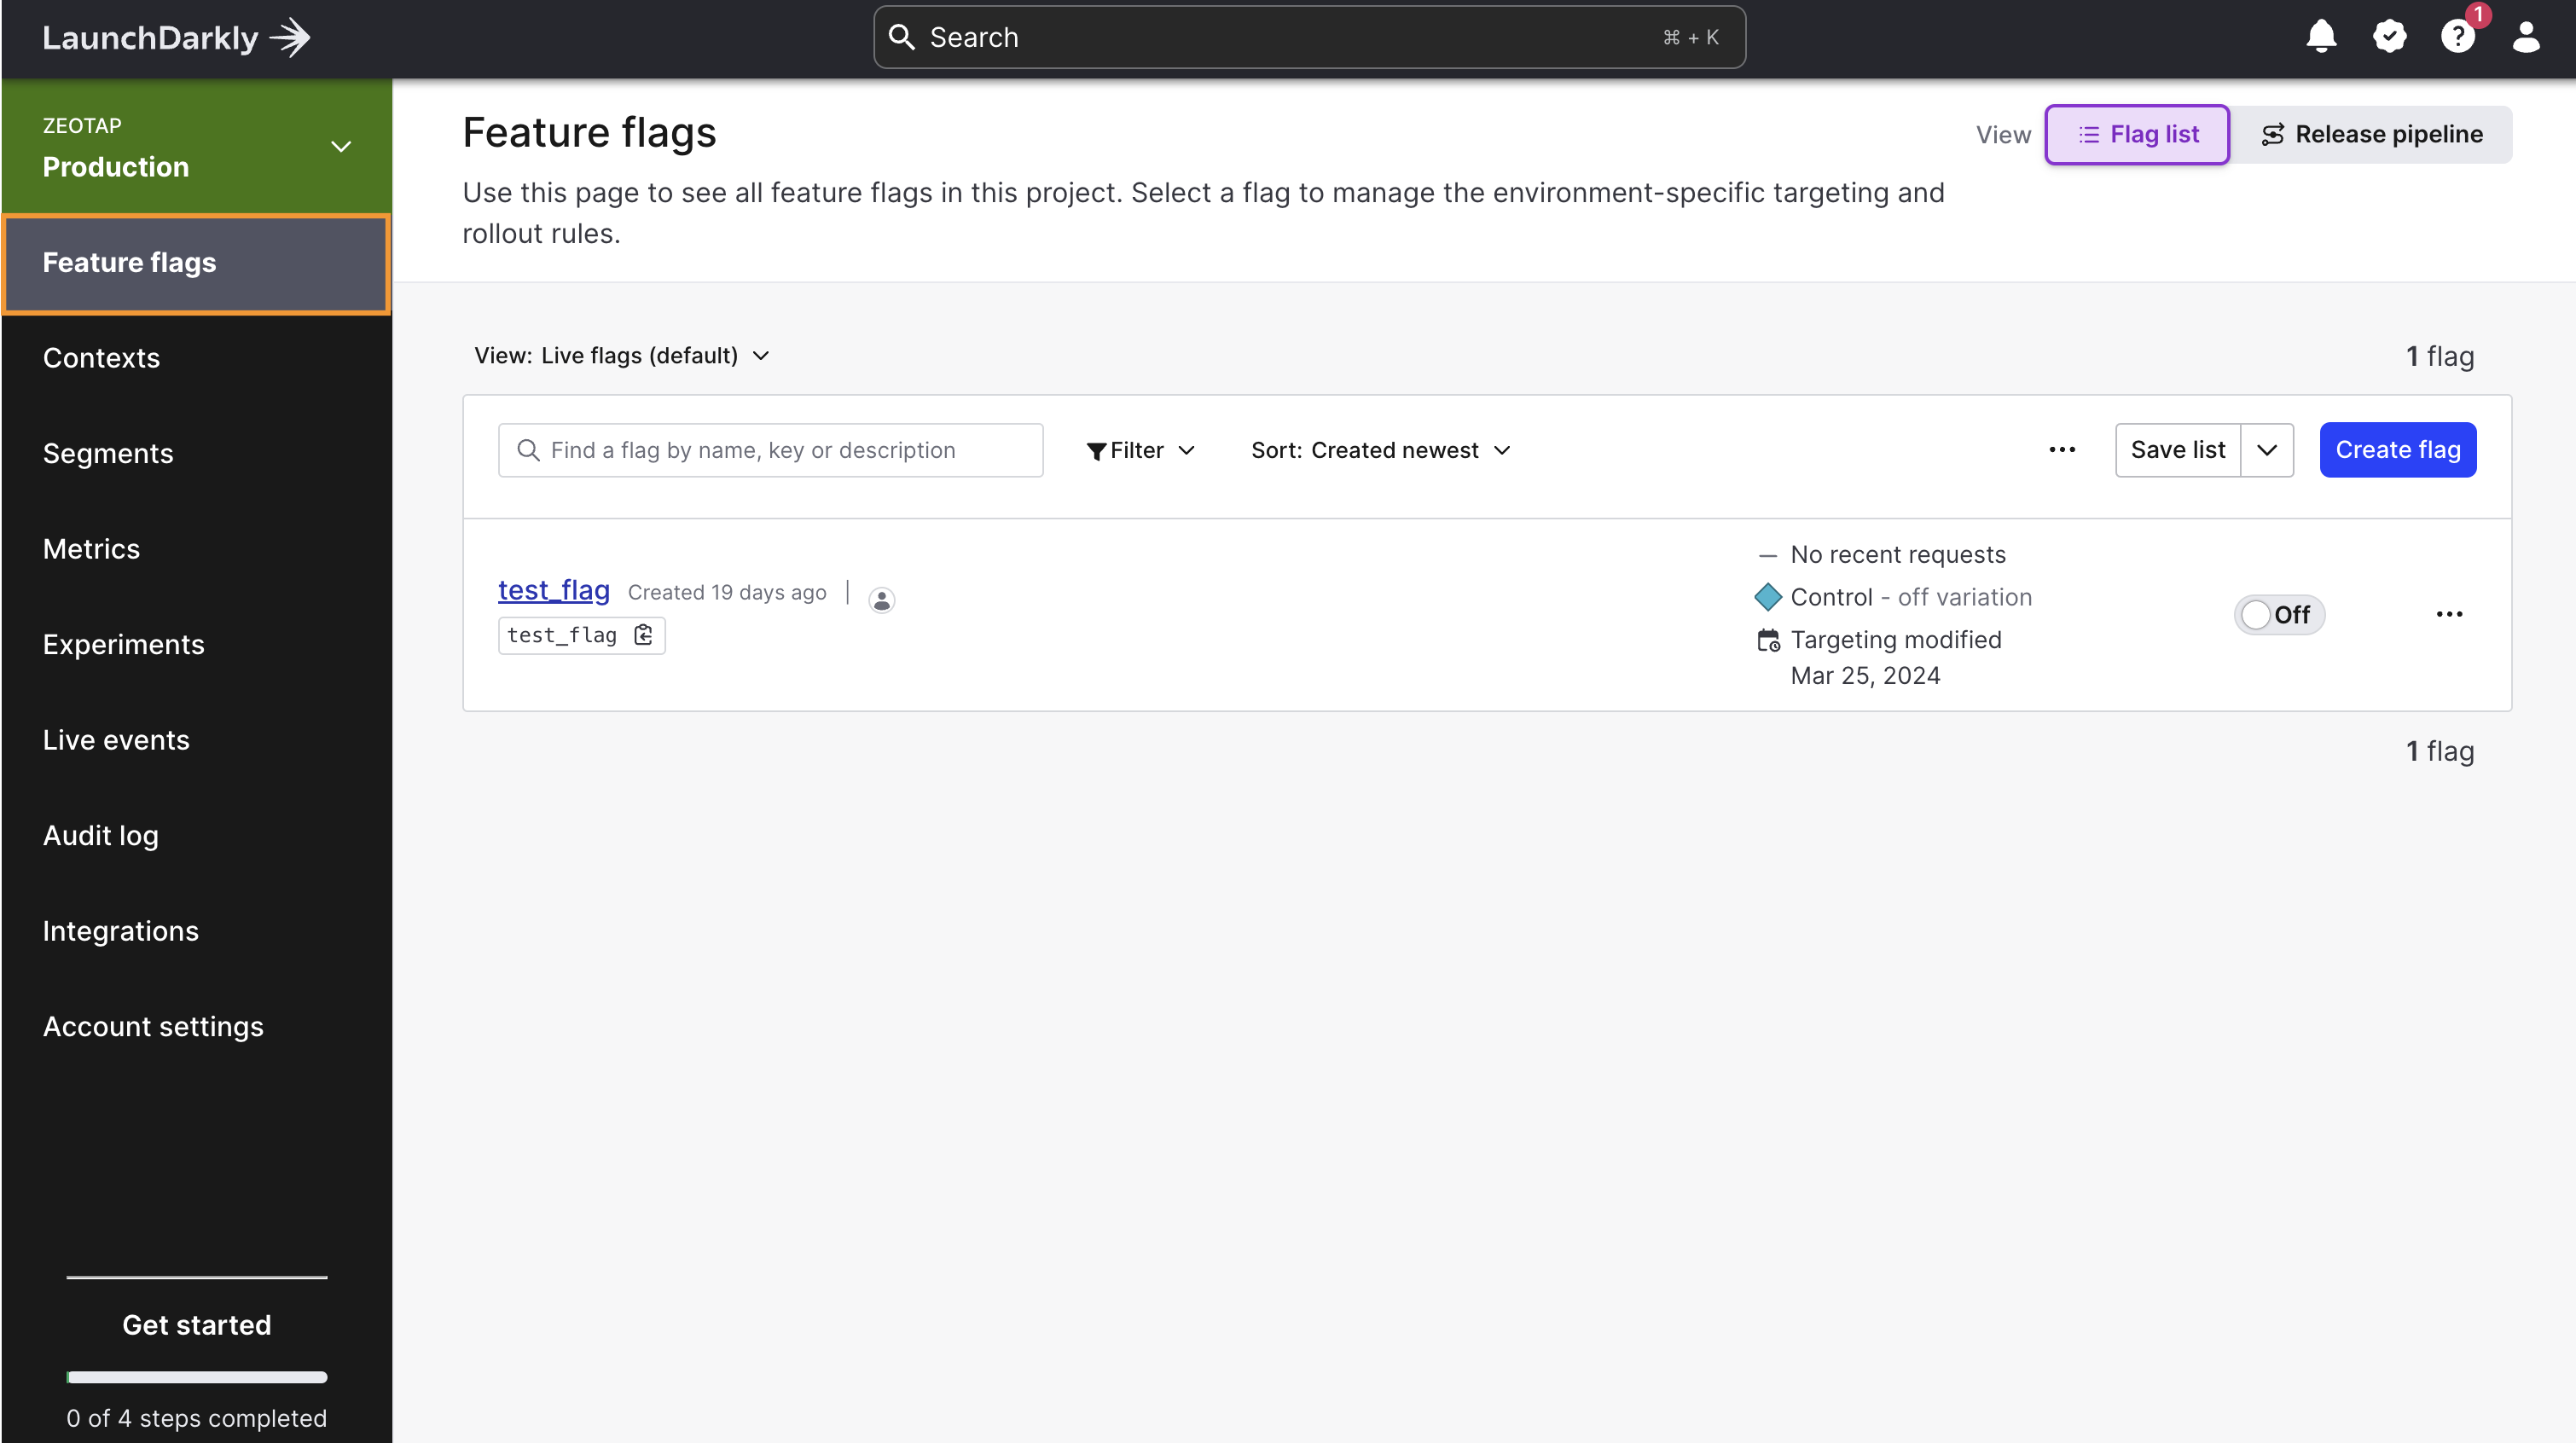
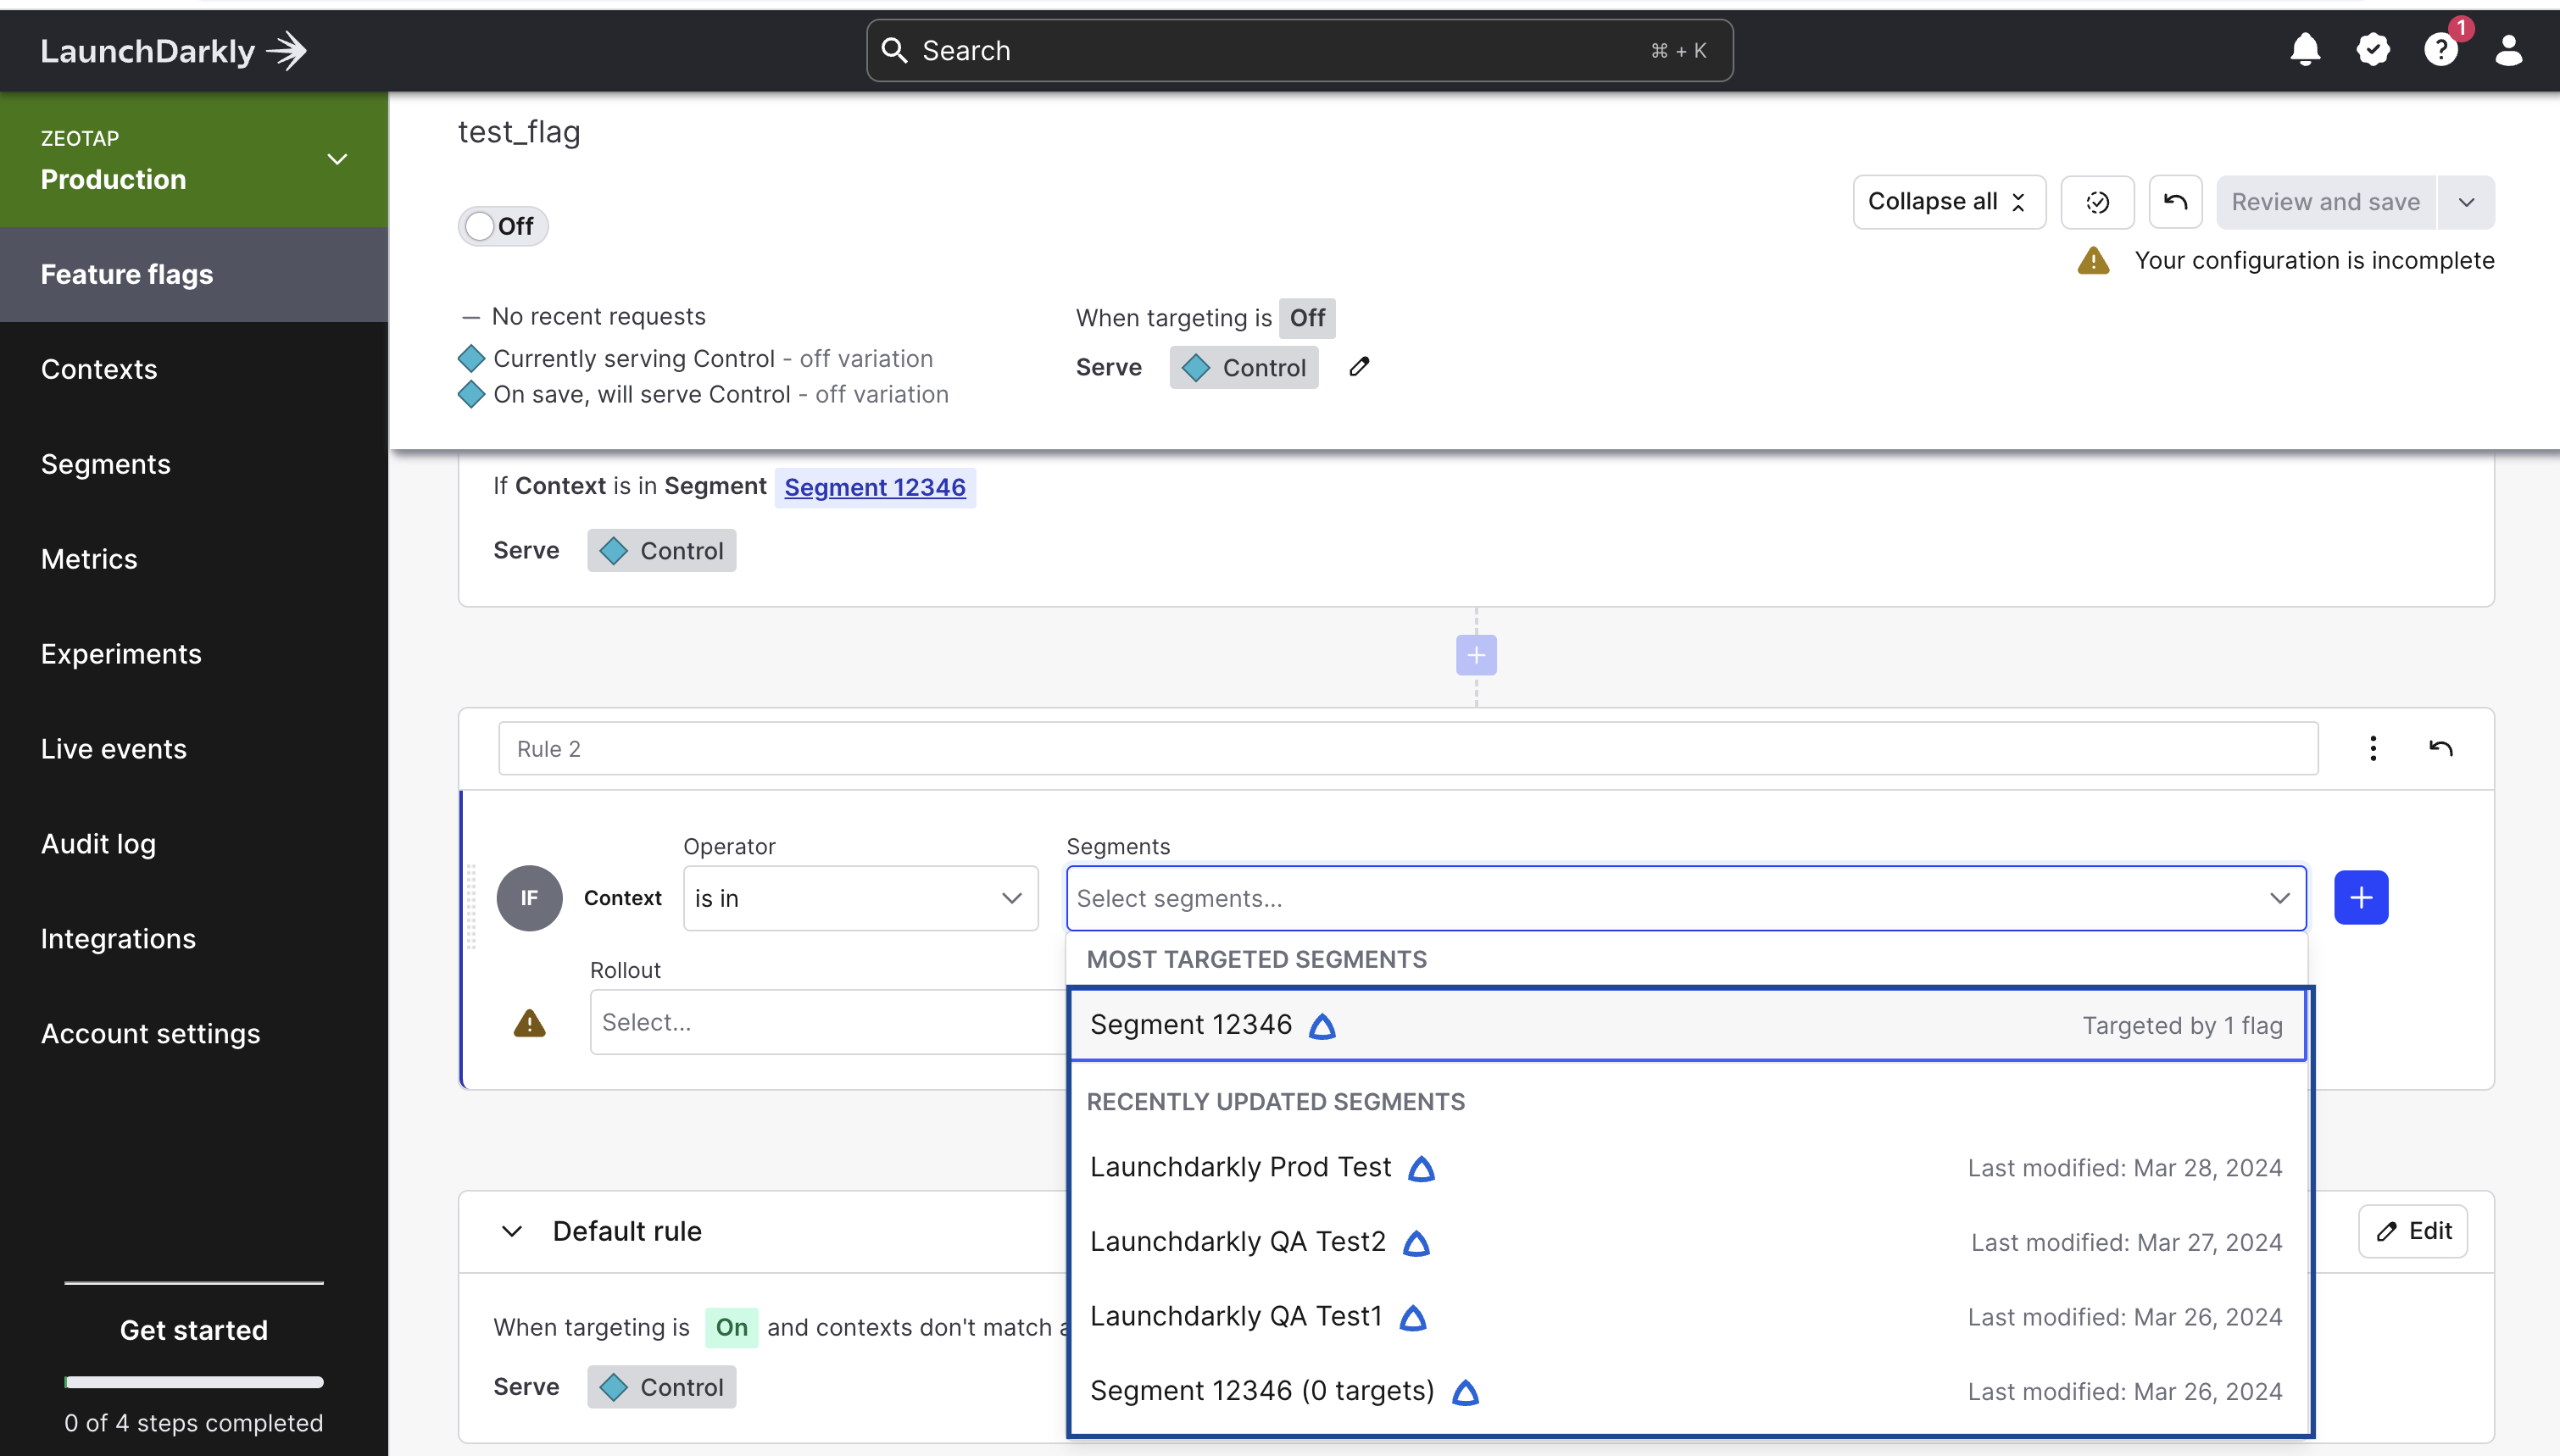
In the new screen that appears, click the Add rule drop-down button and then choose Target Segments from the list. This creates a new Rule section.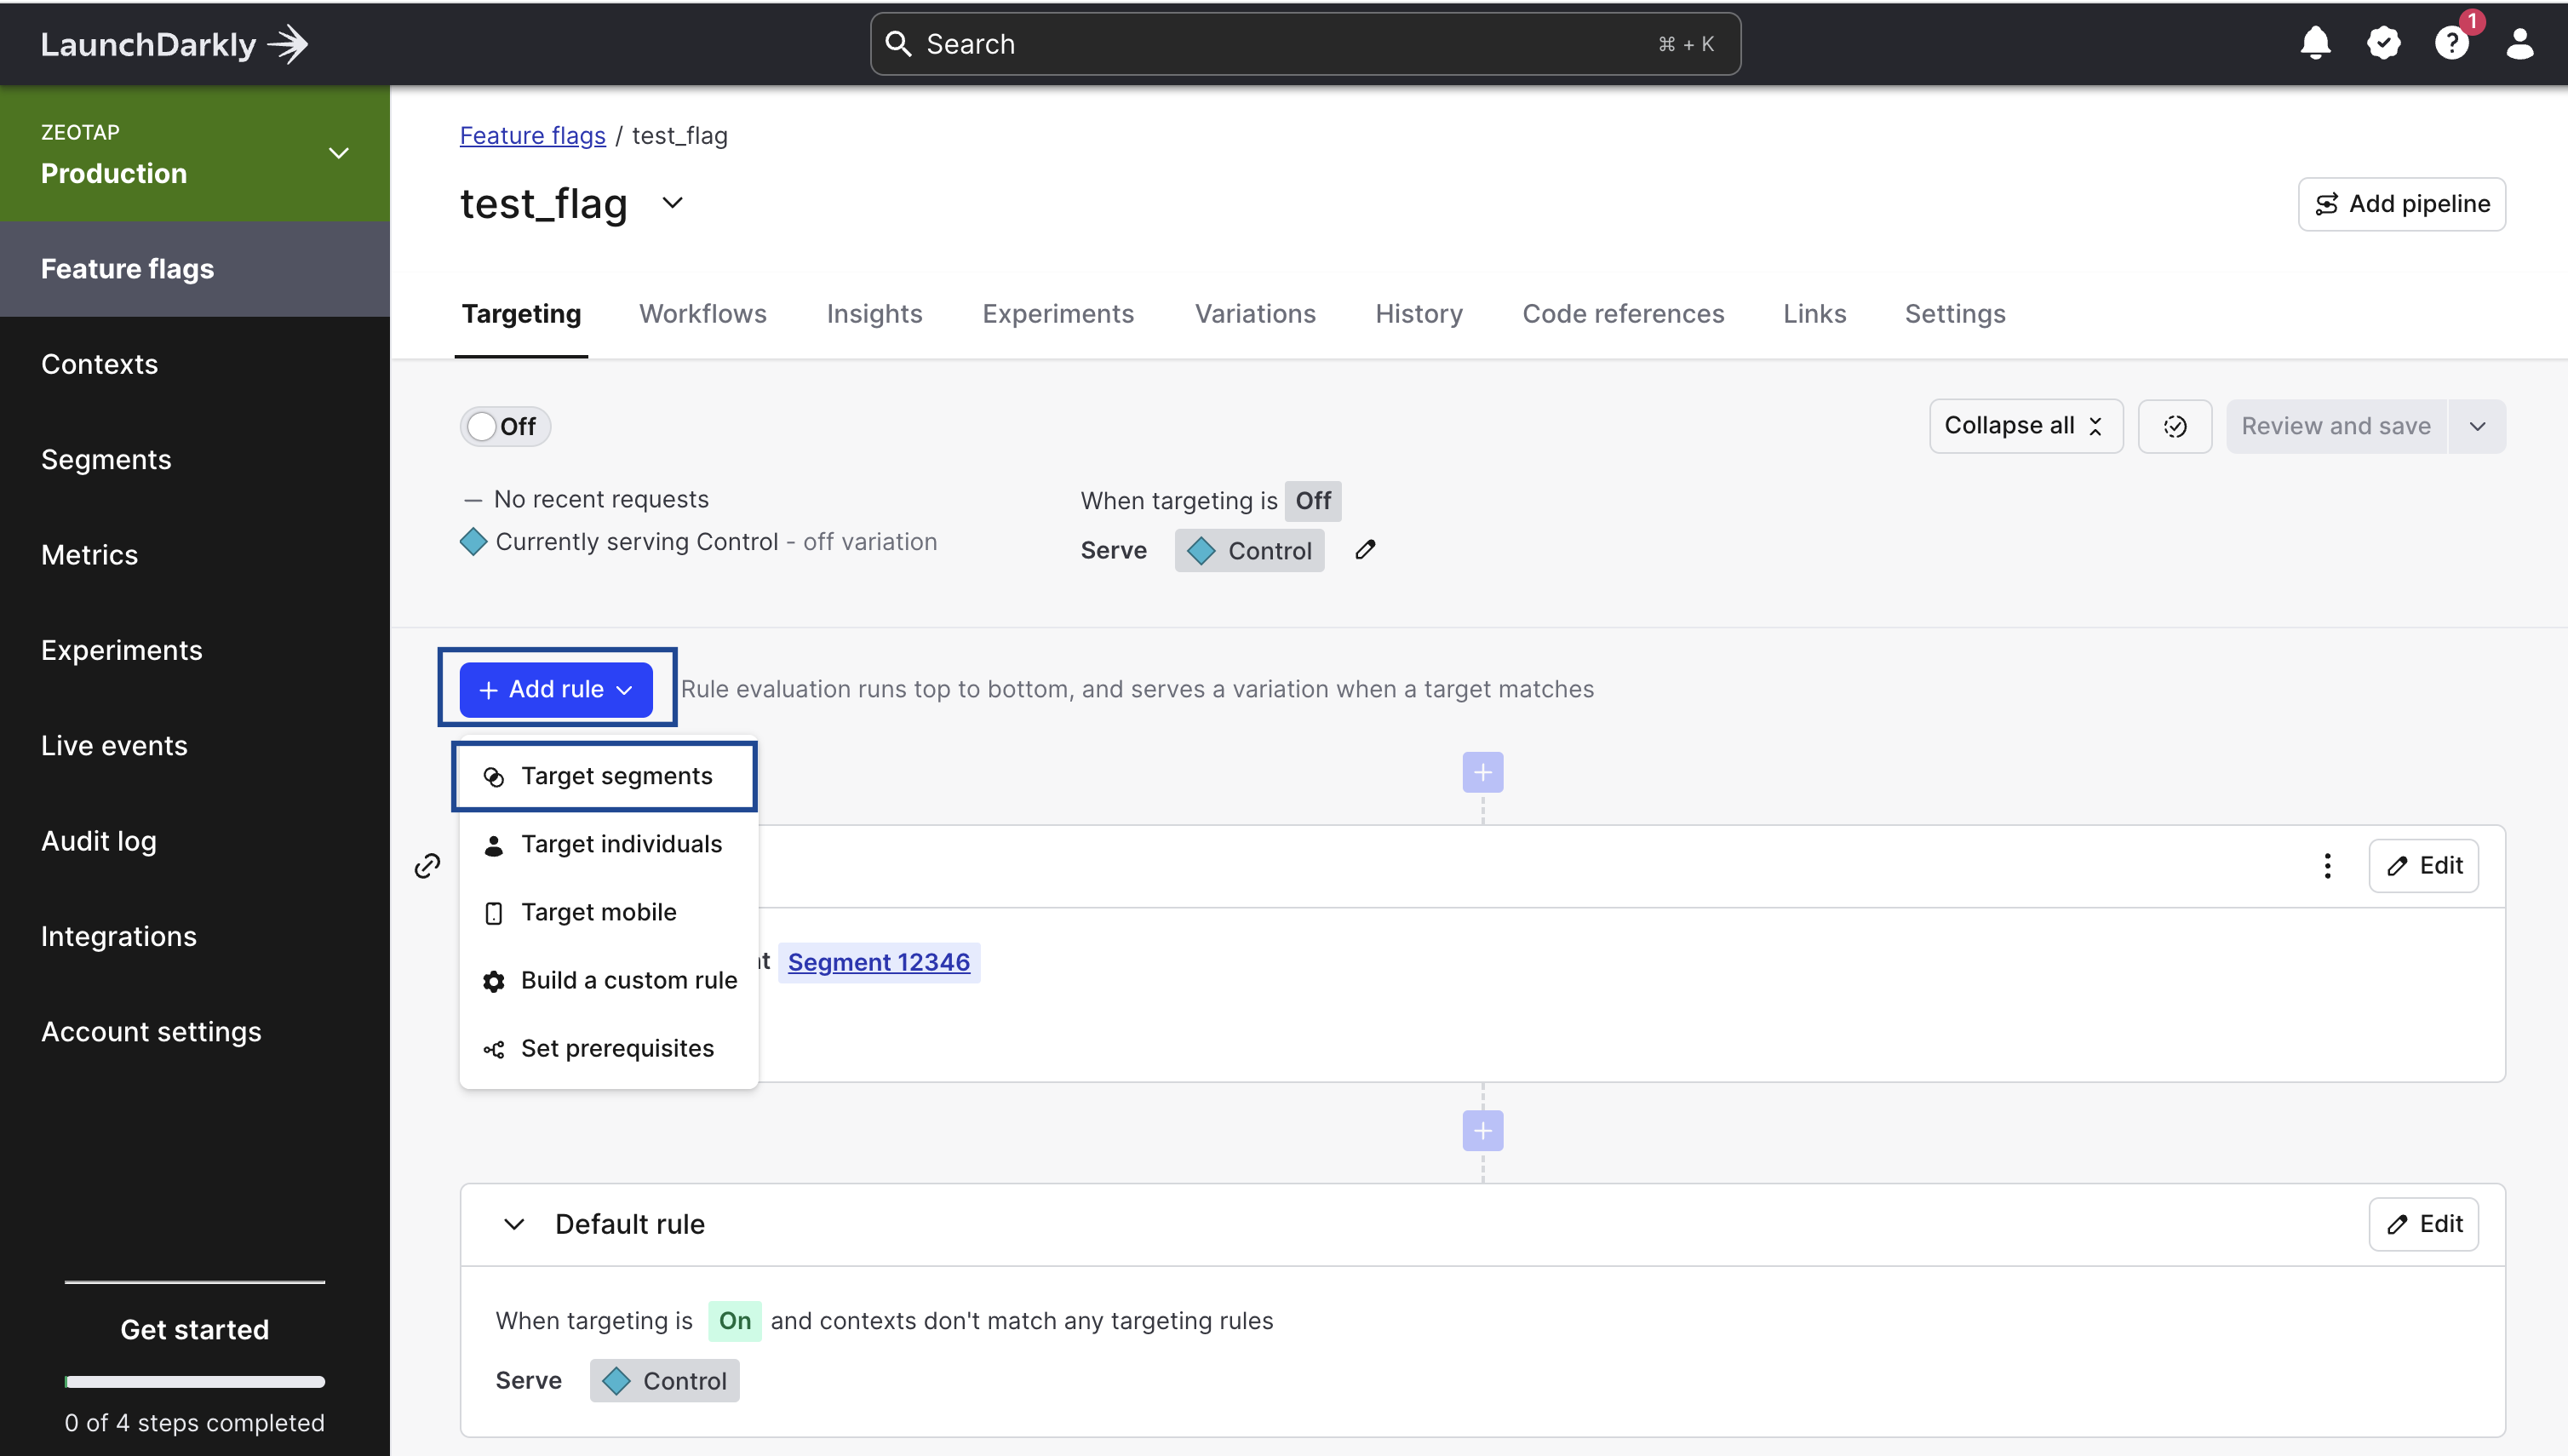
Under the new Rule section that is created, expand the Select Segments drop-down to view the Audiences that are pushed from Zeotap CDP.
Note:To view segments under the Select Segments drop-down, ensure that the LaunchDarkly Destination is created and is linked to at least one Audiences in Zeotap CDP.