Overview
Microsoft Fabric is an all-in-one analytics platform that unifies data engineering, data integration, data warehousing, data science, real-time analytics, and business intelligence under a single SaaS offering. It combines technologies like Power BI, Azure Synapse, and Data Factory into a seamless experience powered by OneLake, a centralized data lake for the entire organization. Designed for both technical and business users, it streamlines the entire data lifecycle from ingestion to visualization. The Microsoft Fabric destination in Zeotap enables the customer to send data from Zeotap to their Microsoft Fabric instance into Zeotap.Supported Identifiers
The customer can send any identifiers and attributes to their MS Fabric instance. The data is sent as JSON.Available Actions and Supported Features
The following table lists the available action types for the integration and the supported features for each action type:| Action Name | ID EXTENSION | DELETE | DELTA UPLOAD |
|---|---|---|---|
| Send JSON file to MS Fabric | - | - | - |
Pre-requisites
The customer should have the following information handy before creating a Microsoft Fabric source in Zeotap.- Service Principle : Steps to create Service principle is outlined in the authentication section.
- Database: The name of the database in Microsoft Fabric.
- Table : The name of the table in Microsoft Fable that you want to send the data from Zeotap.
- Workspace ID : The workspace ID of your Fabric instance.
- Tenant ID (or Directory ID) : The Tenant ID of the service principal.
- Client ID (or Application ID) : The Client ID of the service principal.
- Client Secret : The Client Secret associated with the service principal.
1. Register the Application (Authentication)
First, we need to create a service principal. These are the credentials Zeotap will use to access your Microsoft Fabric resources.Sign in to the Microsoft Entra admin center.
Enter:
- Name: Choose a clear name (e.g., FabricAPIAccessApp).
- Supported account types: Select Accounts in this organizational directory only.
2. Create a Client Secret
Fill in:
- Description: e.g., Fabric API Secret.
- Expires: Choose an expiry period (shorter is more secure; rotate regularly).
- To maintain access to Fabric, make sure to refresh your client secret prior to its expiration.
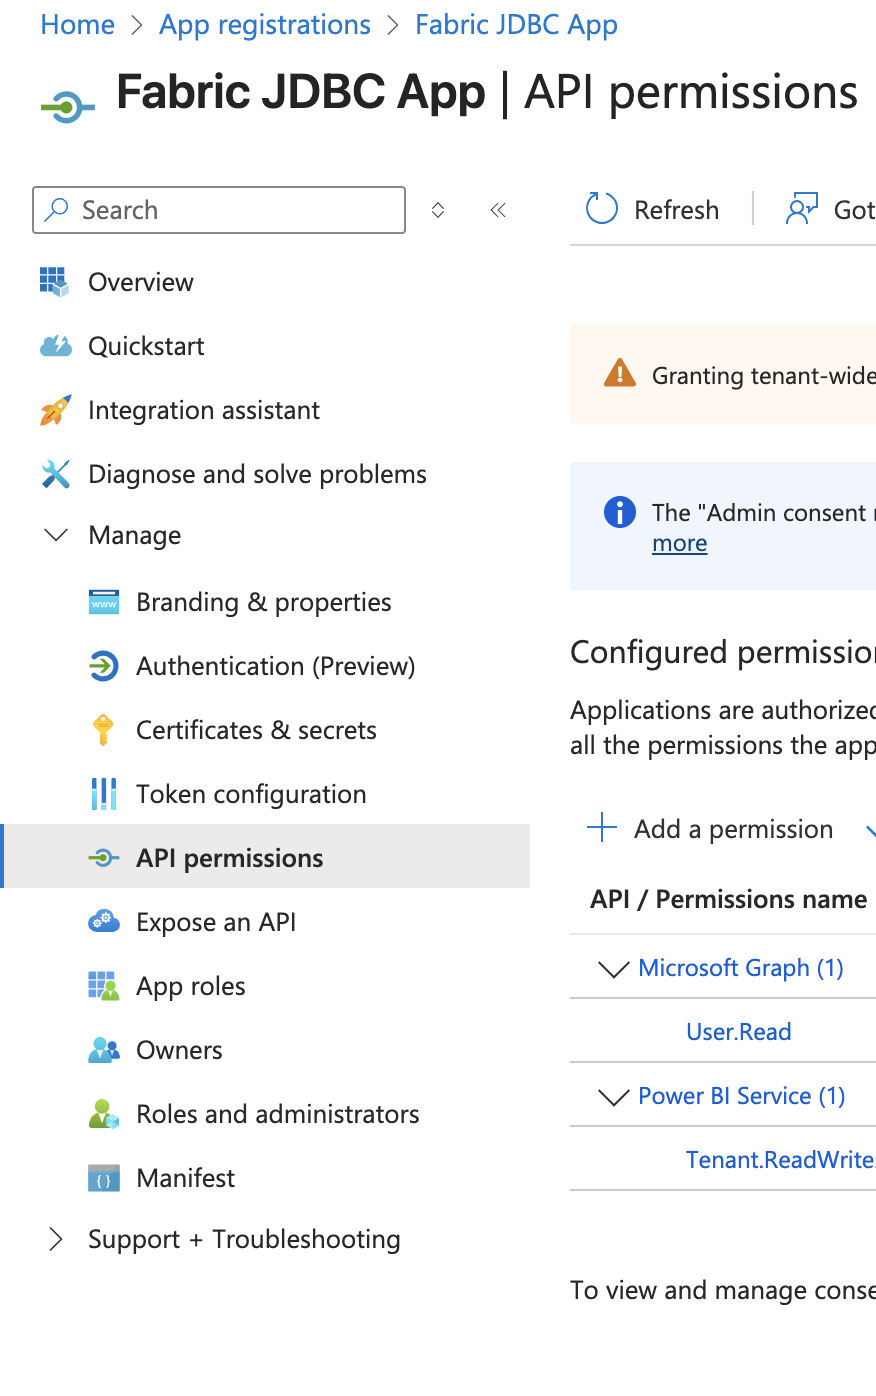
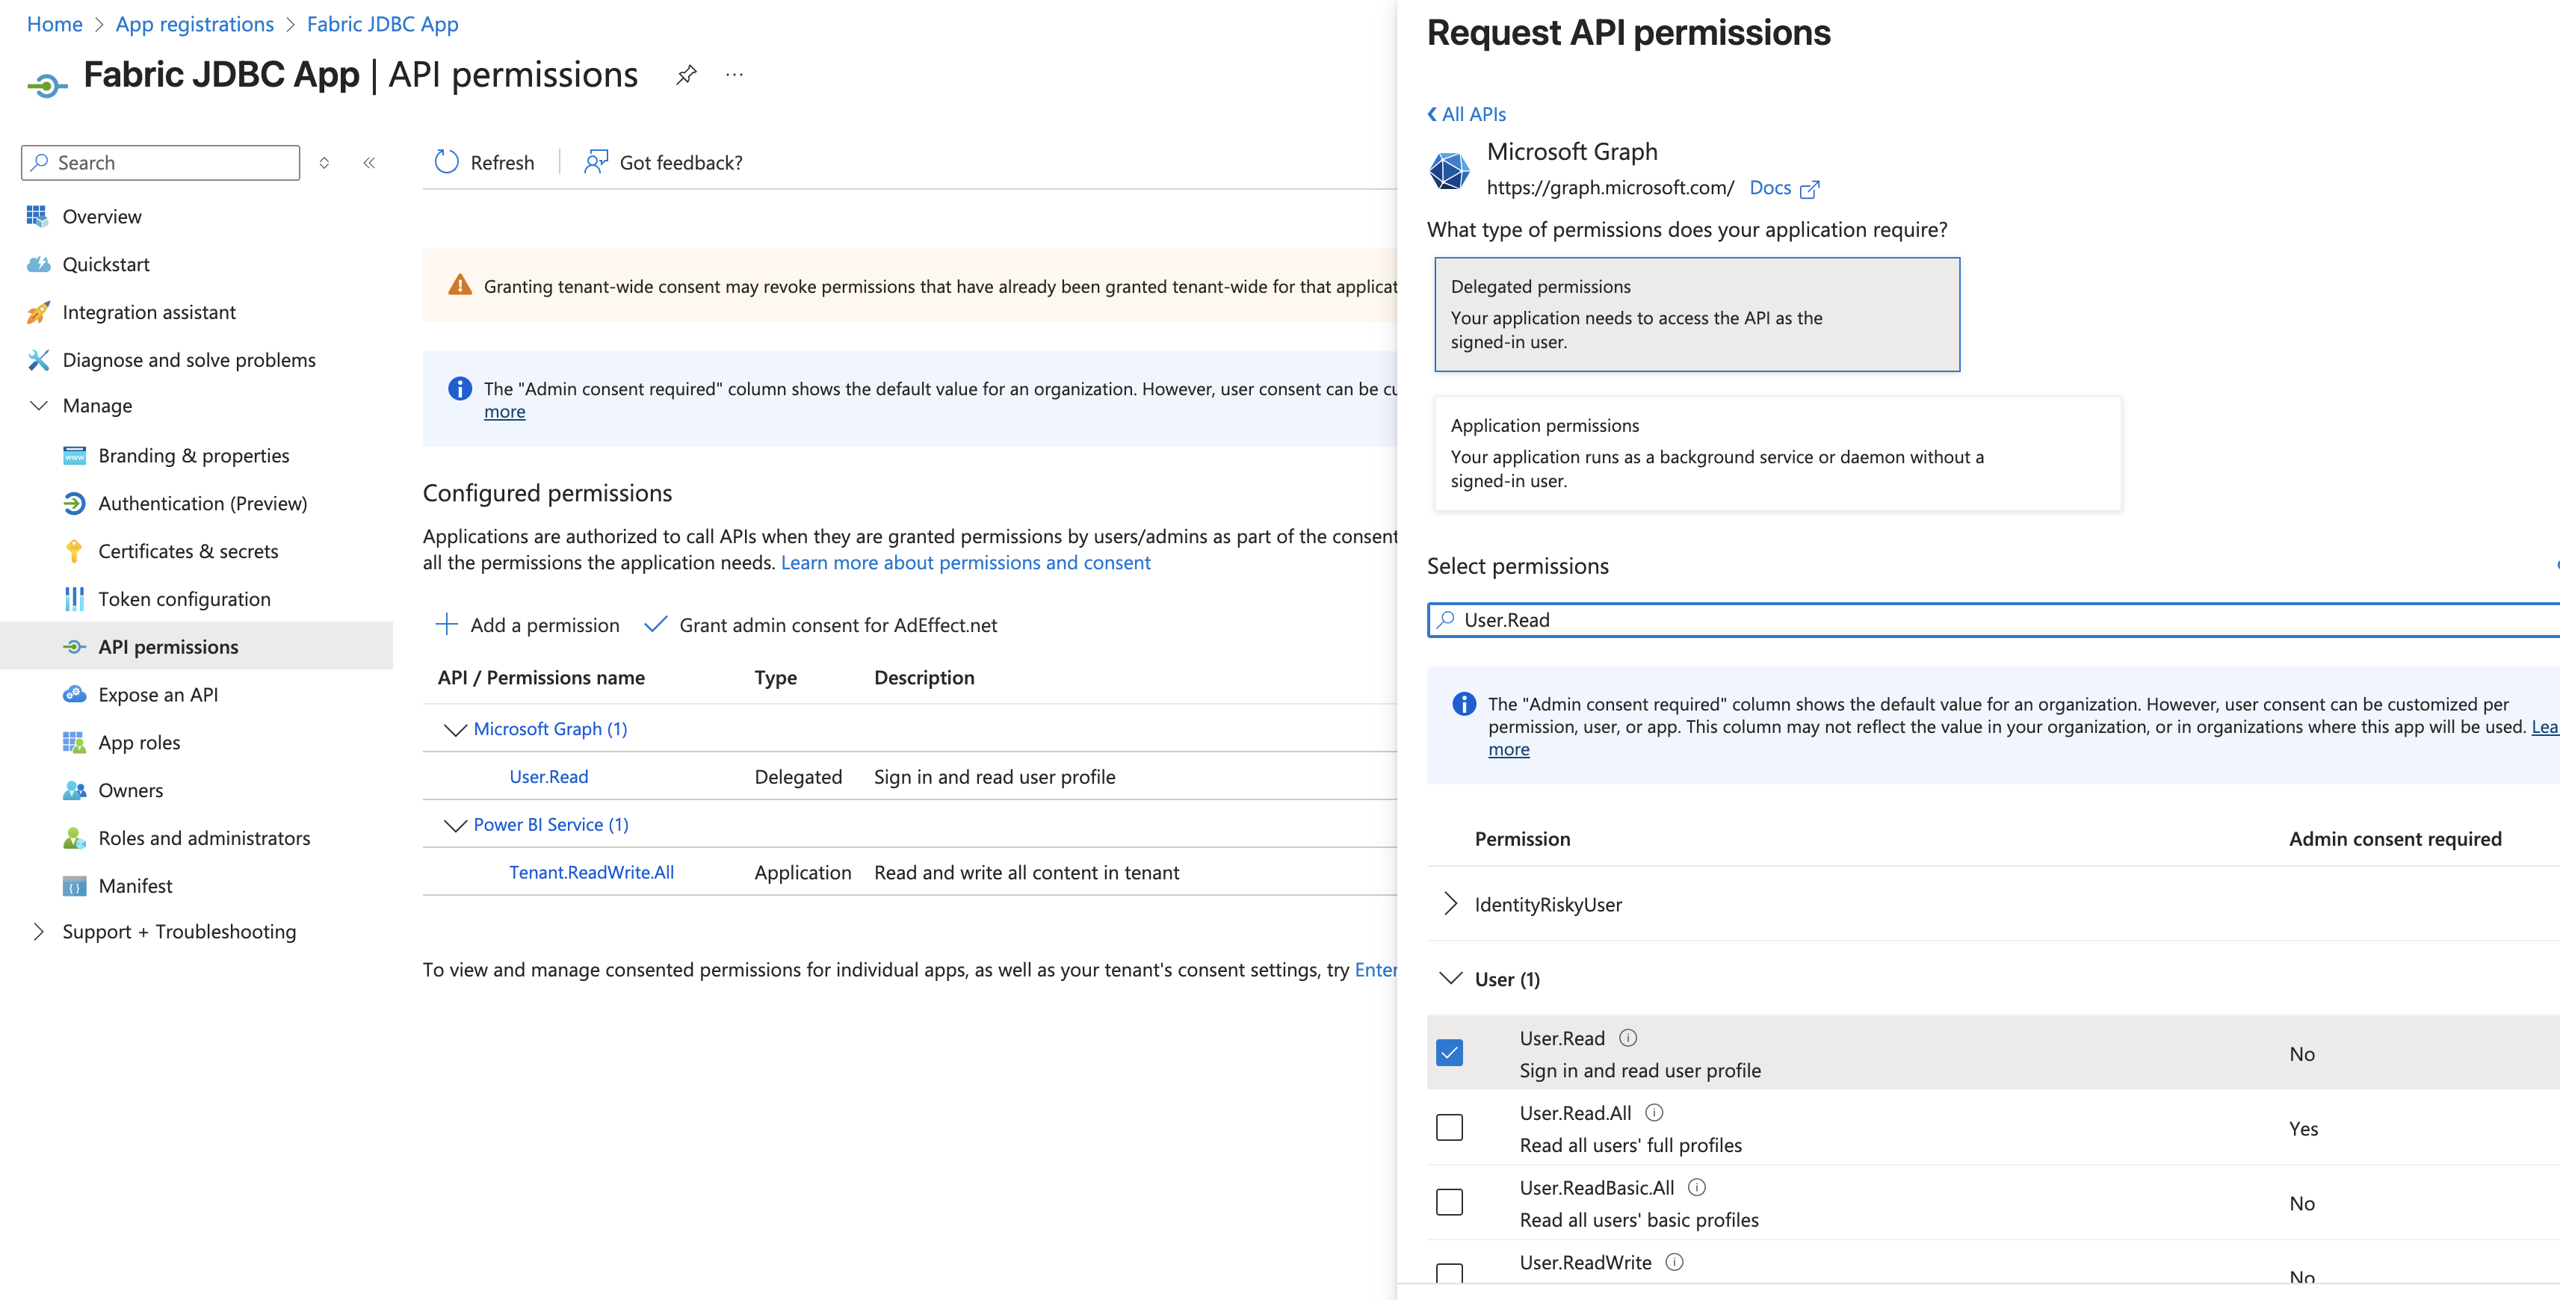
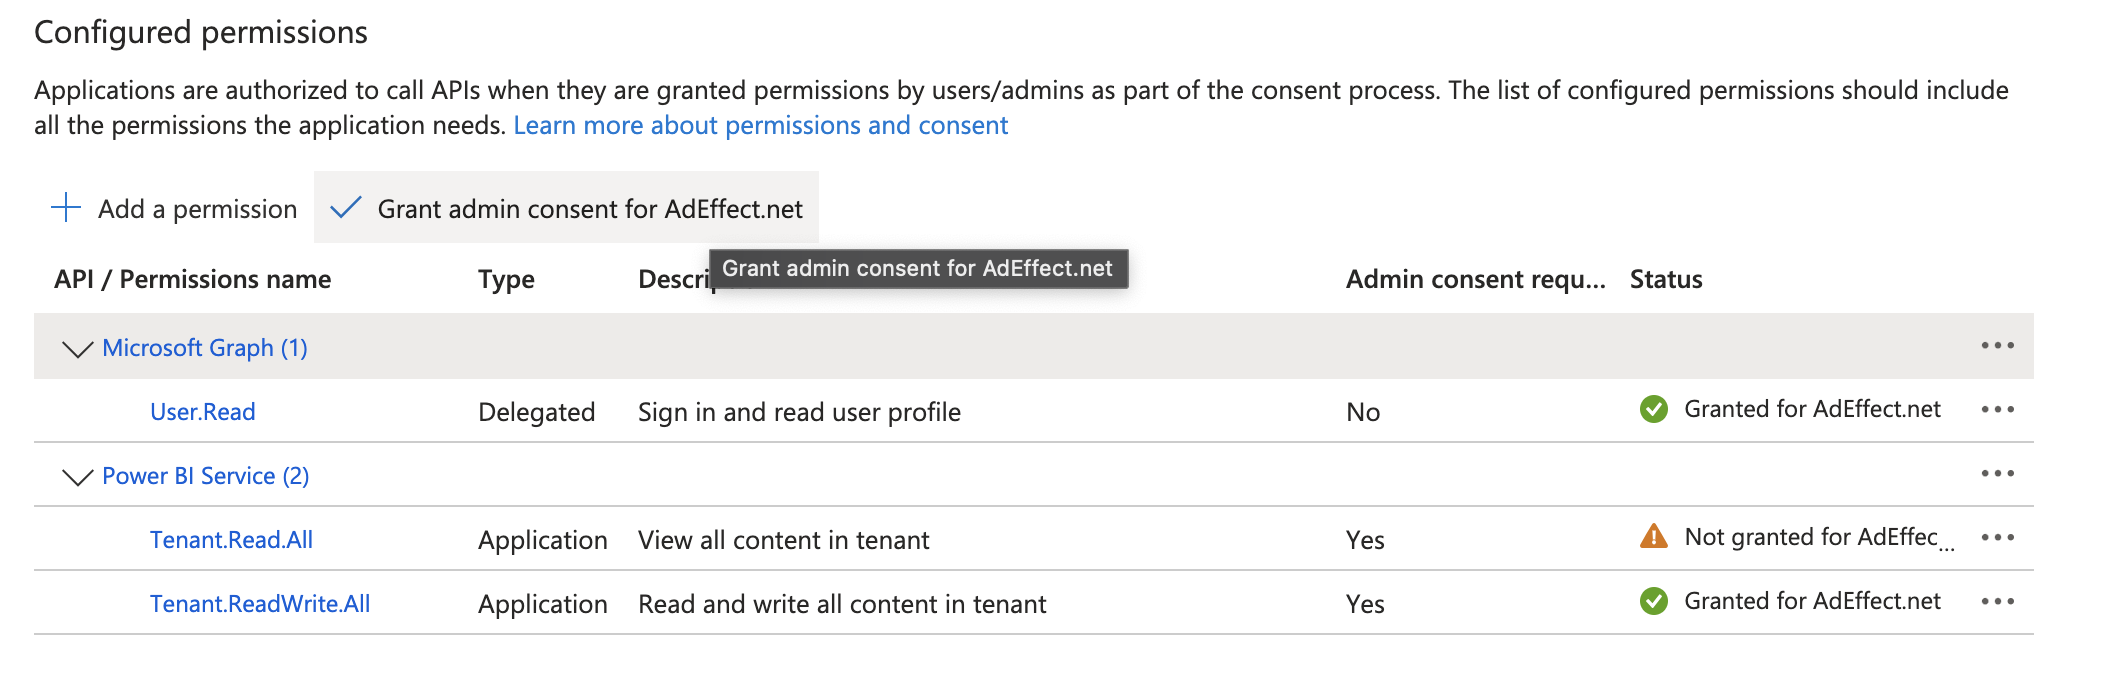
3. Assign API Permissions

4. Enable the Service Principal in Microsoft Fabric
By default, Microsoft Fabric may not be accessible via service principal. To connect, you’ll need to take the following steps.Log in to Microsoft Fabric.
Scroll down to Developer settings and select Service principals can call Fabric Public APIs. Make sure the toggle is set to Enabled.
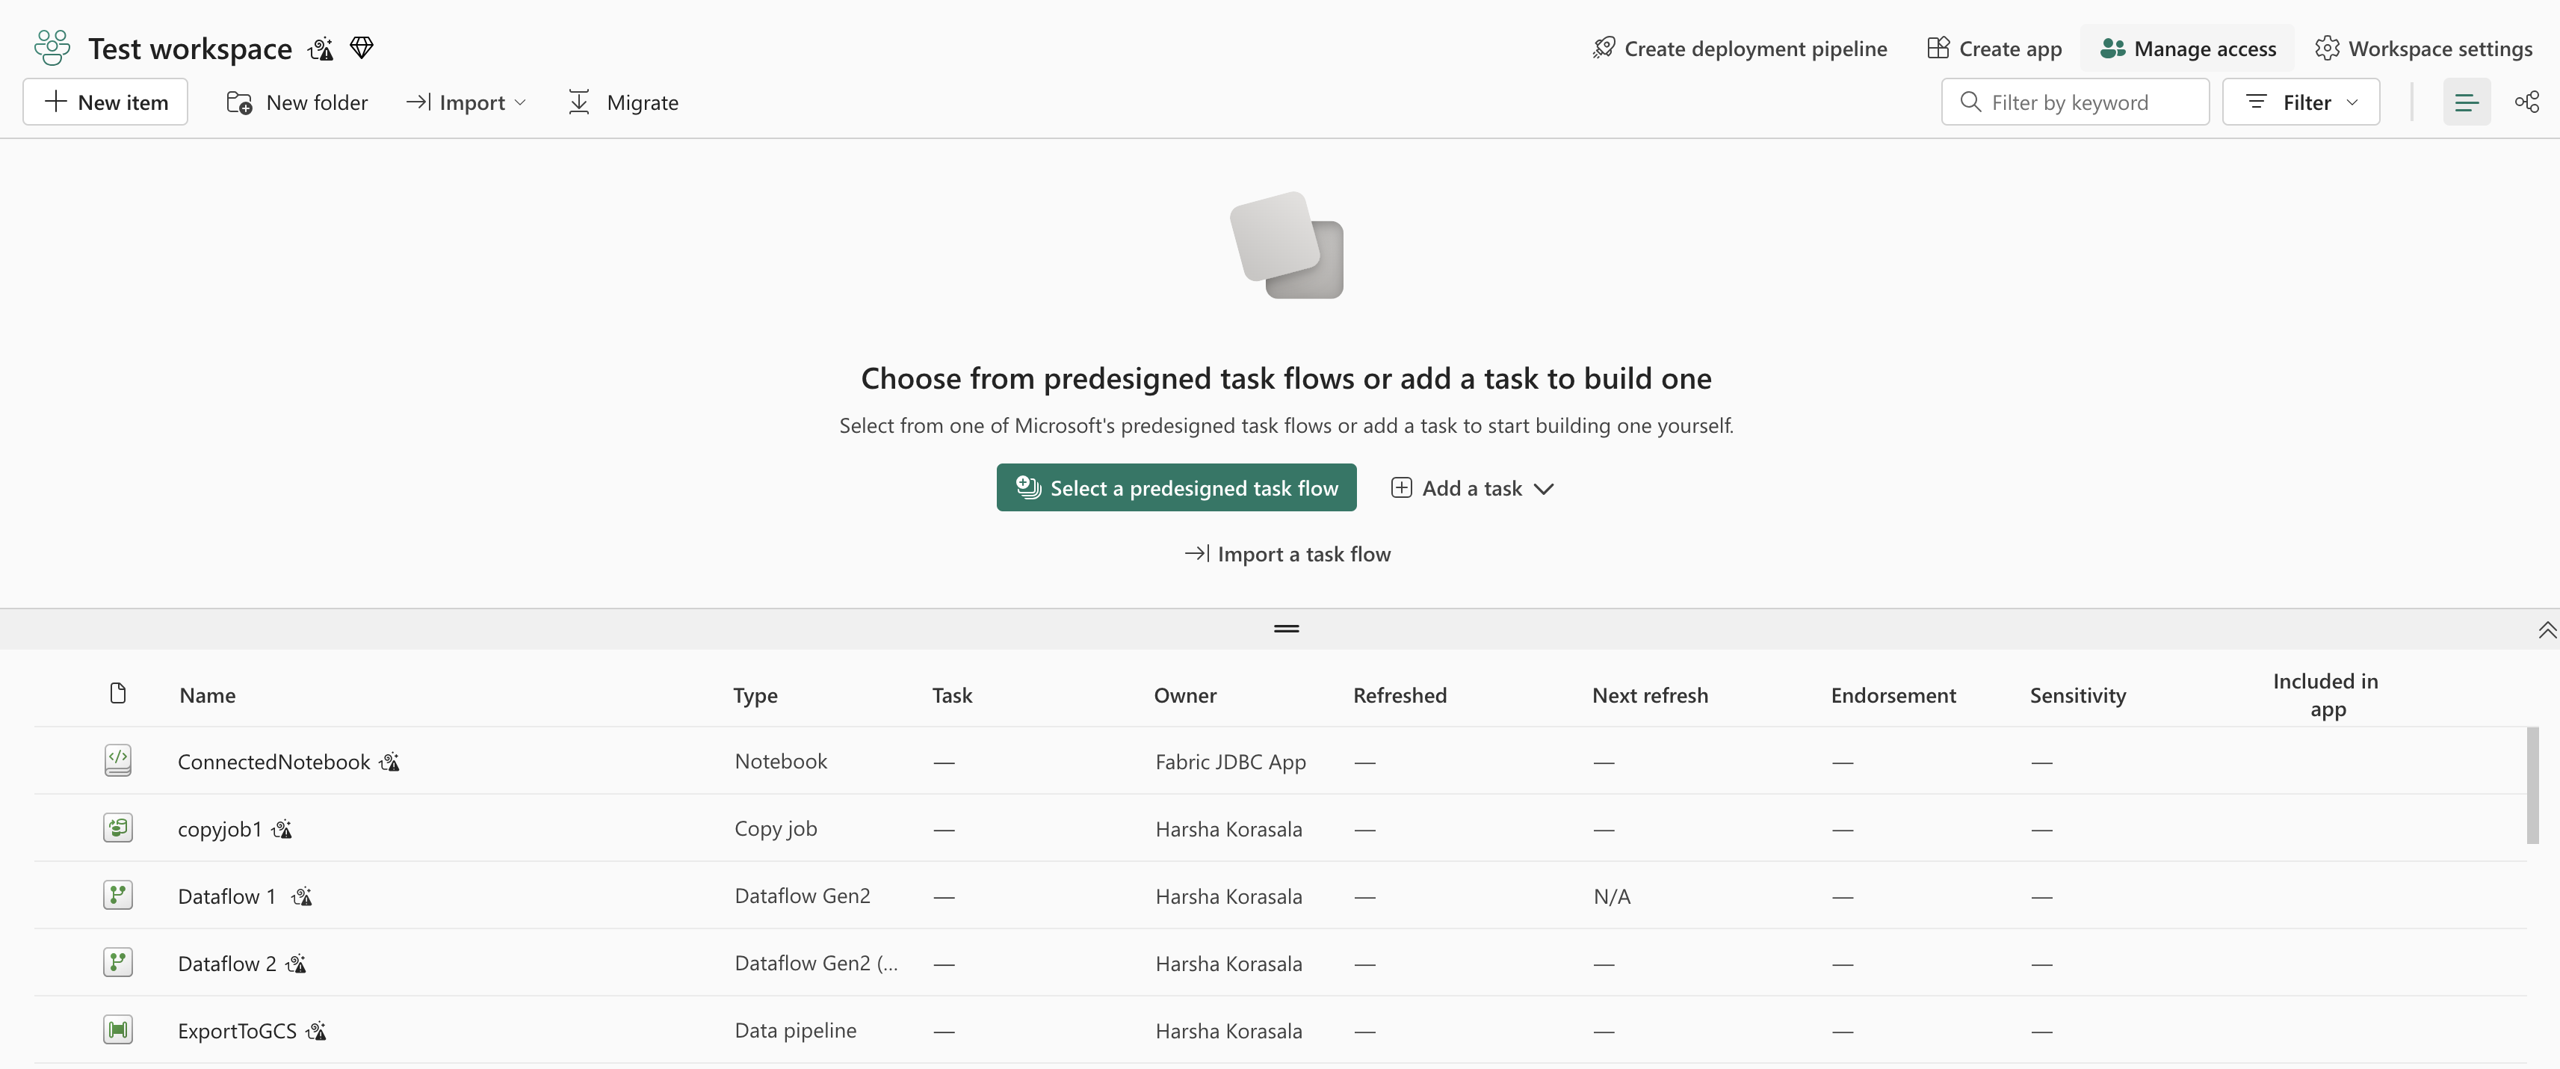
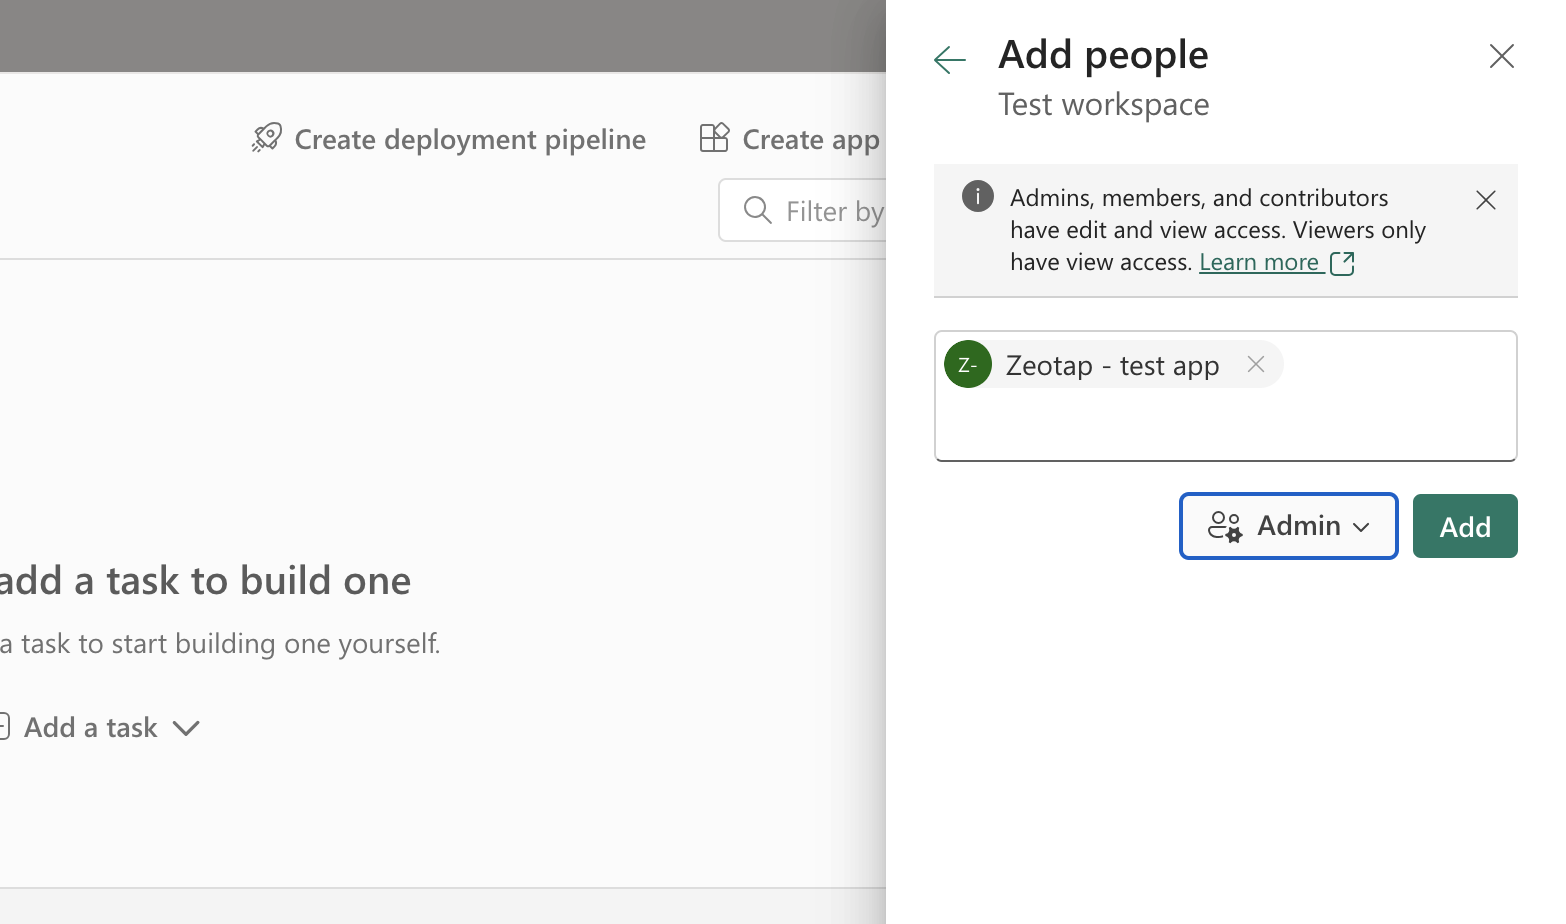
5. Assign Workspace Access
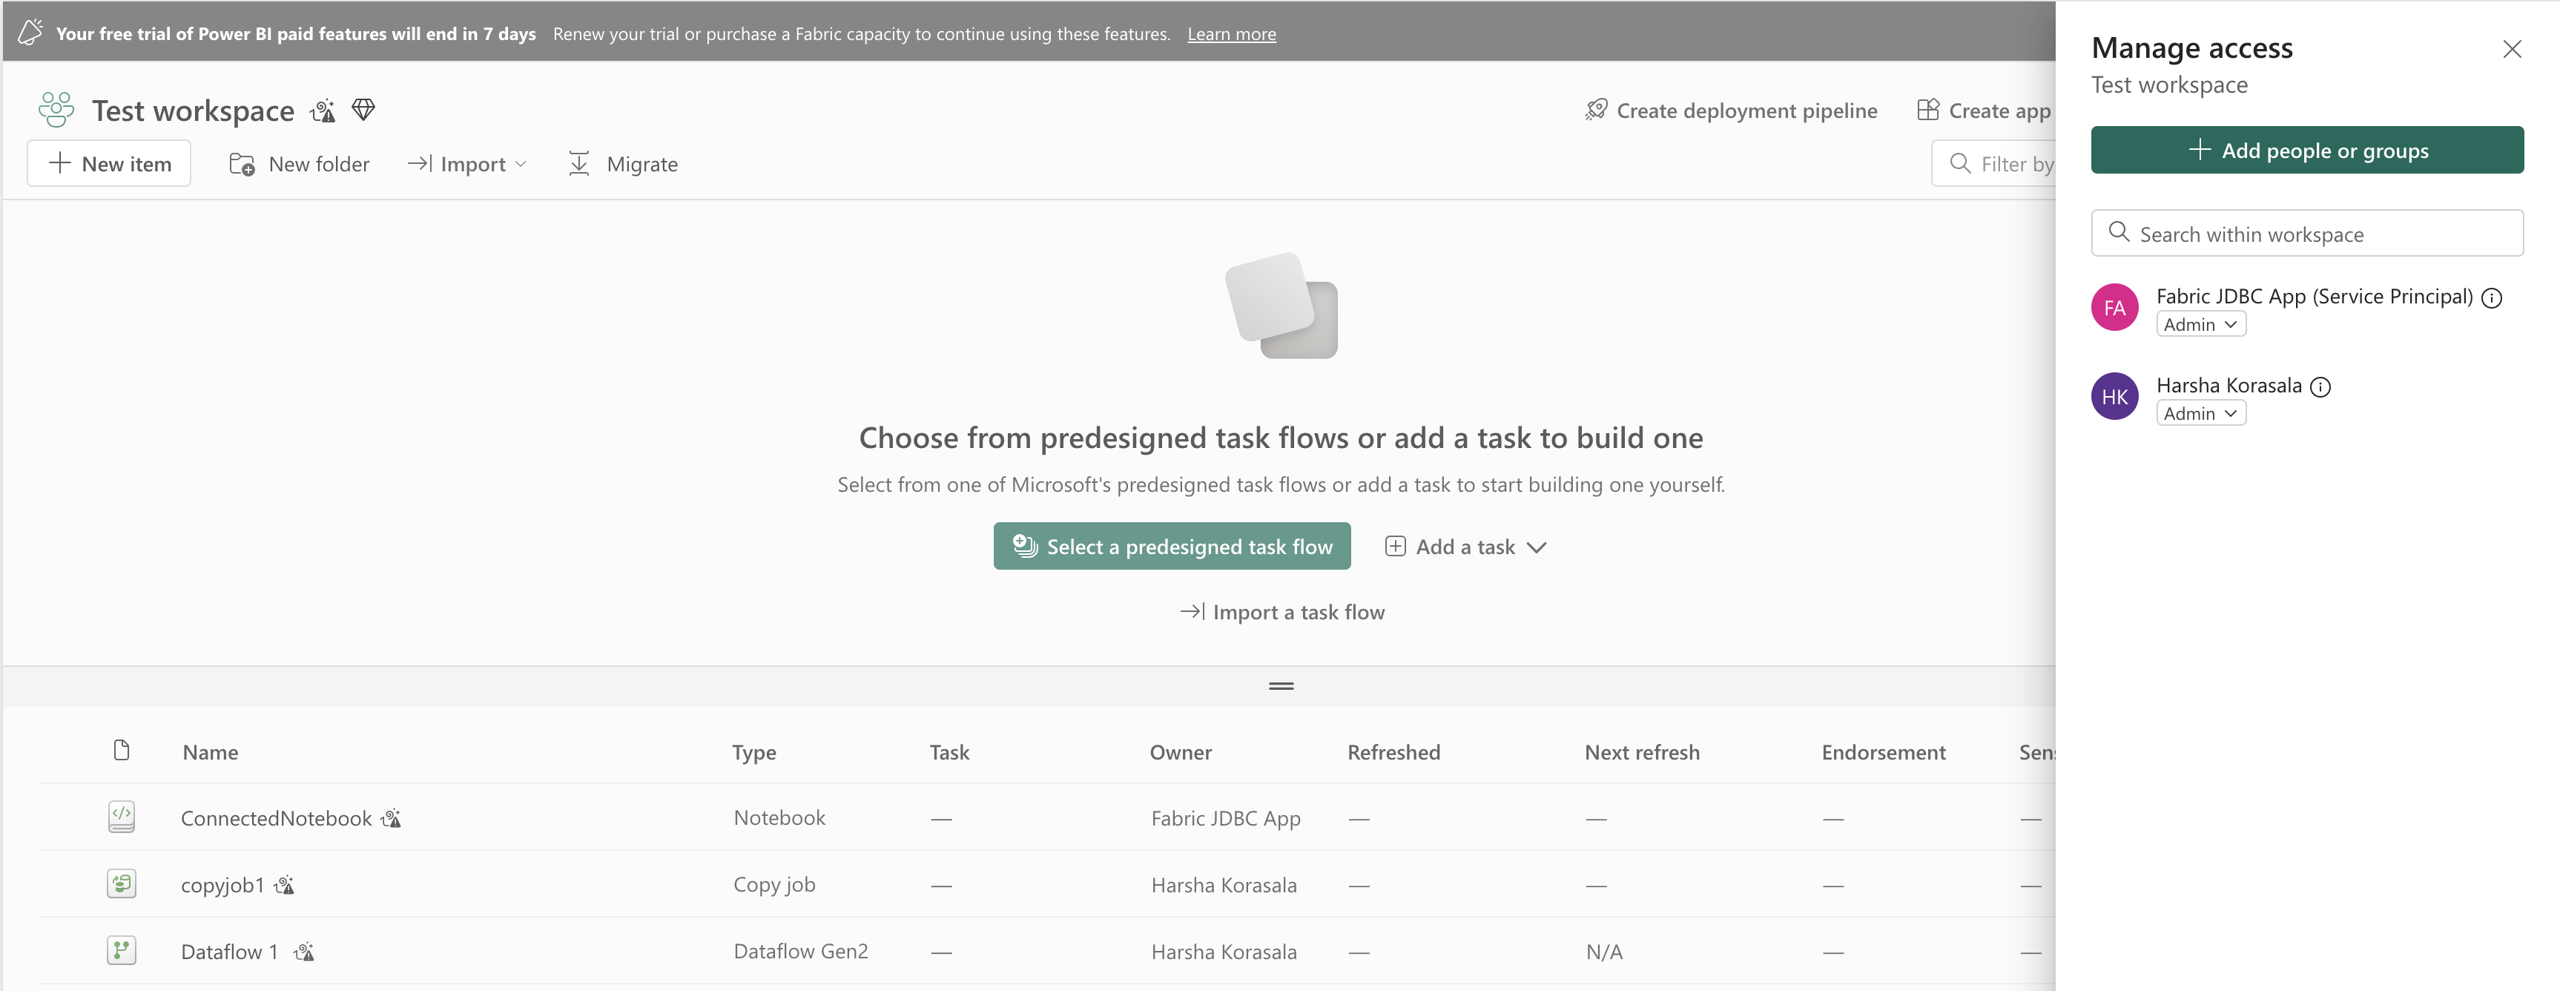
6. Get GCS Service Account & Upload to MS Fabric
We require a Google Cloud Platform (GCP) Service Account to enable data ingestion from Google Cloud Storage (GCS) into Microsoft Fabric. This service account will be used to authenticate Spark jobs running inside Microsoft Fabric and load data into Lakehouse tables.6.1. Service Account Requirements
Create a new GCP Service Account dedicated to this integration.- Purpose: Allow Fabric Spark jobs to read JSON files from a specified GCS bucket and write them to a Lakehouse table.
- Scope: Access should be limited to the relevant bucket(s) only.
6.2. Required Permissions (Bucket Level)
The service account must have the following GCS IAM permissions on the target bucket: Permissions:- storage.objects.get – Read objects from the bucket
- storage.objects.list – List objects in the bucket
- storage.buckets.get – View bucket metadata
- storage.buckets.update – Update bucket metadata if needed
6.3. Service Account Key
- Generate a JSON key file for the service account.
- The file must be securely transferred and stored for further steps.
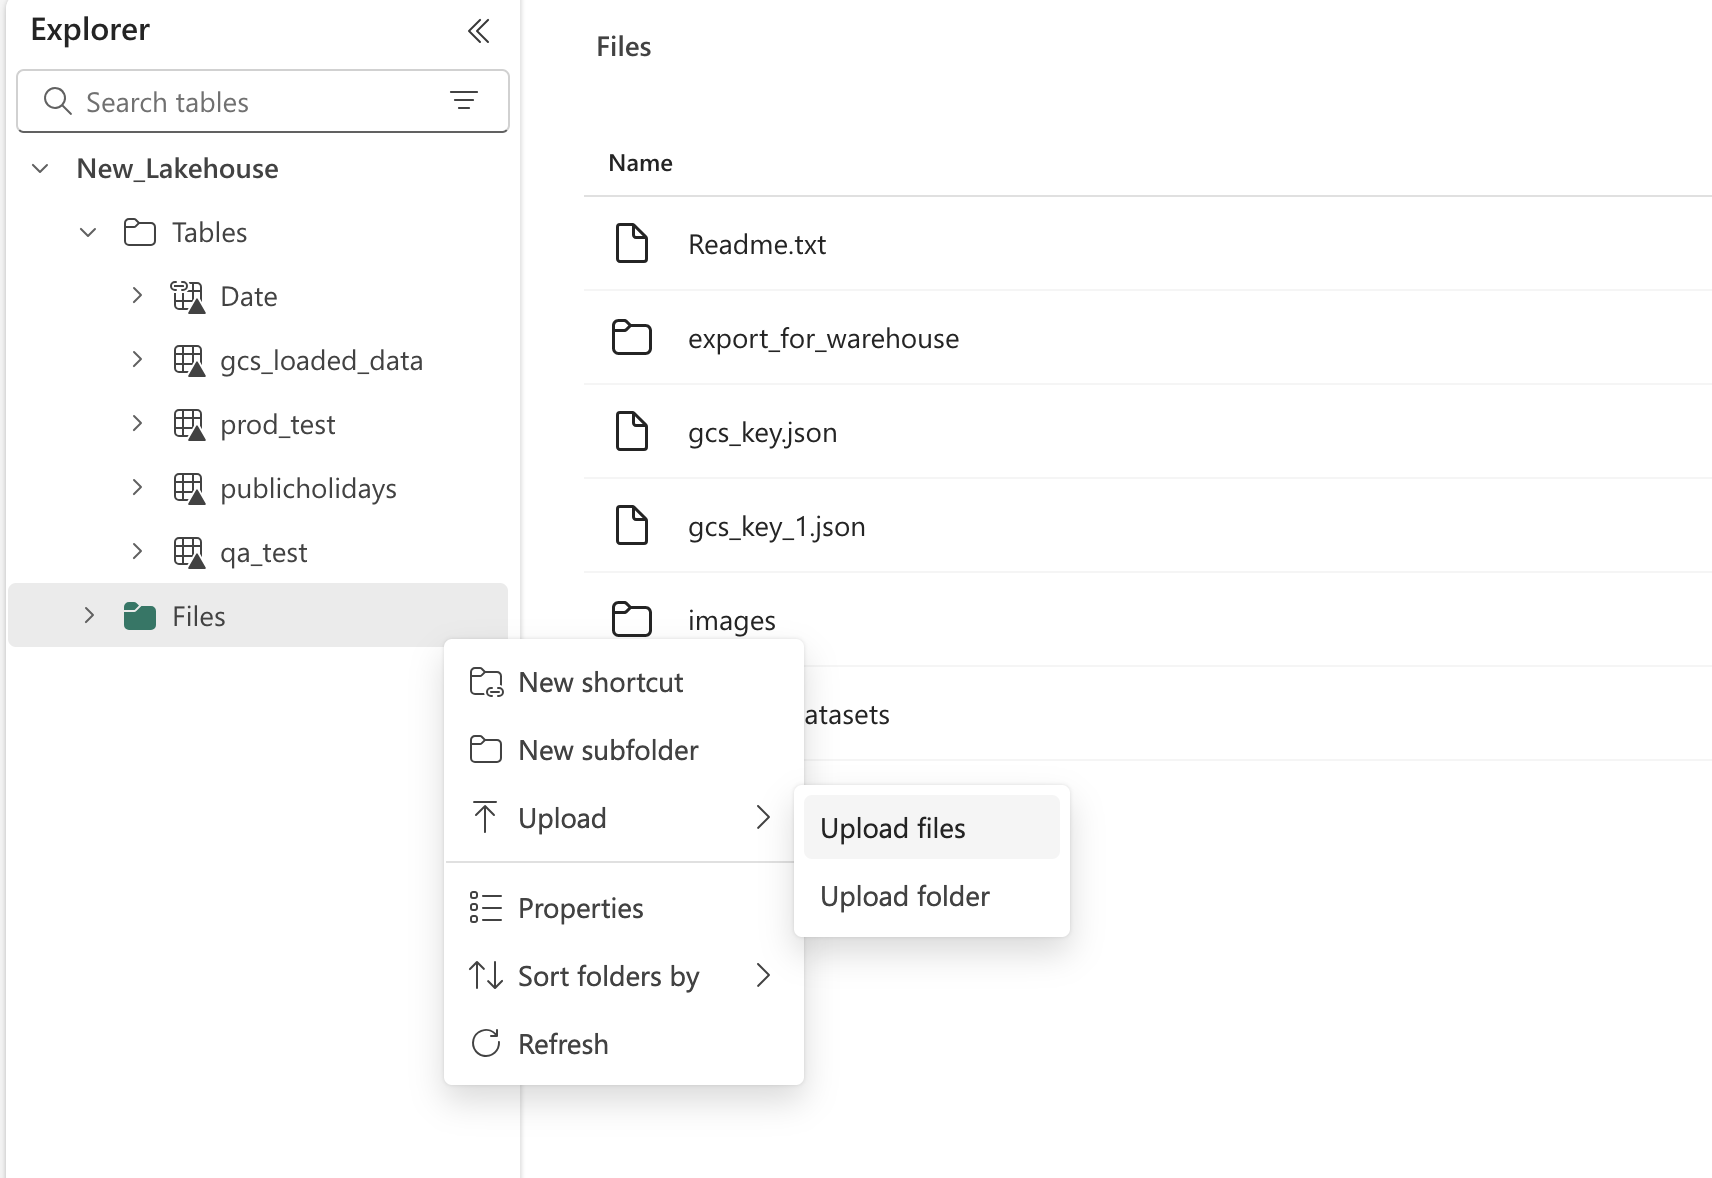
7. Upload the Service Account JSON to MS Fabric Target Lakehouse
Rename the Service Account in your Local system to: “gcs_key”.a. This is really important as we attempt to read the GCS Key with this naming.

8. Inputs on UI
-
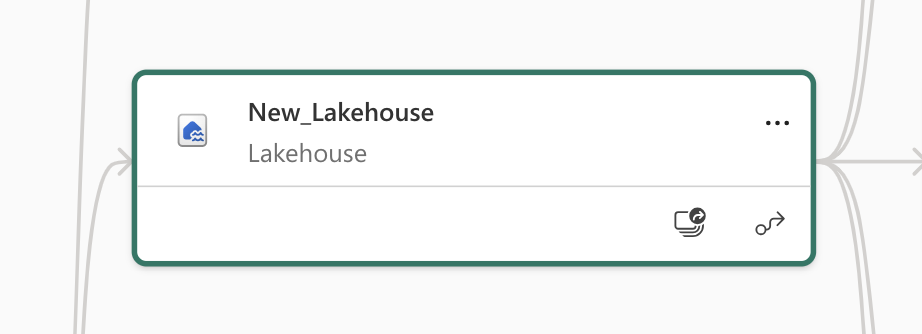
Database: Lakehouse/Warehouse name is the Database name.
- In below case: Lakehouse: “New_Lakehouse”
-
TableName:
- Refer to this section first for some important Rules on Table Name: MS Fabric Destination (Client Doc) | Important Considerations
- You can give any Name if this is your first time creating that table in Destination Lakehouse.
-
Workspace ID
- Go to your workspace in Microsoft Fabric (or Power BI Service).
- Look at the URL in your browser, e.g.:
https://app.powerbi.com/groups/12345678-abcd-1234-abcd-9876543210abcdef/list- or in Fabric:
https://app.fabric.microsoft.com/groups/12345678-abcd-1234-abcd-9876543210abcdef/home- The part after /groups/ and before /list or /home is your Workspace ID:
12345678-abcd-1234-abcd-9876543210abcdef
Important Considerations
When using the GCS → Microsoft Fabric data ingestion process, please note:-
Table Name Conflicts
- Ensure there is no existing table in the destination Lakehouse with the same name as the one you specify during destination creation, unless it is intended to be reused.
- Name collisions may cause ingestion issues.
-
Schema Mismatch Handling
- If the schema of incoming data differs from the schema of an existing table from a previous segment trigger, the data upload will fail.
- In such cases, create a new destination to handle the updated schema.
-
Schema Merge Behavior
- The ingestion process will first attempt to merge the incoming schema with the existing table schema.
- If the table does not exist, it will be created automatically.
- If the table exists and the schema matches, the data will be directly appended to it.
-
Pre-Run Folder Creation in GCS
- The process will automatically create a folder in your GCS Bucket named:
<Target_Lakehouse_Name>.<TableName> - Files will be uploaded to this folder first before the ingestion script transfers them to Microsoft Fabric. GCS will be acting as an intermediate location before transfer into MS Fabric Lakehouse.
- The process will automatically create a folder in your GCS Bucket named:
Create a Destination for Microsoft Fabric
Perform the following steps to create a Destination for Microsoft Fabric:.png?fit=max&auto=format&n=99ae7Xt83Dkoy1LQ&q=85&s=8af304a0fb2280e517f24a4a2ad84e21)
.png?fit=max&auto=format&n=99ae7Xt83Dkoy1LQ&q=85&s=f6ada97715a2a4a0469fef53698ac3b9)
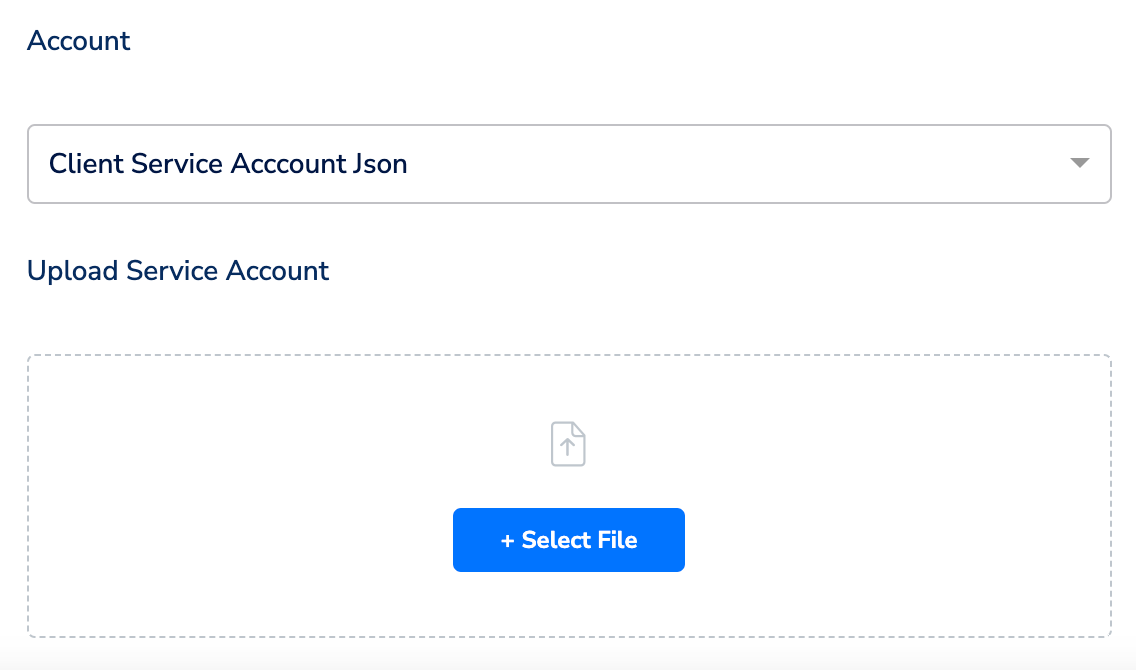
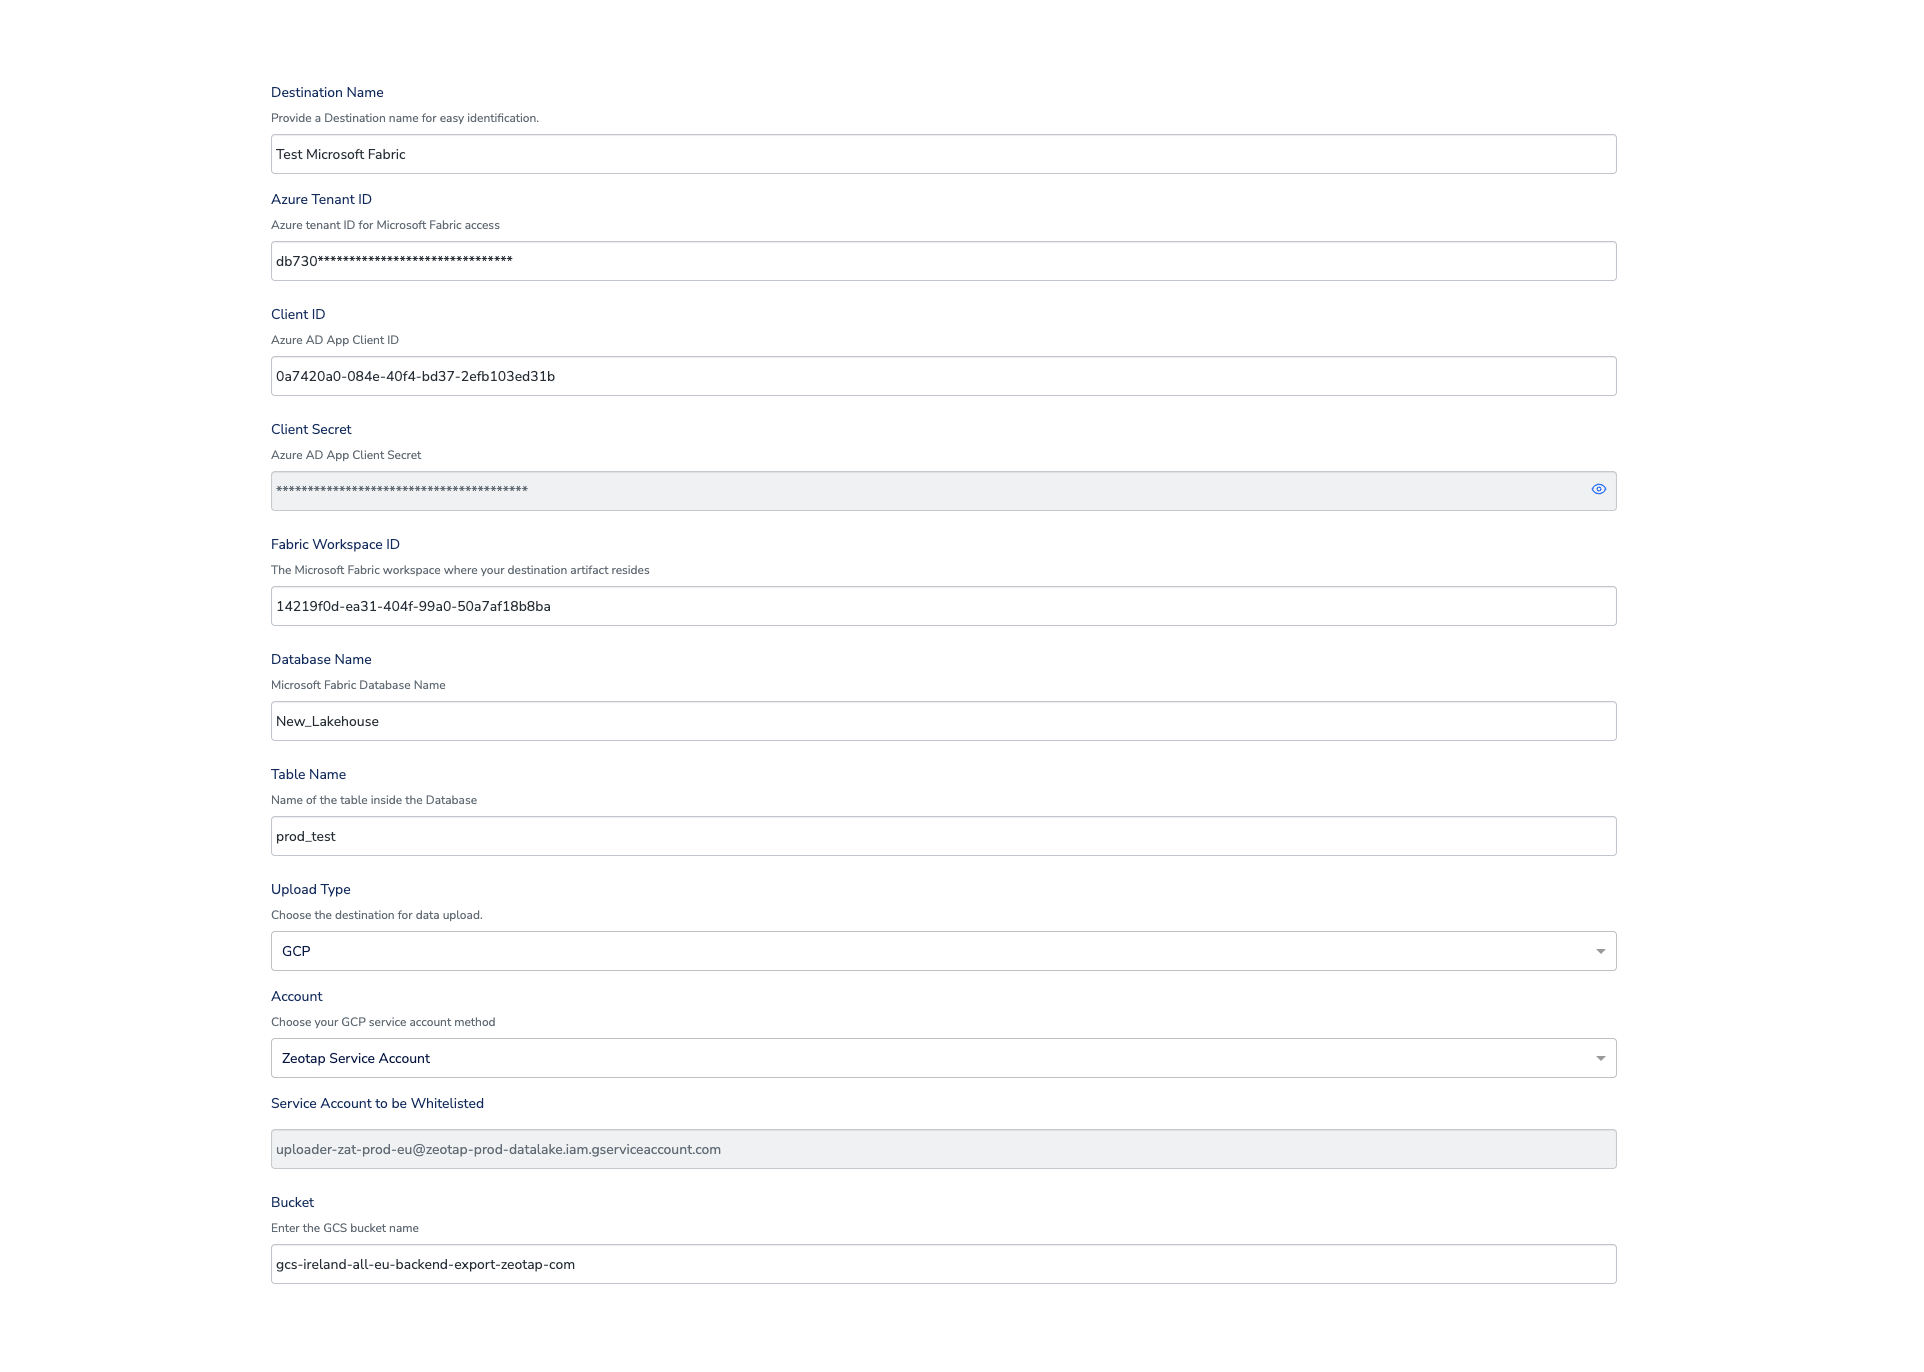
Click Microsoft Fabric. A screen appears displaying details about the particular destination towards the left. On the right-hand side of the screen find a list of fields that are required for the integration to be established. Provide the required details as mentioned in the following steps:a. Enter a name for the Destination.b. In the Azure Tenant ID field, provide the Azure tenant ID.c. Enter Client ID and Client Secret that you generated using the steps in the Authentication section.d. Enter the Fabric Workspace ID, Database Name, and Table Name of Microsoft Fabric where you want to push the data from Zeotap.e. Select the Upload Type. Currently only uploading to GCS is supported.f. Under Account, choose either Zeotap Service Account or Client Service Account Json using the drop-down menu based on the type of authentication you need. If you wish to use Zeotap Service Account, then ensure that you whitelist this it to push audiences (segments) from Zeotap CDP to Google Cloud Storage Platform.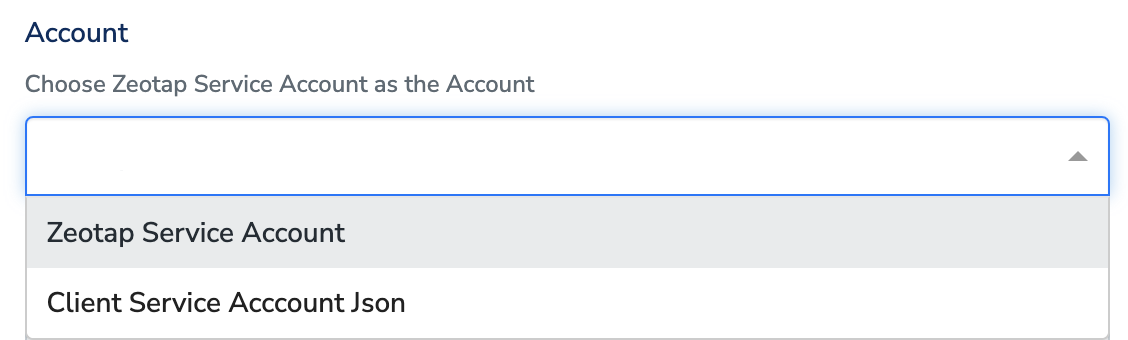

In the new screen that appears, choose the appropriate action and mapping as explained below. Under Choose your Action, you can choose Send Json File to MS Fabric action.a. Click on + Add mapping field and add the fields you want to send. The names in the Destination field (RHS) appears as the names of the columns in your Microsoft Fabric instance.b.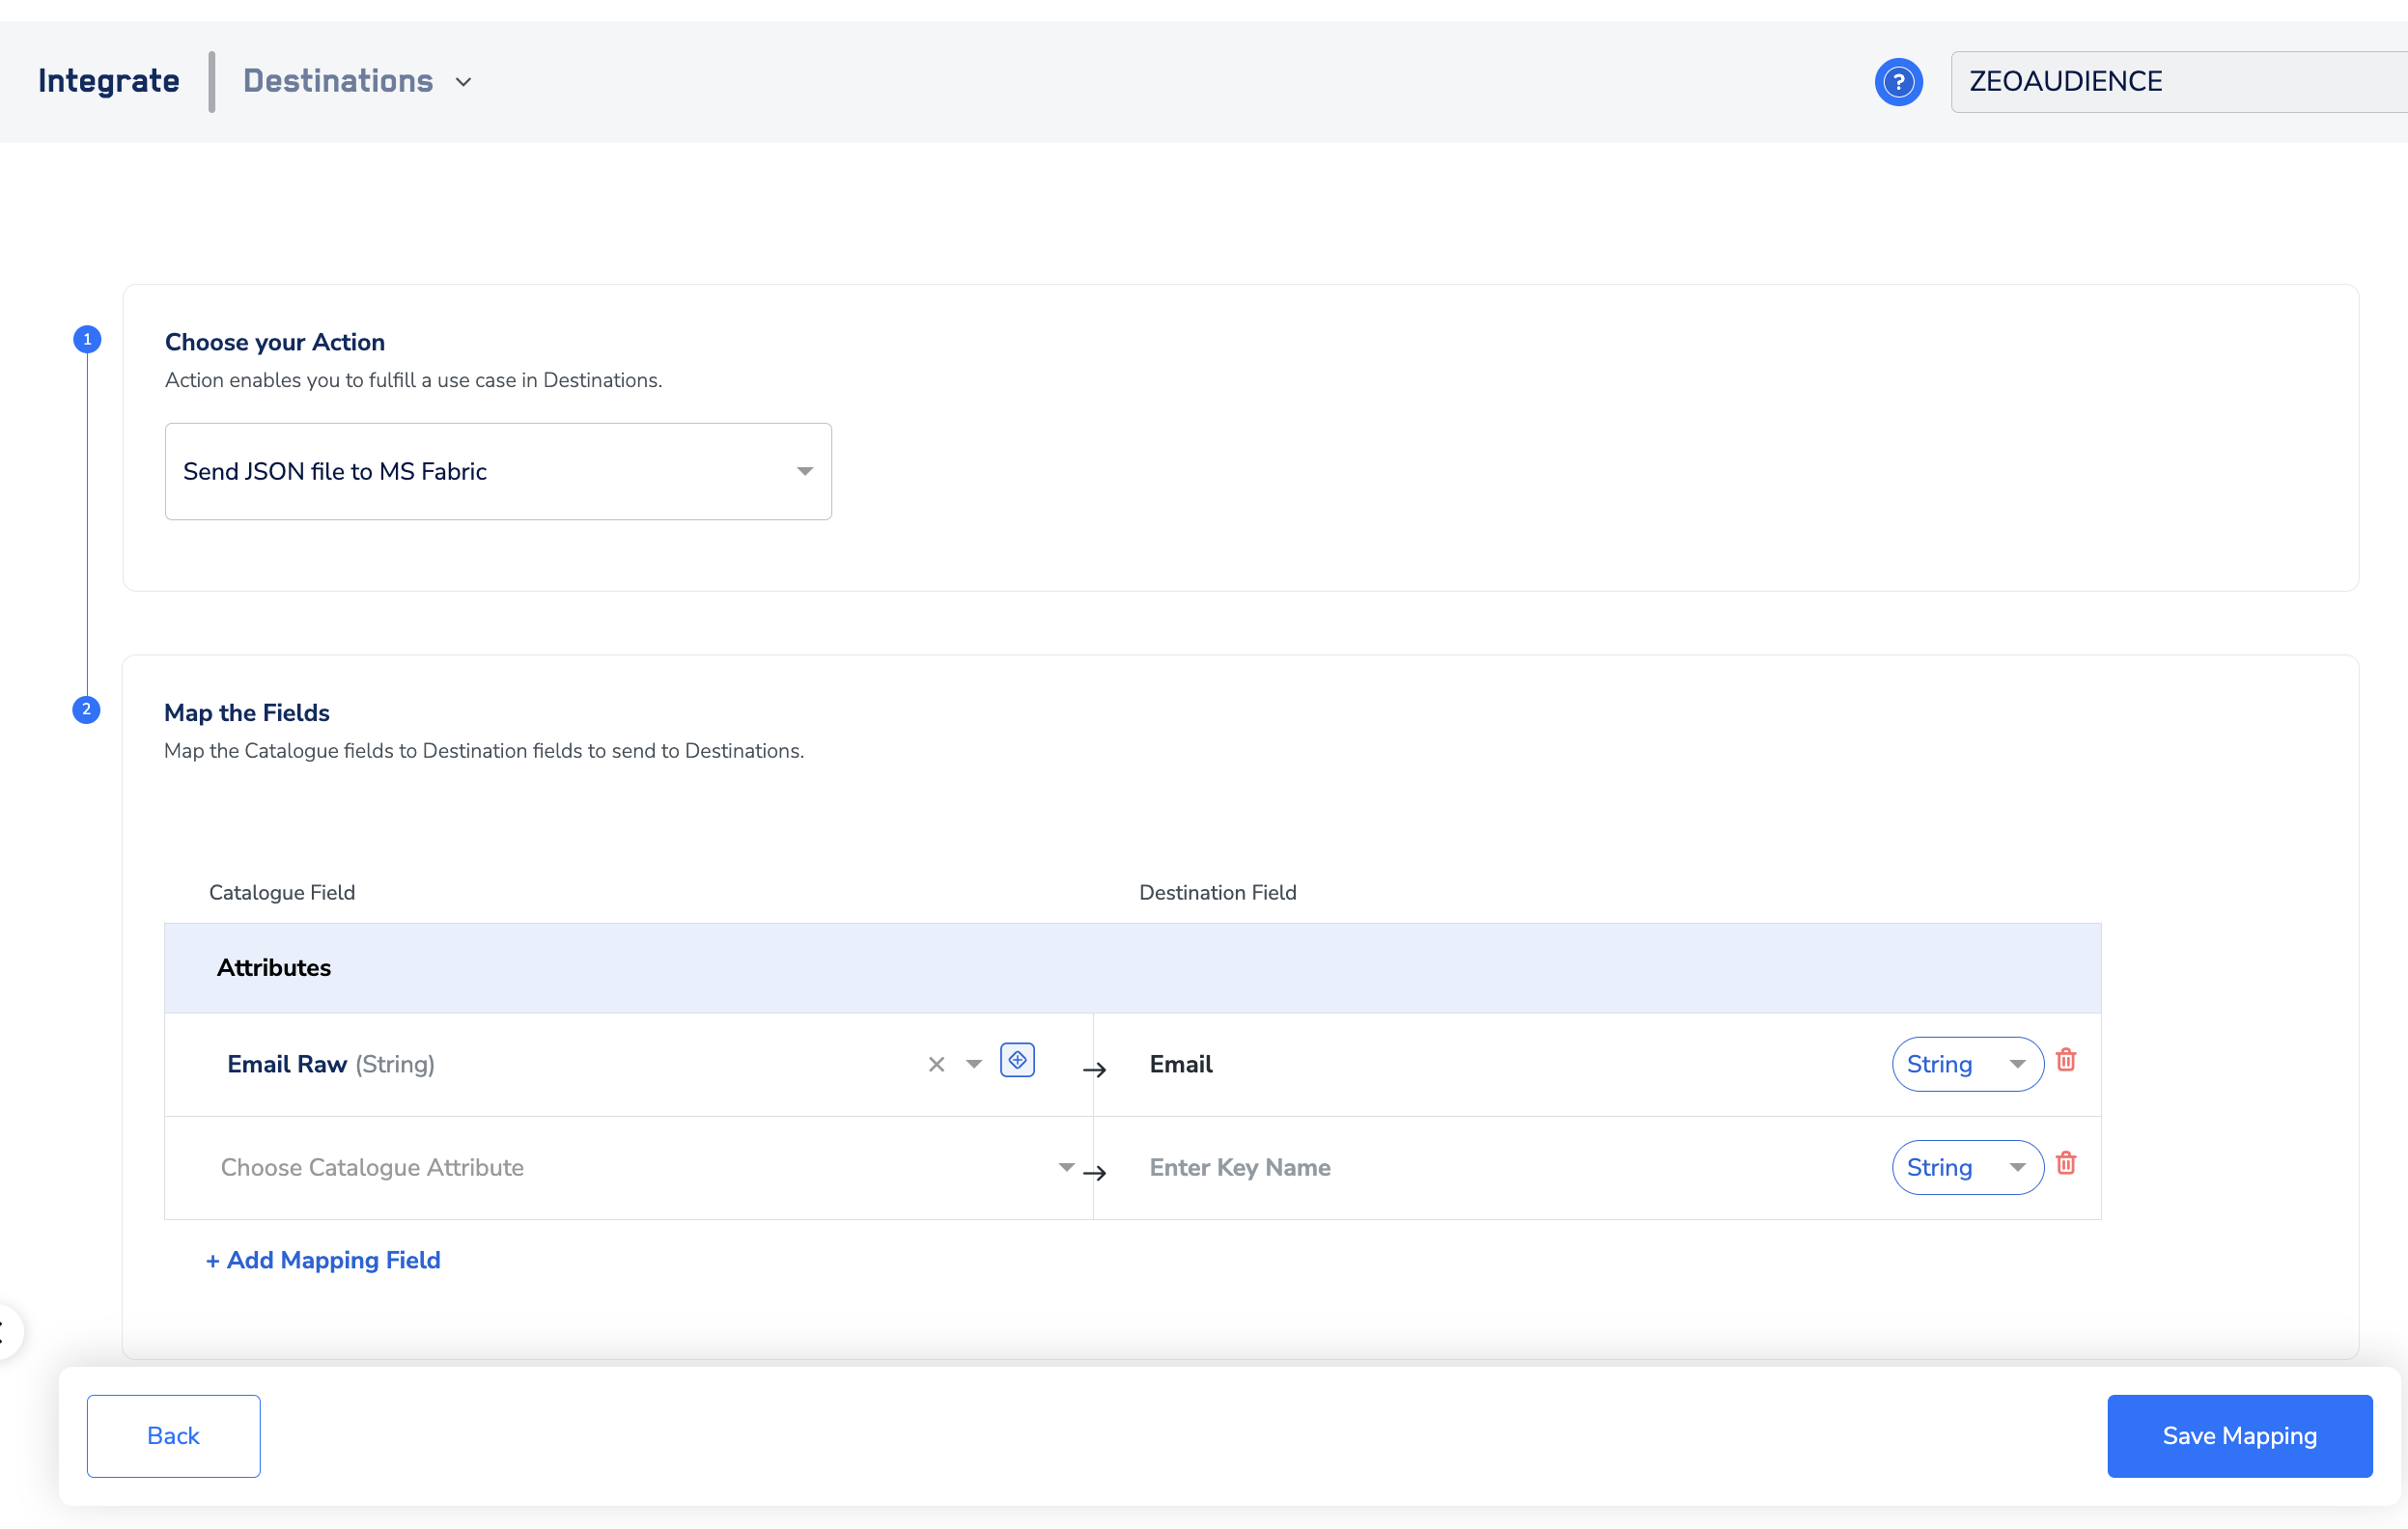
Link an Audience to the Microsoft Fabric Destination
For information about how to link an Audience or segment to the created Destination in Audiences application, refer here.Note:The terms Audiences and Segments are used interchangeably to refer to customer cohorts belonging to a specific category. For example, an Audience or a segment could be a specific group of customers who are over 18 years of age and who have performed an
addToCart event within the last 30 days.