Overview
Snowflake is a cloud-based data warehousing platform designed for scalable data storage, processing, and analytics. It is known for its flexibility, performance, and ease of use in handling large volumes of structured and semi-structured data. Integrated with Zeotap CDP, it allows you to send batched and real-time data based on the audiences (segments) and workflows created in Zeotap CDP.Purpose
This guide explains how to send user data from Zeotap CDP to Snowflake for activation. Here, you establish a connection between your Google Cloud Storage (GCS) bucket and your Snowflake account. Zeotap CDP pushes data to your GCS bucket, where you can set up automation to receive data either in batches at fixed intervals or in real-time by configuring a Pub/Sub notification for the bucket. Before you begin with the integration, ensure you have the following:- A Google Cloud Storage bucket for storing your data files.
- A Pub/Sub topic to enable notifications for automating data loading.
Actions Supported
- Send data to Snowflake - Use this action to send batched data.
- Stream data to Snowflake - Use this action to send real-time data. Note that you enable batching in this action to aggregate real-time data before sending it to Snowflake. Batching occurs based on two factors: Batch duration and Record count, whichever is met first. For example, if you set the batch duration to 2 minutes and the Record Count to 100, then the file is generated and sent when either condition is met.
Key Concepts
Storage Integration
Storage Integration is a feature in Snowflake that securely connects Snowflake with external cloud storage systems, such as Google Cloud Storage (GCS). This integration enables Snowflake to access and interact with external storage securely and efficiently. Permissions required for theSTORAGE_GCP_SERVICE_ACCOUNT:
- Storage Object User
- Storage Insights Collector Service
Notification Integration
Notification Integration enables Snowflake to automatically detect and respond to new data in external storage for auto-ingest scenarios like Snowpipe. This integration works by sending notifications (for example, through Pub/Sub) when new data is available, triggering the data loading process. Without this integration, Snowflake would rely on manual processes or continuous pulling, which is less efficient. Permissions required for theGCP_PUBSUB_SERVICE_ACCOUNT:
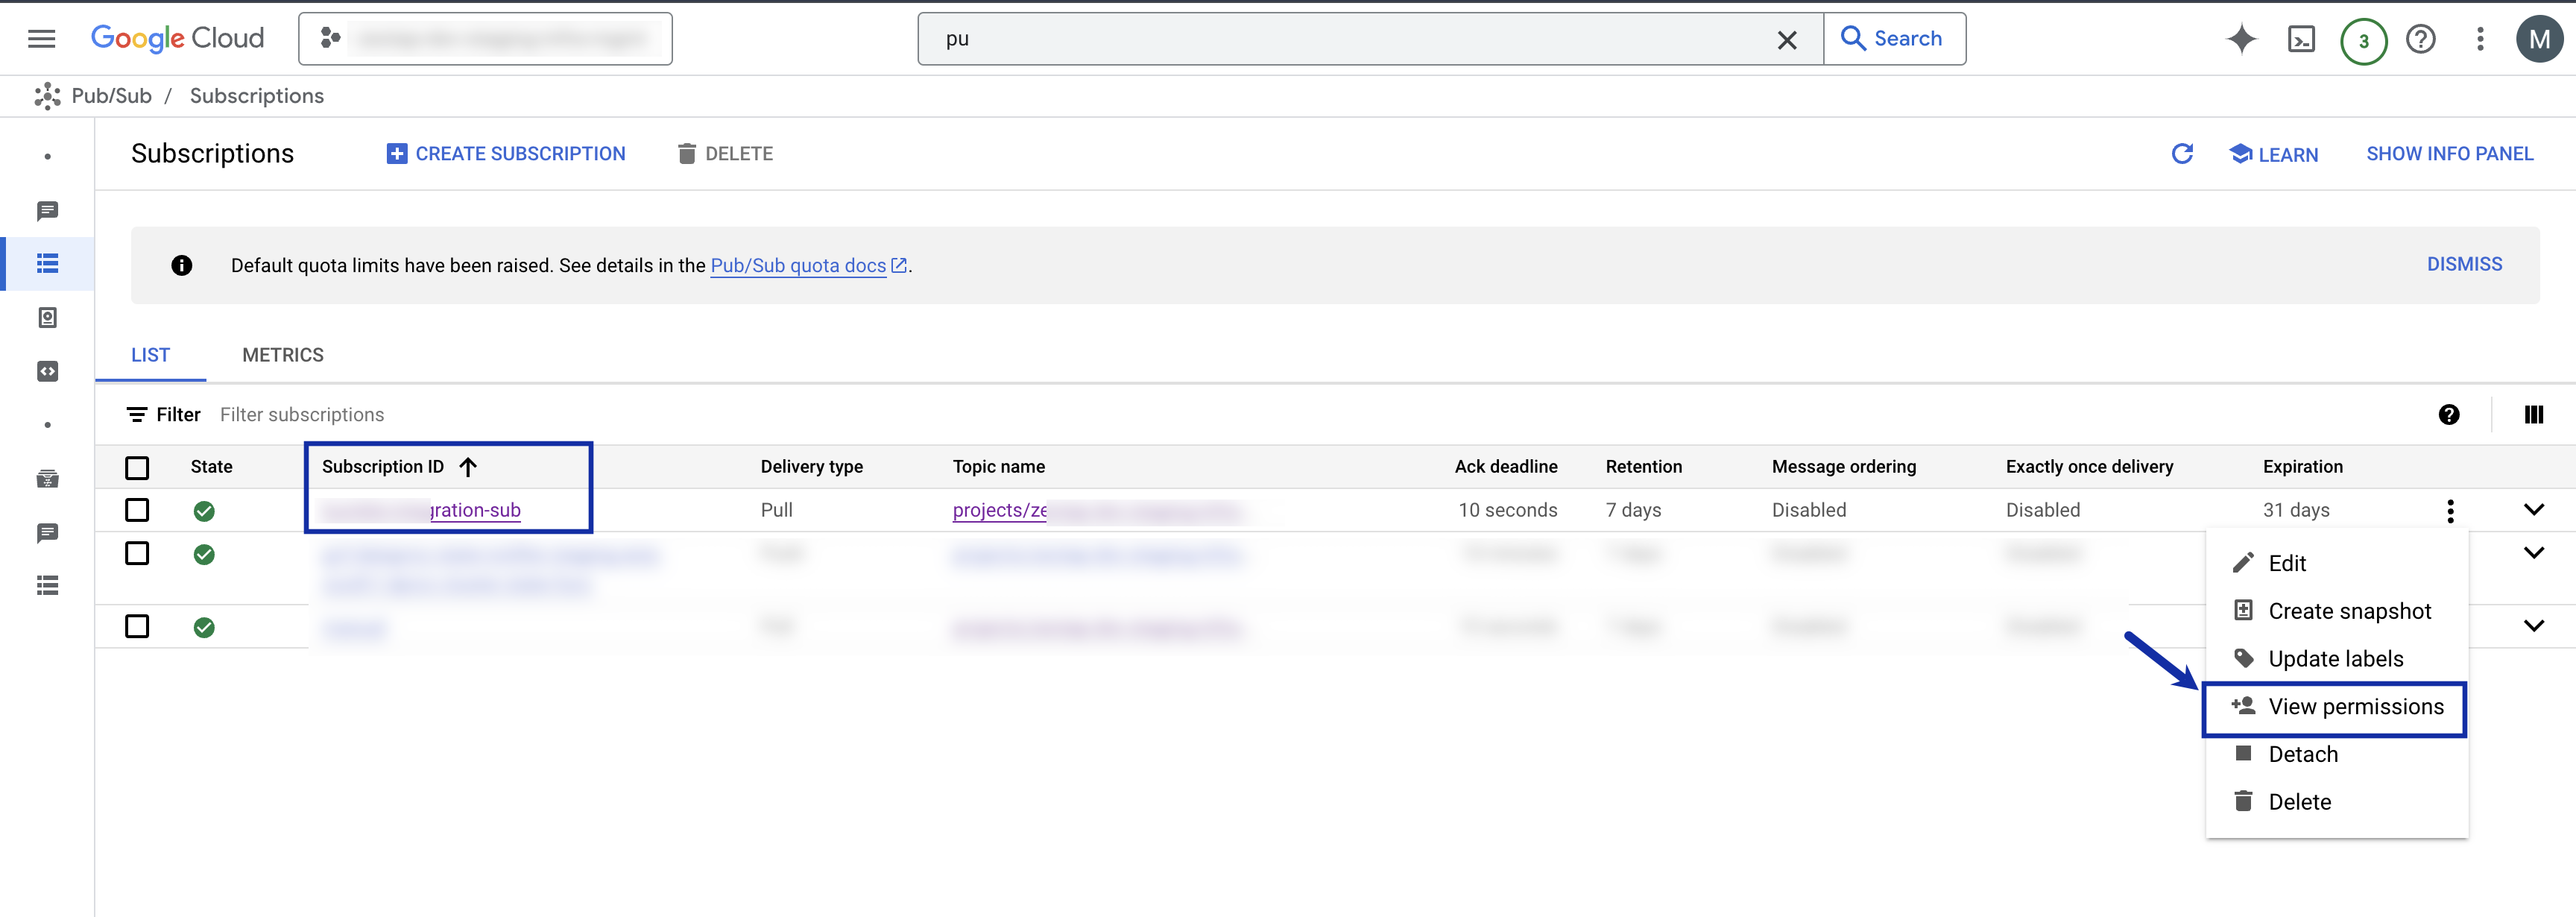
- Pub/Sub Subscriber
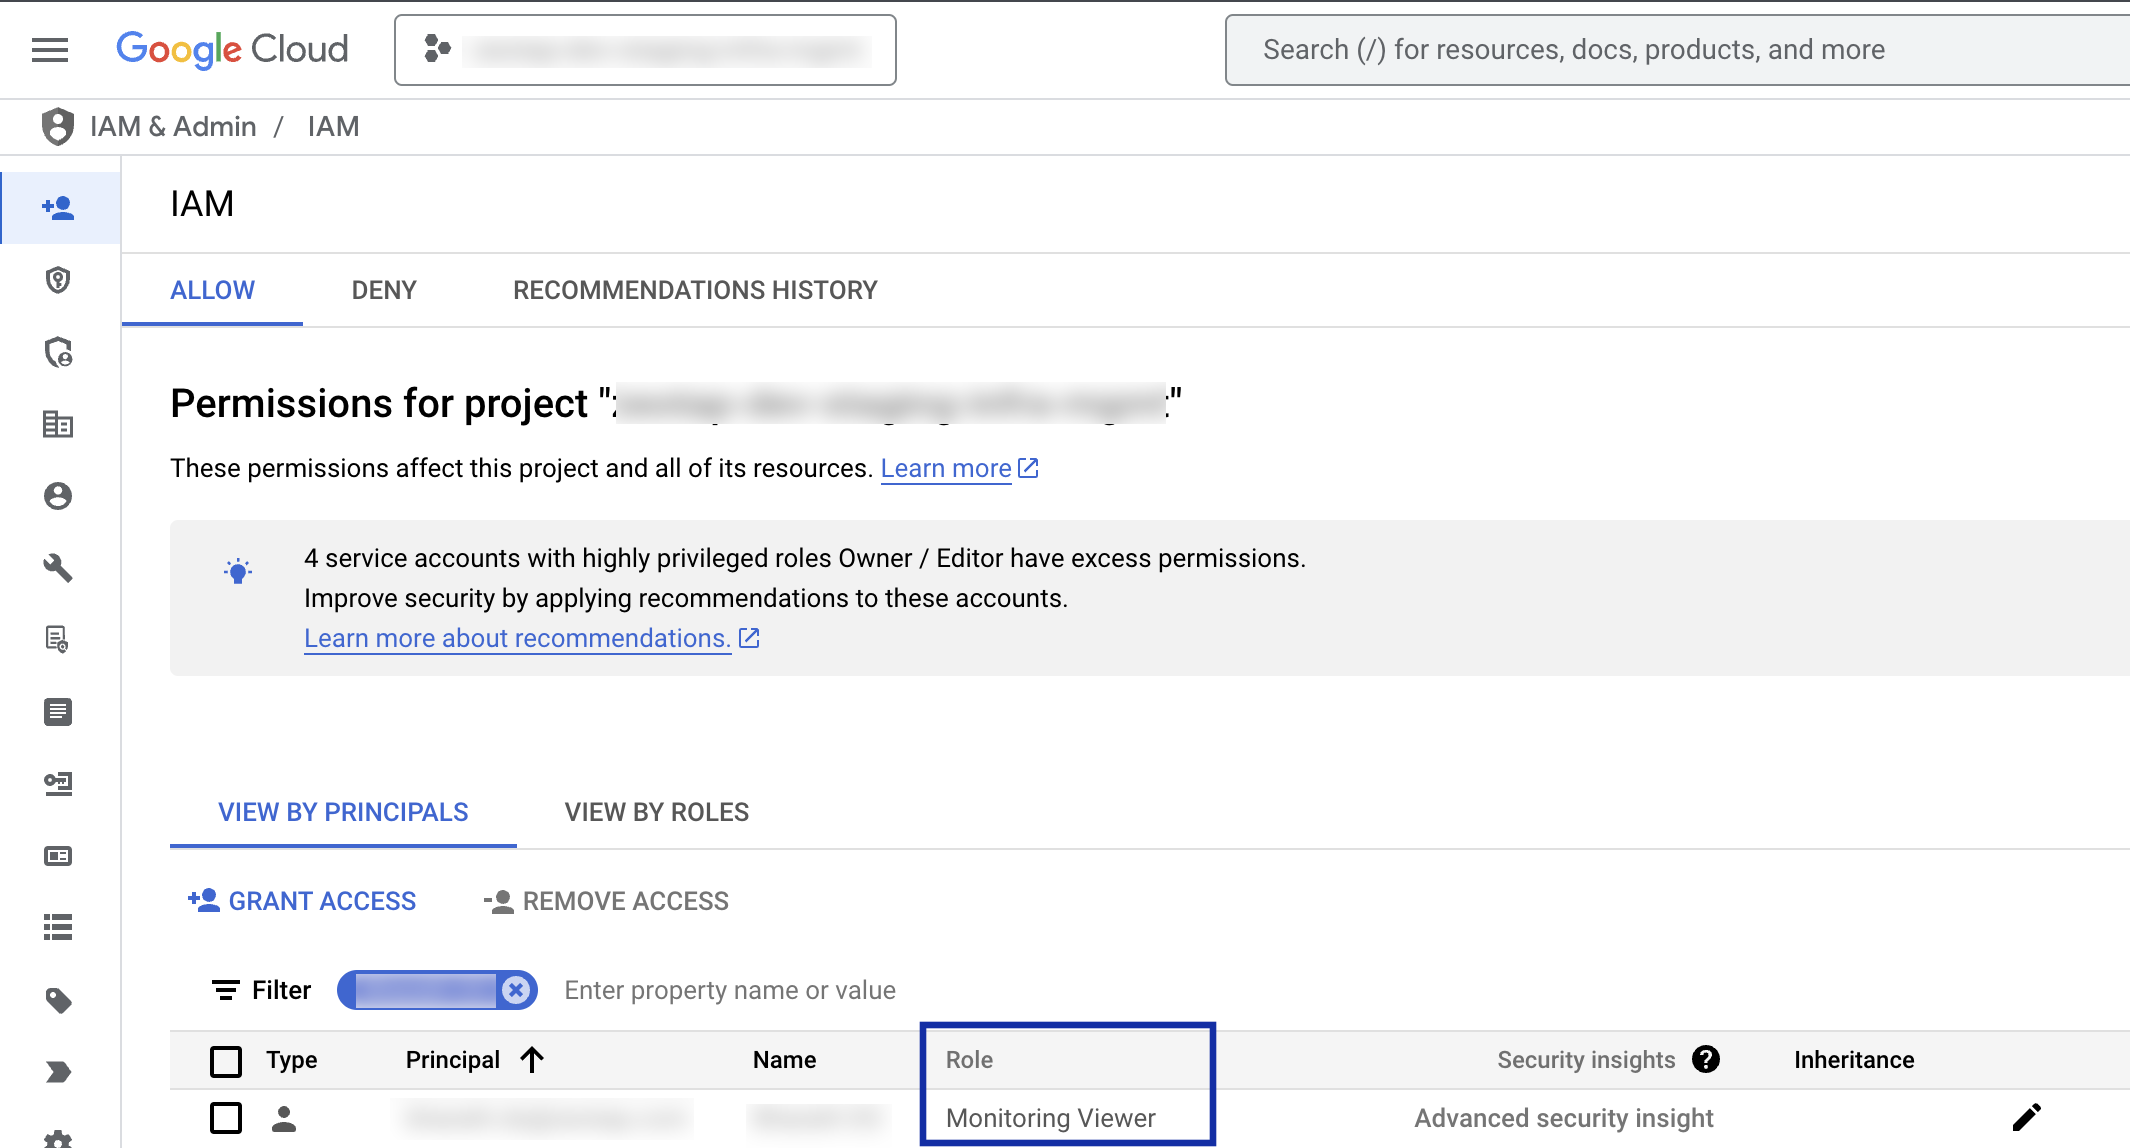
- Monitoring Viewer
Note:The Prerequisites section provides more details about these permissions.
Architecture Diagram
This architecture illustrates the integration of Snowflake with Zeotap CDP Infrastructure.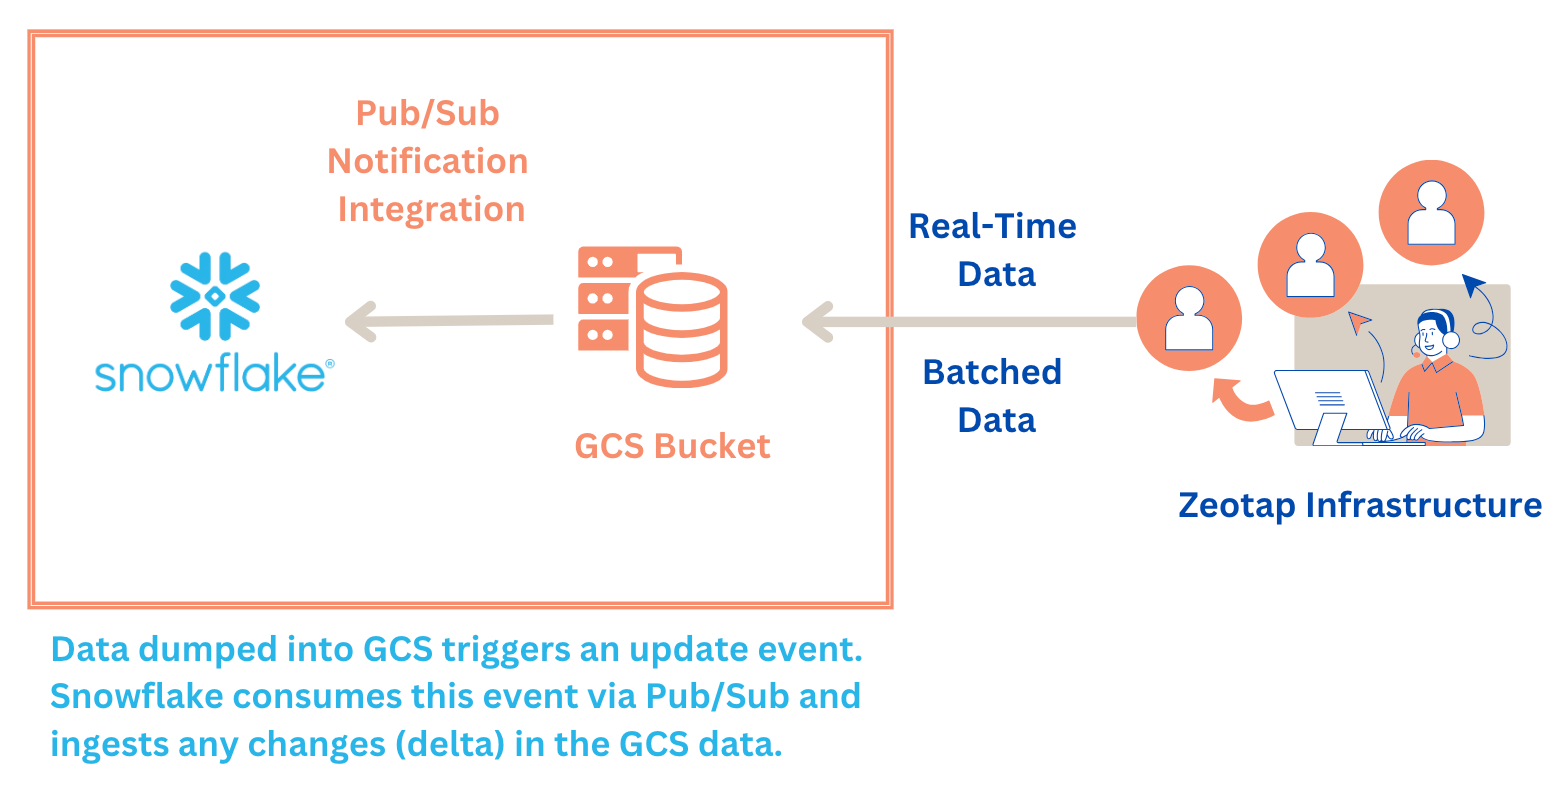
Prerequisites
Ensure that you take care of the following prerequisites before creating a Snowflake destination in Zeotap CDP:Step 1: Integration Setup
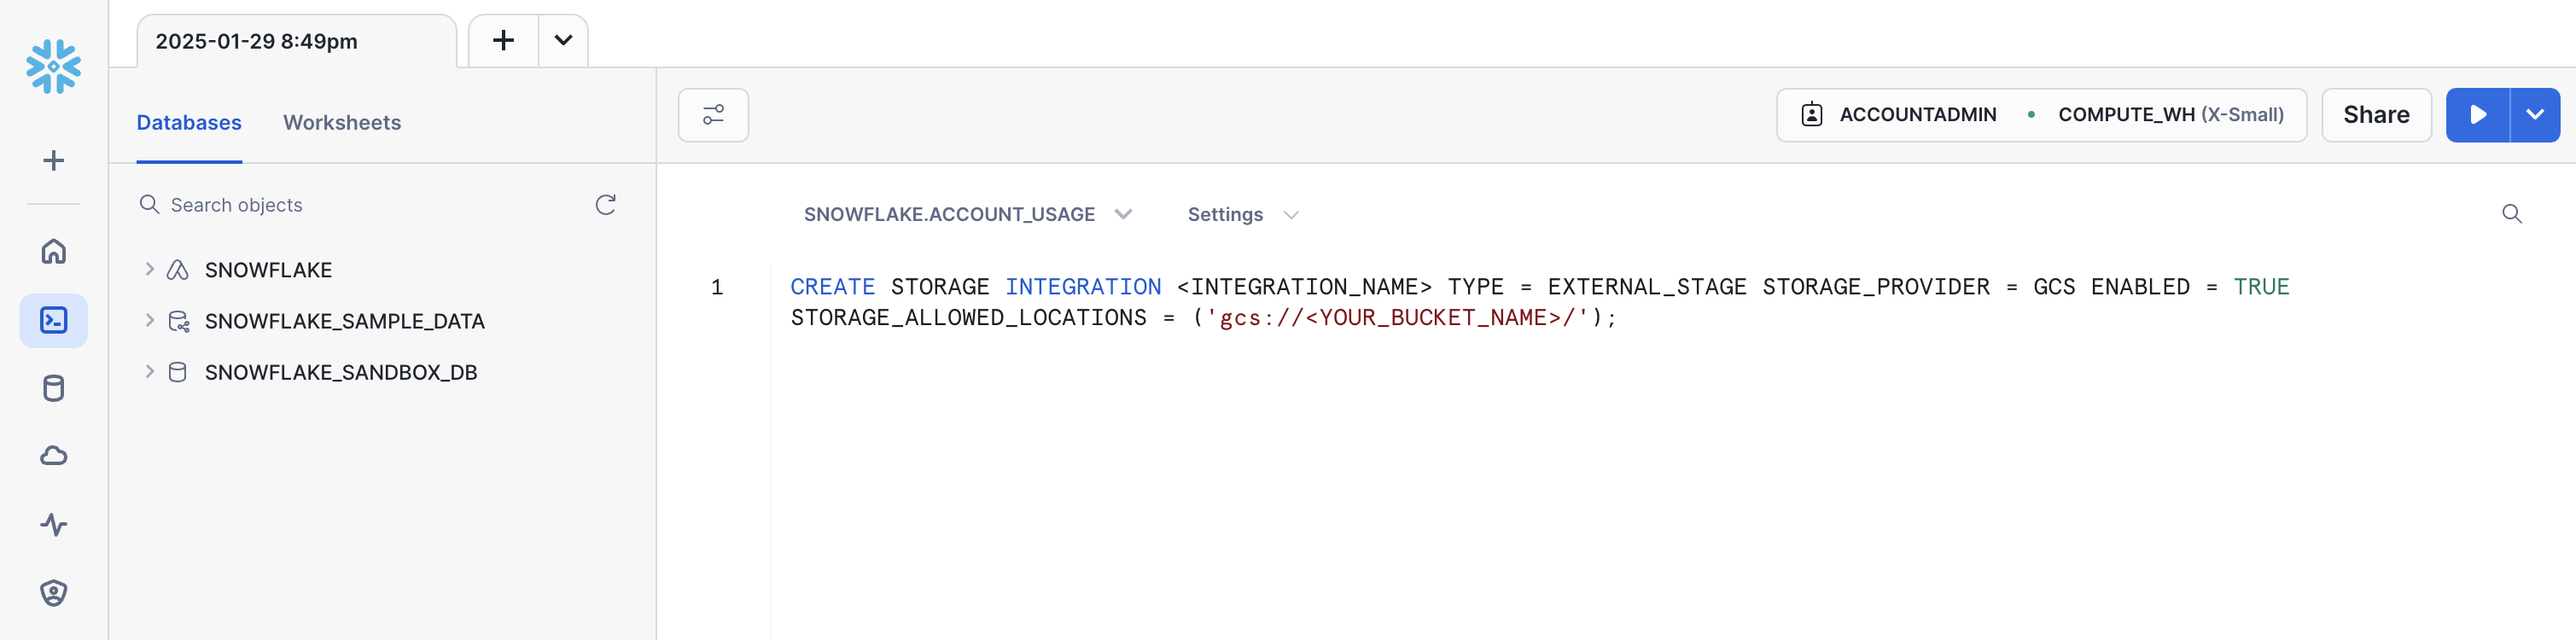
An integration in Snowflake securely connects Snowflake to external cloud storage, such as Google Cloud Storage (GCS). Snowflake creates a service account for the integration, which you use to grant access to your GCS bucket. This service account acts as a secure link between Snowflake and GCS.Step 2: Create a Storage Integration in Snowflake
To connect Snowflake to your GCS bucket, create a storage integration object. This defines the connection and permissions. Run the following command in the Snowflake SQL worksheet to create the storage integration:- Replace
<INTEGRATION_NAME>with a name for your integration (e.g.,my_gcs_integration). - Replace
<YOUR\_BUCKET_NAME>with the name of your GCS bucket.
Note the
STORAGE_GCP_SERVICE_ACCOUNT value, which is the service account Snowflake created for the integration. You need this to grant permissions to the bucket, which is mentioned in Step 3.Step 3: Grant Permissions in GCS
The GCS bucket resides at the your end, so you need to grant access to the Snowflake service account created in Step 2(STORAGE_GCP_SERVICE_ACCOUNT). To do so, perform the following steps:
Under Add principals, add the service account 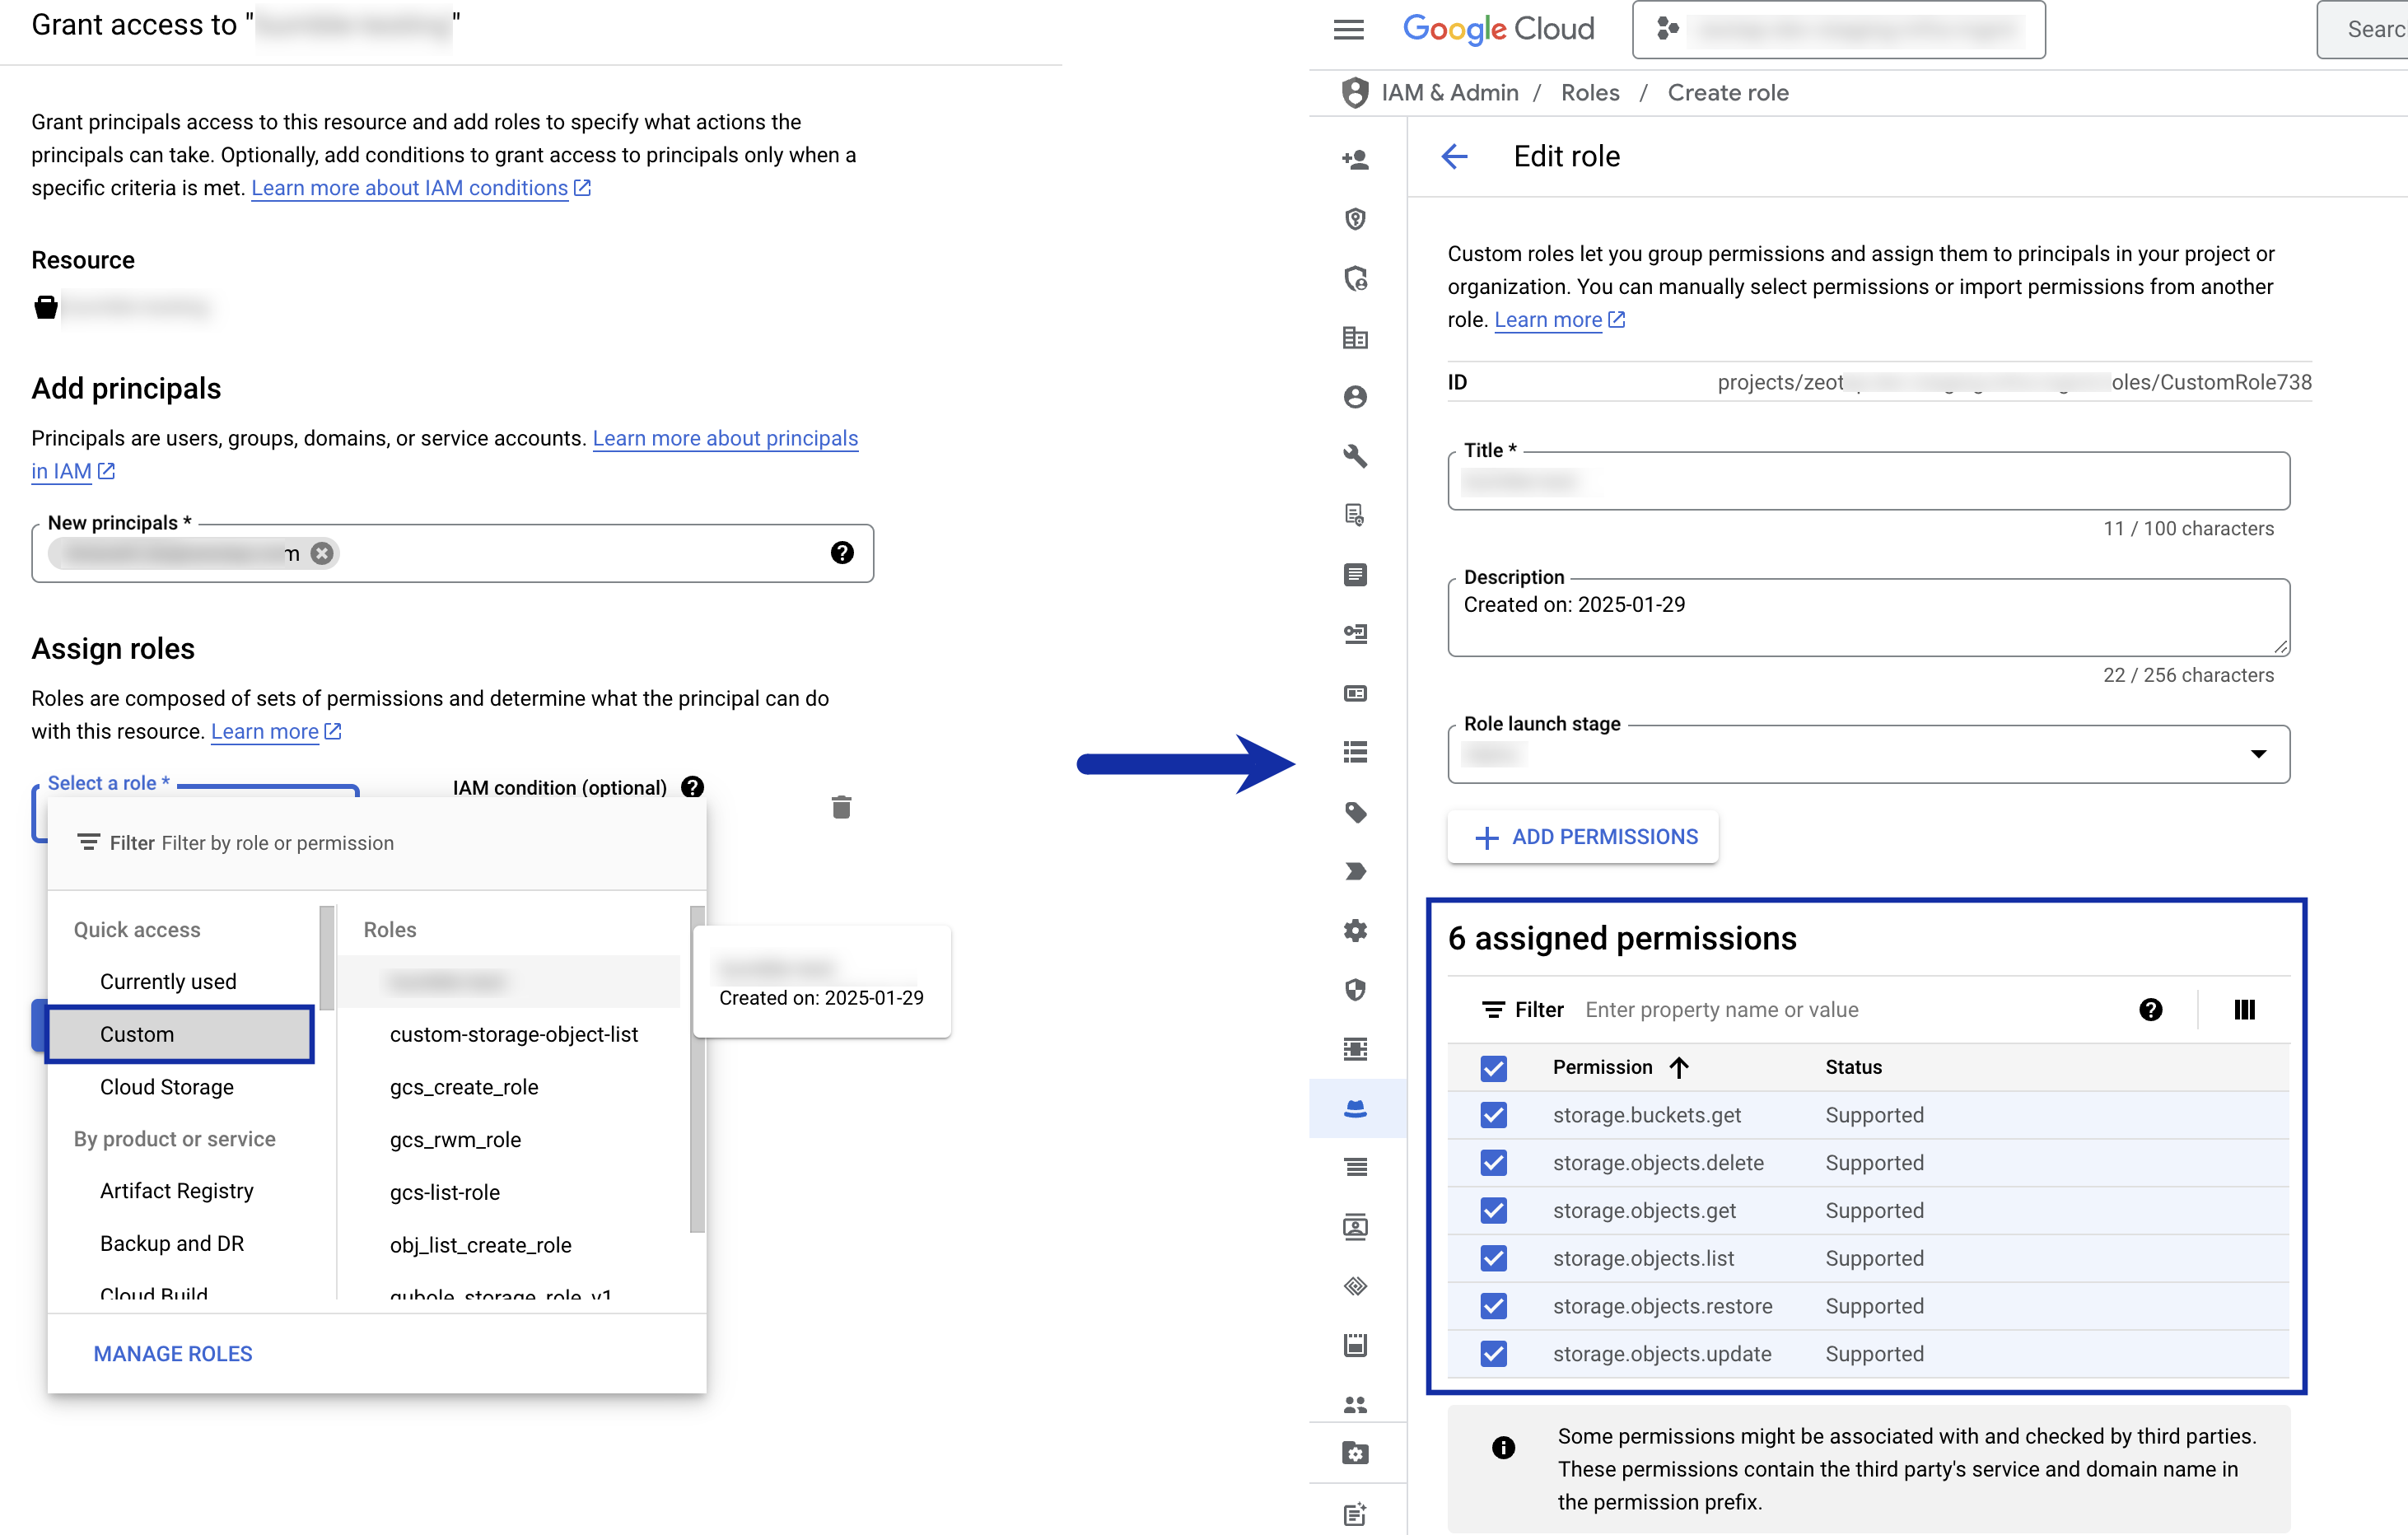
(STORAGE_GCP_SERVICE_ACCOUNT) as new principal, select the custom role you have created and assign the following roles to it:Note:For information about how to create a custom role in the Google Cloud Console, refer to the Google Cloud documentation.
storage.buckets.getstorage.objects.updatestorage.objects.getstorage.objects.liststorage.objects.deletestorage.objects.restore
Step 4: Create a Pub/Sub Notification for the Bucket
Notification Integration enables Snowflake to detect when new data arrives in GCS. So, configure a notification connection between the GCS bucket and a Pub/Sub topic. Run the following command in the Google Cloud Console shell:- Replace
<TOPIC>with the Pub/Sub topic name. - Replace
<BUCKET-NAME>with the name of your GCS bucket.
Step 5: Create a Notification Integration in Snowflake
To automate the process, set up notifications using Pub/Sub. Run the following command in the Snowflake SQL worksheet:- Replace
<INTEGRATION_NAME>with a name for the integration (for example,my_notification_integration). - Replace
<SUBSCRIPTION_ID>with the ID from Step 4.
Note the
GCP_PUBSUB_SERVICE_ACCOUNT value, which is the service account created for the Notification integration. You need to grant permissions to the Pub/Sub subscription. To do so, follow Step 6.Step 6: Grant Pub/Sub Permissions in GCS
Snowflake needs to be notified when new data arrives in GCS. Hence, grant the Snowflake service account (GCP_PUBSUB_SERVICE_ACCOUNT) access to your Pub/Sub subscription:
Step 7: Grant Monitoring Permissions in GCS
Grant the Snowflake service account (GCP_PUBSUB_SERVICE_ACCOUNT) with monitoring viewer access:
Step 8: Create a Stage in Snowflake
Create a stage referencing the GCS bucket. Run the following command in the Snowflake SQL worksheet:- Replace
<STAGE_NAME>with the stage name. - Replace
<BUCKET-NAME>with your GCS bucket name. - Replace
<STORAGE_INTEGRATION_NAME>with the storage integration name from Step 2.
Step 9: Create a Snowpipe
Create a Snowpipe to load data from the GCS bucket into Snowflake automatically. Run the following command in the Snowflake SQL worksheet:- Replace
<PIPE_NAME>with the pipe name. - Replace
<NOTIFICATION_NAME>with the notification integration name from Step 5. - Replace
<TABLE_NAME>with the destination table name. - Replace
<STAGE_NAME>with the stage name from Step 8. - Replace
<FOLDER>with the folder name for the data.
Steps to run the commands
Run the commands in Snowflake console as explained below.

Supported Identifiers
Use this integration to send any number of identifiers and attributes to Snowflake. However, sending event attributes when transferring data from audiences to Snowflake is not supported.Components of Google Cloud Storage Required for Snowflake
Ensure that you have the details about the below components of the Google Cloud Storage account before creating a Destination.Bucket
Folder
Account
Bucket
This is the name of your Google Cloud Storage Bucket. You can obtain this information from your Google Cloud Storage account as shown in the image below.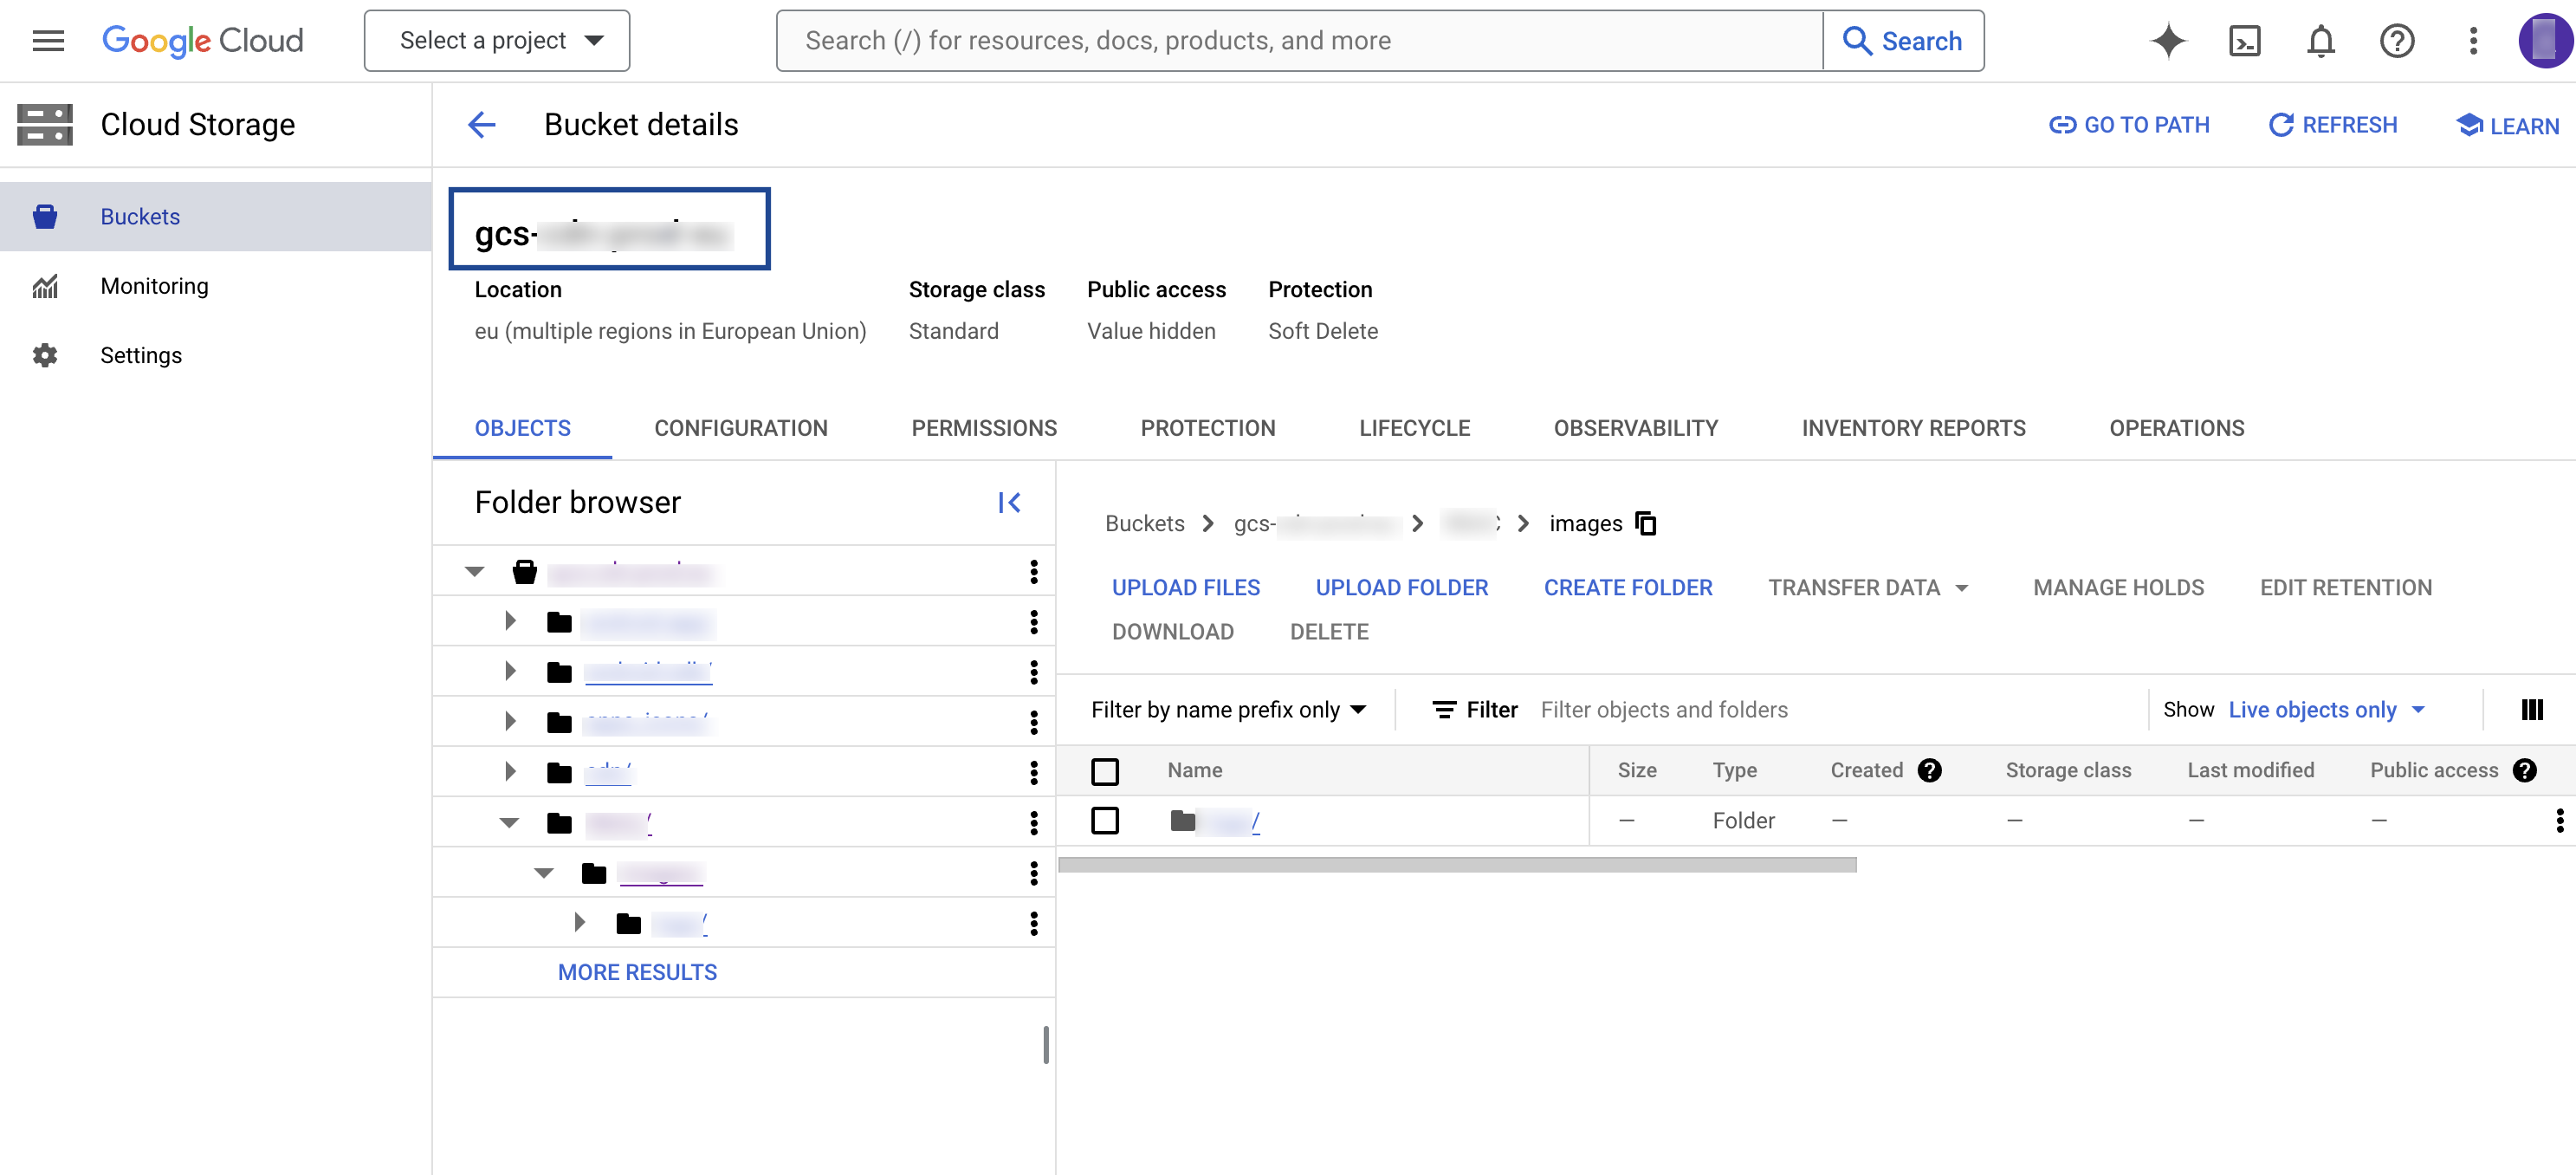
Folder
In Google Cloud Storage, a folder serves as a logical container for organising stored objects within a bucket. In reality, there are no actual folders in Google Cloud Storage. Instead, the folder concept is emulated by employing object key names containing slashes (”/”) to replicate a hierarchical arrangement. You can obtain this information from your Google Cloud Storage account as shown in the image below.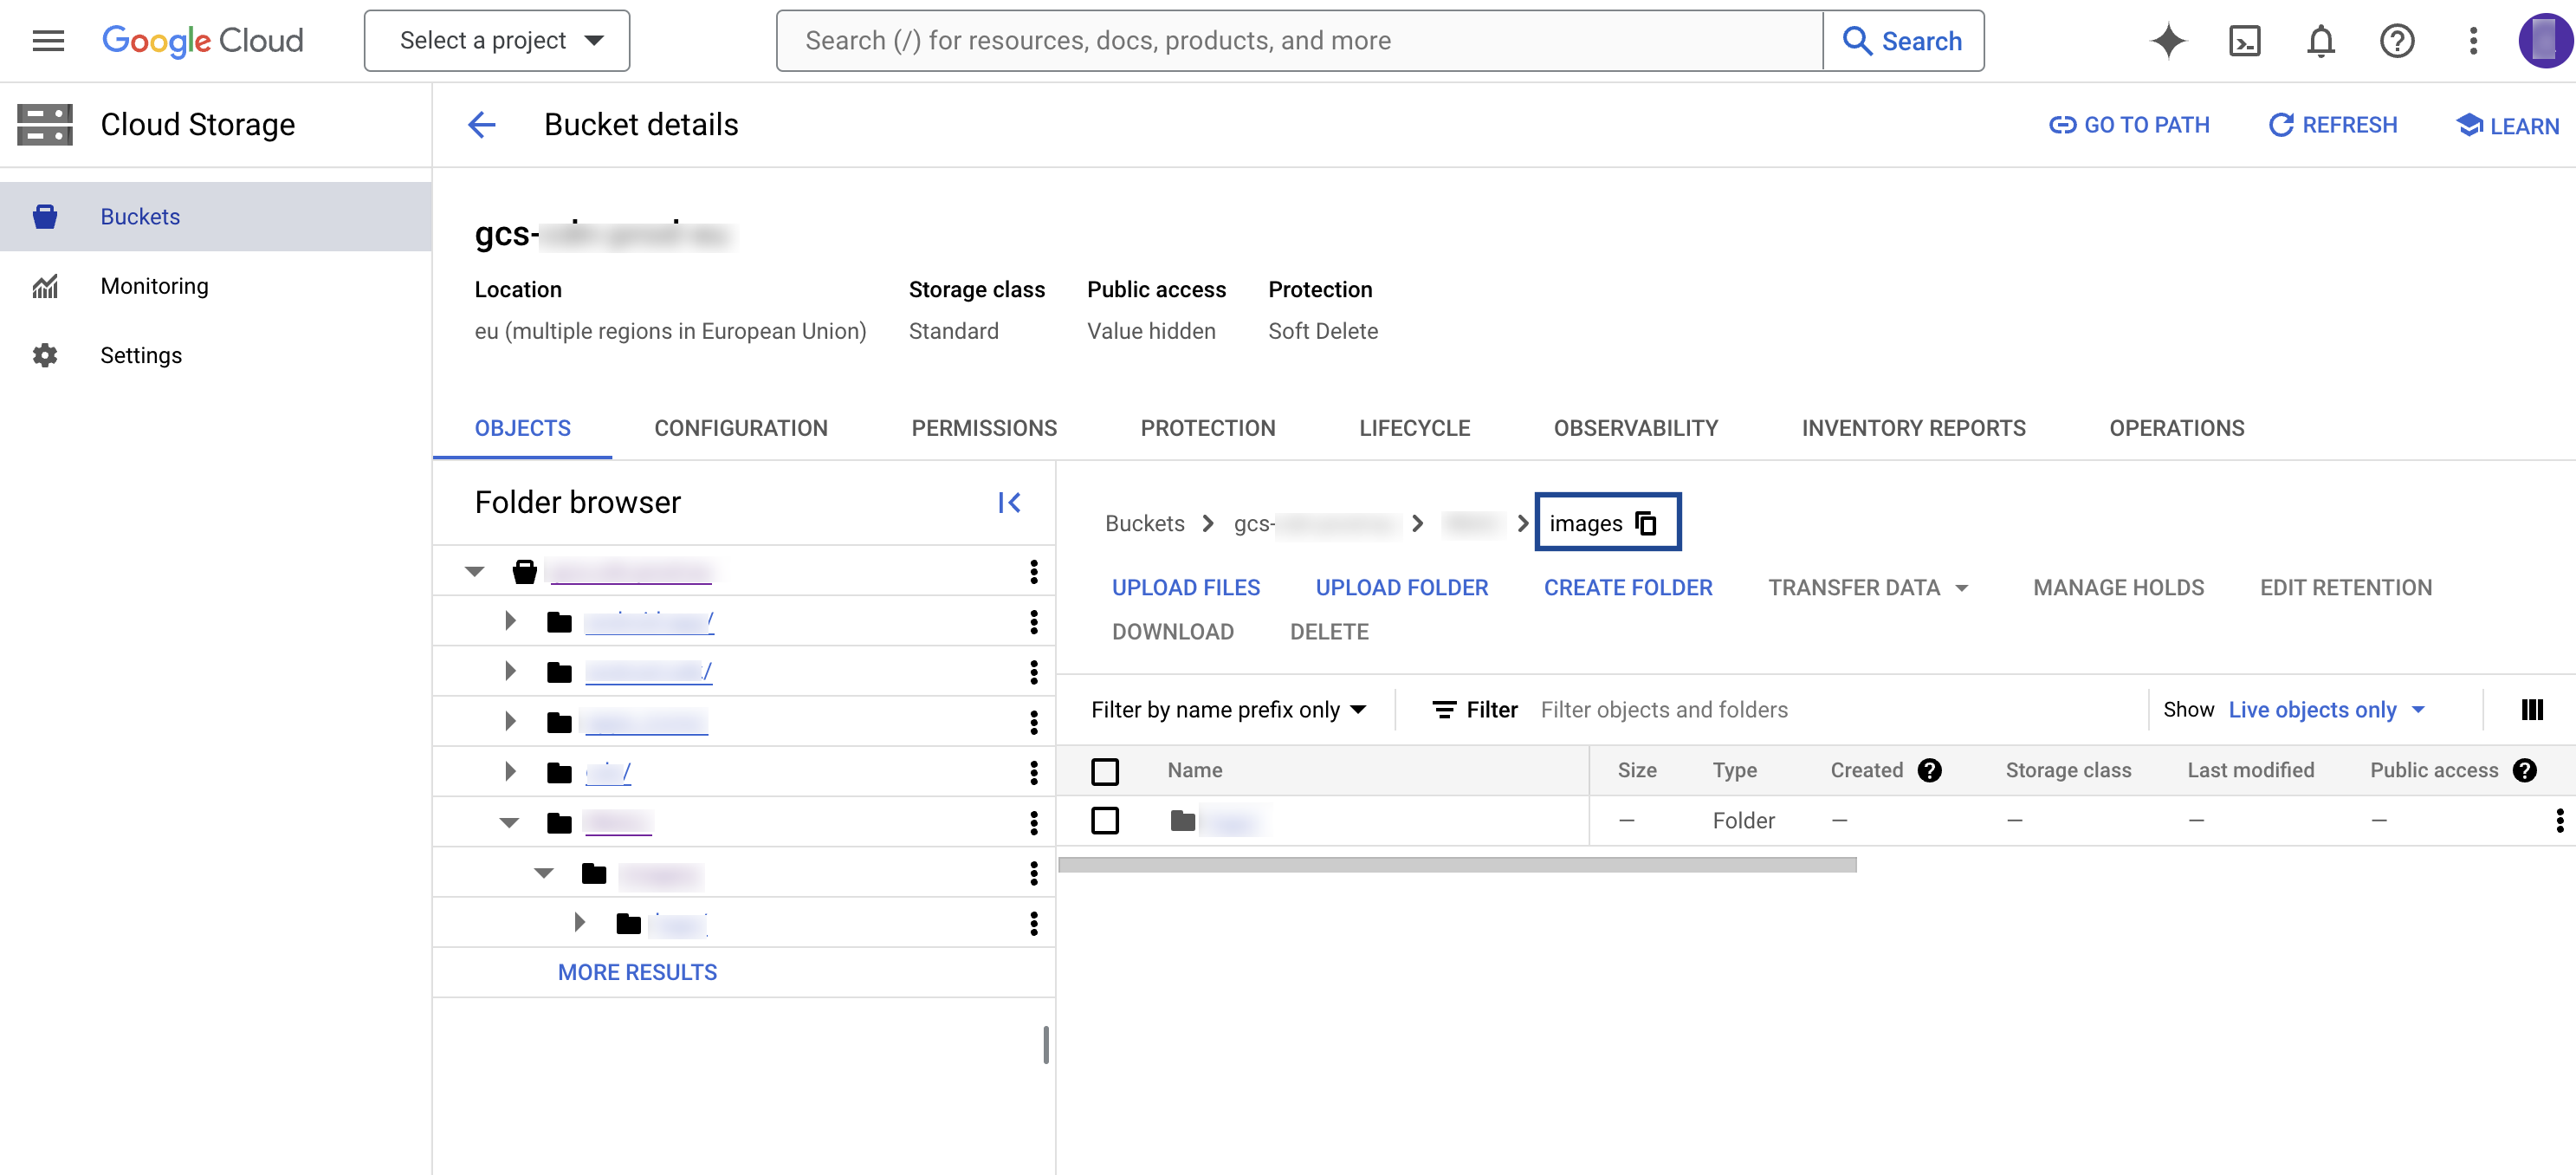
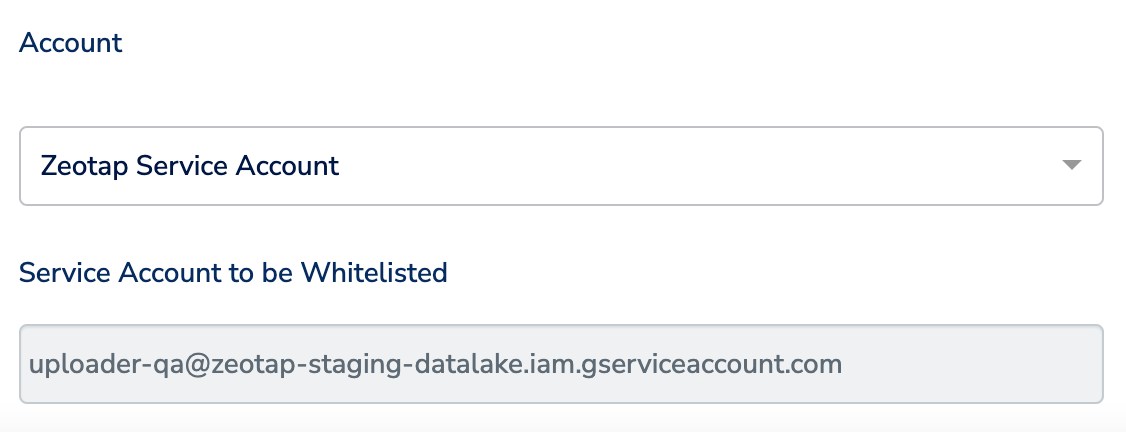
Account
This is the Zeotap Service Account that is used to access the Google Cloud Storage account. Ensure that you whitelist the Zeotap Service Account to successfully push audiences (segments) from Zeotap CDP to Google Cloud Storage.Create a Destination for Snowflake
Perform the following steps to create a Destination for Snowflake:.png?fit=max&auto=format&n=UNwlFBI6l-jpipWP&q=85&s=562fa59a1a1e2b76442fa98f6e6f991e)
.png?fit=max&auto=format&n=UNwlFBI6l-jpipWP&q=85&s=653728565c7ed5863548171765d4086f)
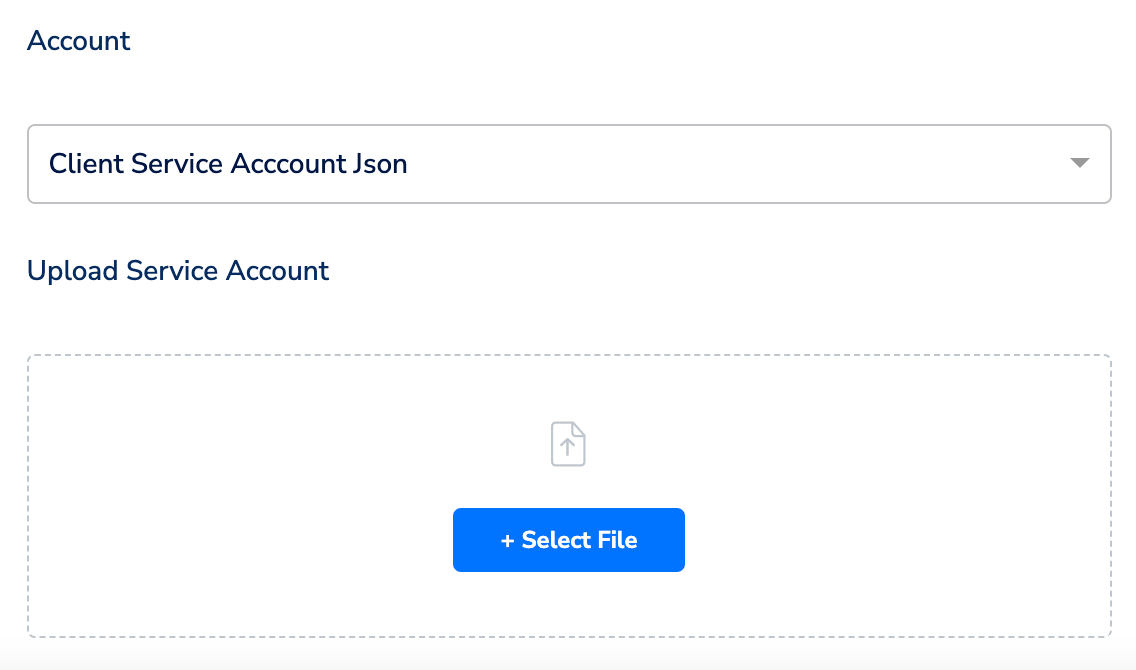
Click Snowflake. A screen appears displaying details about the particular destination towards the left. On the right-hand side of the screen find a list of fields that are required for the integration to be established. Provide the required details as mentioned in the following steps:a. Enter a name for the Destination.b. In the Destination Instance Name field**,** provide a desired value for this internal field.c. In the Bucket field, provide the name of the Google Cloud Storage Bucket.d. In the Folder field, provide the folder path in your storage location where Zeotap CDP can store your exported data.e. Under Account, choose either Zeotap Service Account or Client Service Account Json using the drop-down menu based on the type of authentication you need. If you wish to use Zeotap Service Account, then ensure that you whitelist this it to send audiences (segments) from Zeotap CDP to Snowflake.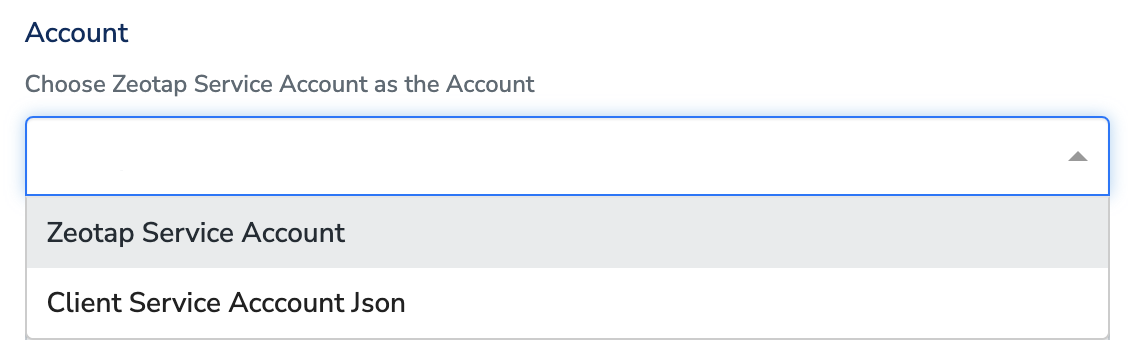
Note:Ensure to follow the below points while providing the folder path:
- The folder path should follow the below structure:
folder_name/sub_folder_name/
- The folder name should not start with a
/ - The folder name and sub-folder name should end with a
/
In the new screen that appears, choose the appropriate action and mapping as explained below. Under Choose your Action, you can either choose Send data to Snowflake or Stream data to Snowflake as the action depending on whether you want to use Audiences (batched data activation) or Journeys (real-time activation).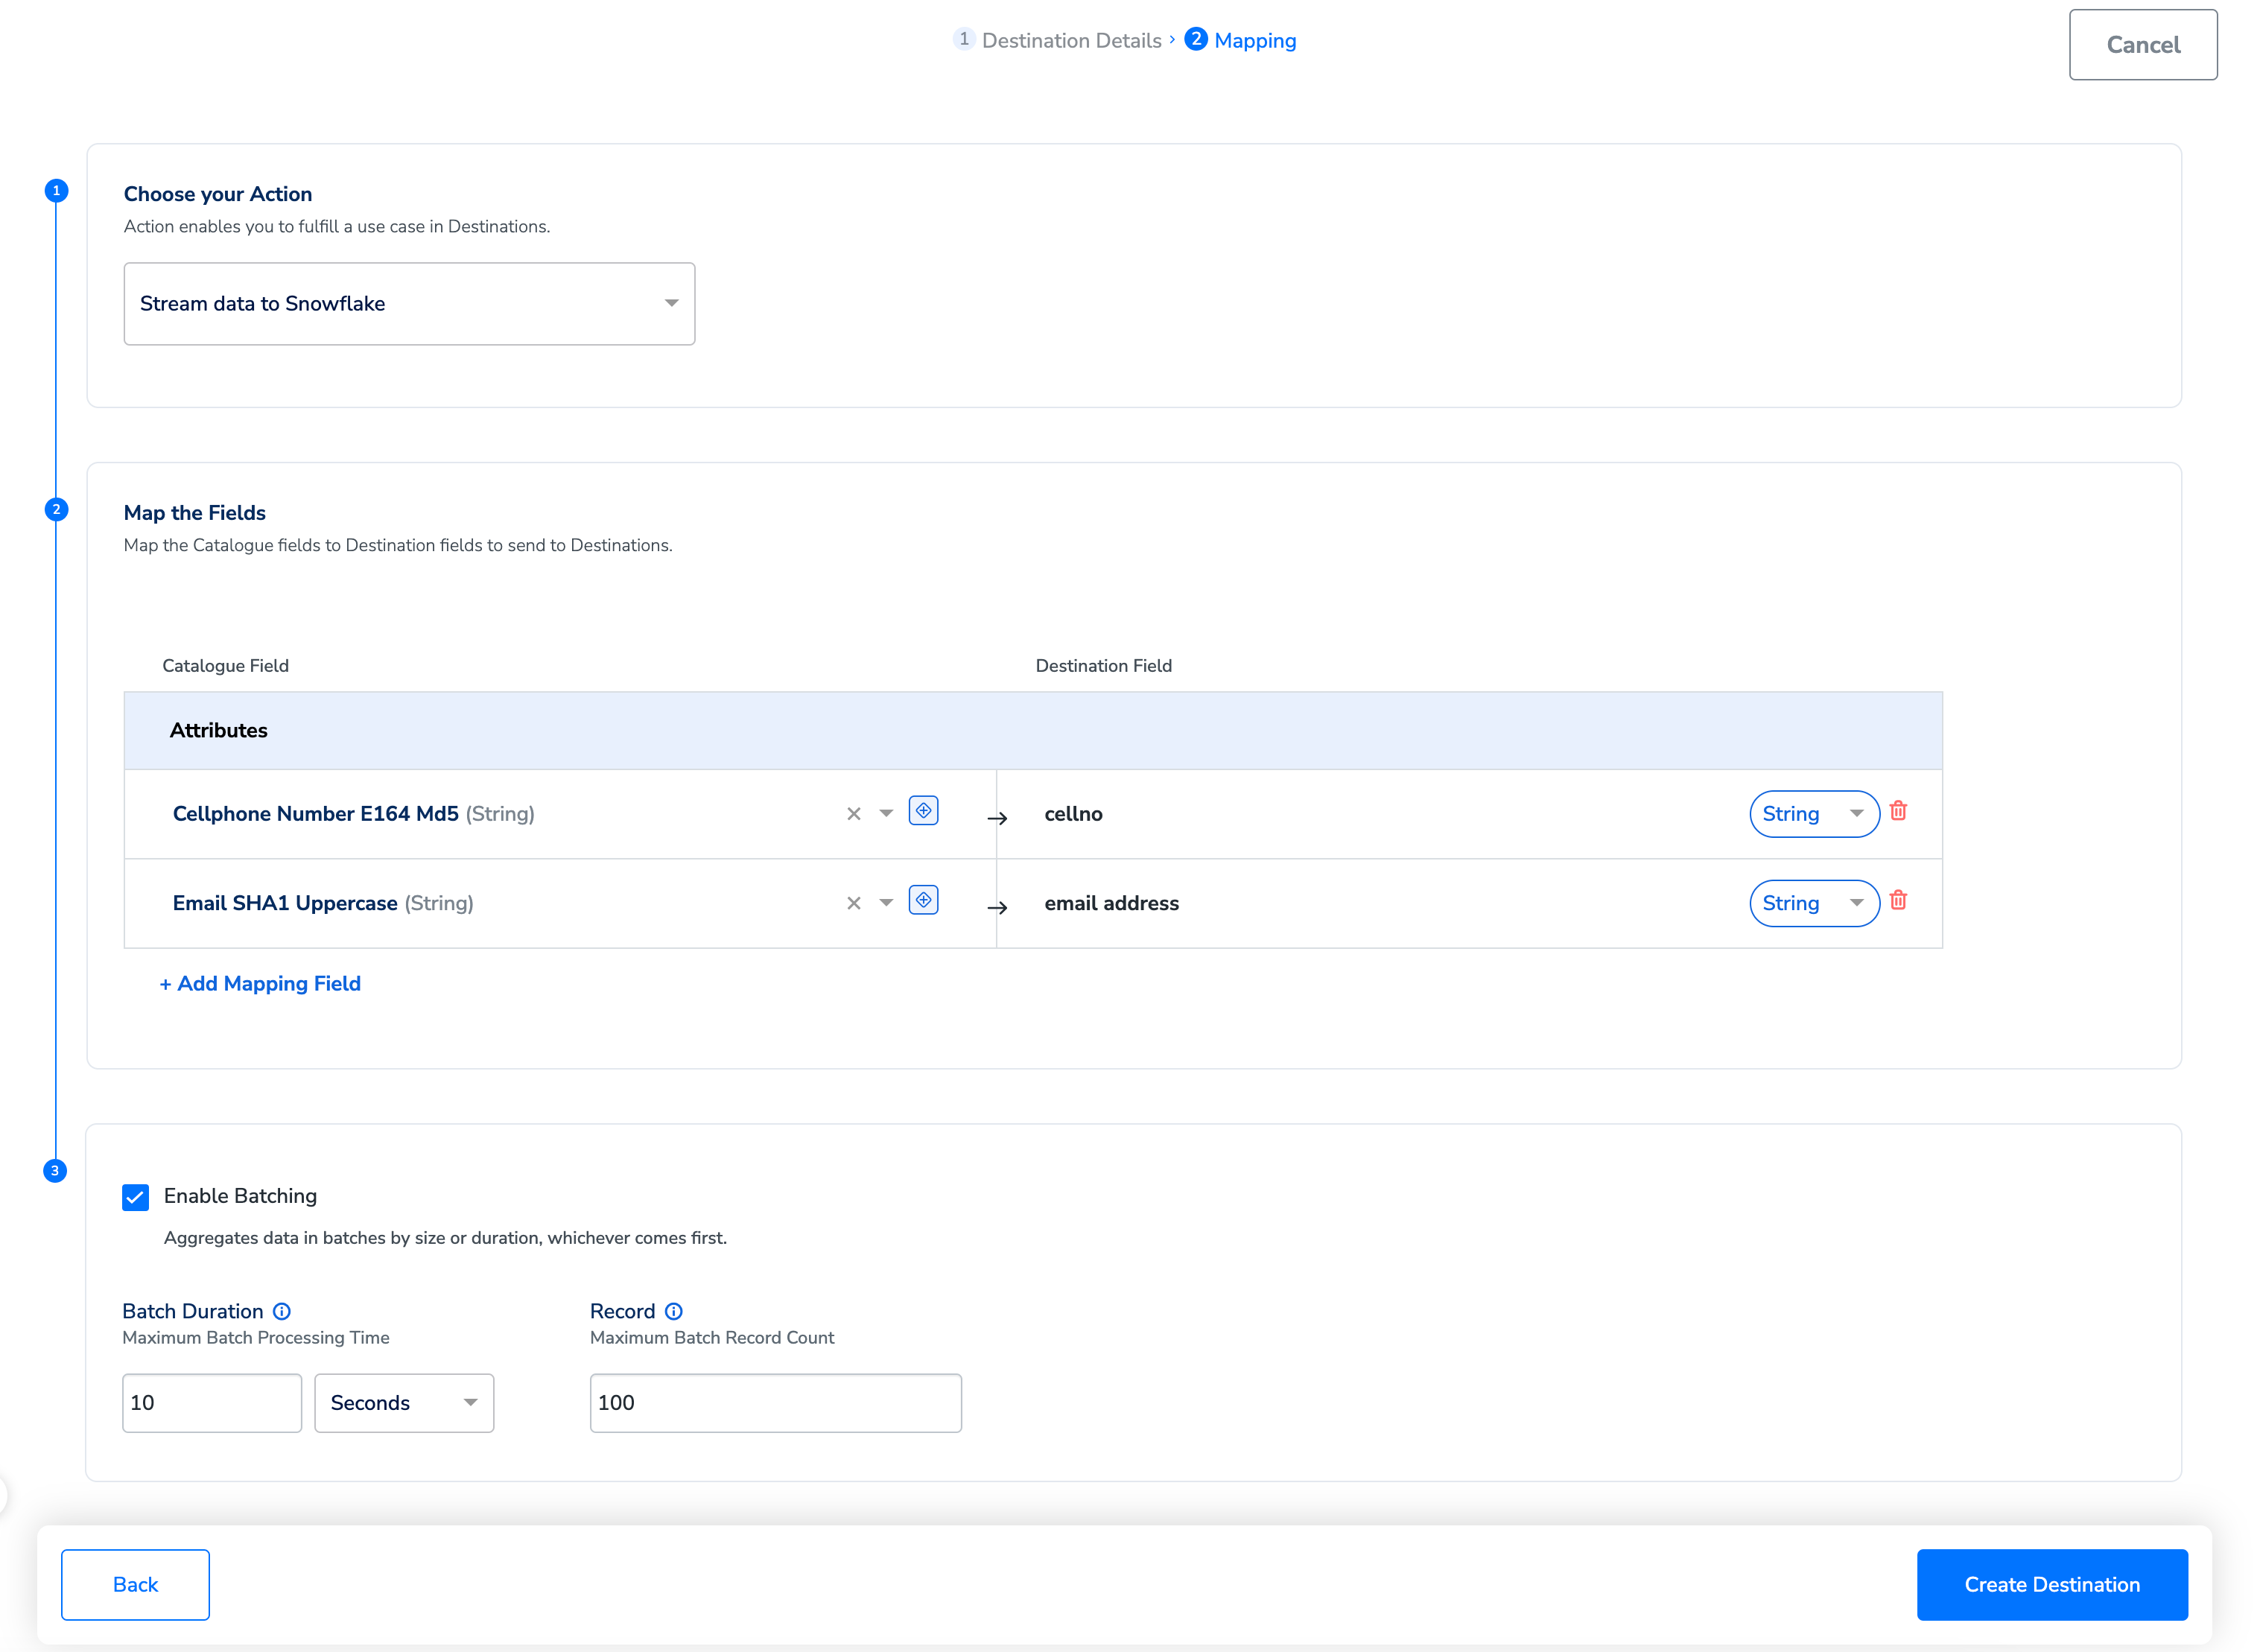
Ensure that you map the exact column names to the Destination Fields in Zeotap CDP.
a. If you choose Send data to Snowflake as your action, then you can send any attributes and identifiers to Snowflake and link it to any Audience created.b. If you choose Stream data to Snowflake as your action, then you can send any attributes and identifiers to Snowflake and link it to any workflow created in Journeys.- Use the Enable Batching checkbox to aggregate data before sending it to Snowflake through the workflow. Batching occurs based on two factors: processing time and record count, whichever occurs first. For example, if you set the the batch processing time to 2 minutes and record count limit as 100, then the file is generated and sent to Snowflake when either condition is met.
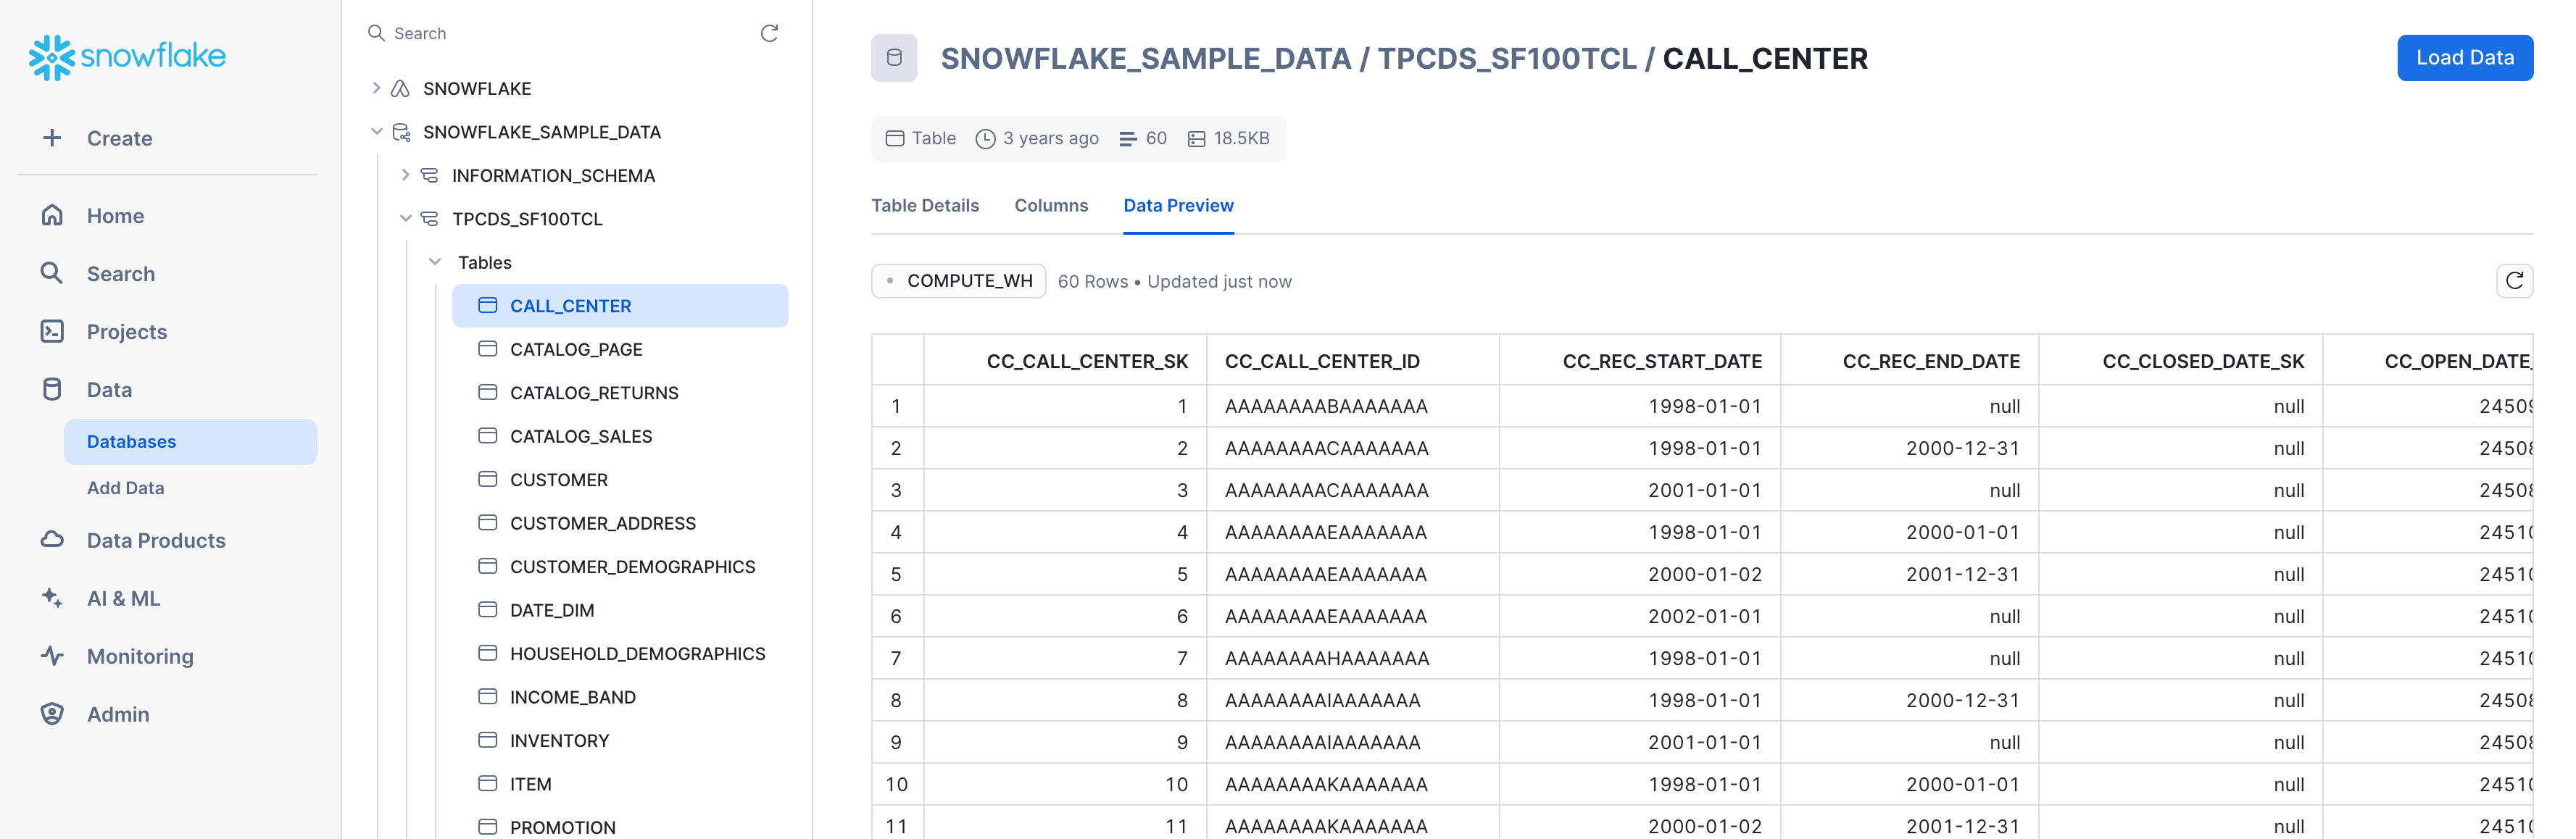
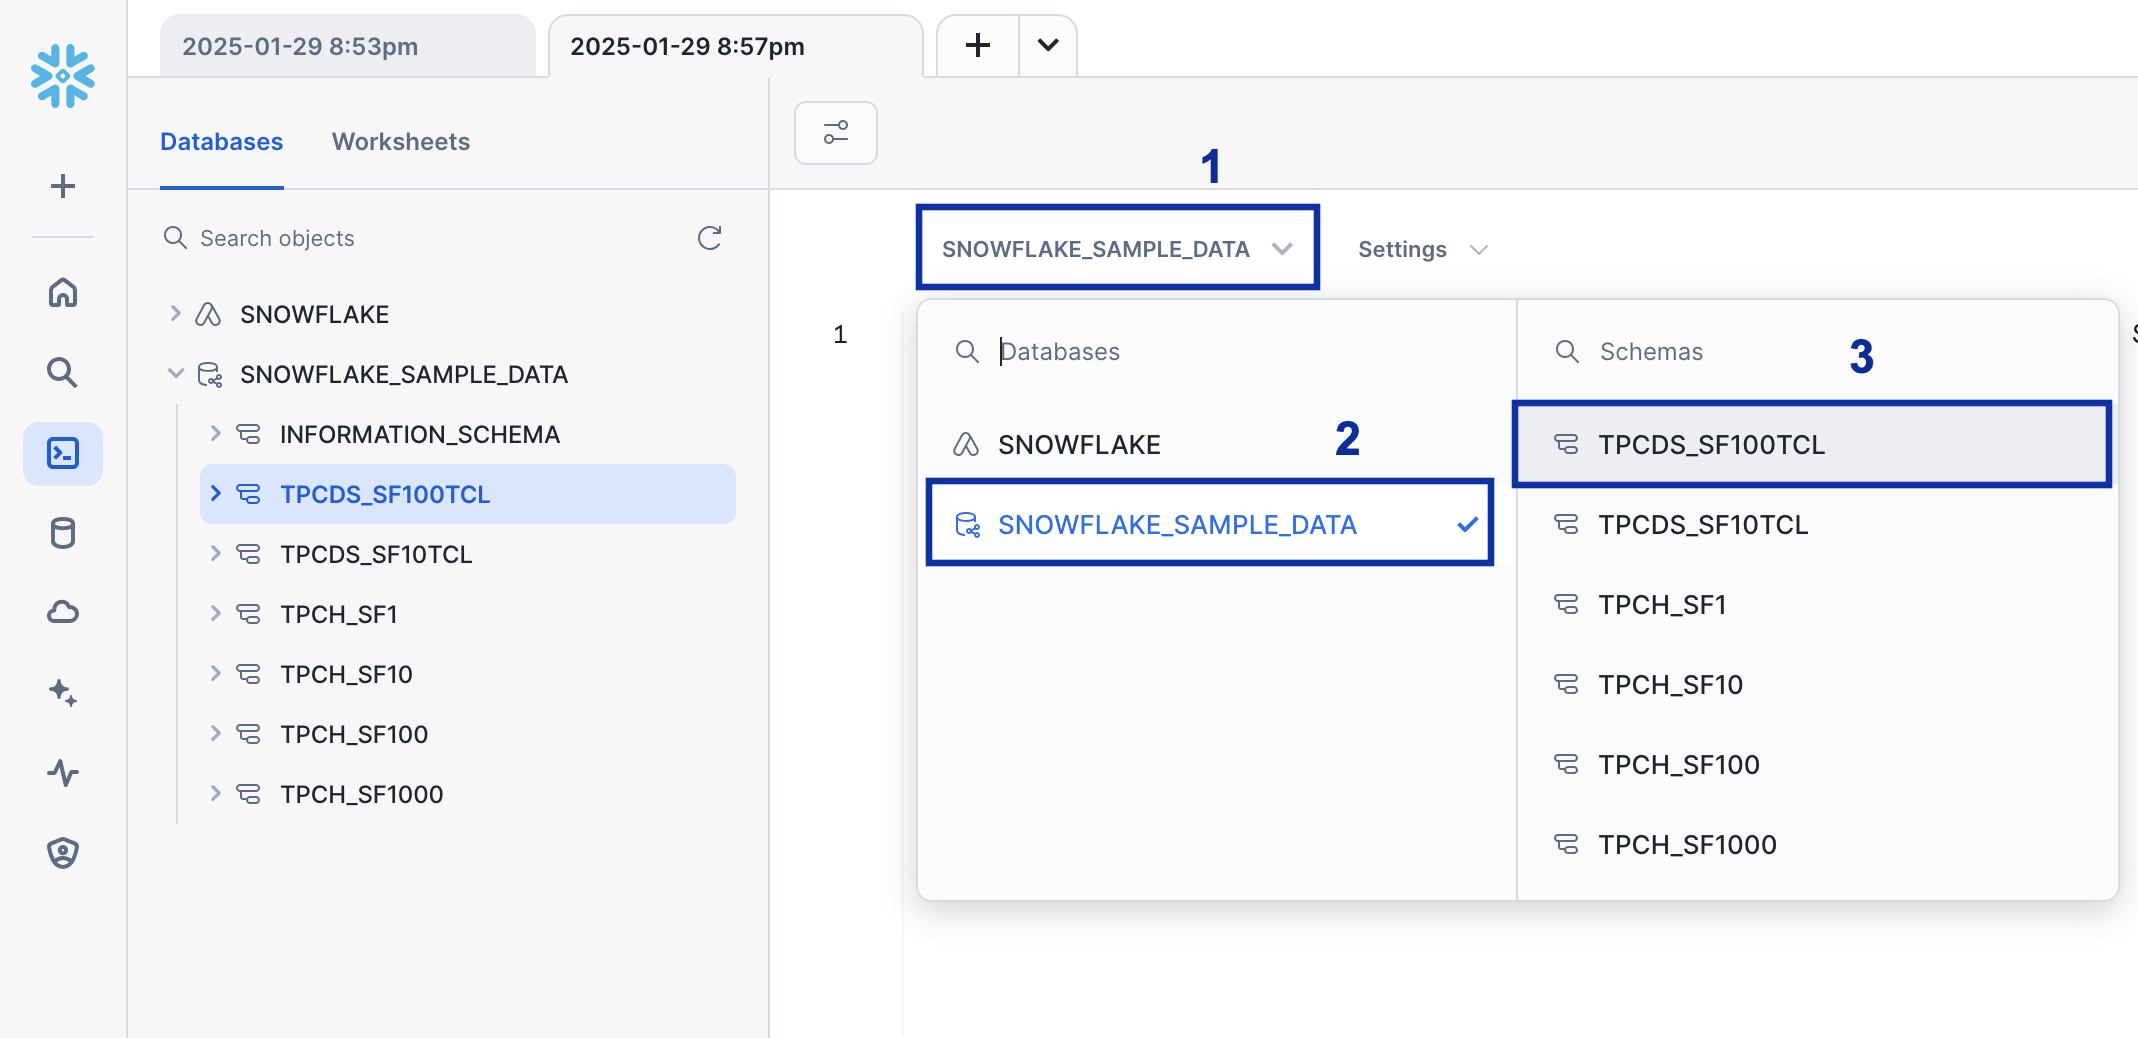
Identify Your Files in Snowflake
After linking an audience/Journeys workflow to a destination, Zeotap CDP sends the data to your Google Cloud Storage bucket. Snowflake then pulls the data from the bucket into your Snowflake account. In Snowflake, the data appears in theDatabase/Schema/Table you selected for data transfer, as shown below.