Overview
Neodata provides data-driven solutions for businesses, particularly in the realm of advertising and marketing. They offer various services related to data analysis, audience segmentation, targeting and optimisation to help businesses make informed decisions and improve their marketing strategies. Integrated with Zeotap, it combines rich customer data with Neodata’s analytics expertise allowing businesses to gain deeper insights into customer behaviour for more effective targeting and personalised marketing campaigns.Prerequisites
Ensure that you have a Neodata account for creating this Destination.Supported Identifiers
This integration supports Device IDs (MAIDs) and Neodata Cookies.Available Actions and Supported Features
The following table lists the available action types for the integration and the supported features for each action type:| Action Name | ID EXTENSION | DELETE | DELTA UPLOAD |
|---|---|---|---|
| Send identifiers to Neodata | ✅ | - | - |
Components of Neodata
Ensure that you have the details about the below components of the Neodata account before creating a Destination.Client Name
This is the client name for your Neodata account. You can find it by navigating to the Neodata Console.SAS URL
This is the SAS URL of the relevant Azure storage, which is used for authentication so that Zeotap CDP can upload the files to the Azure storage.Create a Destination for Neodata
Perform the following steps to create a Destination for Neodata:
Click Neodata. A screen appears displaying details about the particular destination towards the left. On the right-hand side of the screen find a list of fields that are required for the integration to be established. Enter the required details as mentioned in the following steps:a. Enter a name for the Destination.b. Enter the Client Name of your Neodata account.c. Enter the SAS URL. This is the SAS URL of the relevant Azure storage.d. Review all the values entered above and then click Next to proceed.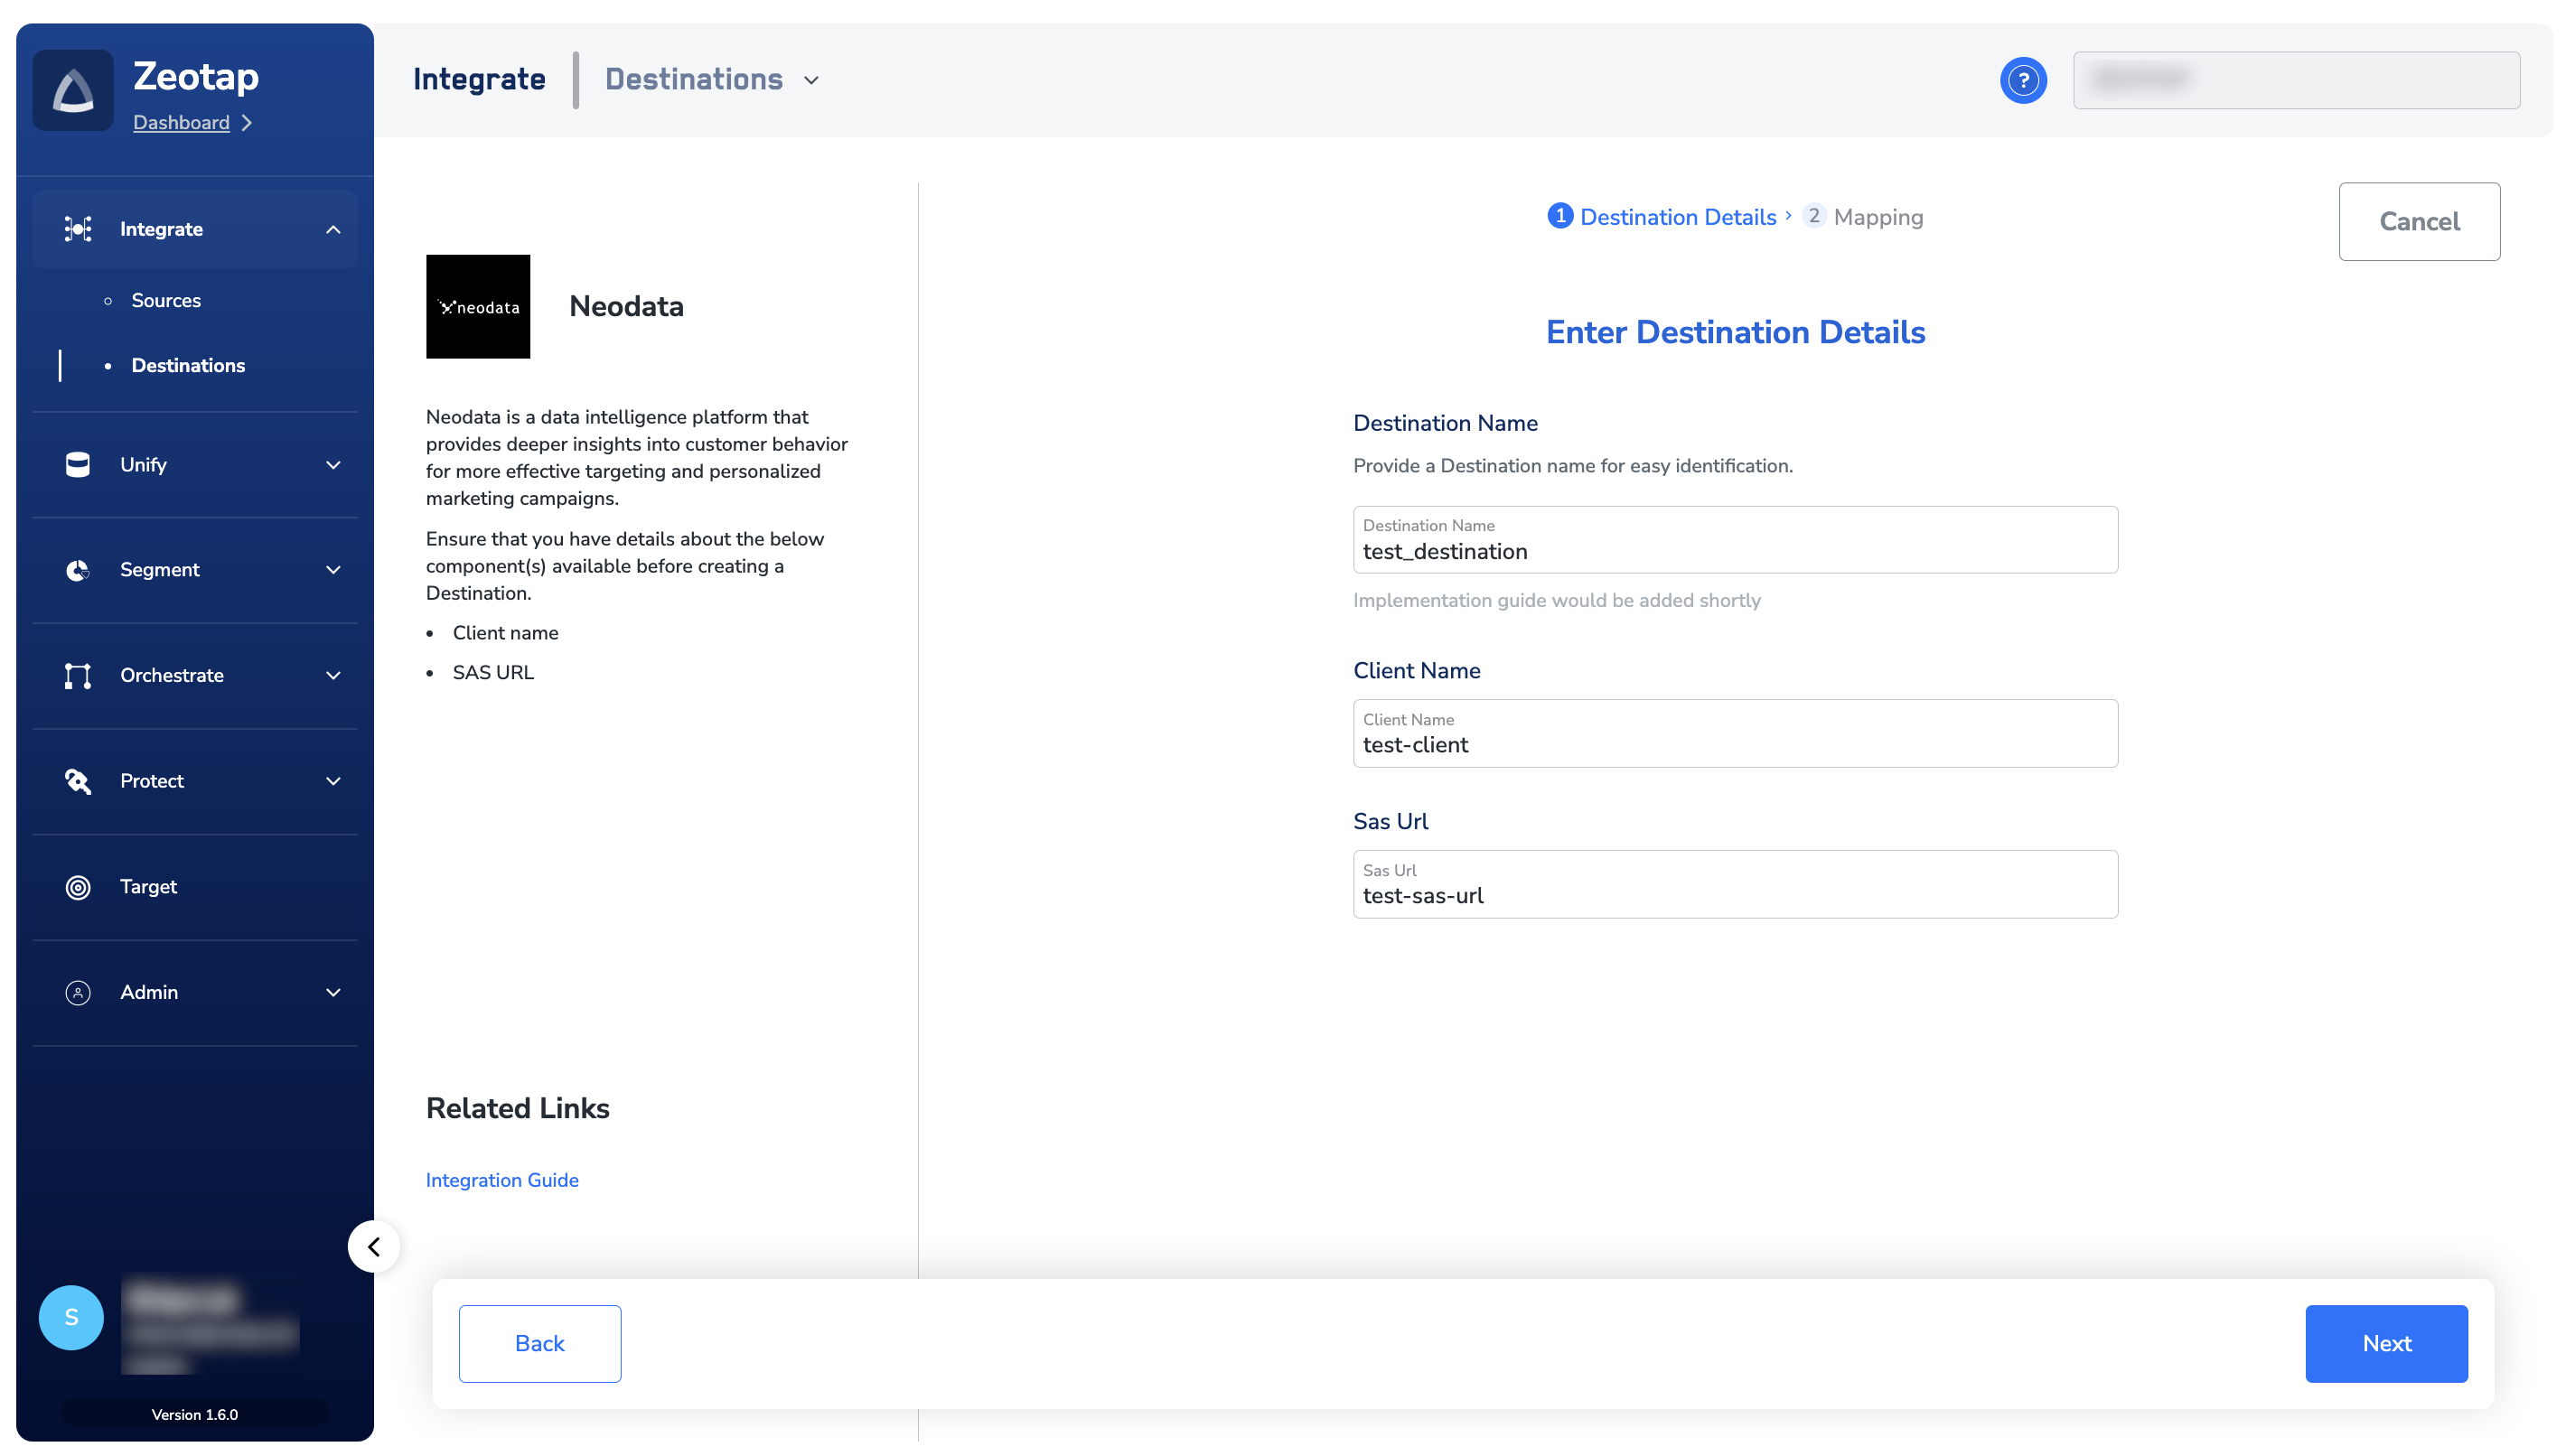
In the new screen that appears, choose the appropriate Action and Mapping as explained below.a. Choose the desired action under Choose your Action and then choose the corresponding identifiers under Map the Fields. By default, the Output Identifiers that are accepted by the platform such as MAIDs, Cookies and more are displayed. However, you can edit, add or remove an identifier from the list. To do so, refer here.b. Click Create Destination. The created Destination gets listed in the Audience and Target applications, which can be linked to an Audience/segment.
Link an Audience to the Neodata Destination
For information about how to link an Audience or segment to the created Destination in Audiences and Target applications, refer here.Note:The terms Audiences and Segments are used interchangeably to refer to customer cohorts belonging to a specific category. For example, an Audience or a segment could be a specific group of customers who are over 18 years of age and who have performed an
addToCart event within the last 30 days.