Note:The terms Audiences and Segments are used interchangeably to refer to customer cohorts belonging to a specific category. For example, an Audience or a segment could be a specific group of customers who are over 18 years of age and who have performed an
addToCart event within the last 30 days.Activate in Audiences
Once you have created an Audience with the desired criteria, you can activate it by linking to a Destination, as explained below.Search for the appropriate audience and click the Audience Activation icon and then click Link to Destination.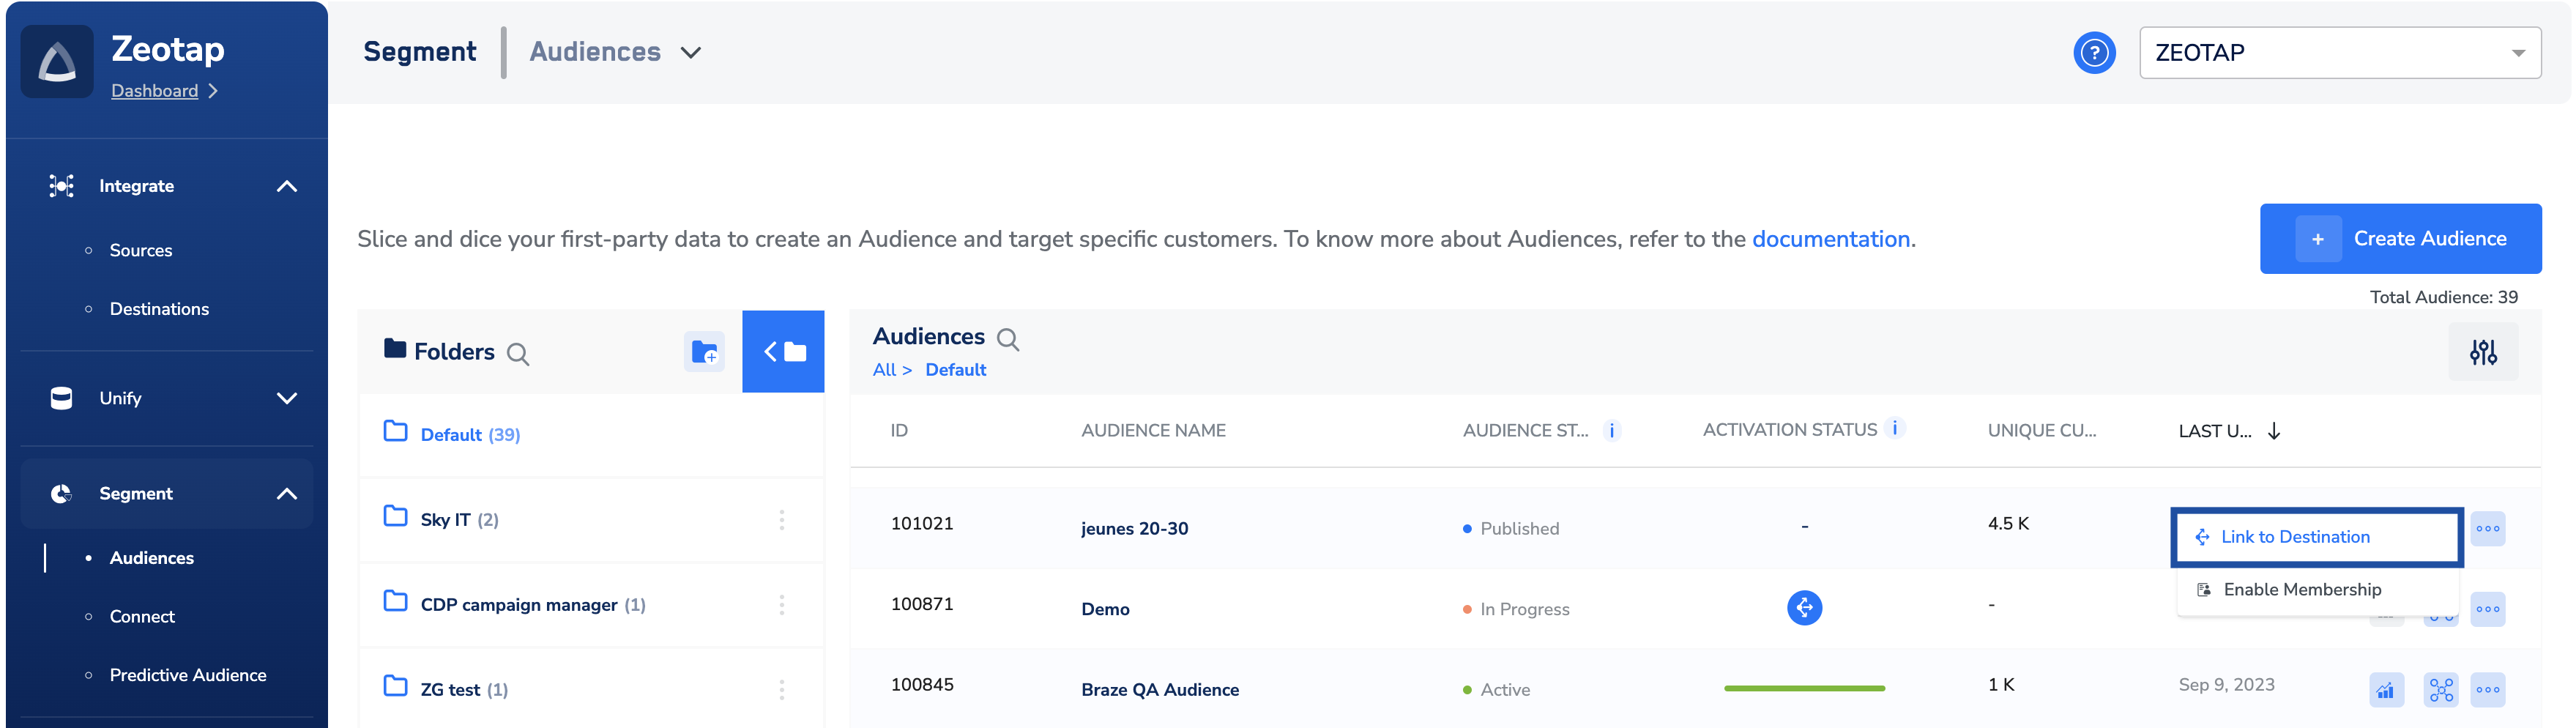
In the screen that appears, you can drag and drop the Destination to which you wish to link the Audience. If the desired Destination is not available, then create a new one by using + Create Destination.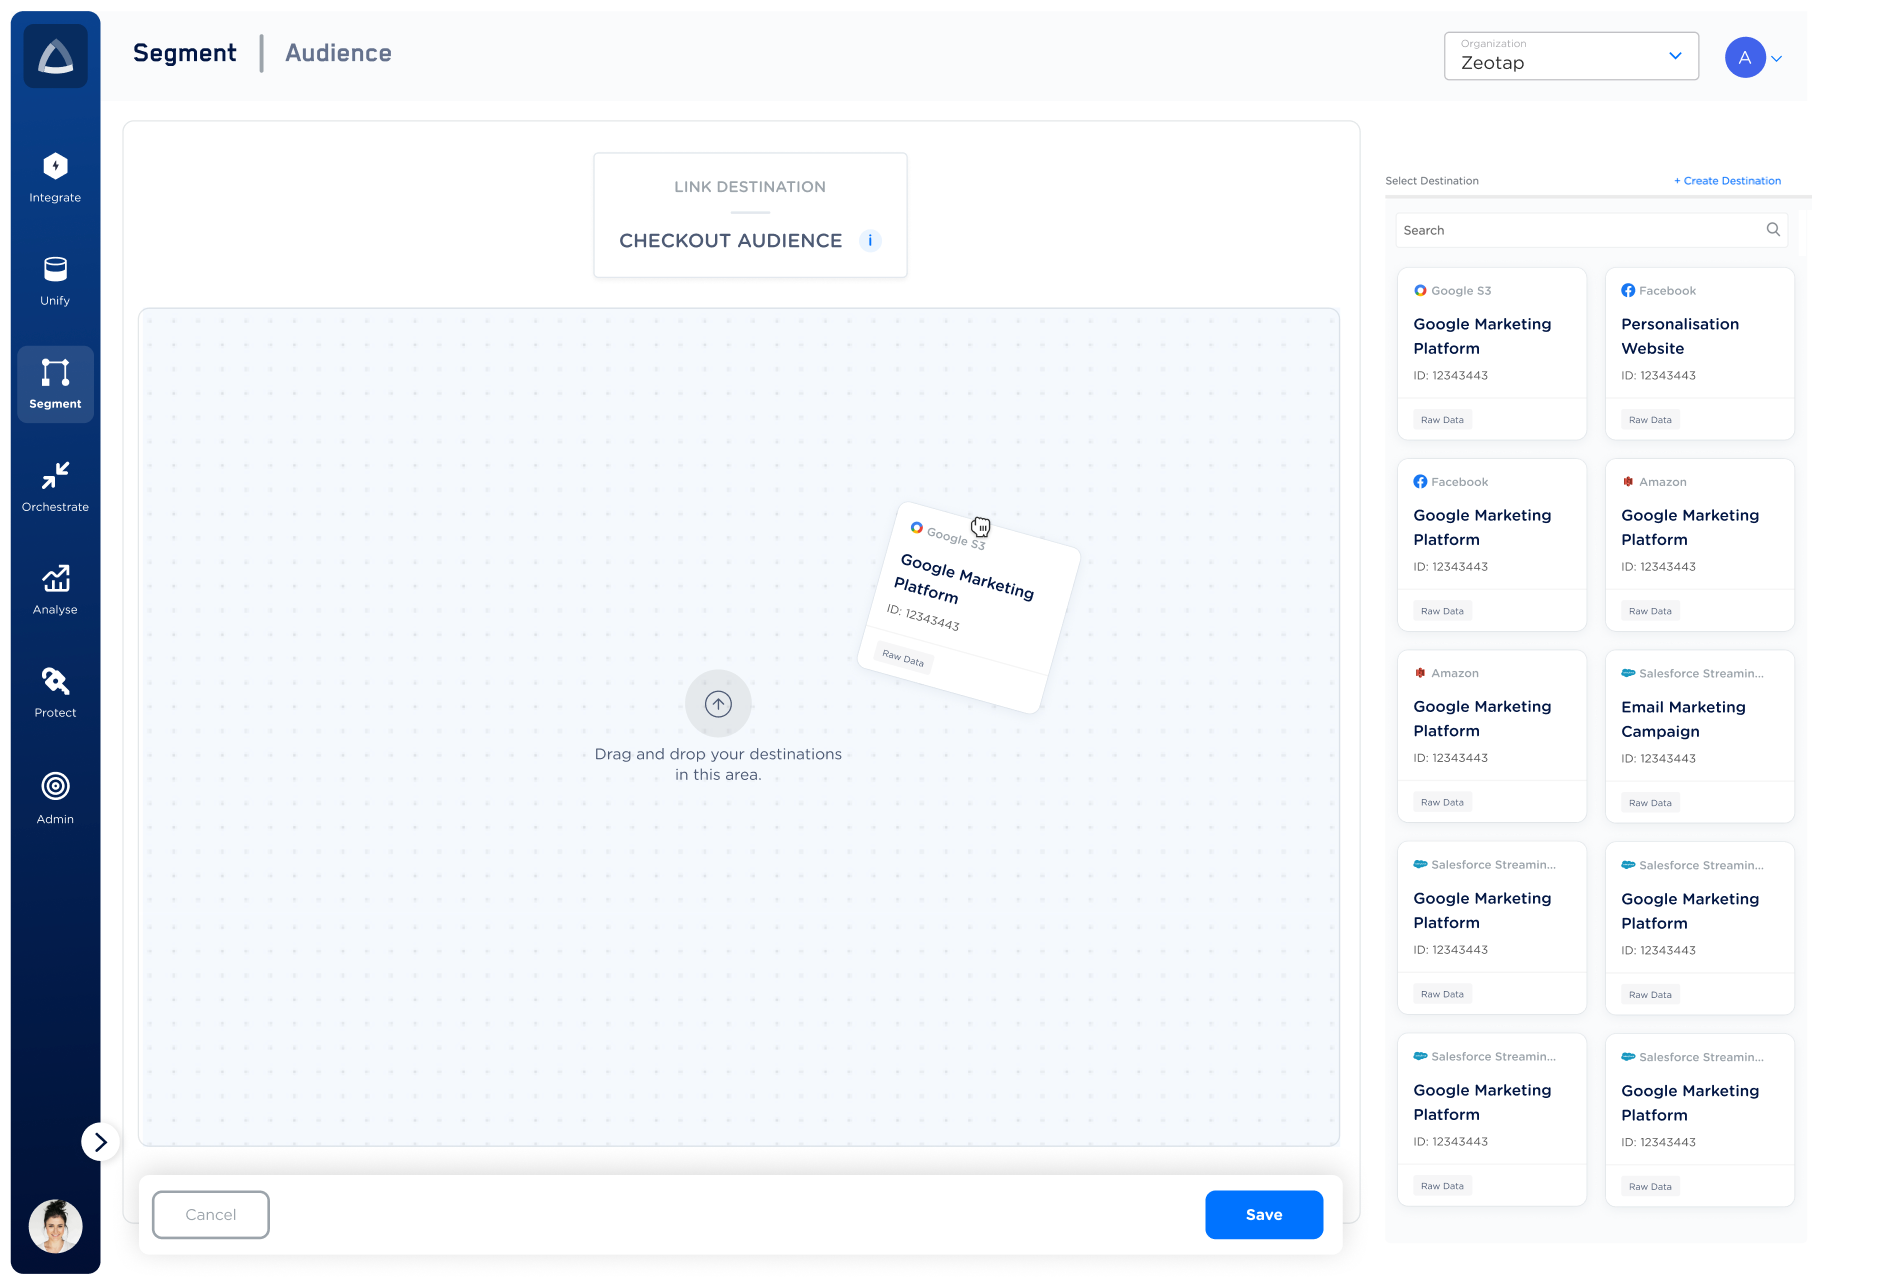
In the Destination Settings window, perform the following steps: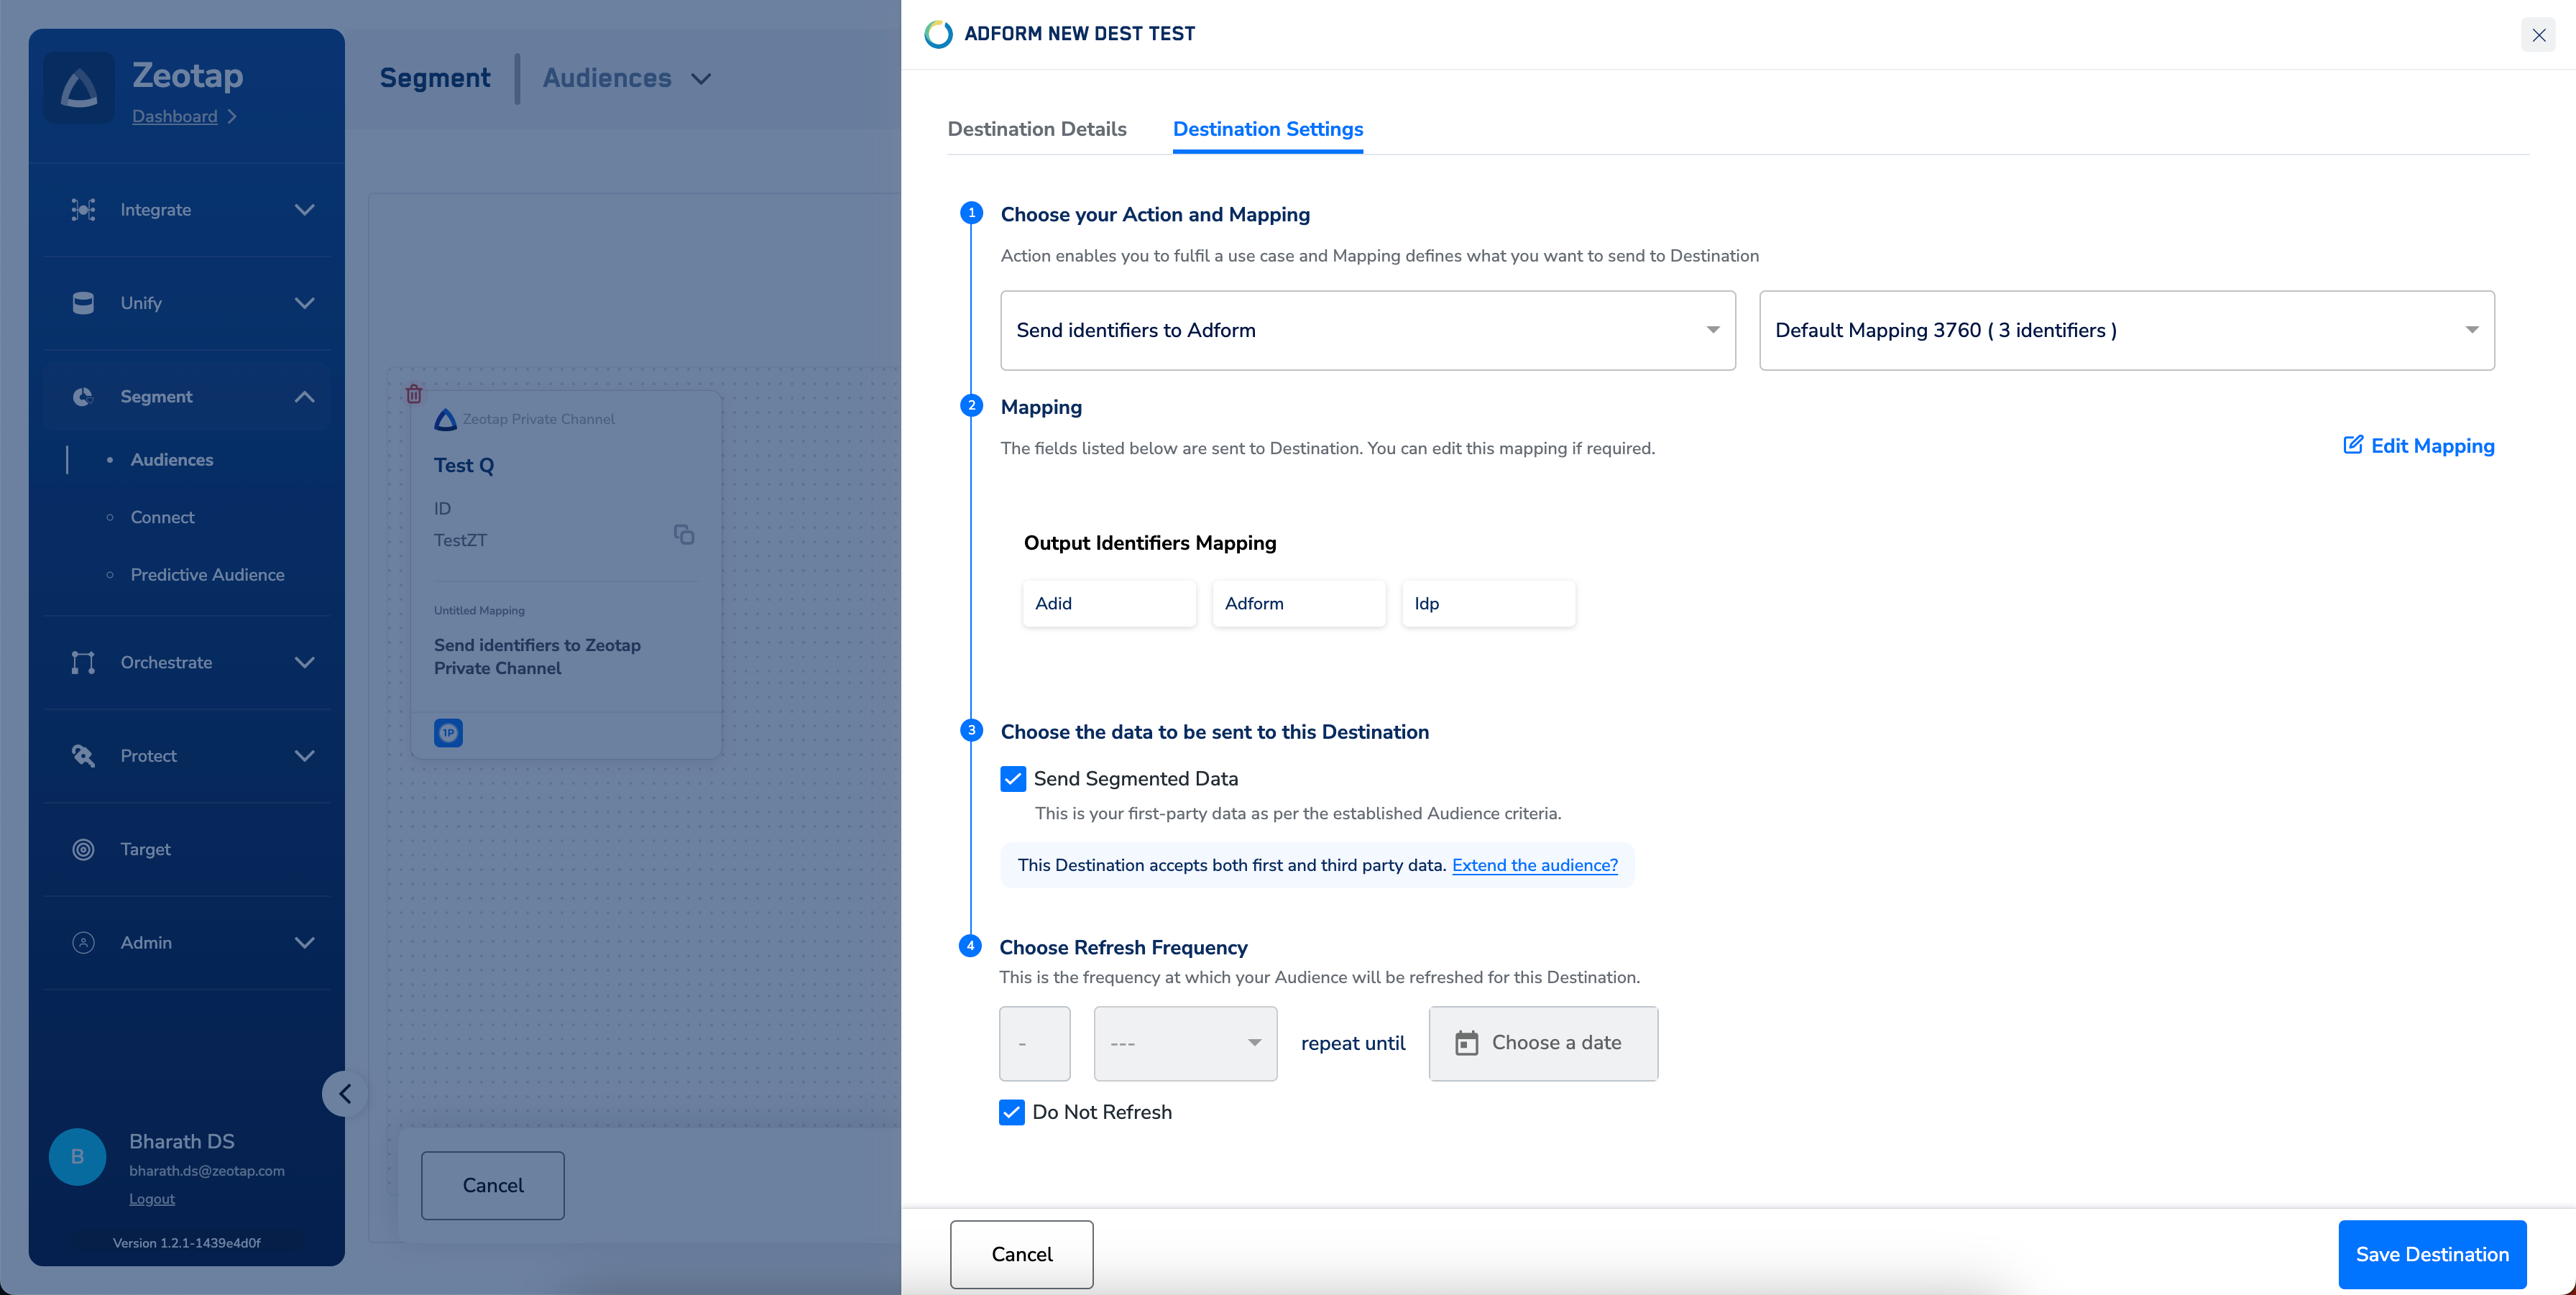

d. To apply the extensions (ID Extension and/or Lookalike), under Send Extended Data, click Extend the audience? and select the appropriate checkbox. To know more about the extensions and how to apply them, refer here.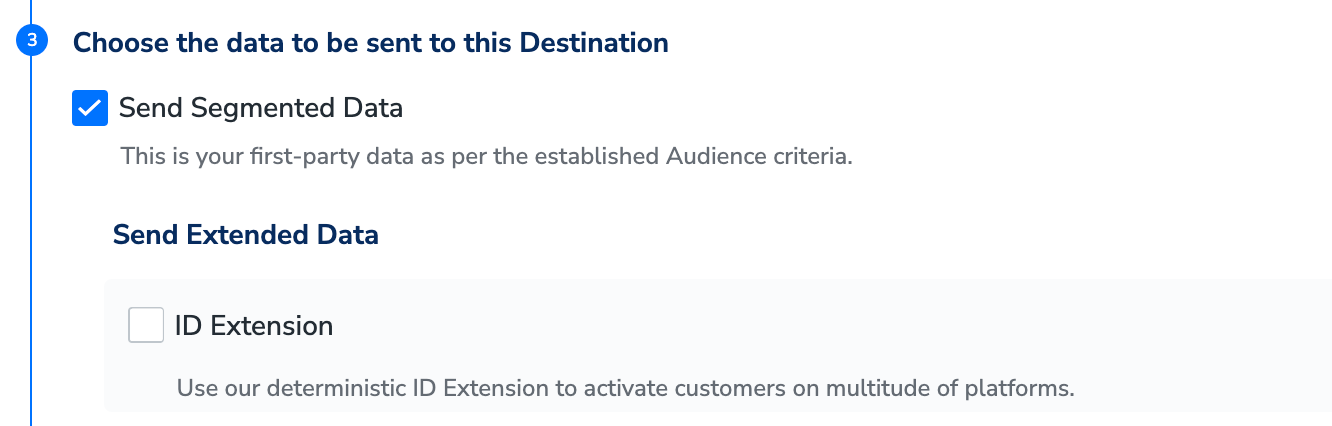

d. To apply the extensions (ID Extension and/or Lookalike), under Send Extended Data, click Extend the audience? and select the appropriate checkbox. To know more about the extensions and how to apply them, refer here.
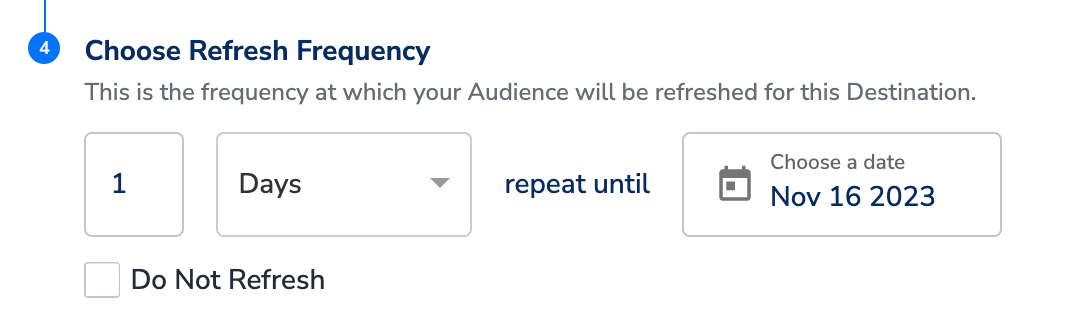
Note:You can also disable this option by selecting the Do not Refresh check box.
Note:In addition to creating a Destination within the Audience module, you have the option to create one directly from the Destinations module itself. For more information about how to create a Destination from the Destinations module, refer here.
Activate in Target
On the Segment Activation screen, choose either Standard or Custom for the Segment Type.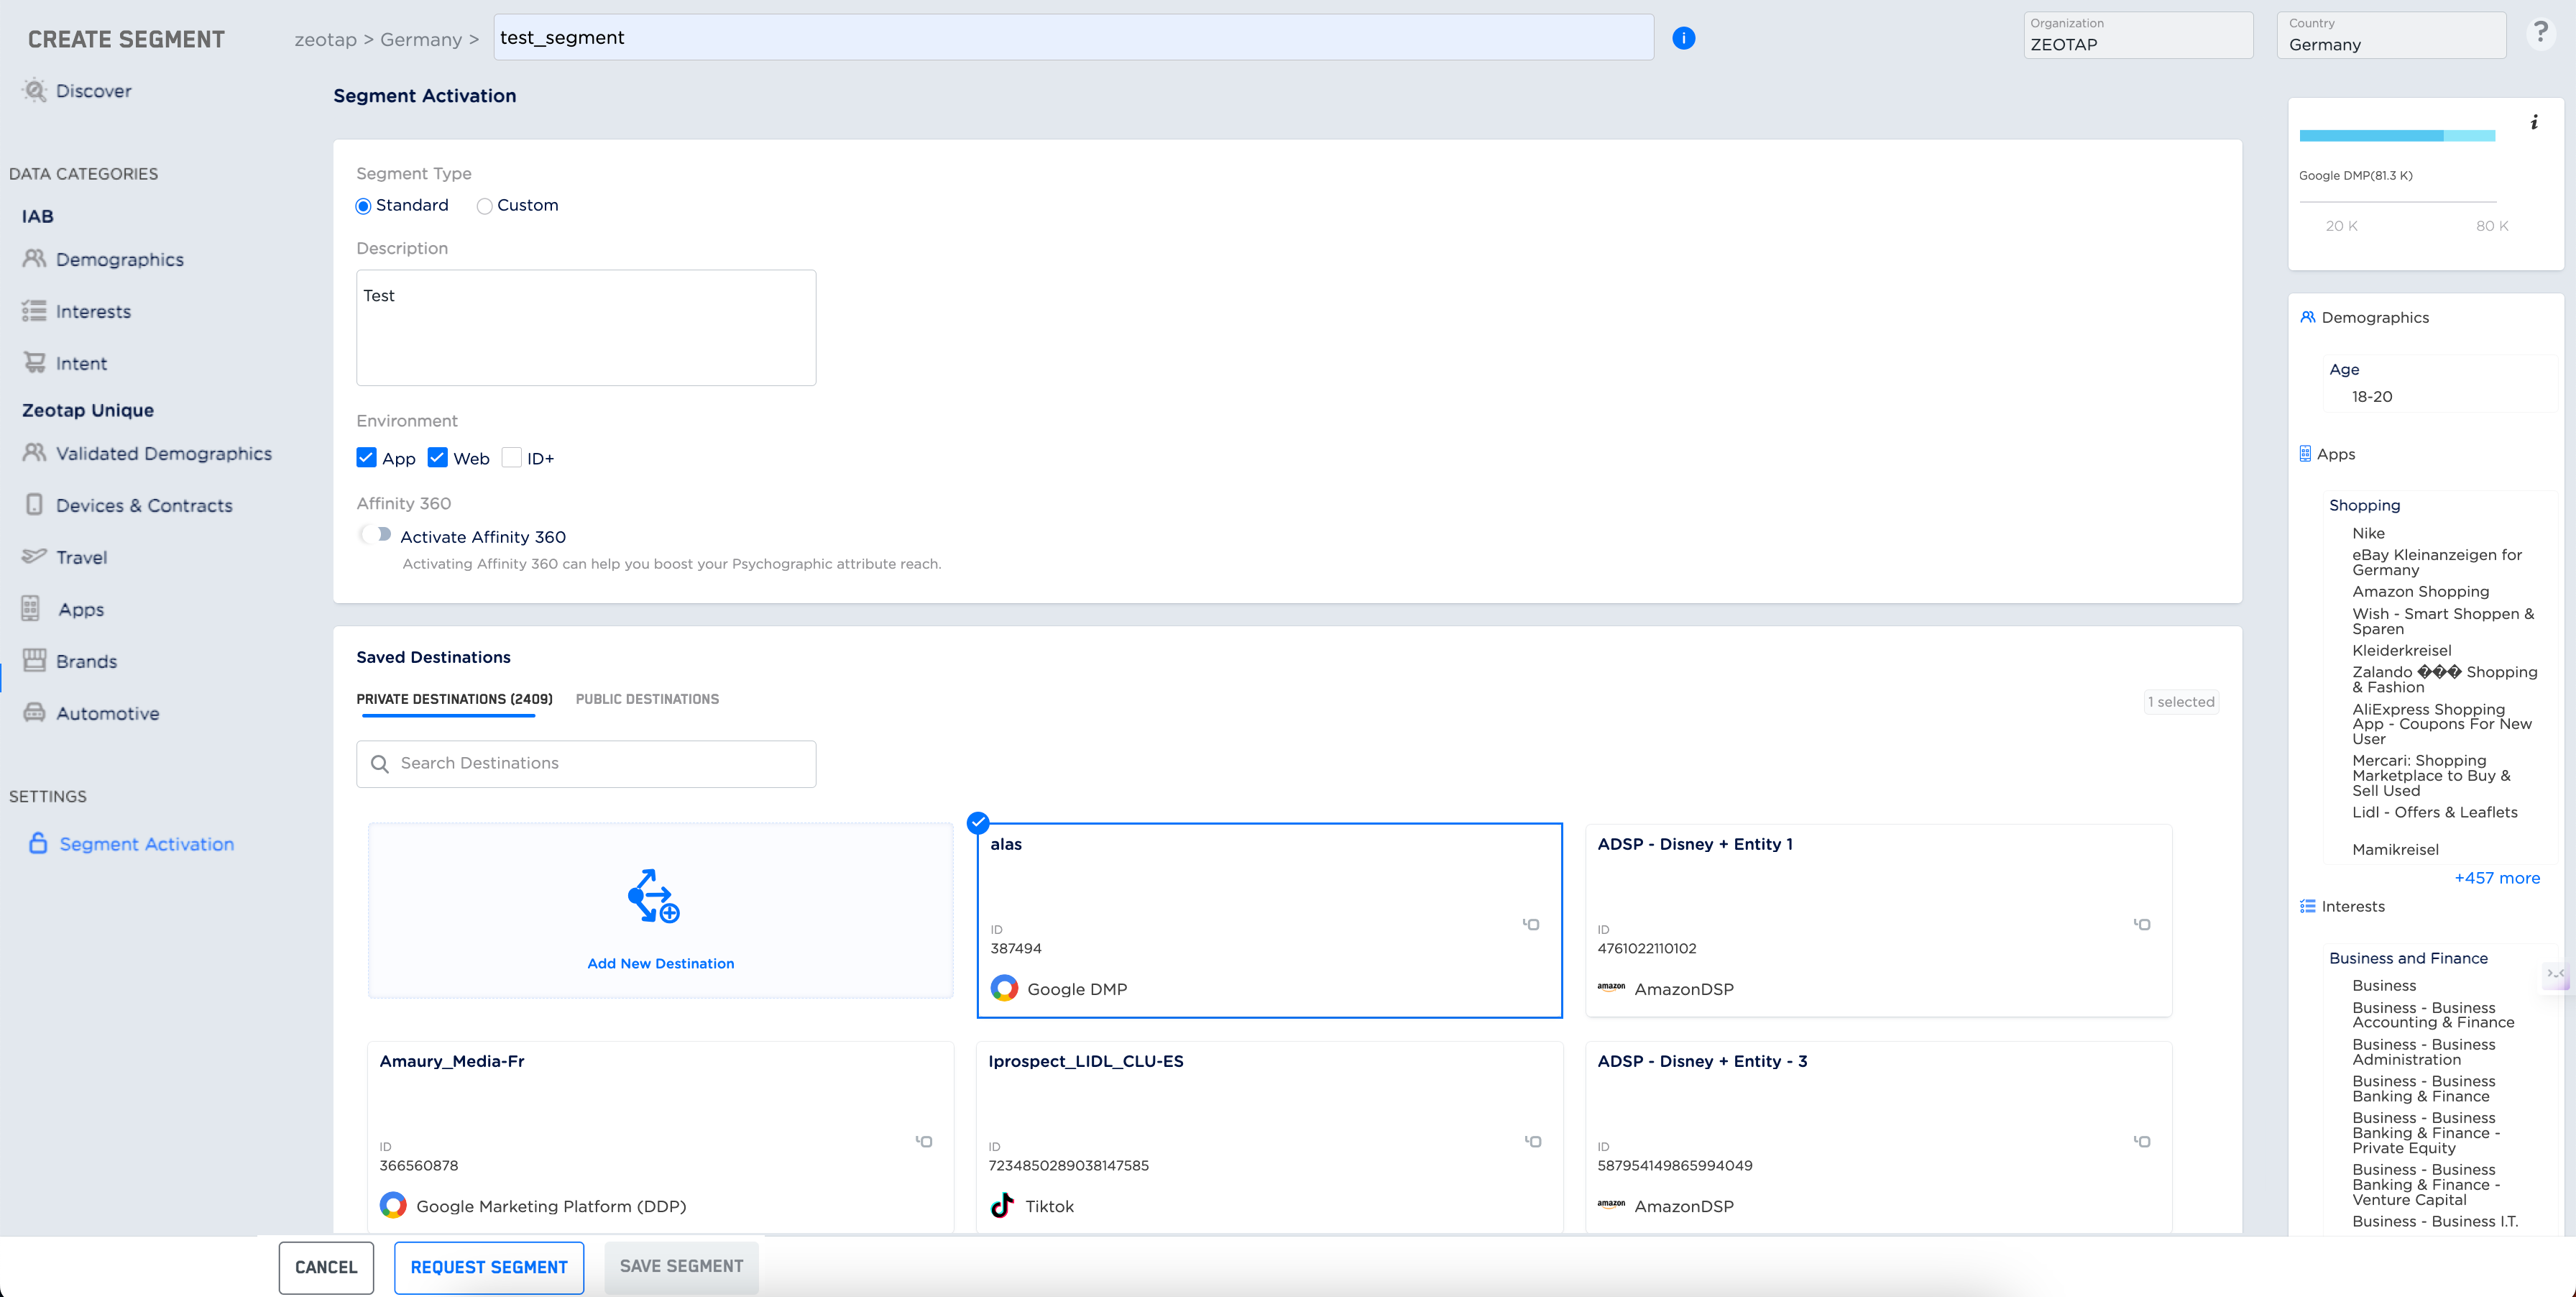
- Standard segments are predefined segments within the Targeting platform, created based on commonly used data categories or entities. Note that the Standard segments have only one attribute per segment. For example, a segment that filters all customers under 18 years of age. Here, It has only age (demographics) as the filter, which is a common data category. To build your desired audience, you can use a combination of standard segments available within the system.
Note:The standard segments are valid for 10 years after creation. During this period, the segments are auto-refreshed (syncs data) depending on the frequency configured while creating them.
- Custom segments are segments that are created based on user-defined data categories or entities within the Targeting platform. Unlike standard segments, custom segments are tailored to specific business needs and requirements. You can create, configure and manage custom segments to capture and process data that is unique to your needs. For example, a segment that filters only male customers who are based out of Germany and are above 18 years of age.
Note:The custom segments are valid for just 6 months after creation. Therefore, to continue to use the segment after it expires, you have to extend the validity of the segment either through the UI or through raising a ticket with the support team. For more information about how to extend the validity of the segments, refer here.
Select the Mobile App or Mobile Web checkbox based on the environment where you want to target your audience.
Based on the environment that you choose, the number of private or public Destinations available for the same is displayed. Accordingly, choose the private or public Destination(s) and confirm the selection. Based on whether you choose Mobile App or Mobile Web, the right panel displays an estimated count of MAIDs and Cookies that can be targeted for the chosen Destination.