Overview
Salesforce CRM is a cloud-based customer relationship management platform that helps businesses manage sales, marketing, and customer service in one unified system. It enables teams to track leads, automate workflows, and gain insights through real-time reporting and analytics. Designed for scalability and customization, Salesforce supports integrations with external systems and offers industry-specific solutions. The integration with Zeotap allows the customer to send audience data from Zeotap to standard objects within Salesforce. Here is a brief of the supported Standard Objects:- Account – Represents an individual account, which is an organisation or person involved with your business (such as customers, competitors, and partners). To know more about Accounts, refer here.
- Contact – Represents a contact, which is a person associated with an account. To know more about Contacts, refer here.
- Lead – Represents a prospect or lead. To know more about Lead, refer here.
- Case - Represents a case, which is a customer issue or problem. To know more about Case, refer here.
- Opportunity- Represents an opportunity, which is a sale or pending deal. To know more about Opportunity, refer here.
- Account Partner - Represents a partner involved in a customer’s account, such as a reseller or strategic ally. To know more about Account Partner, refer here.
- Campaign - Represents a marketing program, promotion, or initiative, such as an advertisement, seminar, or direct mail effort. To know more about Campaign, refer here.
- Opportunity Line Item - Represents a product or service that has been added to an opportunity (sale or pending deal), detailing the price, quantity, and total amount. To know more about Opportunity Line Item, refer here.
- Task - Represents a standard work item or to-do assigned to a user, which typically has a due date and completion status. To know more about Task, refer here.
- Custom Object - Represents a database table created by a user to store information specific to their organization or industry, extending the standard set of data tables available.
Supported Identifiers/Attributes
The integration supports all the standard and custom attributes for each of the standard objects in Salesforce.Prerequisites
To proceed with Salesforce CRM creation, ensure that you adhere to the following points:- Salesforce Organization: Active Salesforce org (Developer, Sandbox, or Production). a. The org’s unique domain name can be found in Setup > My Domain.
- Connected App: A Connected App must be created in Salesforce Setup with appropriate OAuth settings. a. Navigate to Setup > App Manager > New Connected App to create one. The Client ID and Client Secret are provided upon successful creation. You must enable OAuth and select the required scopes (e.g., api, refresh_token).
Create a Destination for Salesforce CRM
Perform the following steps to create a Destination for Salesforce CRM: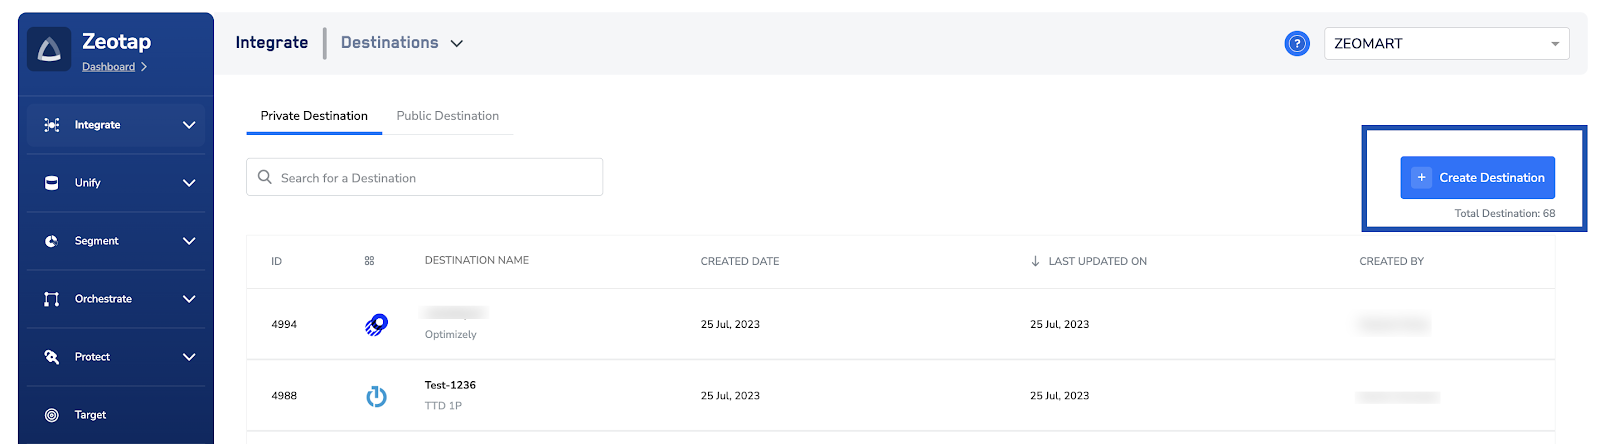
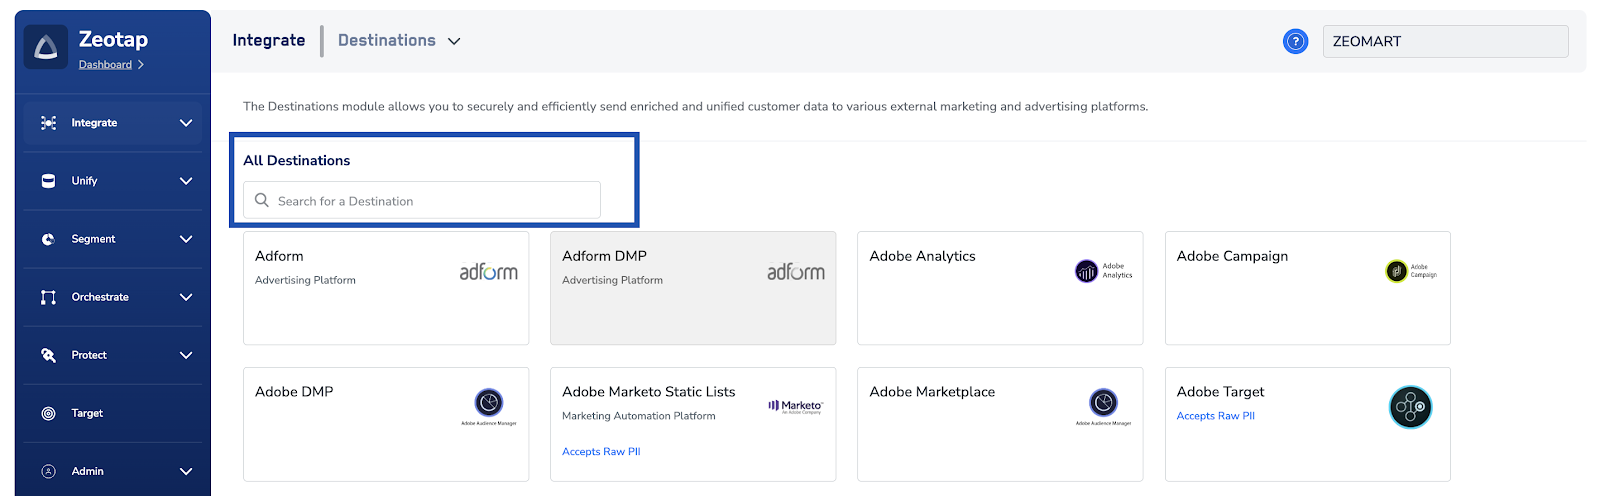
Click Salesforce CRM. A screen appears displaying details about the particular destination towards the left. On the right-hand side of the screen find a list of fields that are required for the integration to be established. Enter the required details as mentioned in the following steps:a. Enter a name for the Destination.b. Enter a value for the Destination Instance Name. This is an internal name and used internally.c. Enter the name of your Salesforce Domain Name.d. Enter the Client ID.e. Enter the Client Secret.f. Review the values above and click Connect to Salesforce CRM. You will be redirected to Salesforce to log in; please use the account credentials linked to the created app.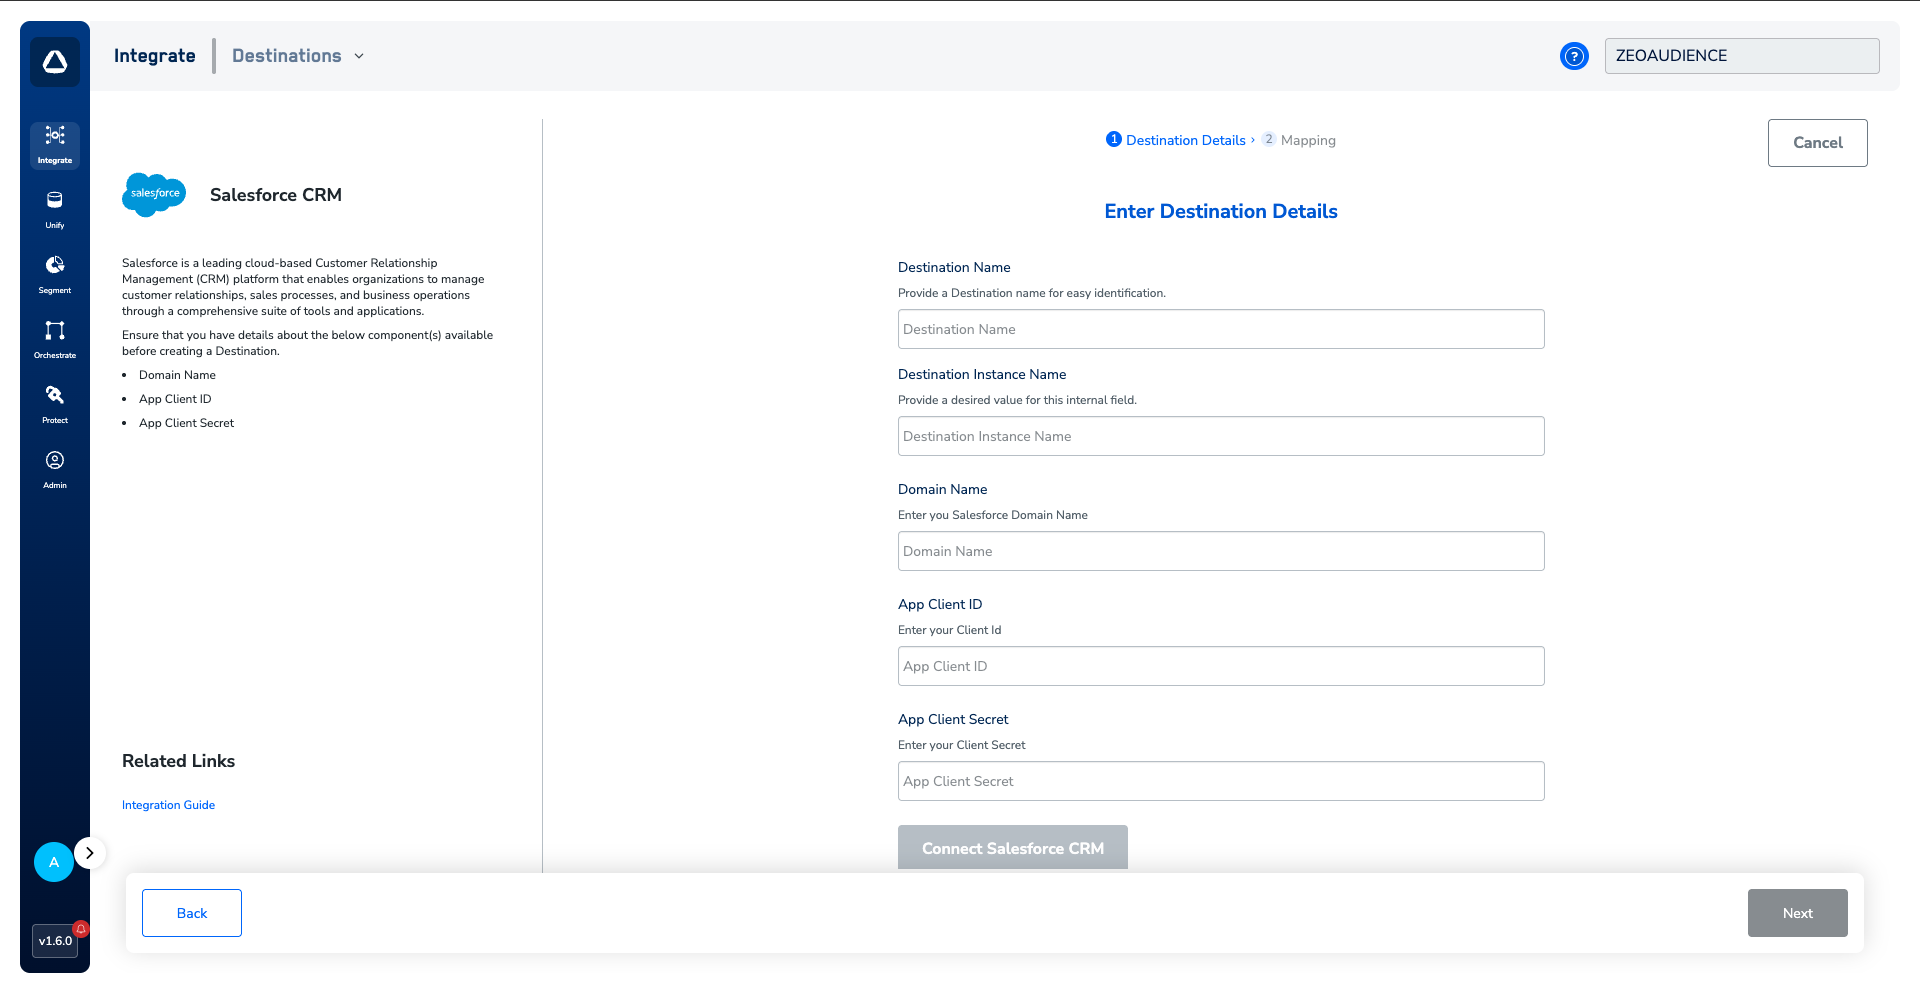
Under Choose your Action, you have the following optionsa. Send Contacts datab. Send Account datac. Send Case datad. Send Lead datae. Send Opportunity dataf. Send Opportunity Line Item Datag. Send Task Datah. Send Campaign Datai. Send Account Partner Dataj. Send Custom Object Data
Once you choose the action, map the corresponding fields you want to send to your Salesforce CRM instance from Zeotap.a. The field name that you provide in the Destination fields must exactly match Salesforce API field names (not the display labels you see in the UI).b. You can find the field names in salesforce by navigating to Object Manager → [Object] → Fields & Relationships. You would need to use the Field Name (not the Label).c. For Custom Object Data, please follow these requirements:i. Custom Fields: Append 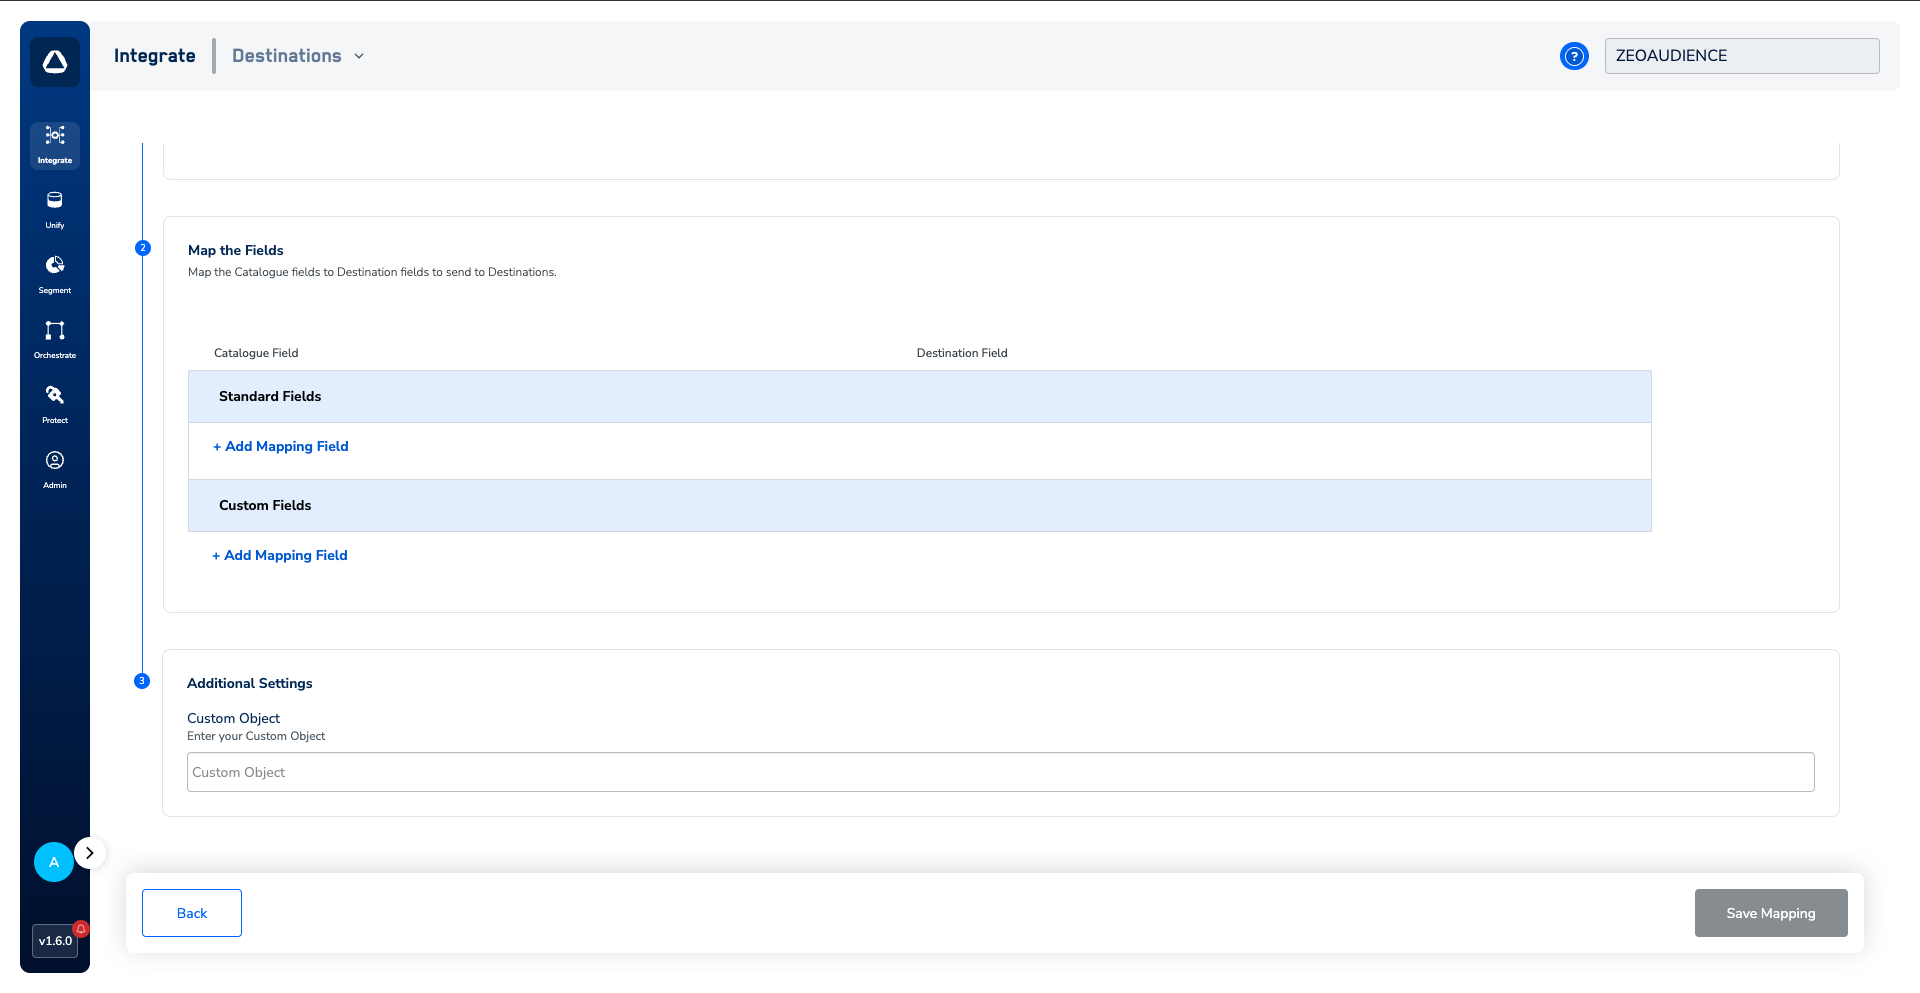
__c to all custom field names (e.g., enter Loyalty_Points__c instead of Loyalty Points).ii. Object Name: In the Additional Settings section below, enter the Object Name with the __c suffix (e.g., Customer_Feedback__c).iii. Navigate to Object Manager → [Object Name] → Fields & Relationships, and use the Field Name (API Name), ensuring custom fields and objects include the __c suffix.