Overview
A Webhook is a type of integration that allows you to establish a secure connection between Zeotap and your internal system. It enables Zeotap to conveniently transfer data based on the criteria you specify. Once you enable the Webhook, Zeotap initiates HTTP calls to your designated endpoint. As soon as Zeotap receives data, it promptly forwards it to your HTTP endpoint. This ensures efficient data transfer between Zeotap and your system.Integration with Zeotap Webhook
Prerequisites
Ensure that you have the following details available before starting the integration:- Upload URL
- API Type
- Authentication Type
Upload URL
This is the end point URL of the customer’s API through which Zeotap sends data to the customer.API Type
API Type refers to the specific category of an API based on its functionality. The following are the API types supported by Zeotap:- POST – This API Type allows you to include data that the recipient server uses to create a new resource. For example, in a blog API, you can use the POST API type to create a new blog post by sending the content and other details in the request body.
- PATCH – This API Type allows you to update specific fields of an existing resource. Unlike the PUT method that replaces the entire resource, PATCH allows partial updates. For example, in an e-commerce API, you can use a PATCH request to update the quantity or price of a product.
Authentication Type
Authentication Type is a method to verify the identity of a customer who is attempting to access the system or resource. The following are the two Authentication Types supported by Zeotap:-
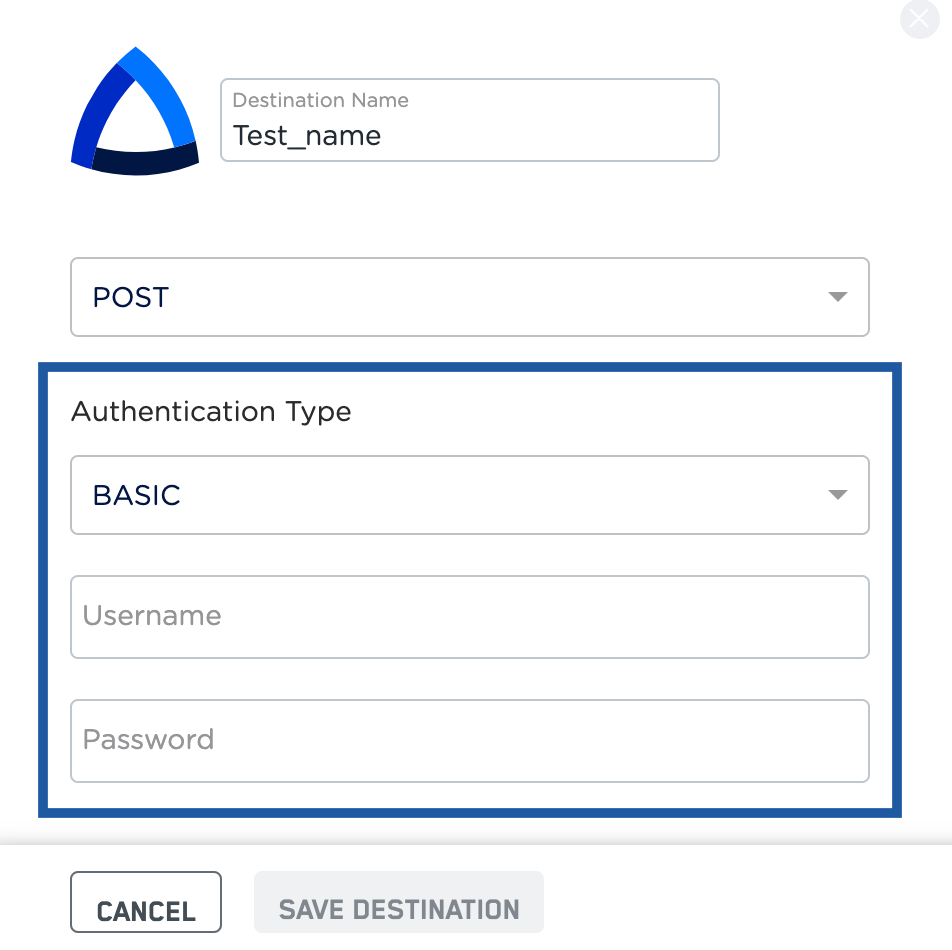
Basic - This information is used to verify your identity and grant access to the relevant resource. If you choose Basic as the Authentication Type, then you have to provide a Username and Password.
-
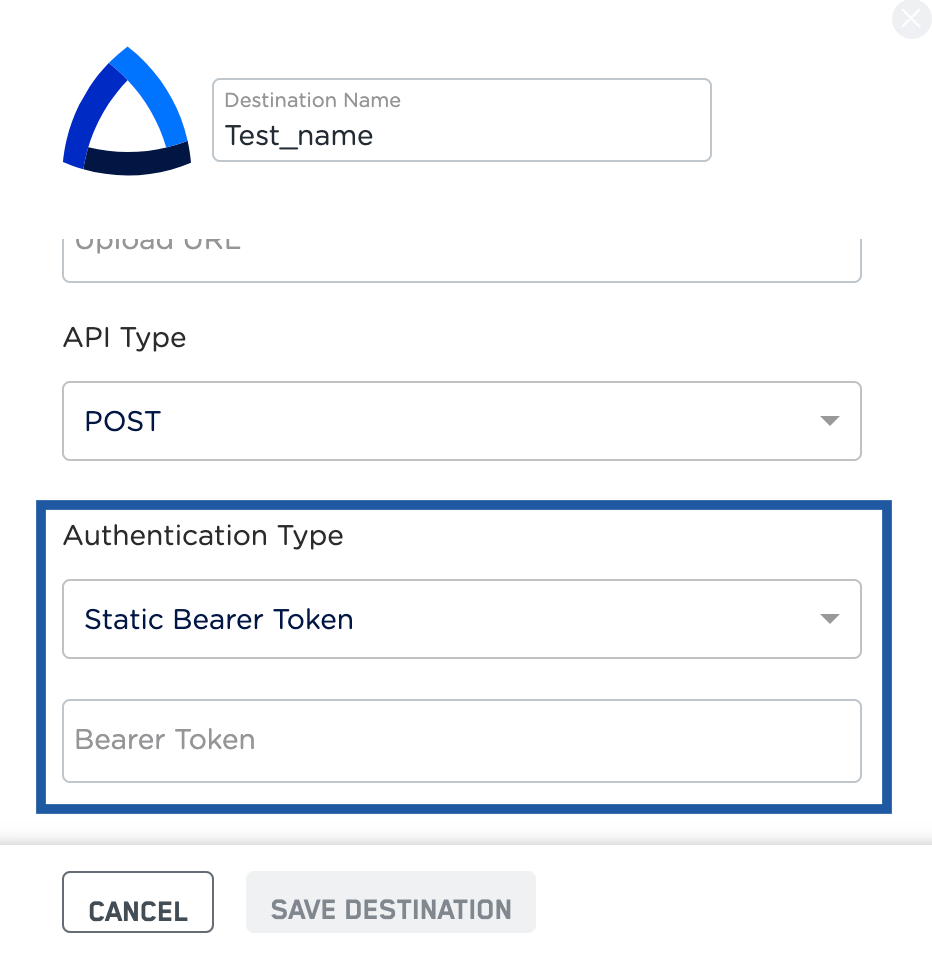
Static Bearer Token - This token is generated by your client who host their resource/system in Webhook. If you choose Static Bearer Token as the Authentication Type, you must provide a Bearer Token. This serves as a form of authentication to access the relevant resource.
Destination Setup
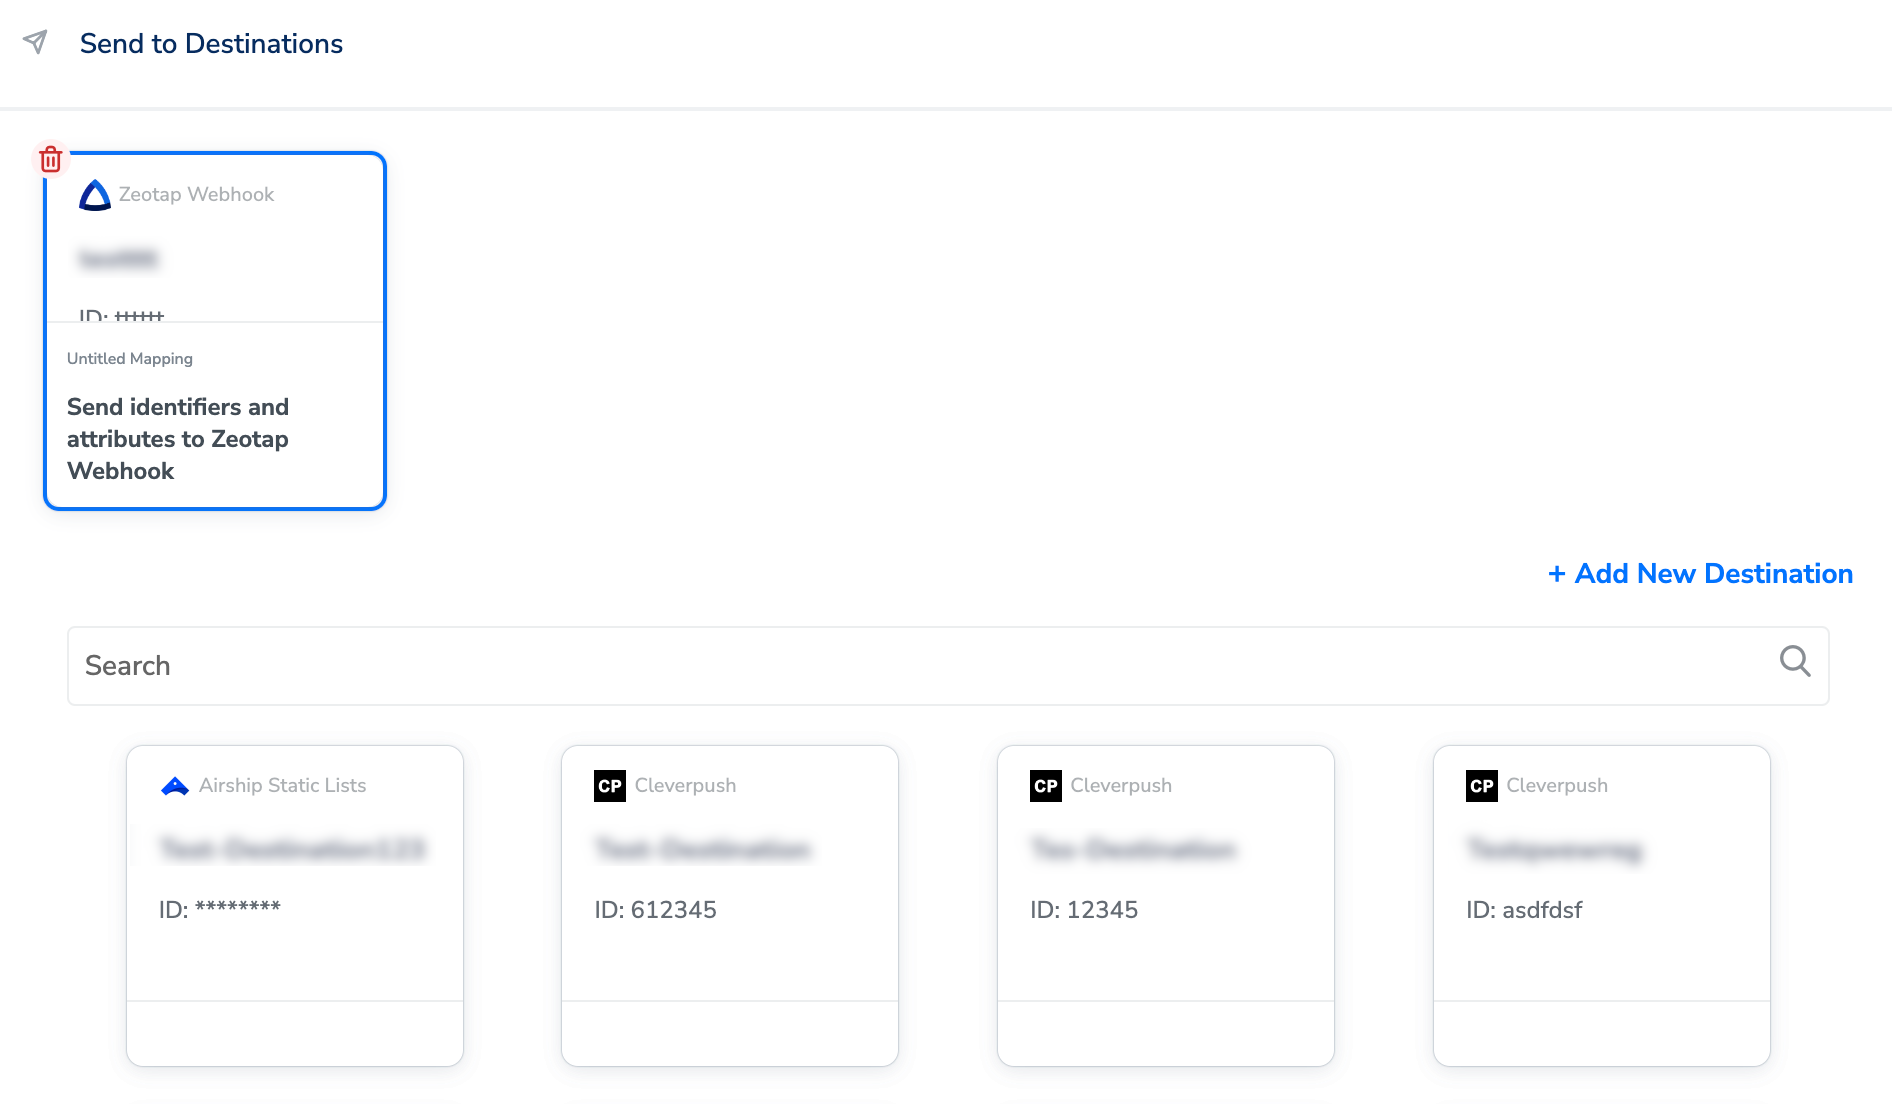
After you have applied filters or added conditions for your users in Journeys, you can activate them in Zeotap Webhook under Send to Destinations. A new window appears, where you can set up your destination. You can use an already existing destination from the list of available Destinations **** or create a new one by clicking + Add New Destination.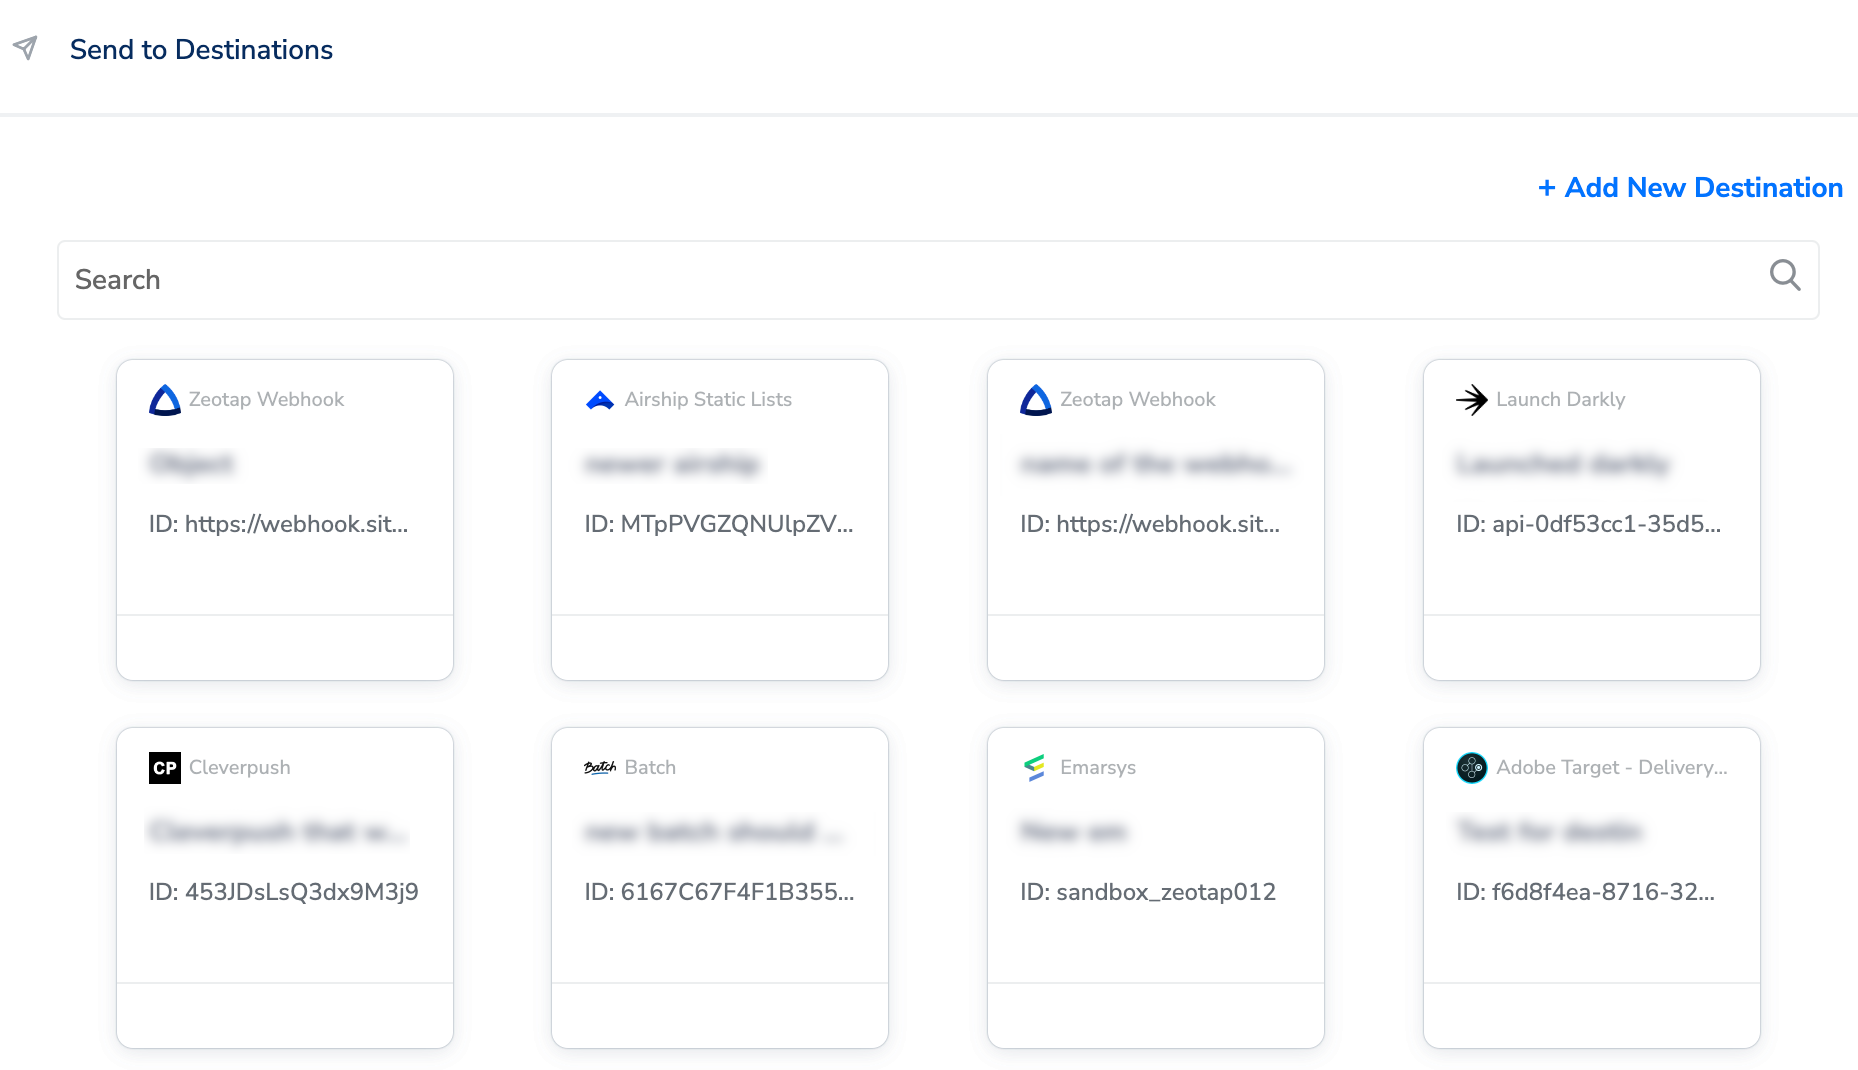
Add New Destination
Perform the following steps to add a new destination:Choose the API Type from the drop-down menu. You can either choose POST or PATCH as per your requirement. To know more about these API Types, refer here.
Choose the Authentication Type from the drop-down menu. You can either choose BASIC or STATIC BEARER TOKEN depending on the requirement. Based on your selection, enter the required user input. To know more about these Authentication Types, refer here.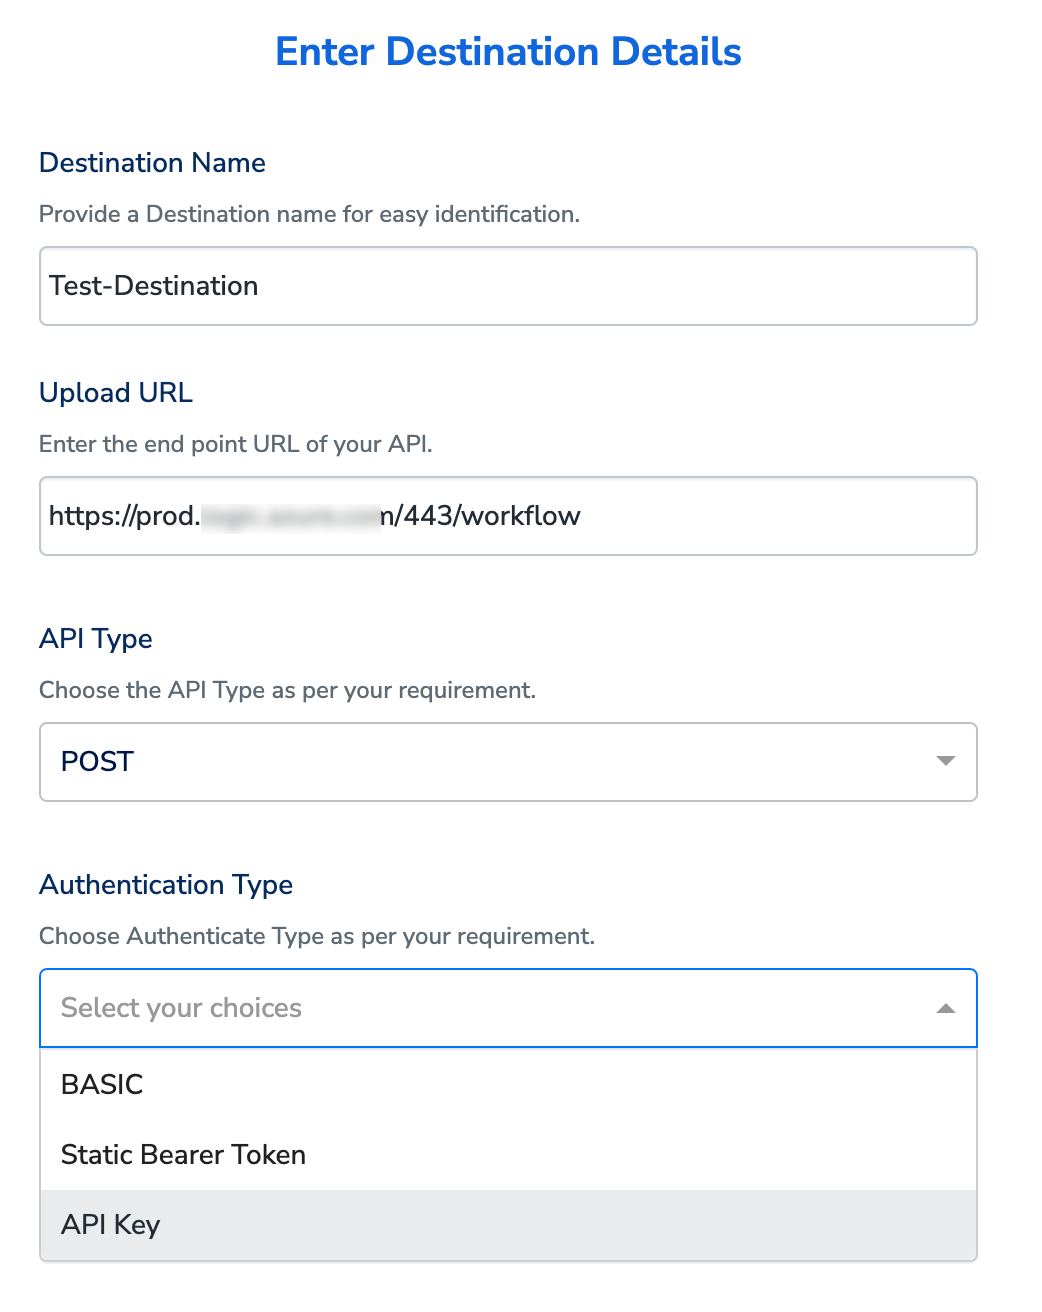
In the mapping screen that appears, under Choose your Action, select Send identifiers and attributes to Zeotap Webhook as the action for sending data from the workflow created in Journeys. Under Map the Fields, you can map custom data to the relevant Zeotap field and send to Zeotap Webhook.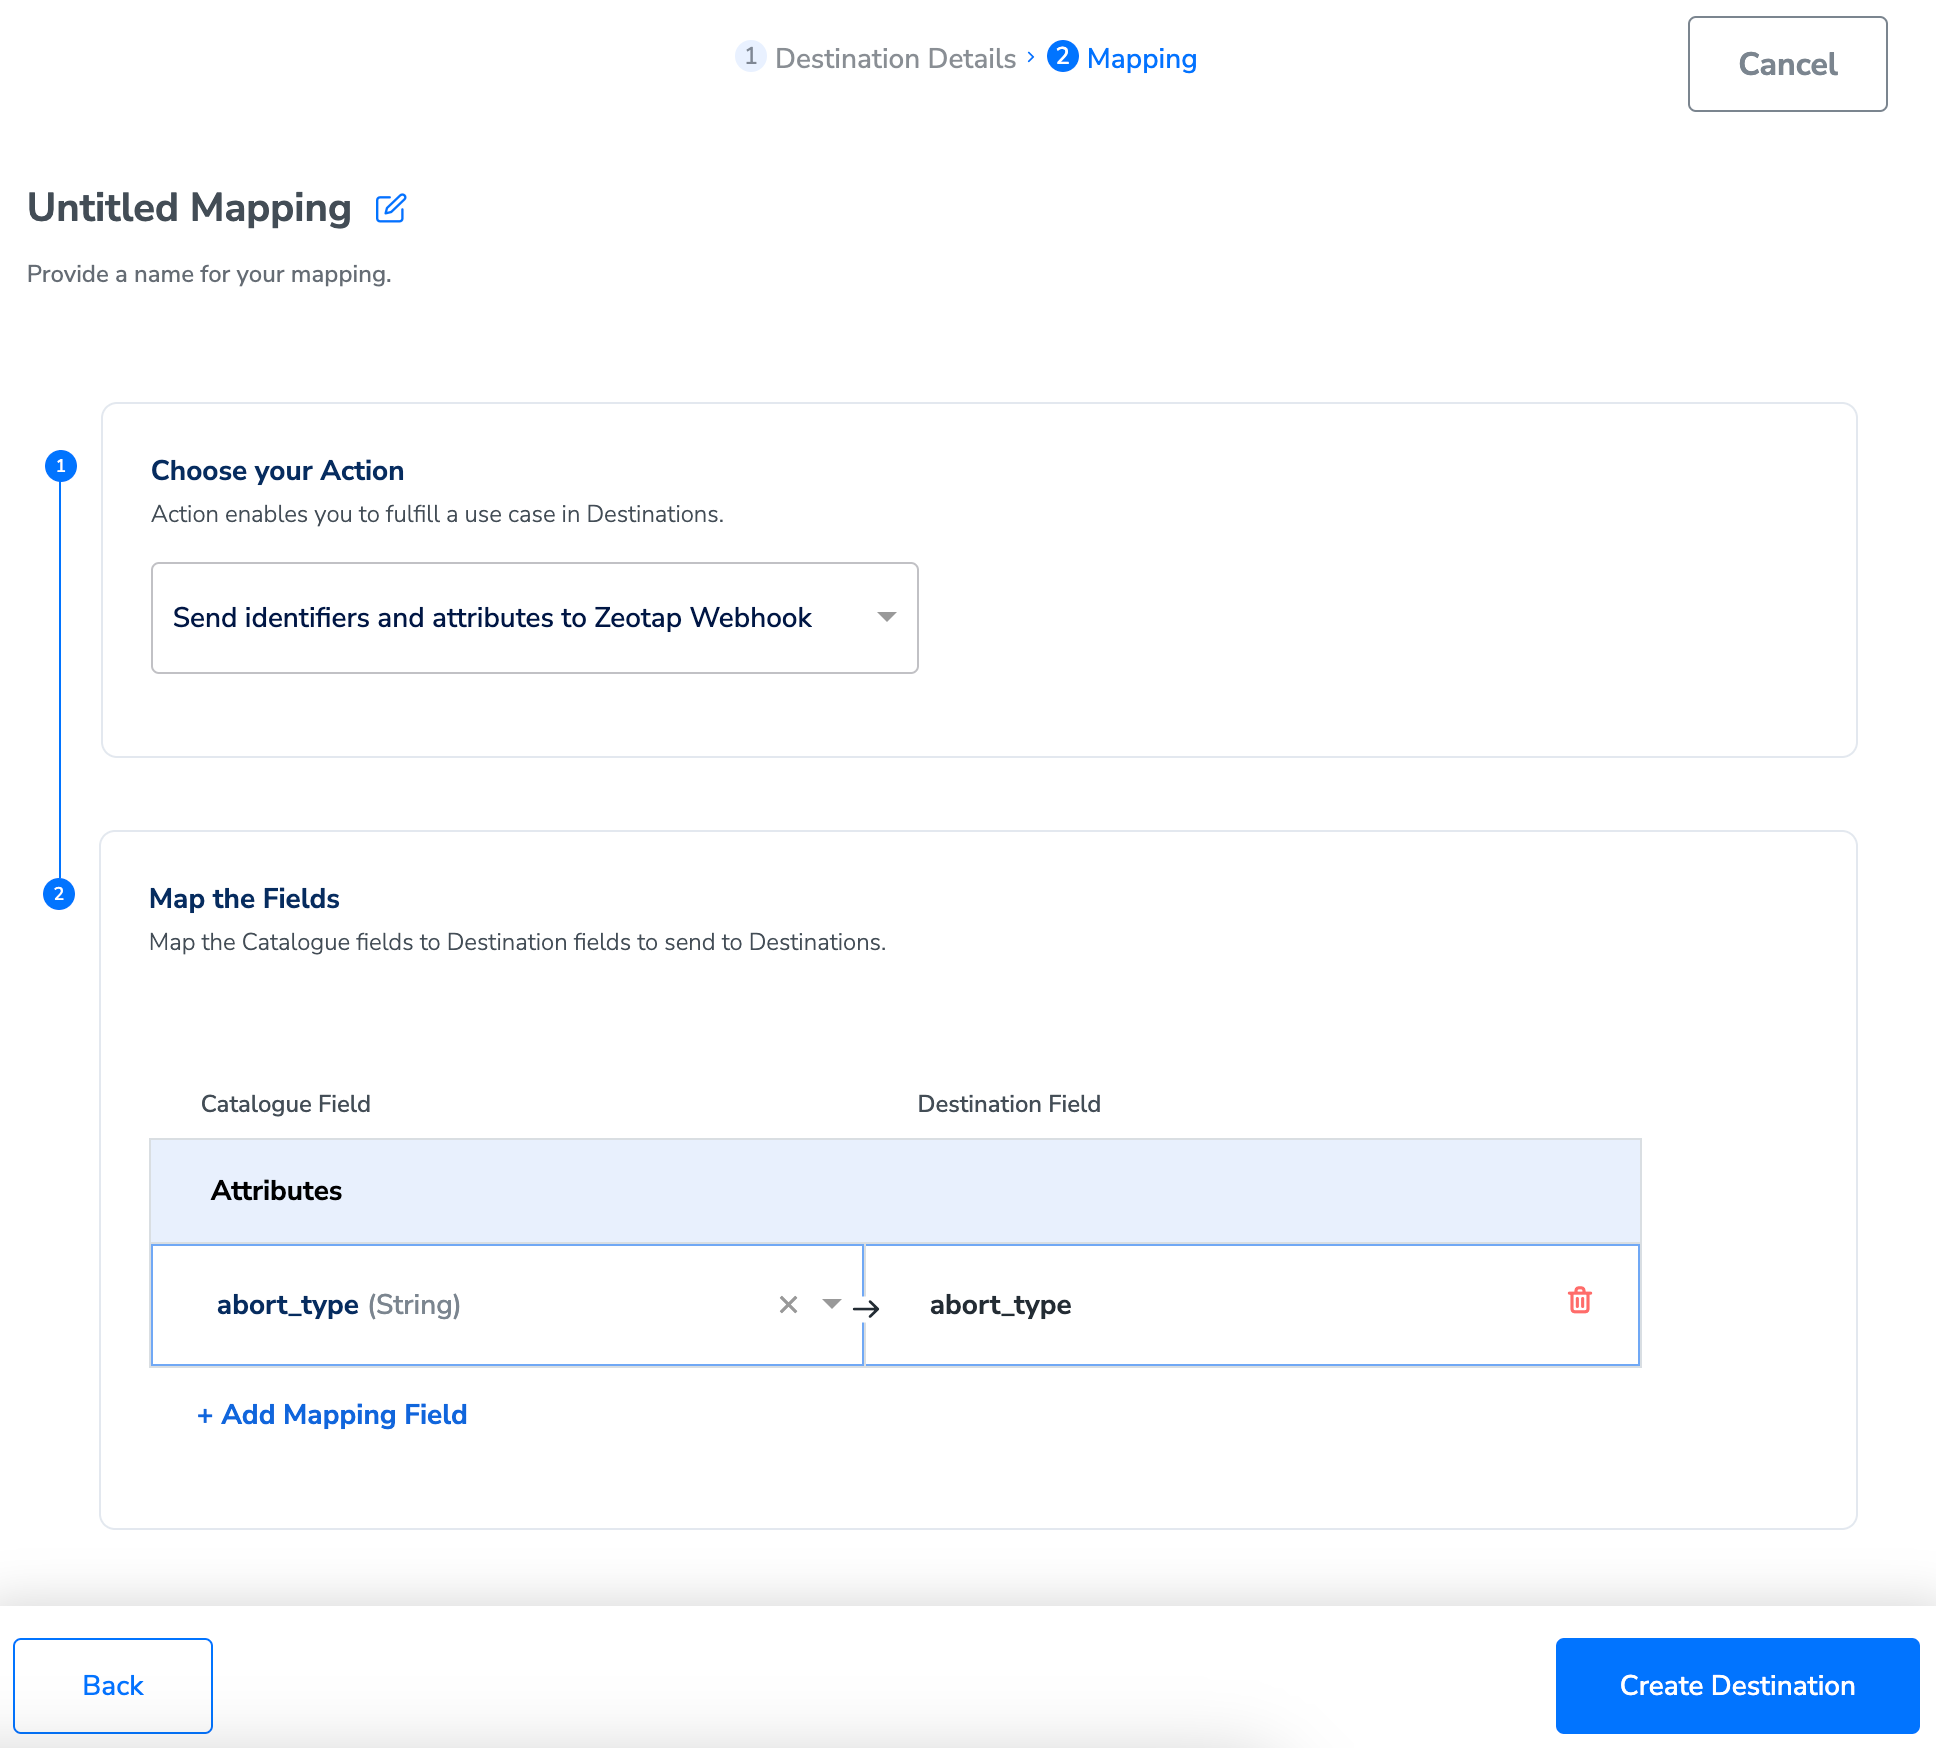
Note:Ensure that you map at least one attribute. Otherwise, the data does not flow to the Destination.
Activate the Destination on Journeys
After creating a destination, next, you need to link it in the Send to Destination node within the workflow, as explained below.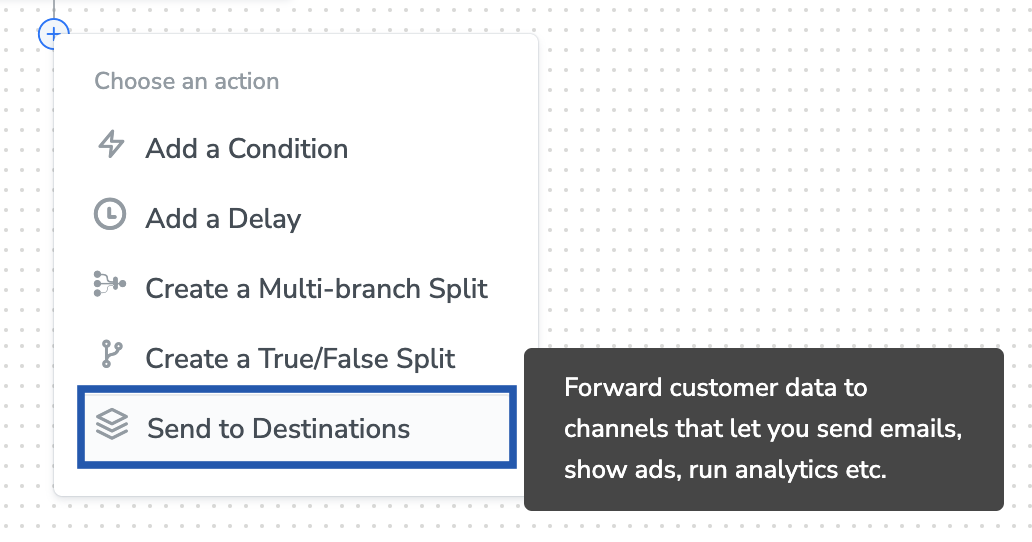

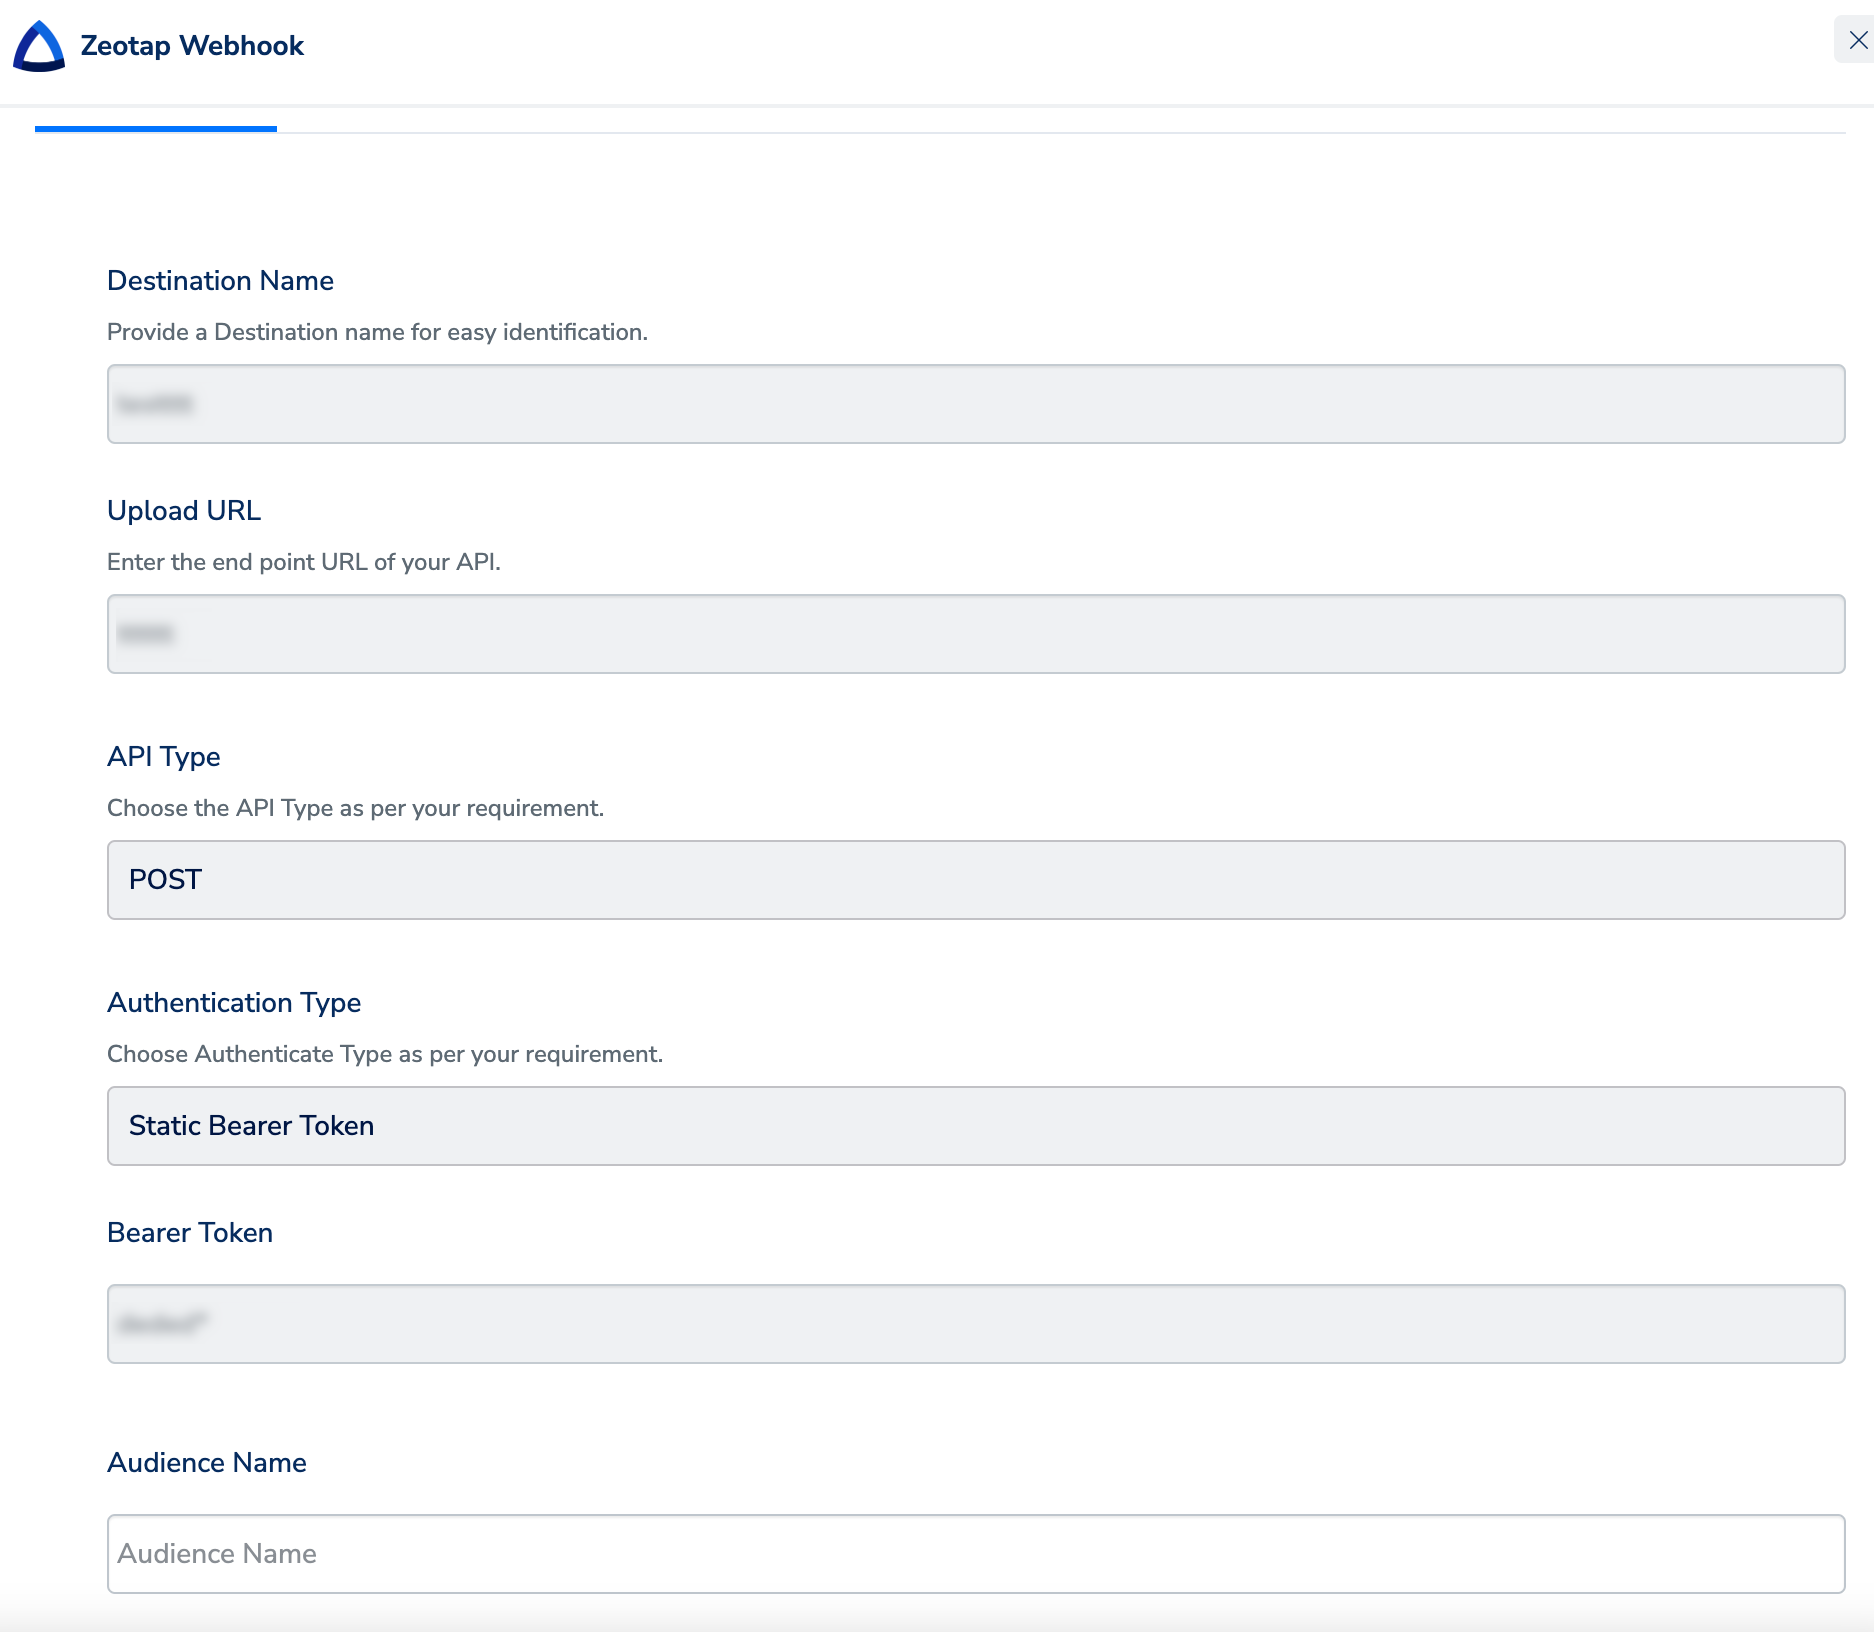
Under the Destination Details tab, the Upload URL, API Type, Authentication Type and Bearer Token fields are automatically populated based on the value that you had entered while creating the destination. However, in the Audience field, enter a name to categorise your users.