Overview
Oracle Responsys is a cloud-based marketing automation platform designed to help businesses create personalized, data-driven marketing campaigns across multiple channels, including email, mobile, web, and social. It enables brands to engage with customers at the right time through targeted communications, utilizing customer data to optimize marketing efforts. The platform offers tools for segmentation, campaign management, analytics, and real-time personalization, helping businesses enhance customer experiences, increase engagement, and drive conversions. Responsys is particularly beneficial for enterprise-level companies with complex marketing needs, offering scalable solutions to improve customer relationships and optimize marketing ROI. The Responsys Journeys integration with Zeotap allows the customer to trigger emails in Responsys based on the workflows created in Zeotap.Responsys concepts and terminologies
- Trigger email messages a. This API endpoint is used to Trigger on-demand campaign message delivery to specific recipients for Email, SMS, and Push campaigns
- Merge member into a profile list and trigger emails a. Using the Merge Trigger APIs, you can also merge data into your Profile List and immediately trigger the campaign to the merged recipients.
Supported Identifiers
This integration supports customerId, emailAddress, emailMD5Hash, and emailSHA256HashPrerequisites
Before you create an Responsys Destination in Zeotap , ensure to have the following details :- Username a. This is the username of your Responsys account
- Password a. This is the password your Responsys account
-
URL dropdown
a. You can find your account’s endpoint by simply going to your Oracle Responsys login screen and looking at your url.
i. For example : https://interact2.responsys.net
ii. NOTE: You can find your account’s endpoint by simply going to your Oracle Responsys login screen and looking at your url.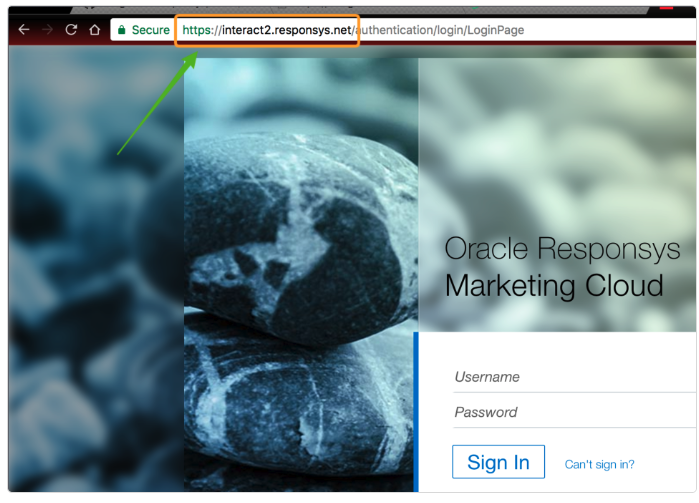
- Profile List name a. This is the name of the profile list where the data sent from Zeotap would be updated.
- Profile Extension table name (only for this action we need this) a. This is the name of the profile extension table where the data sent from Zeotap would be updated.
- Folder name a. This is the name of the folder within Responsys where the data sent from Zeotap would be populated.
- Campaign Name a. The campaign in Responsys which needs to be triggered based on the workflow created in Zeotap.
Destination setup in Journeys
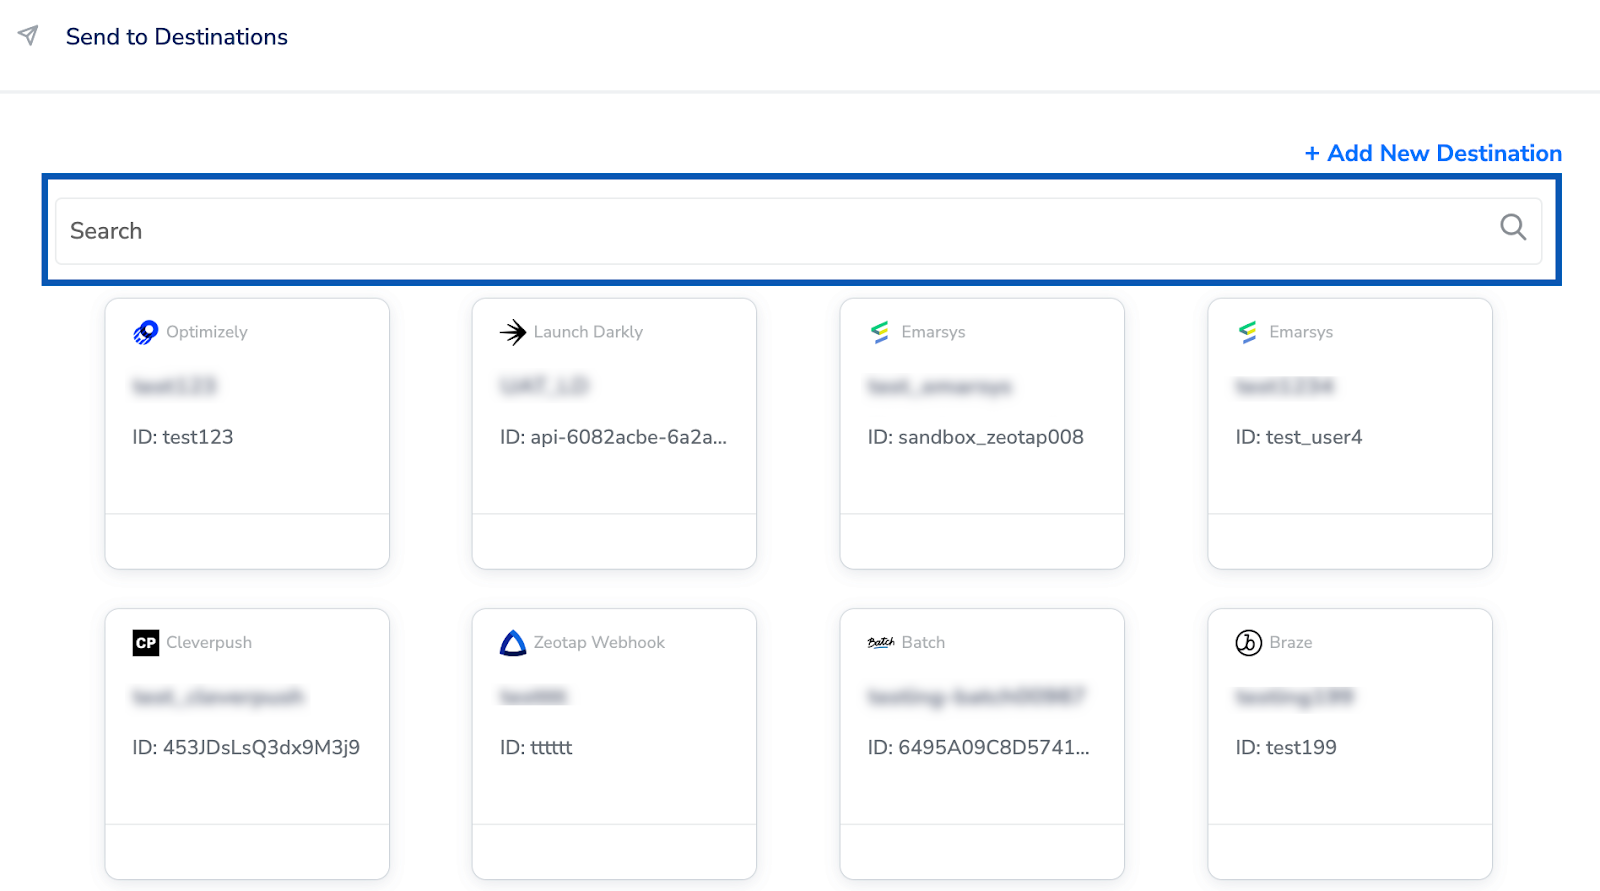
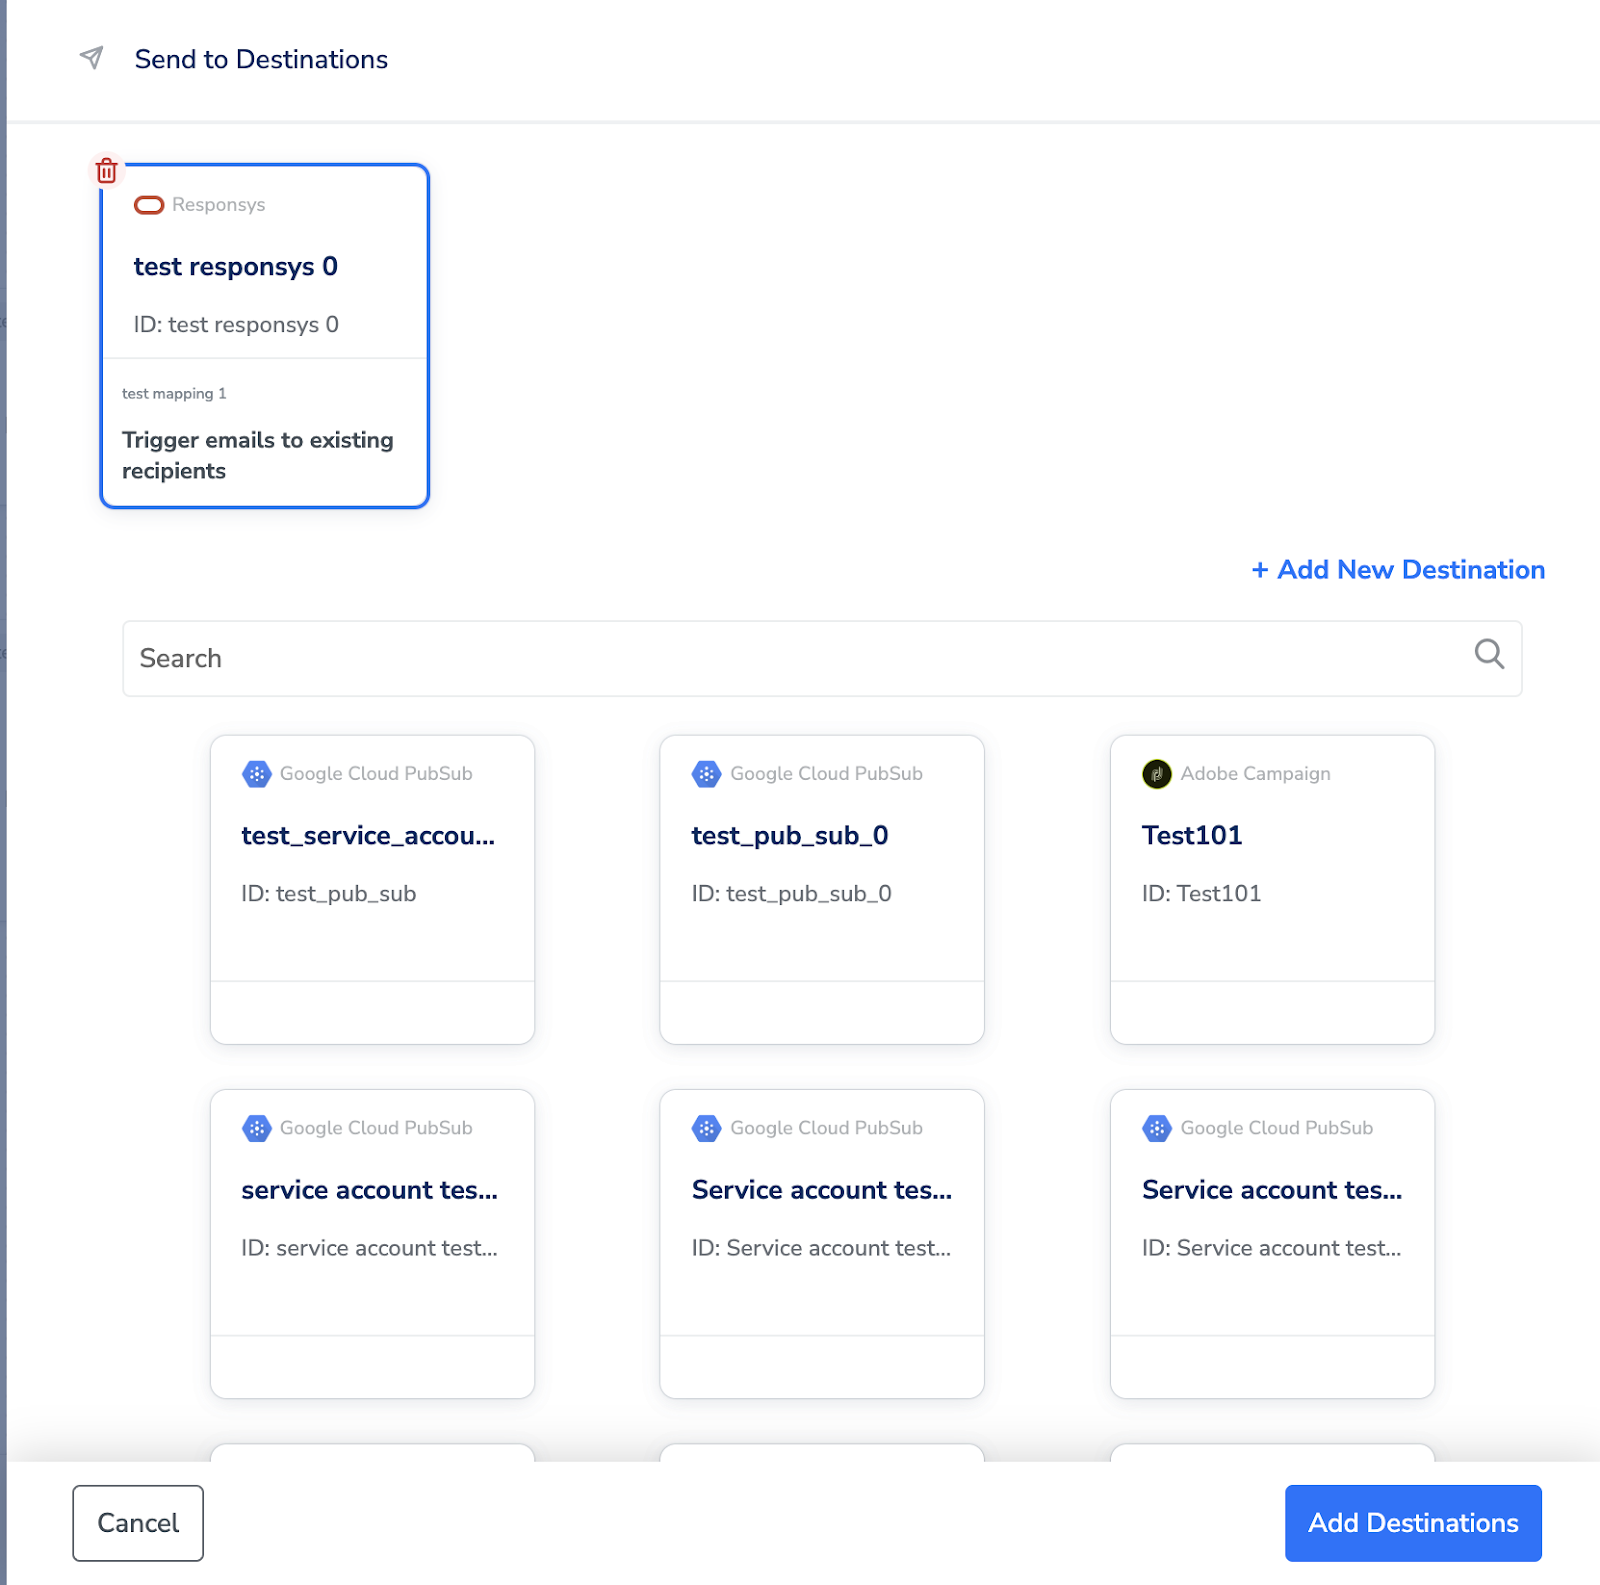
After configuring and obtaining the required fields from the Emarsys platform, you can create a workflow in Journeys (Zeotap CDP). Apply filters or add conditions for your users in Journeys, then activate them in Emarsys by clicking Send to Destinations at the node level, as shown in the image below. A new window appears where you can set up your destination. You can either select an existing destination from the list of available Destinations or create a new one by clicking + Add New Destination.
Add New Destination
Perform the following steps to add a new destination:In the Profile List name field, enter the name of the profile list in Responsys where the data sent from Zeotap needs to be updated.
In the Profile Extension table name field, enter the name of the profile extension table in Responsys where the data sent from Zeotap needs to be updated.
In the Folder field, provide the folder path in your Responsys instance where the data sent from Zeotap CDP can be stored.

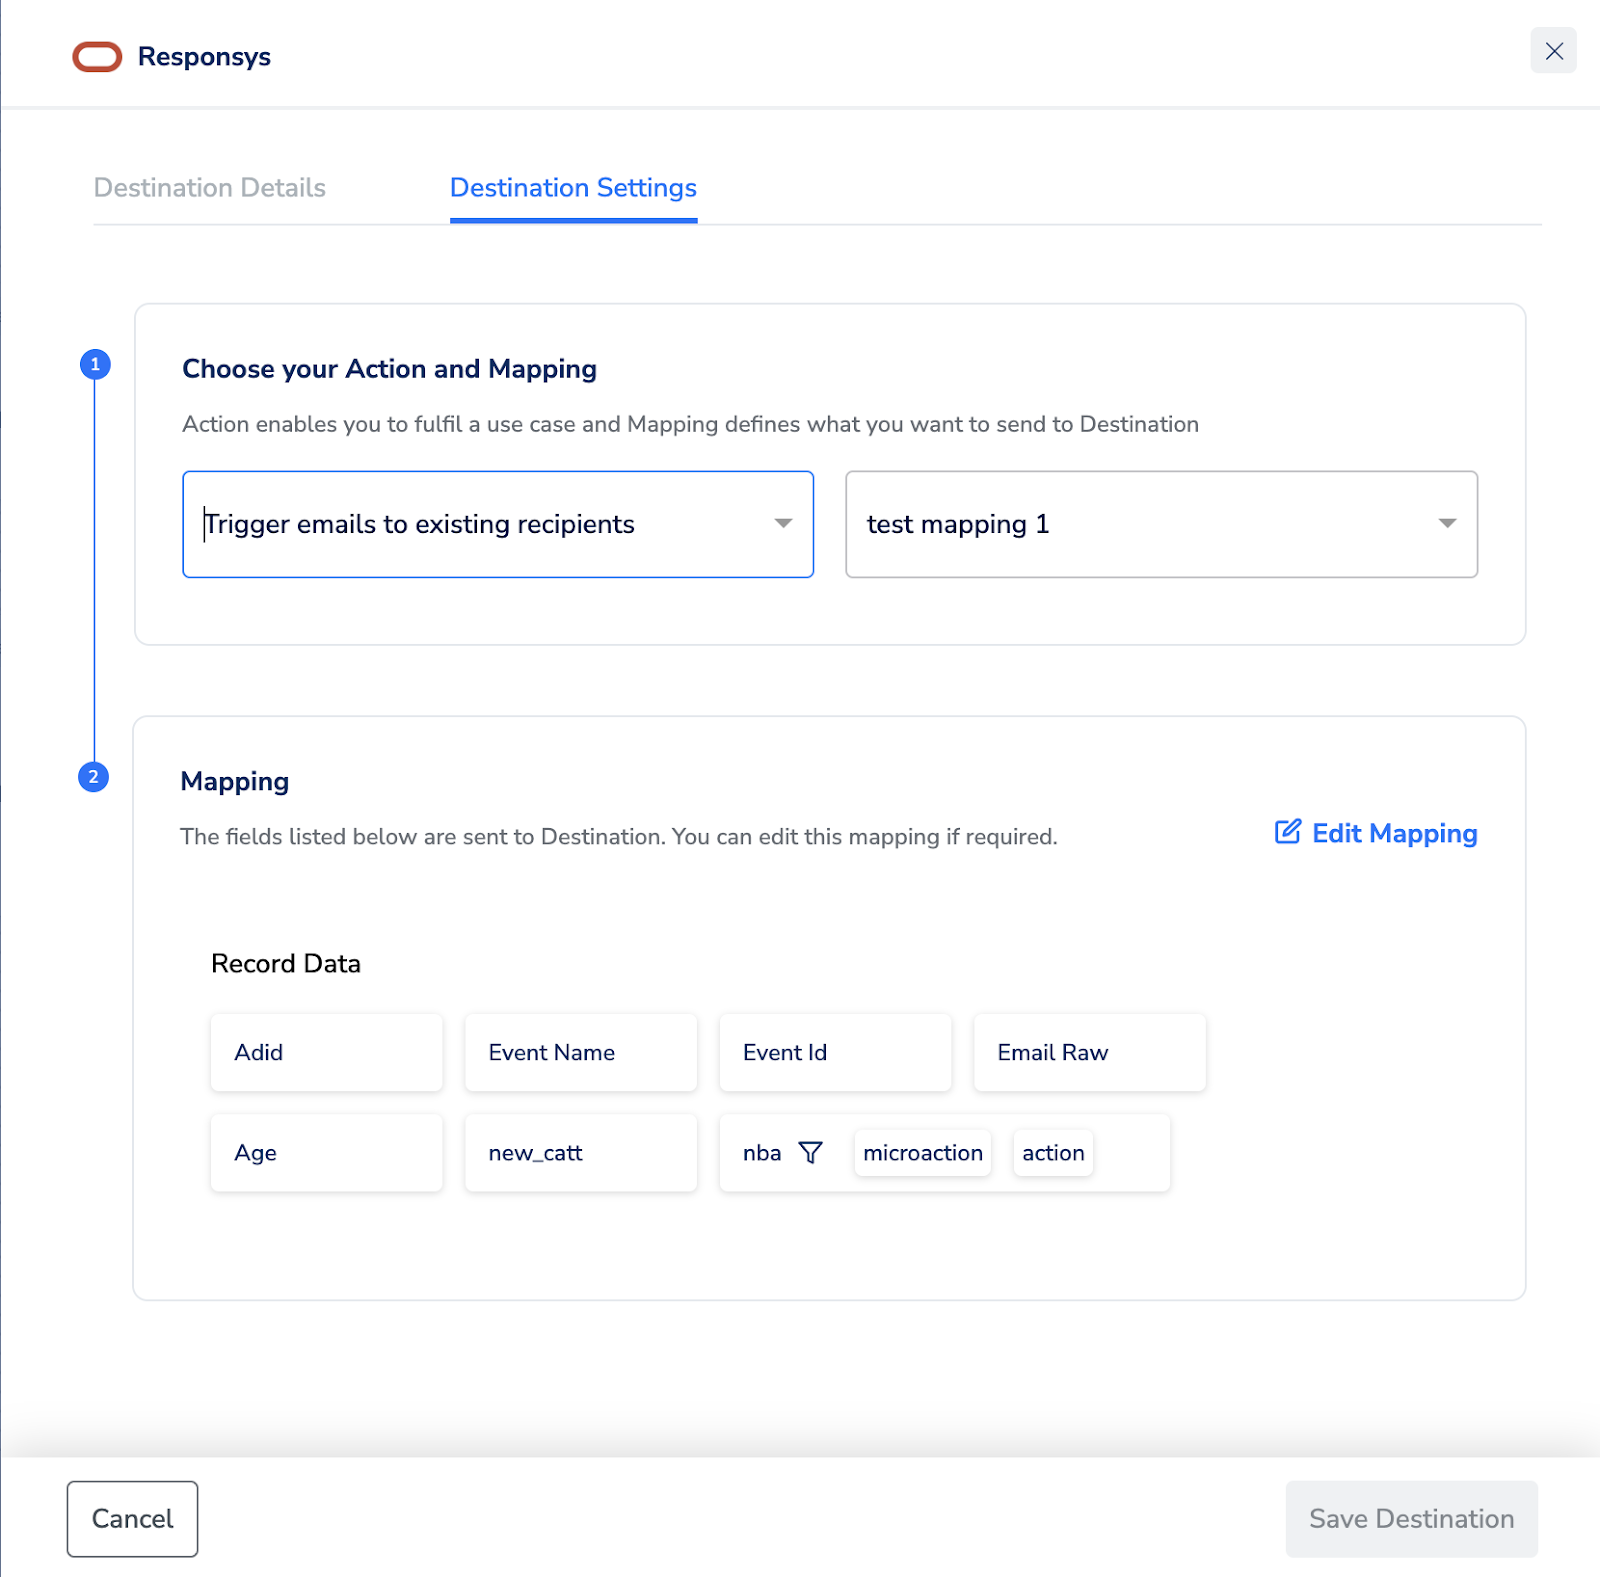
In the Actions and Mapping screen that appears, you can choose one of the following actions as per your requirement:a. Trigger emails to existing recipients
b. Trigger emails to existing and new recipients
b. Trigger emails to existing and new recipients
Based on the actions you choose, map the catalogue fields to the corresponding destinations fields. Ensure that you map the mandatory fields, otherwise destination will fail.
Activate the destination in Journeys
After creating a destination, next, you need to link it in the Send to Destination node within the workflow, as explained below.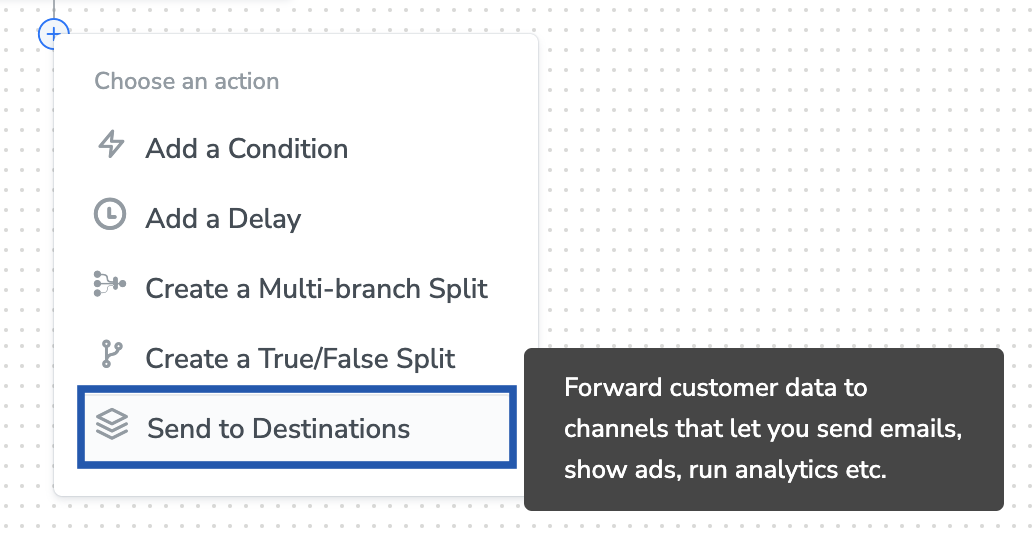
Under the Destination Details tab, all the fields required for Responsys destination that you entered while creating the destination is already populated. However, you need to enter the following details :a. Campaign namei. This is the Campaign name in Responsys which needs to be triggered based on the workflow setup in Zeotap.b. Match Column 1i. First match column for determining whether an insert or update should occur in Responsys.c. Match Column 2i. Second match column for determining whether an insert or update should occur in Responsys. (optional)d. Insert On No Matchi. Indicates what should be done for records where a match is not found in Responsys (true = insert / false = no insert)e. Update On Matchi. Controls how the existing record should be updated in Responsys (Values - Replace All, No Update)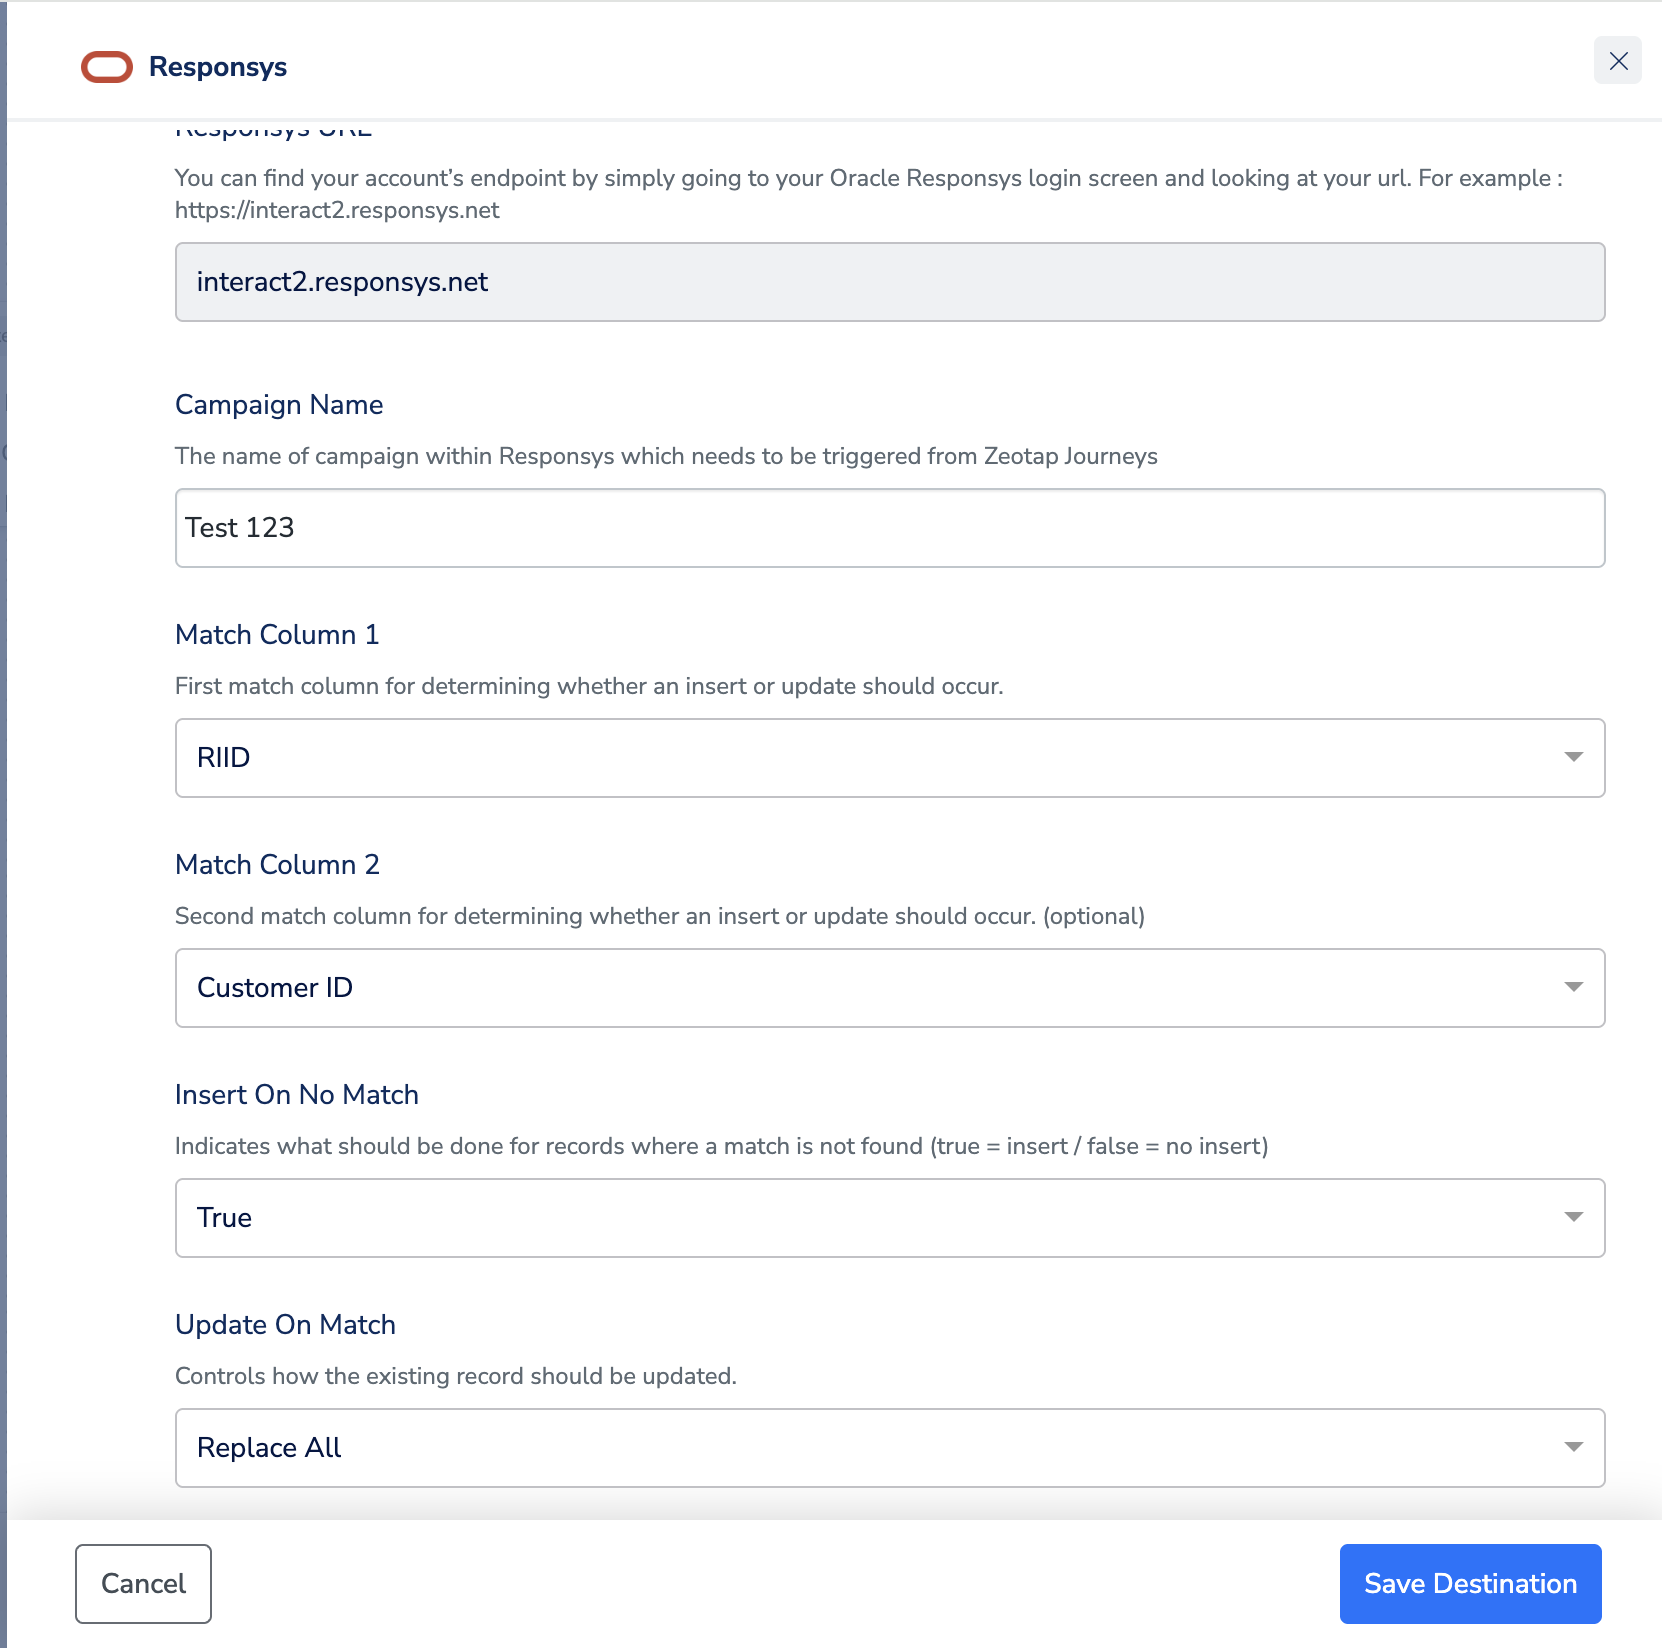
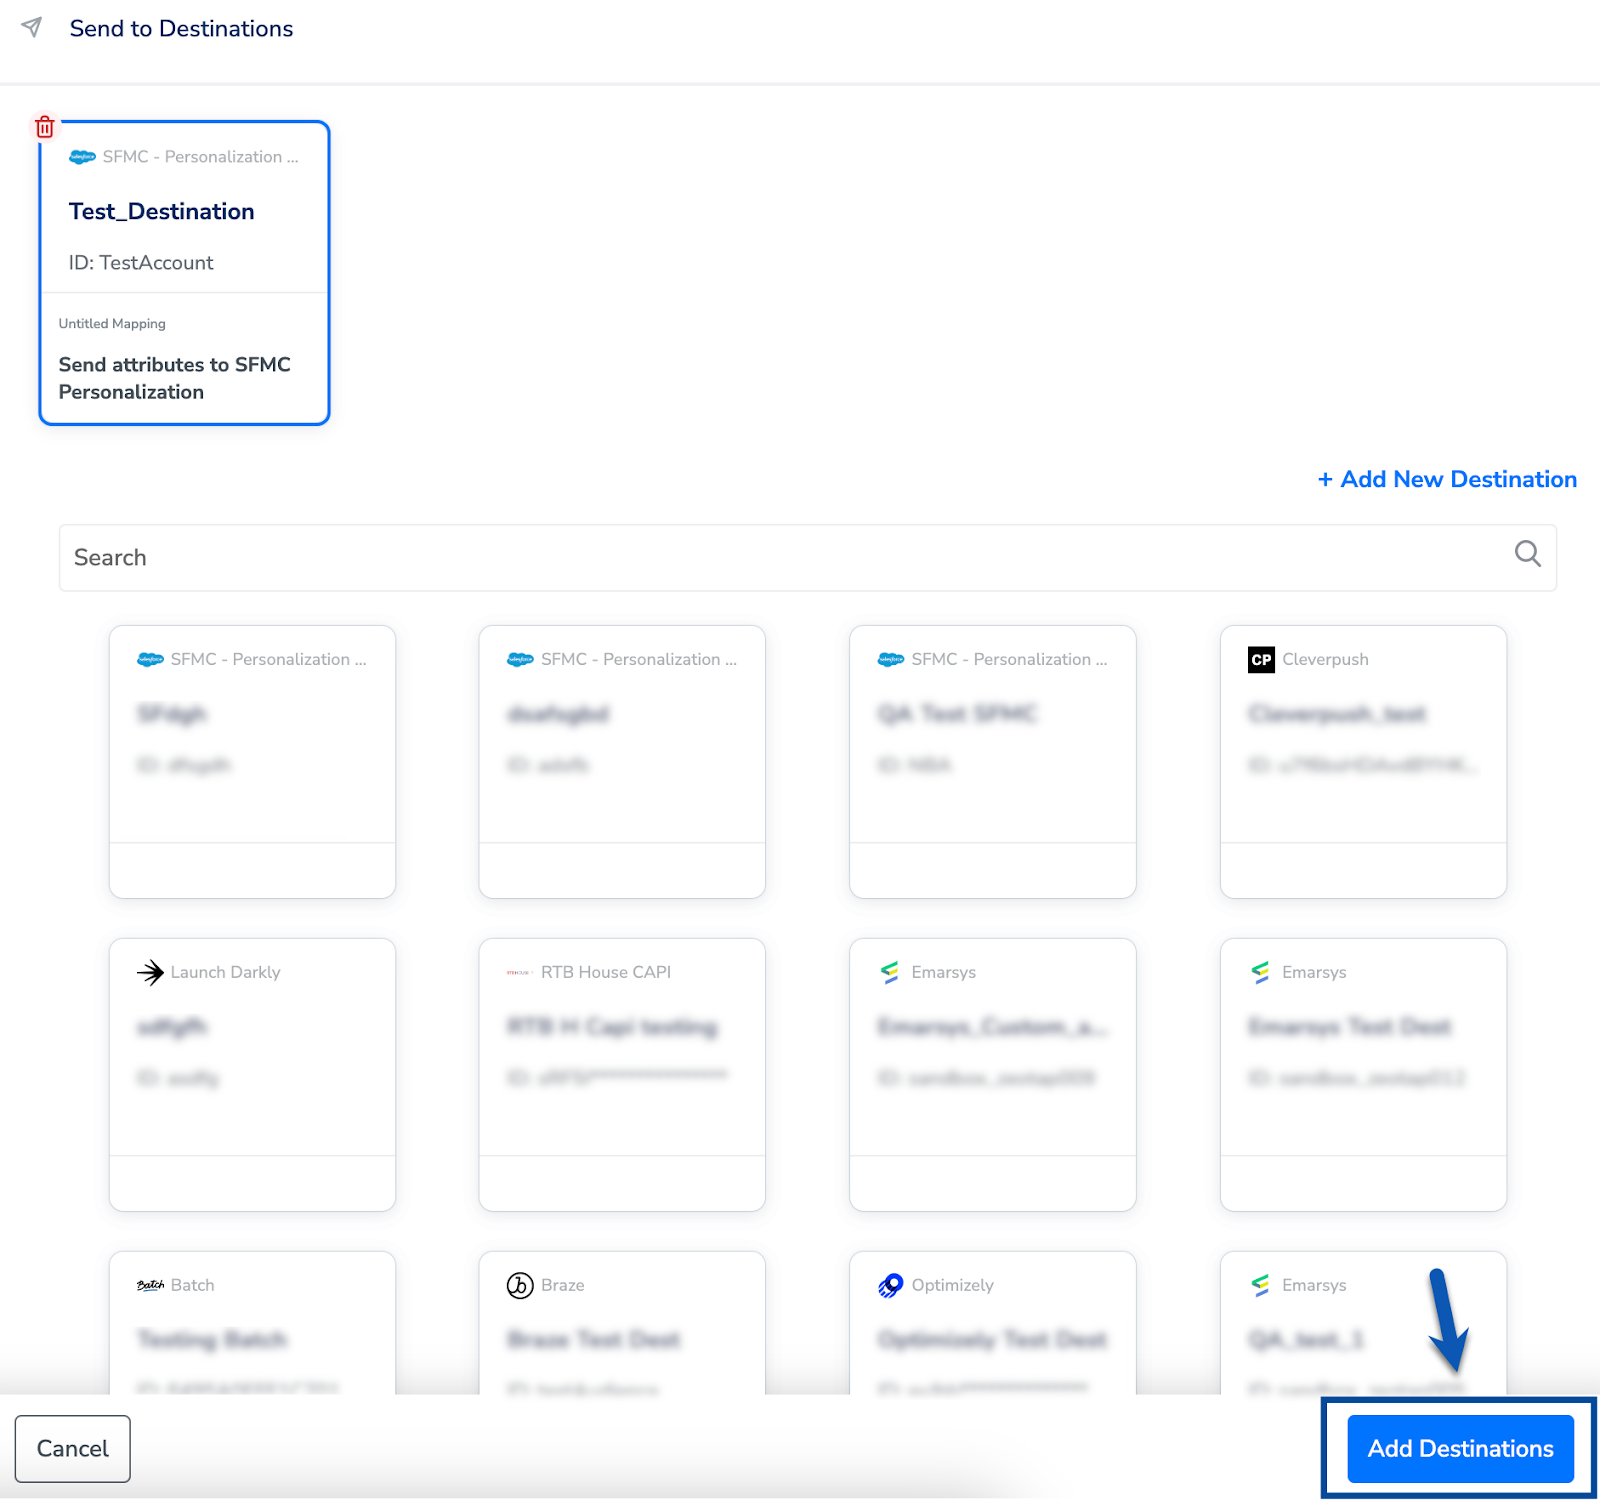
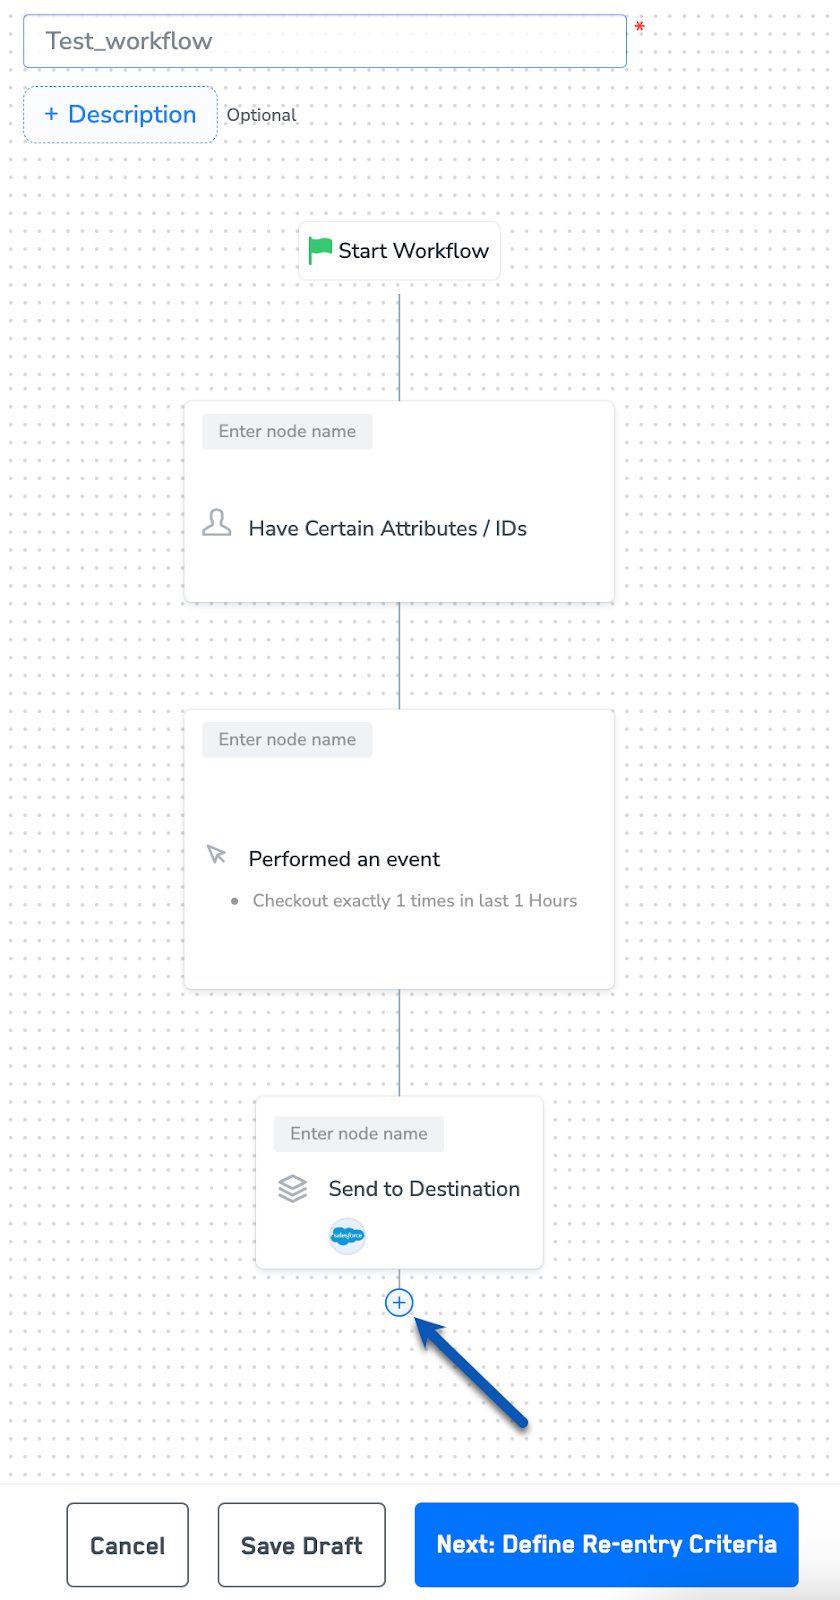
The linked Destinations appear in the Send to Destinations node within the workflow as shown below. Further, you can then build and customise your workflow as needed by clicking ’+’ . Note that you must enter a name for your workflow in the provided text box to save it.
After adding conditions and filters for users, choose one of the following options:
- Save Draft: Enables you to revisit and edit the workflow before publishing.
- Next: Re-entry Condition: Determines whether a user can re-enter the same workflow.