Overview
Google Pub/Sub is an asynchronous and scalable messaging service that decouples services producing messages from services processing those messages. Pub/Sub is used for streaming analytics and data integration pipelines to ingest and distribute data.Prerequisites
Ensure that you have the following details available before starting the integration:- Project Id
- Topic Id
- Authentication
Project Id
A Project ID is a unique string that differentiates your project from all others on Google Cloud. You can use the Google Cloud console to generate a Project ID. You can find the Project ID in the Google Cloud console - Dashboard page. In the below example, the Project name is My Sample Project and the Project ID is my-sample-project-191923.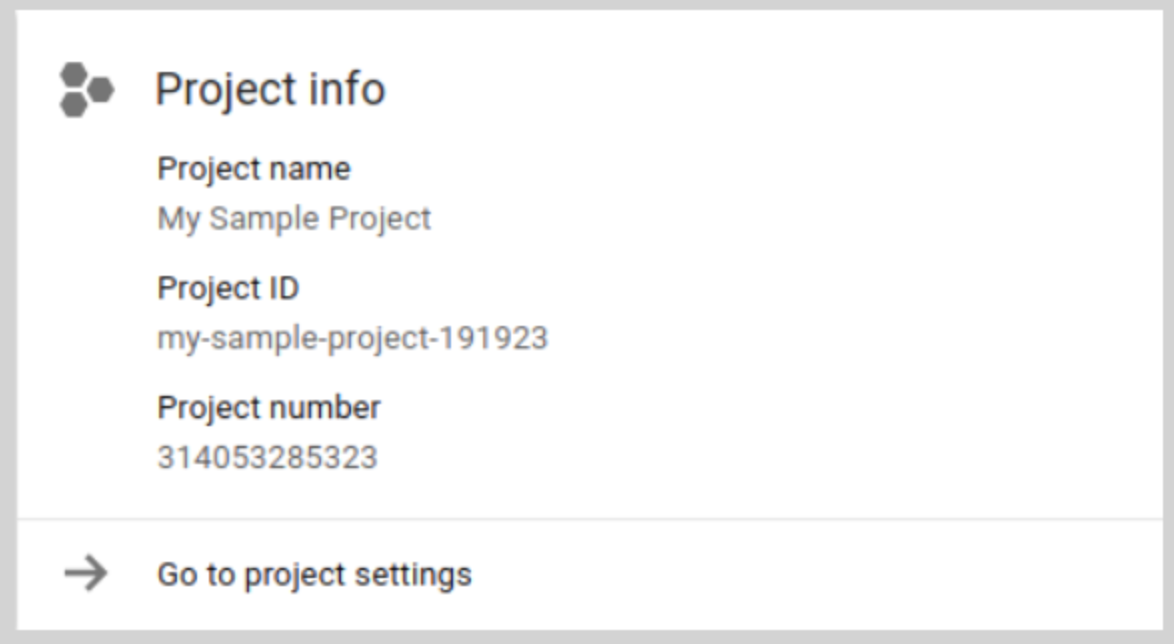
Topic Id
In the Google Cloud console, go to the Pub/Sub page > Topics. A list of all the topics created appears. Copy the relevant Topic Id and use it for the destination setup.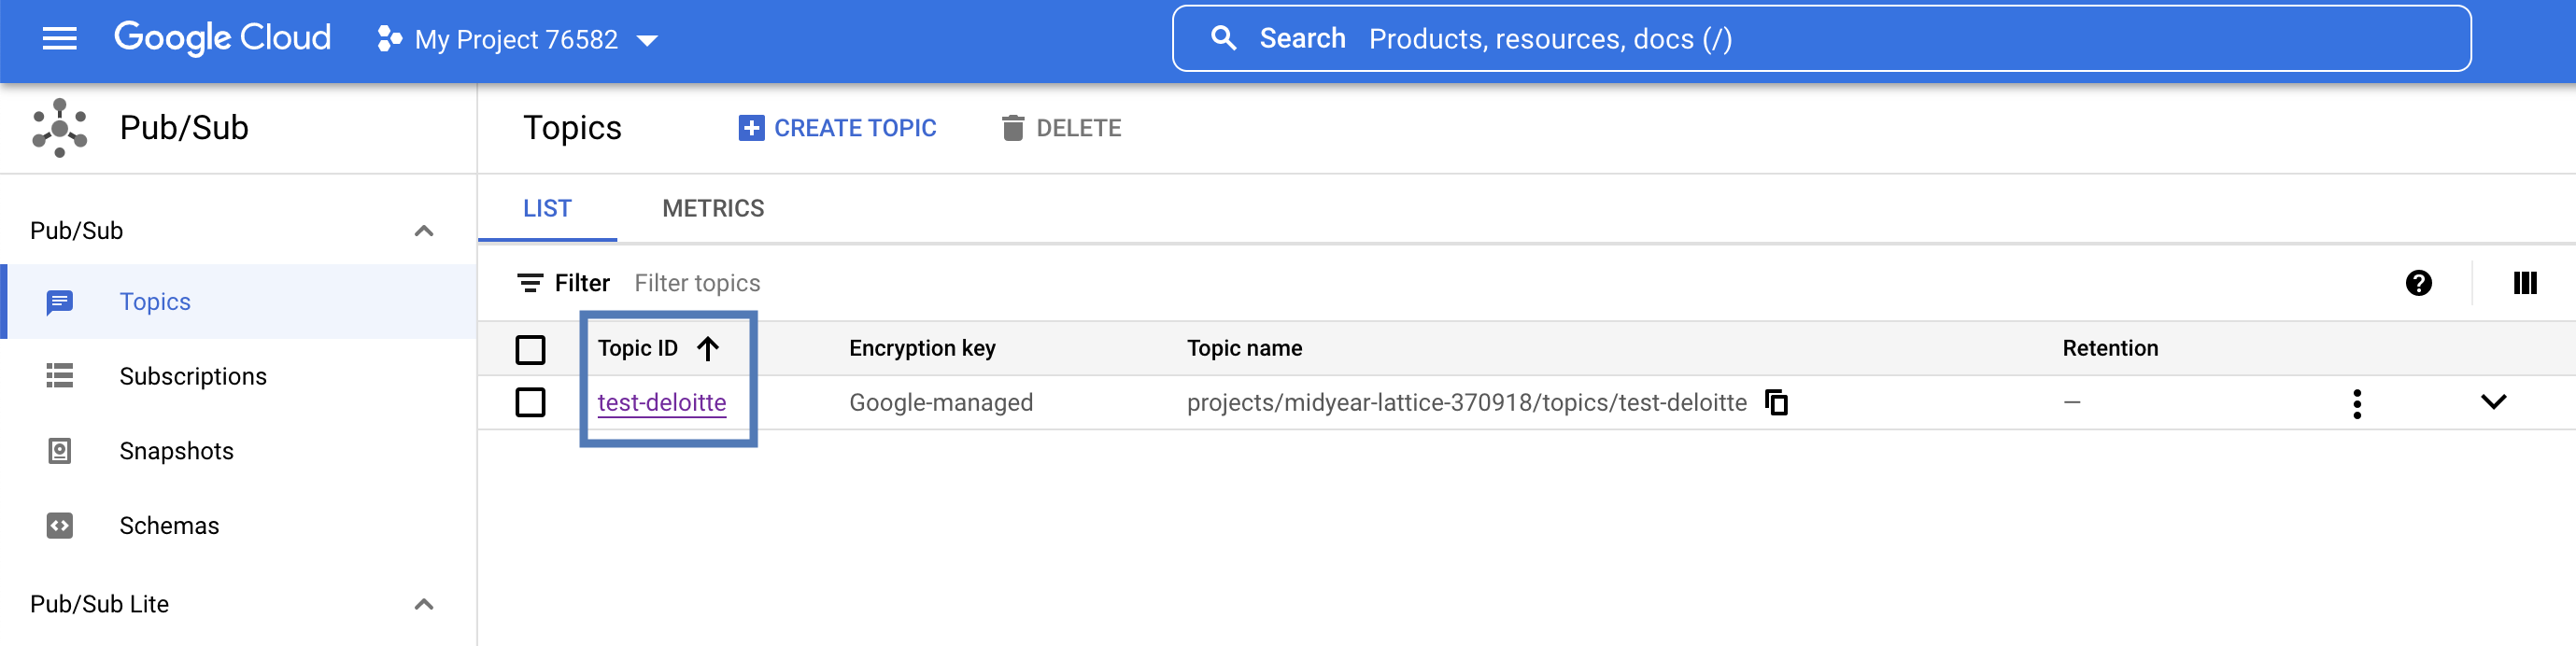
Authentication
The authentication method for the Pub/Sub destination can be Refresh Token or Service Account. Provide the required details based on the authentication method you choose.Refresh Token Authentication
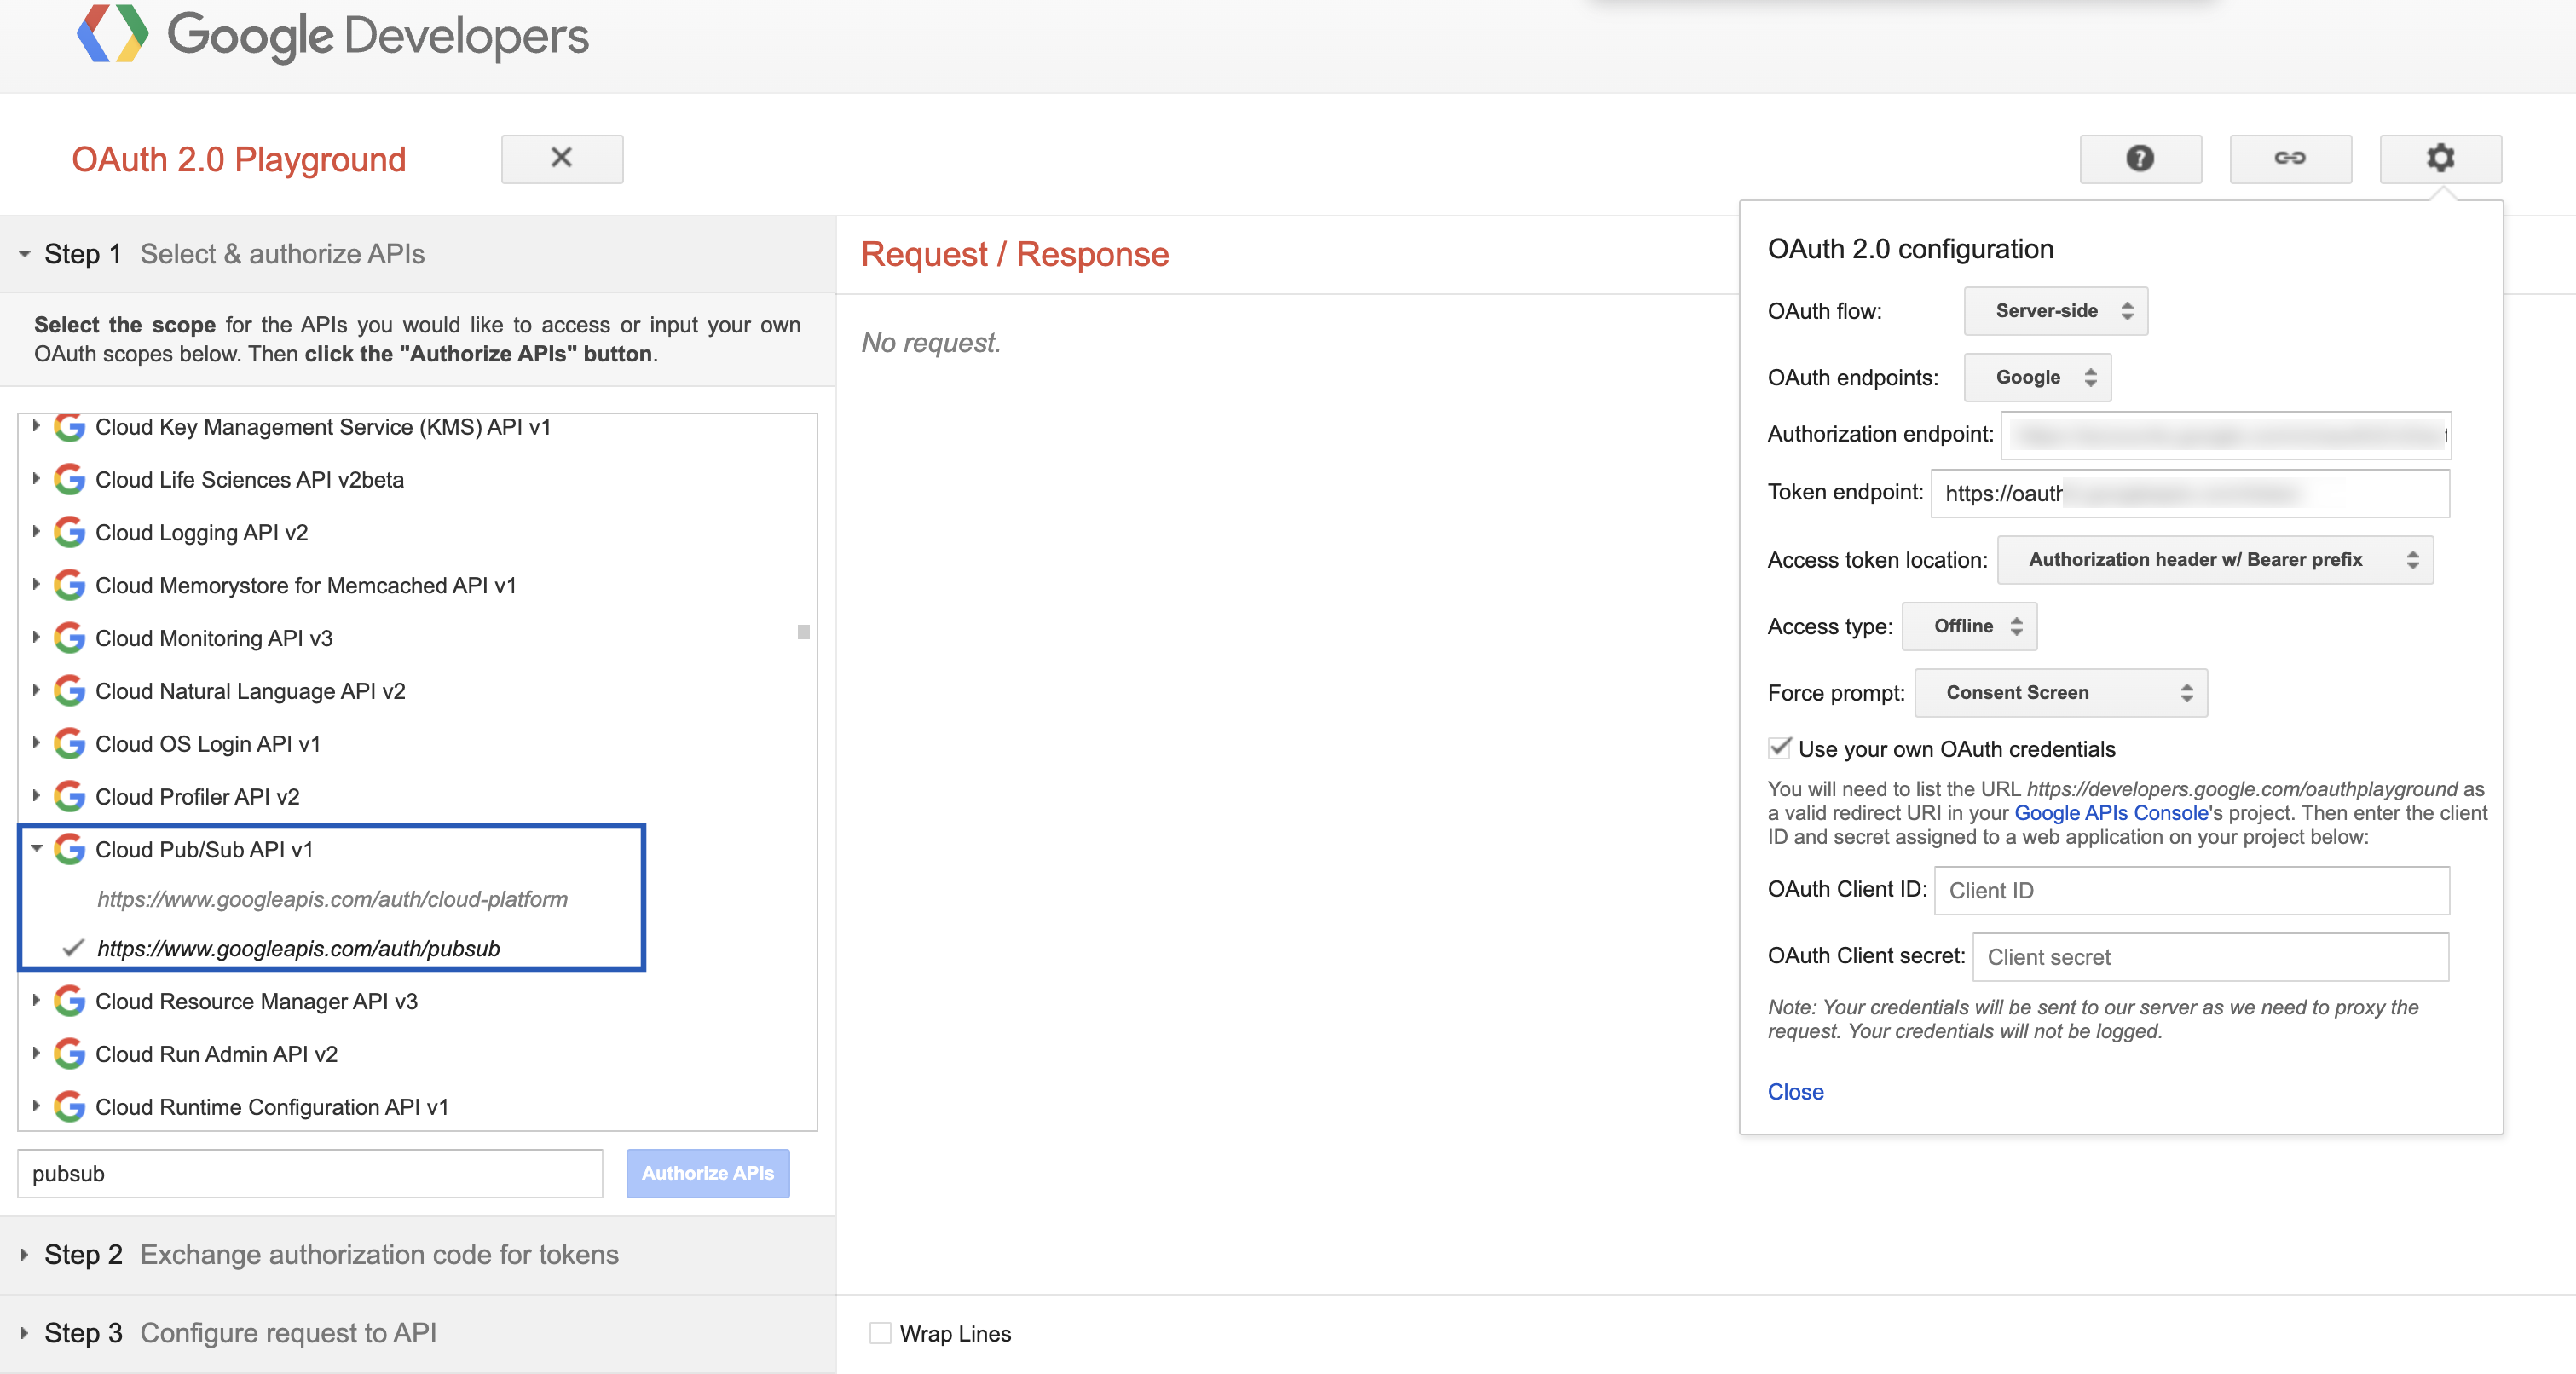
To authenticate using a Refresh Token, you need the following details:- Client ID
- Client Secret
- Refresh Token
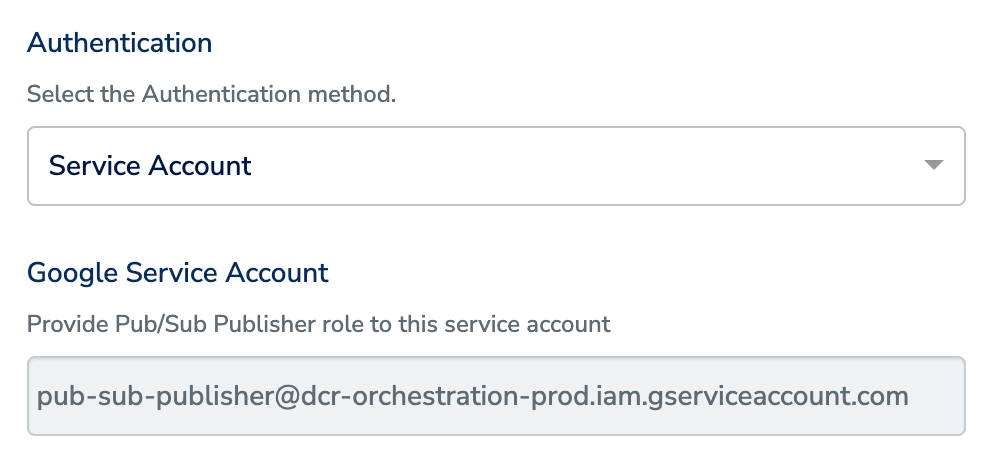
Service Account Authentication
To authenticate using a Service Account, you must assign the Pub/Sub Publisher role to the “[email protected]” service account within Pub/Sub as shown below.
Destination Setup
Once you have taken care of the prerequisites mentioned above, you can proceed to creating workflow in Journeys (Zeotap CDP). After you have applied filters or added conditions for your users in Journeys as mentioned in Create a Workflow, you can activate them in Google Pub/Sub in the Send to Destinations node as shown below.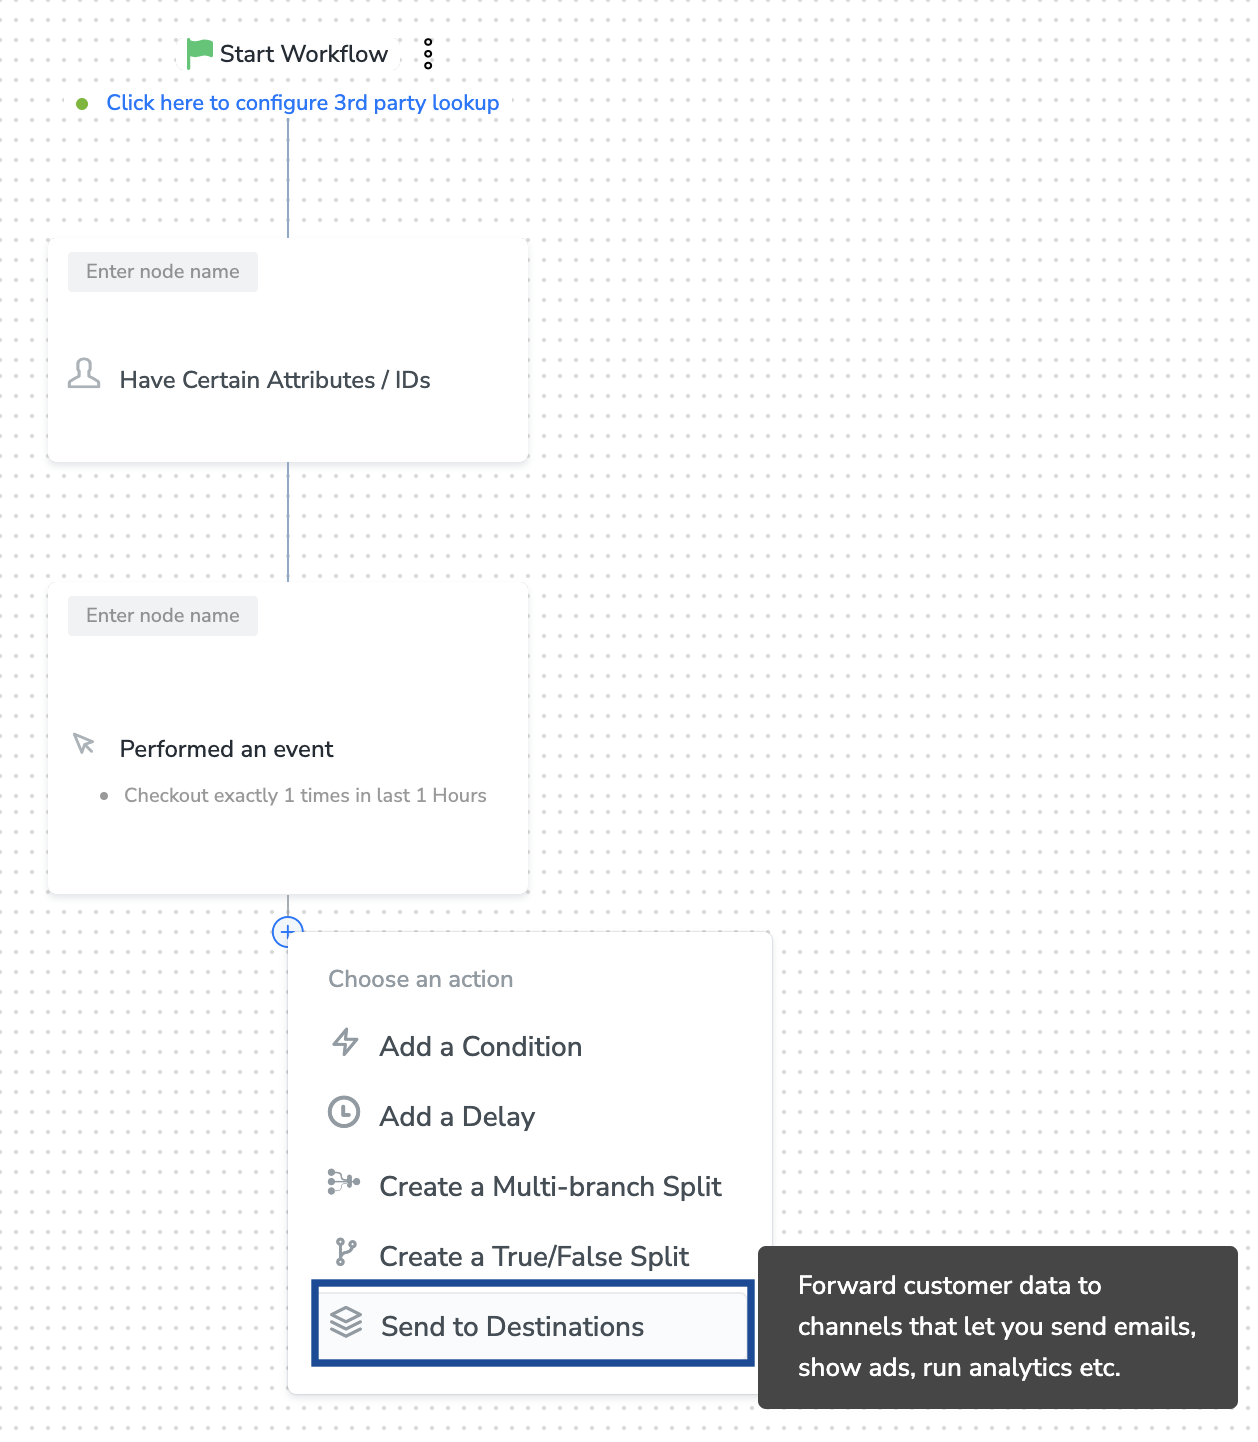
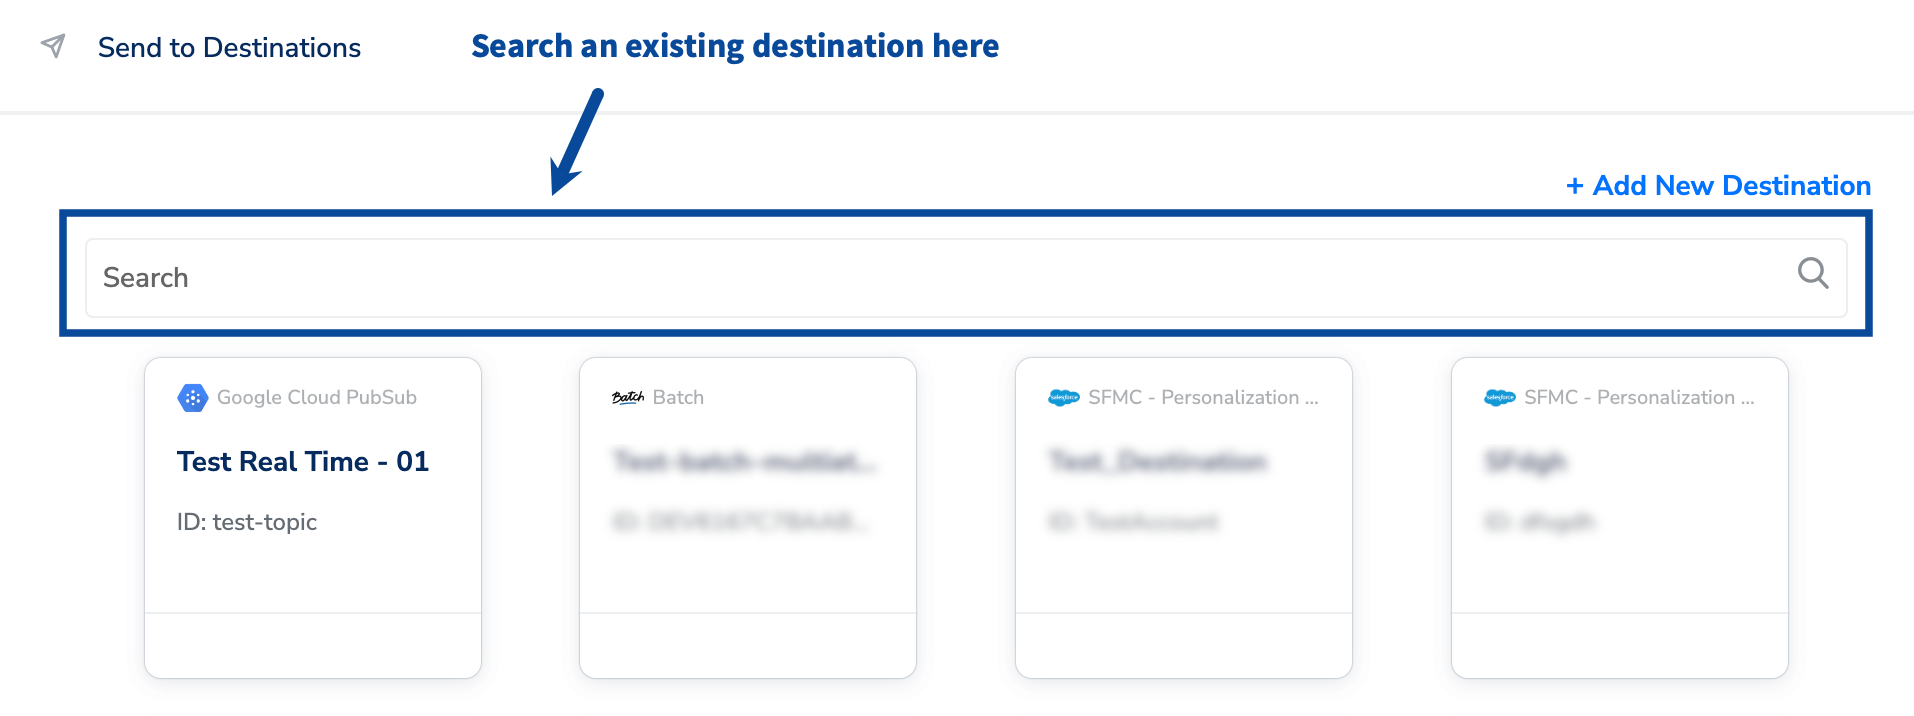
Note:To use an existing destination for activation in Journeys, click here.
Add New Destination
Perform the following steps to add a new destination:Provide the Project Id and Topic Id obtained from your Google Cloud. Learn more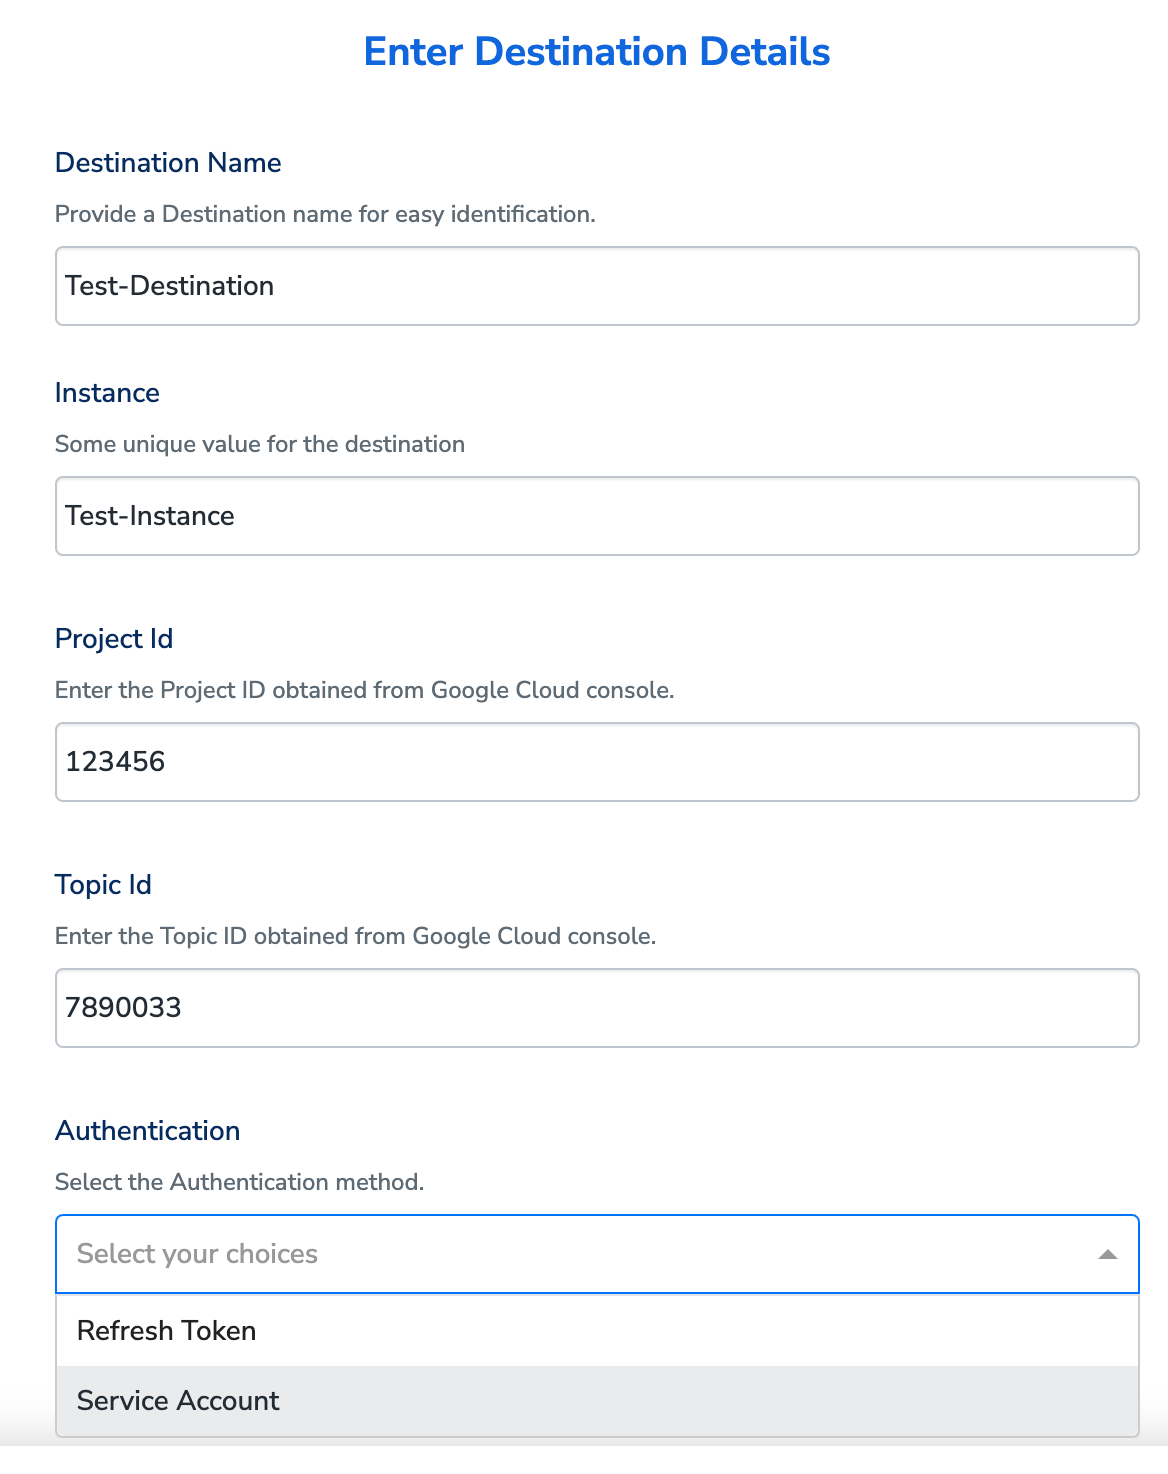
Choose either Refresh Token or Service Account as your Authentication method, based on your requirement.a. If you choose Refresh Token, then provide the Client Id, Client Secret and Refresh Token details in the respective fields. Learn more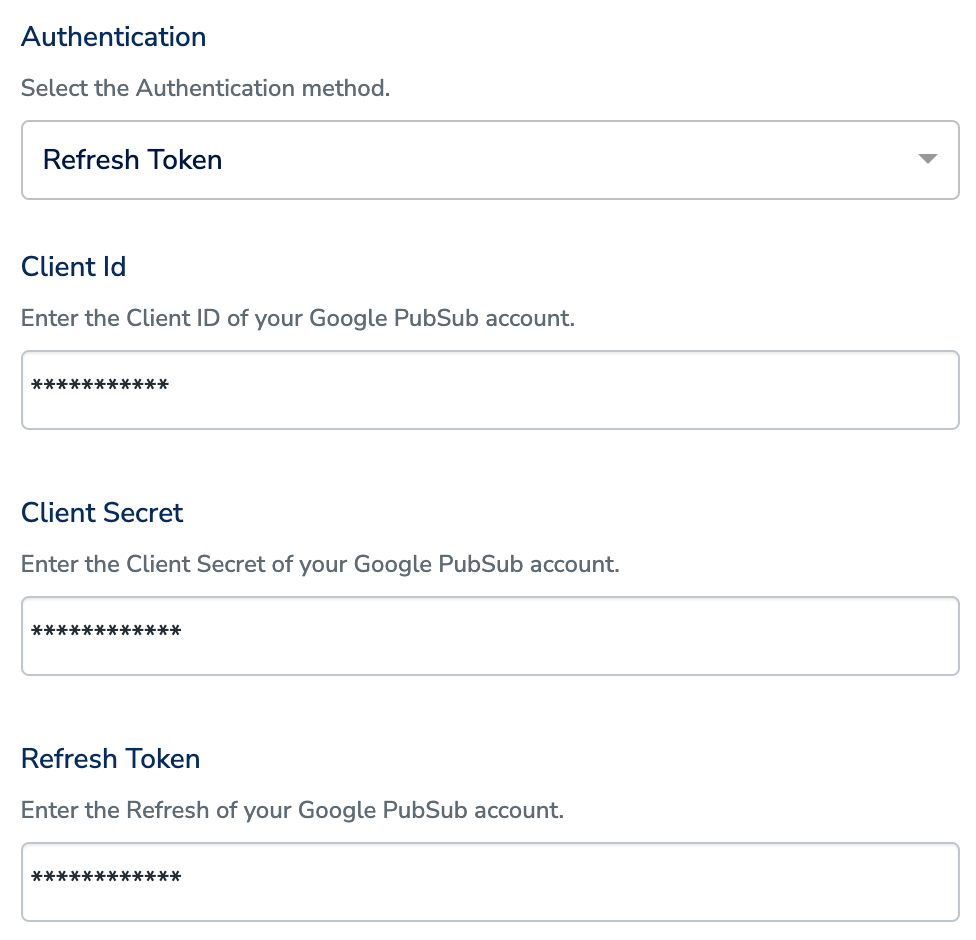
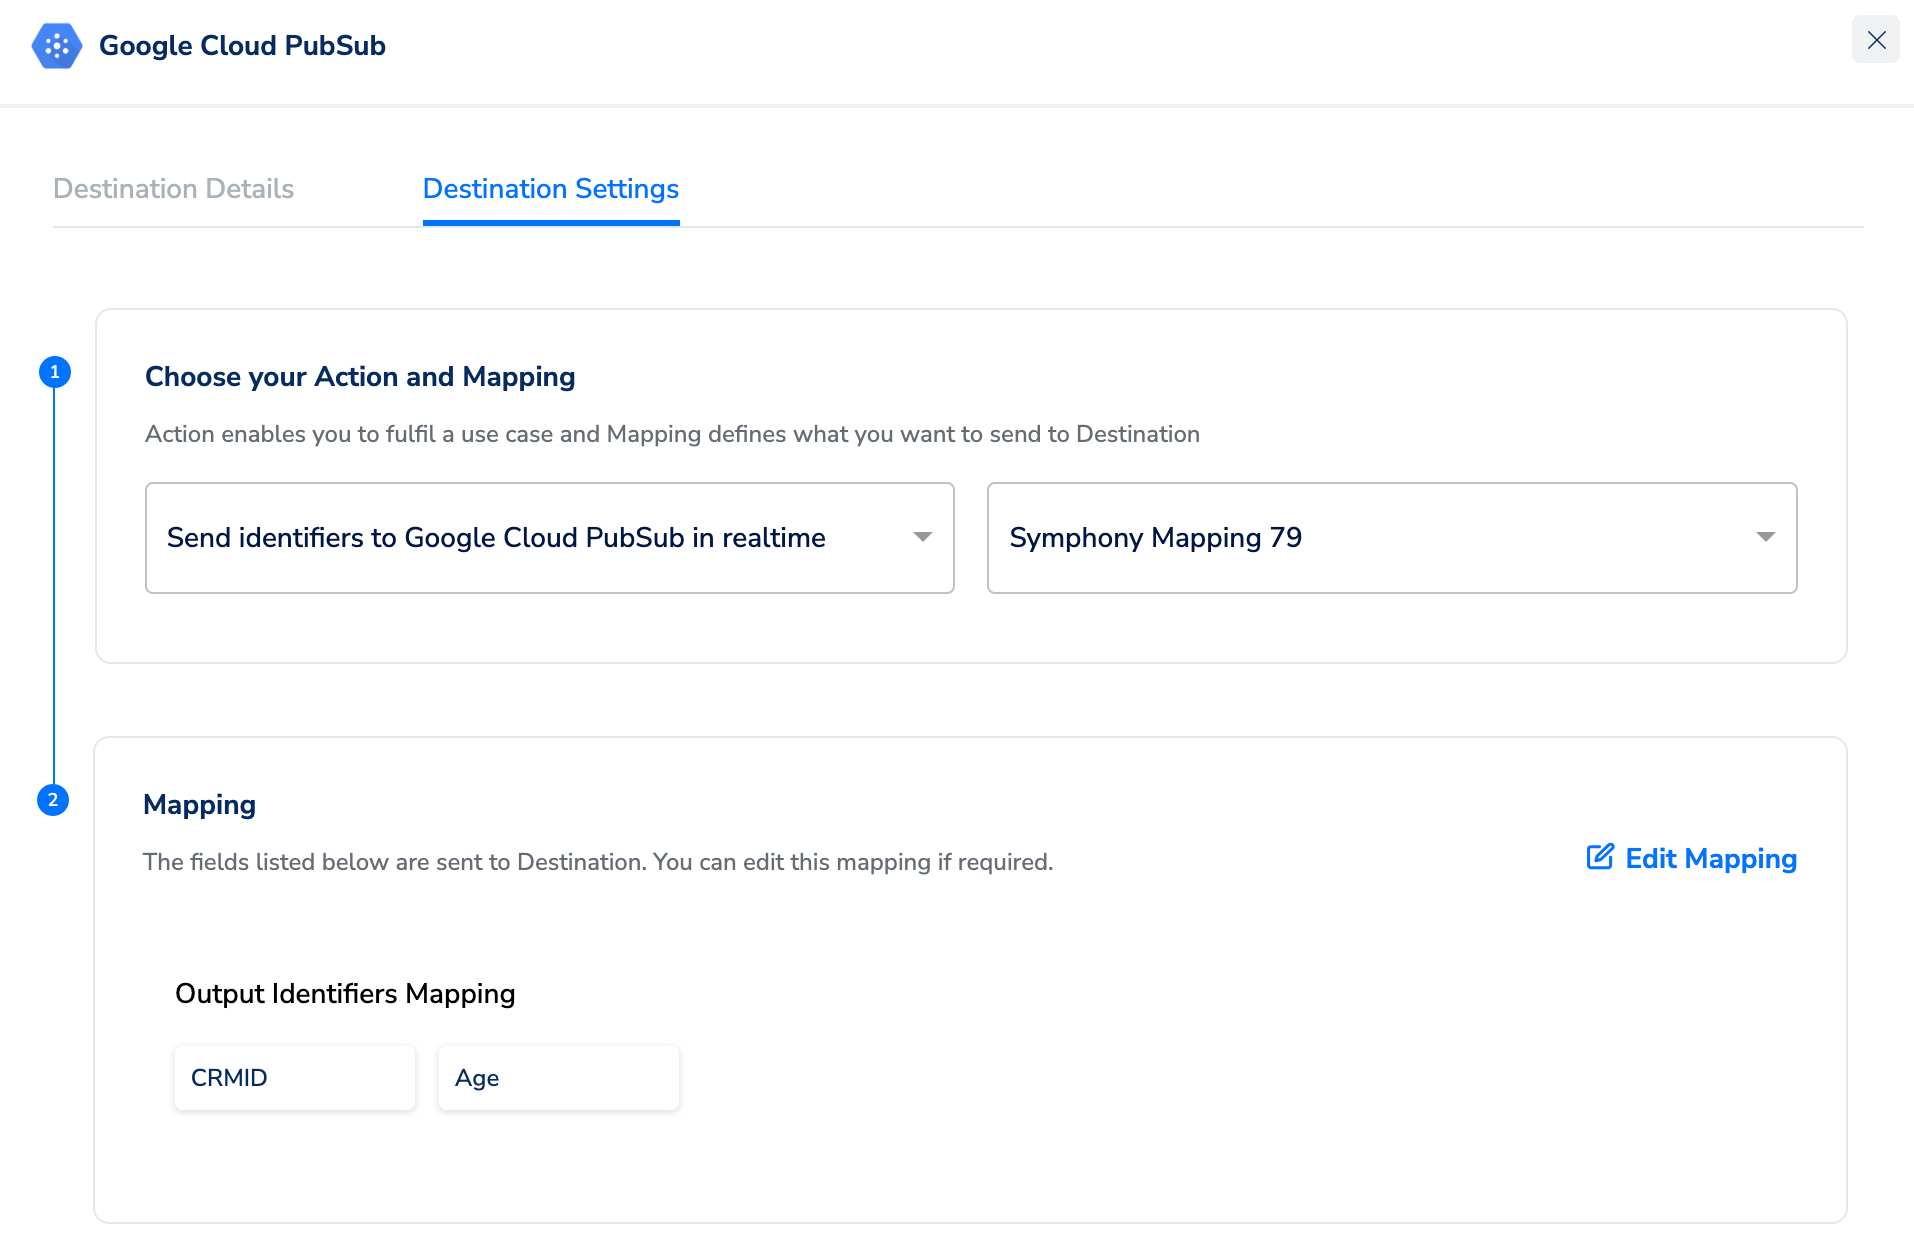
In the mapping screen that appears, under Choose your Action, select Send identifiers to Google Cloud PubSub in realtime as the action for sending data from the workflow created in Journeys.Under Map the Fields, use + Add Mapping Field to add any custom field that you wish to send to Google Pub/Sub. Ensure that you map at least one attribute. Otherwise, the data does not flow to the Pub/Sub destination.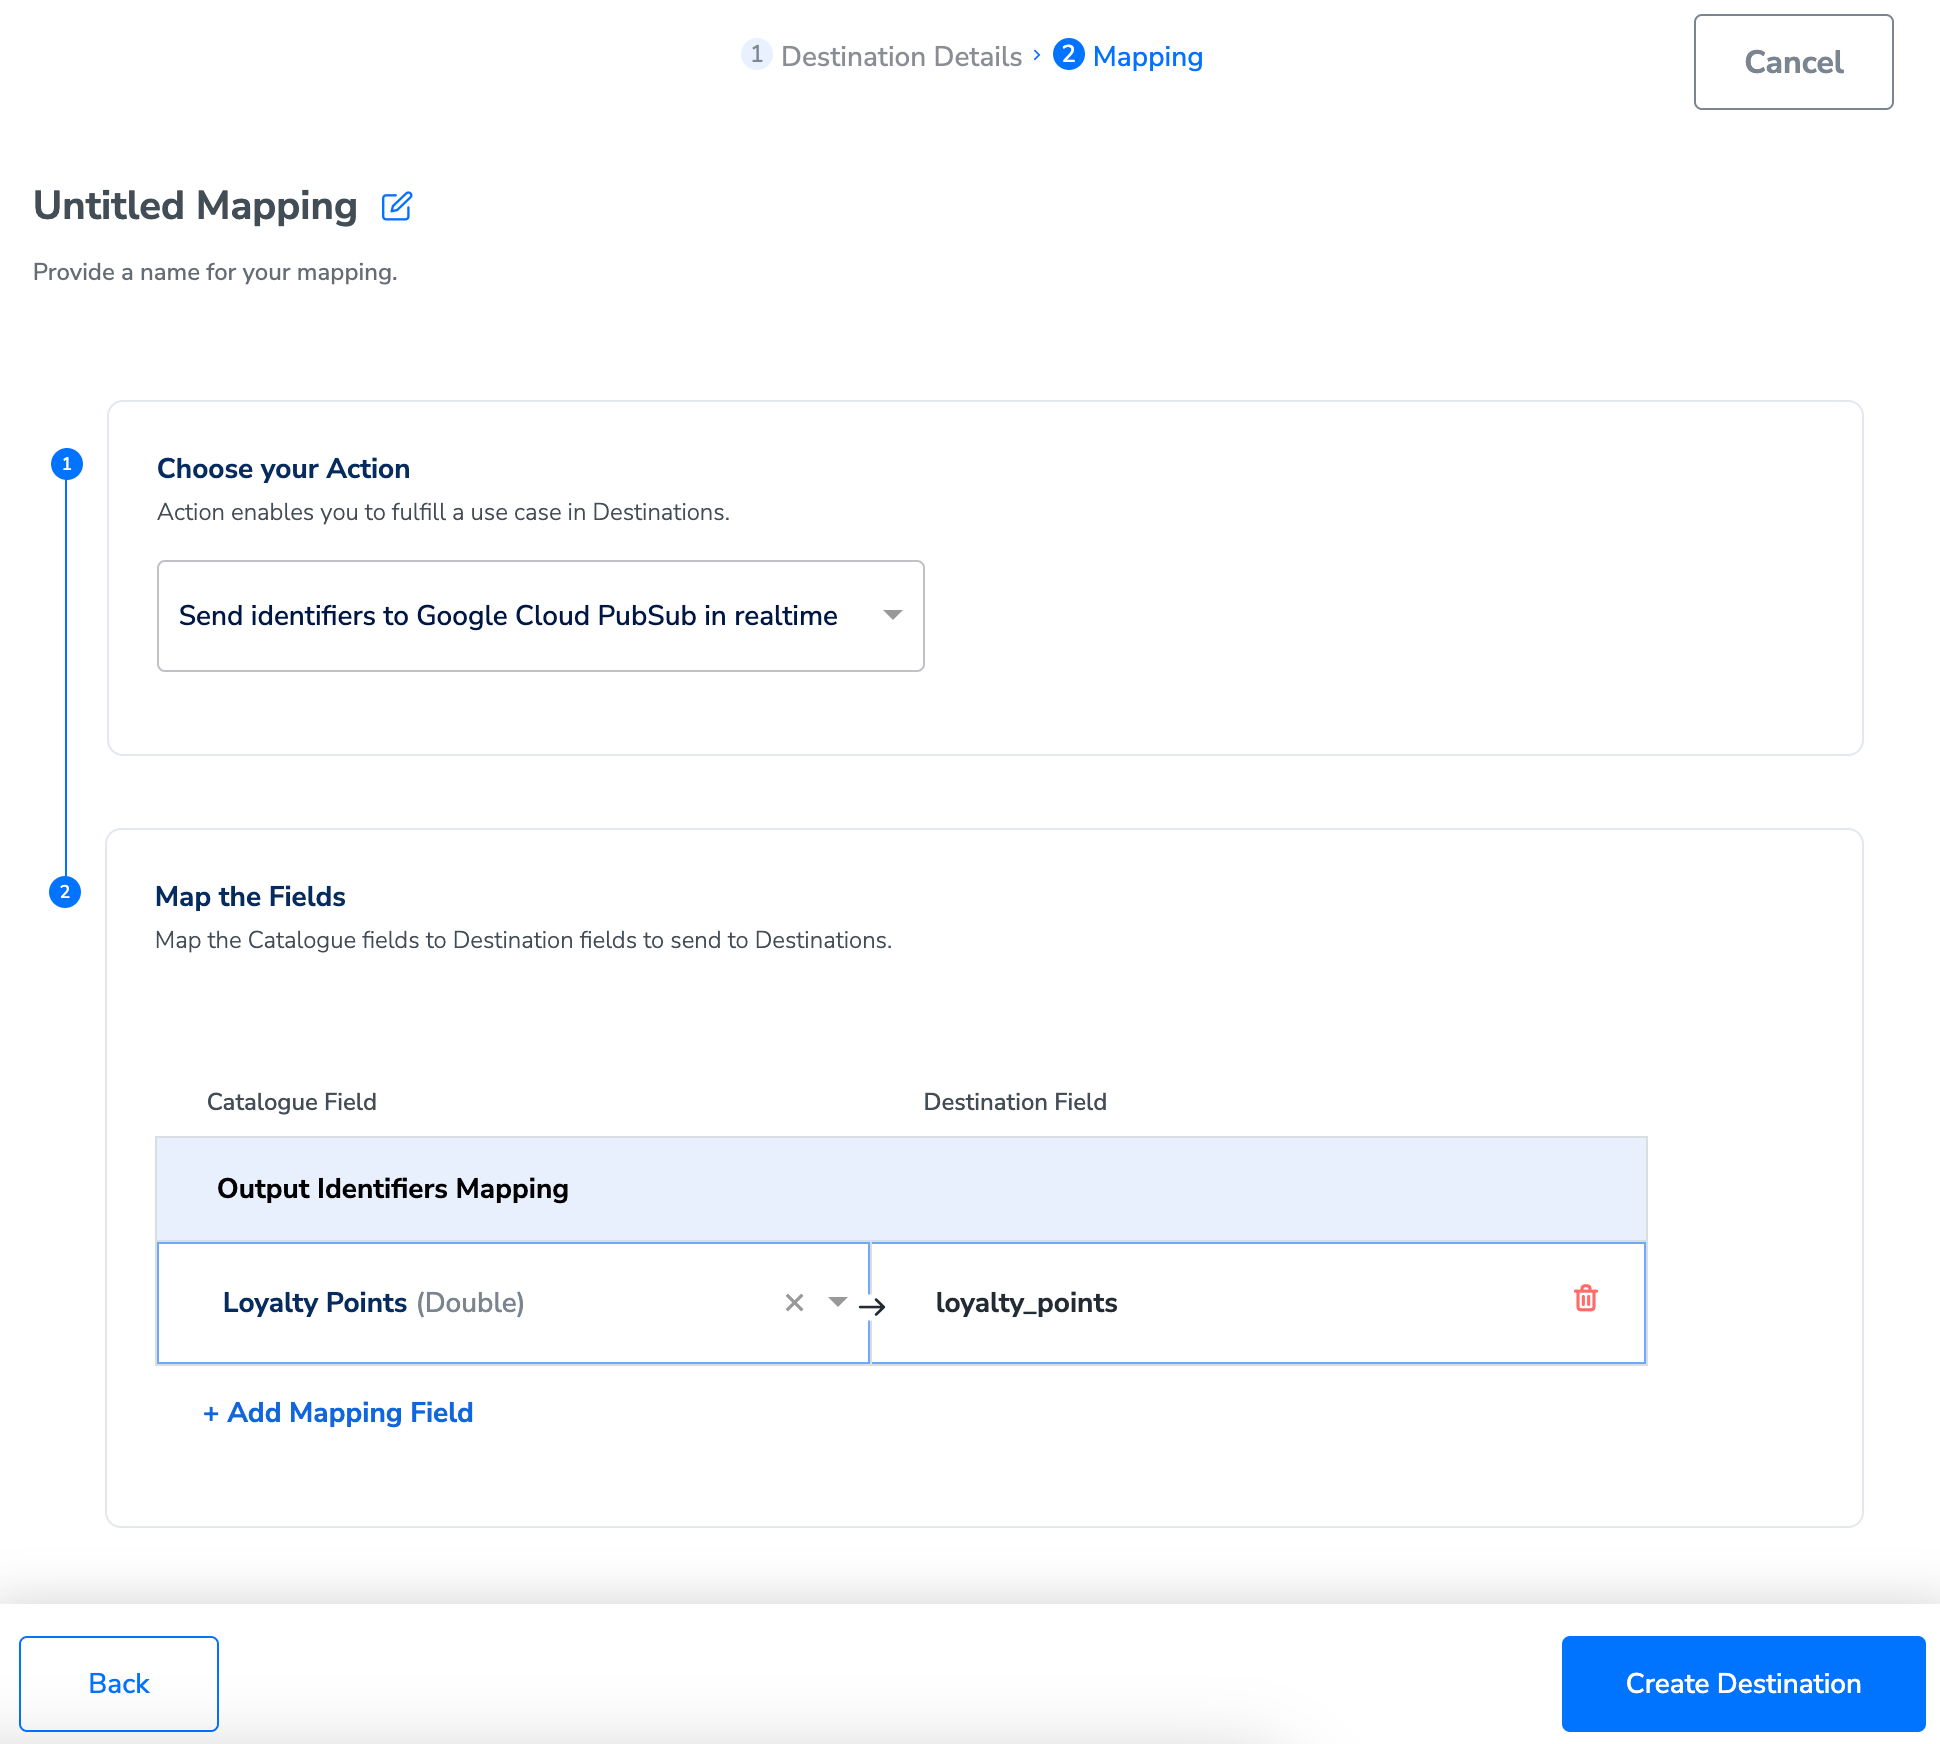
Activate the Destination on Journeys
After creating a destination, next, you need to link it in the Send to Destination node within the workflow, as explained below.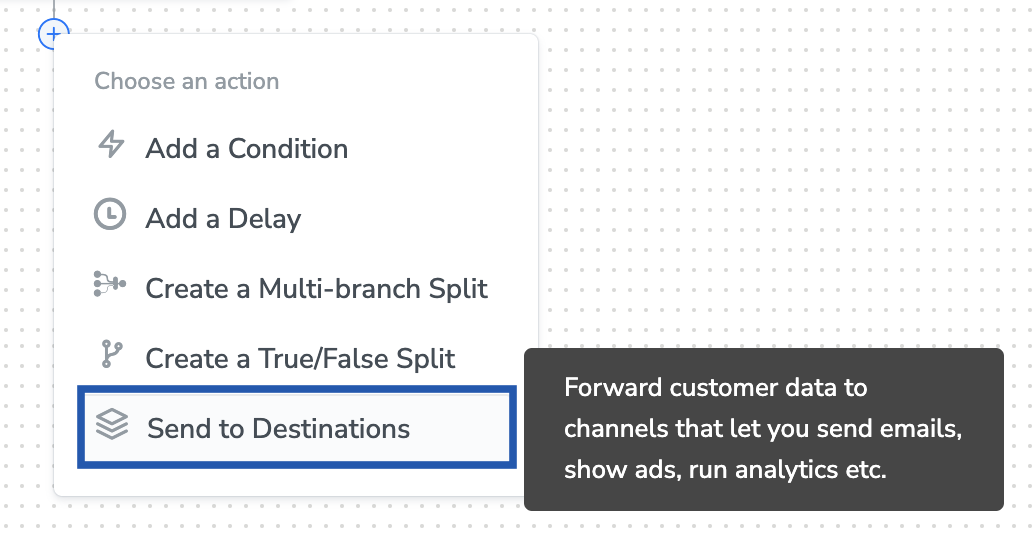
Under the Destination Details tab, based on the authentication type you have chosen, the Instance, Project Id, Topic Id, Authentication (Refresh Token/Service Account) and other fields as shown in the image below automatically populates based on the values that you have entered while creating the destination. However, you need to provide an Audience Name to save the Destination.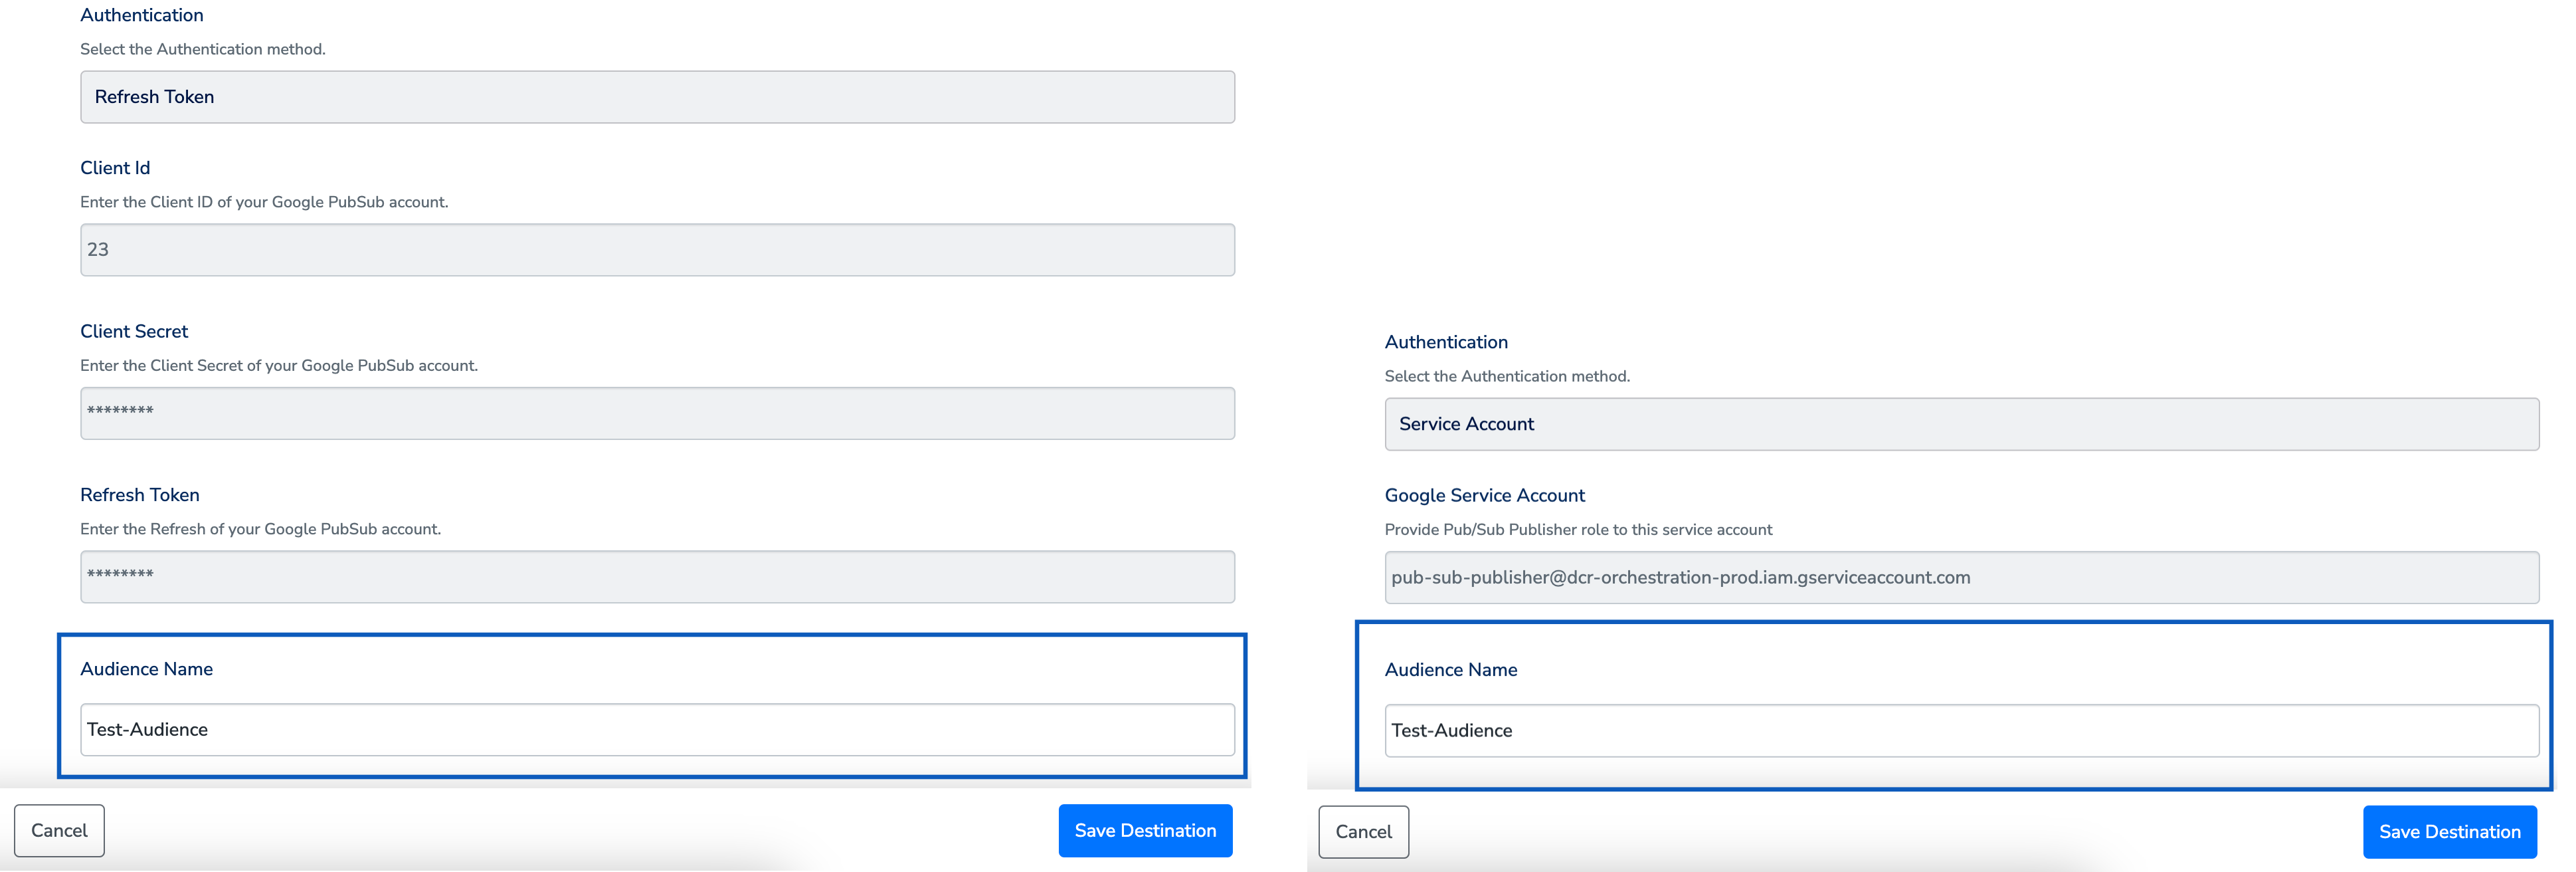
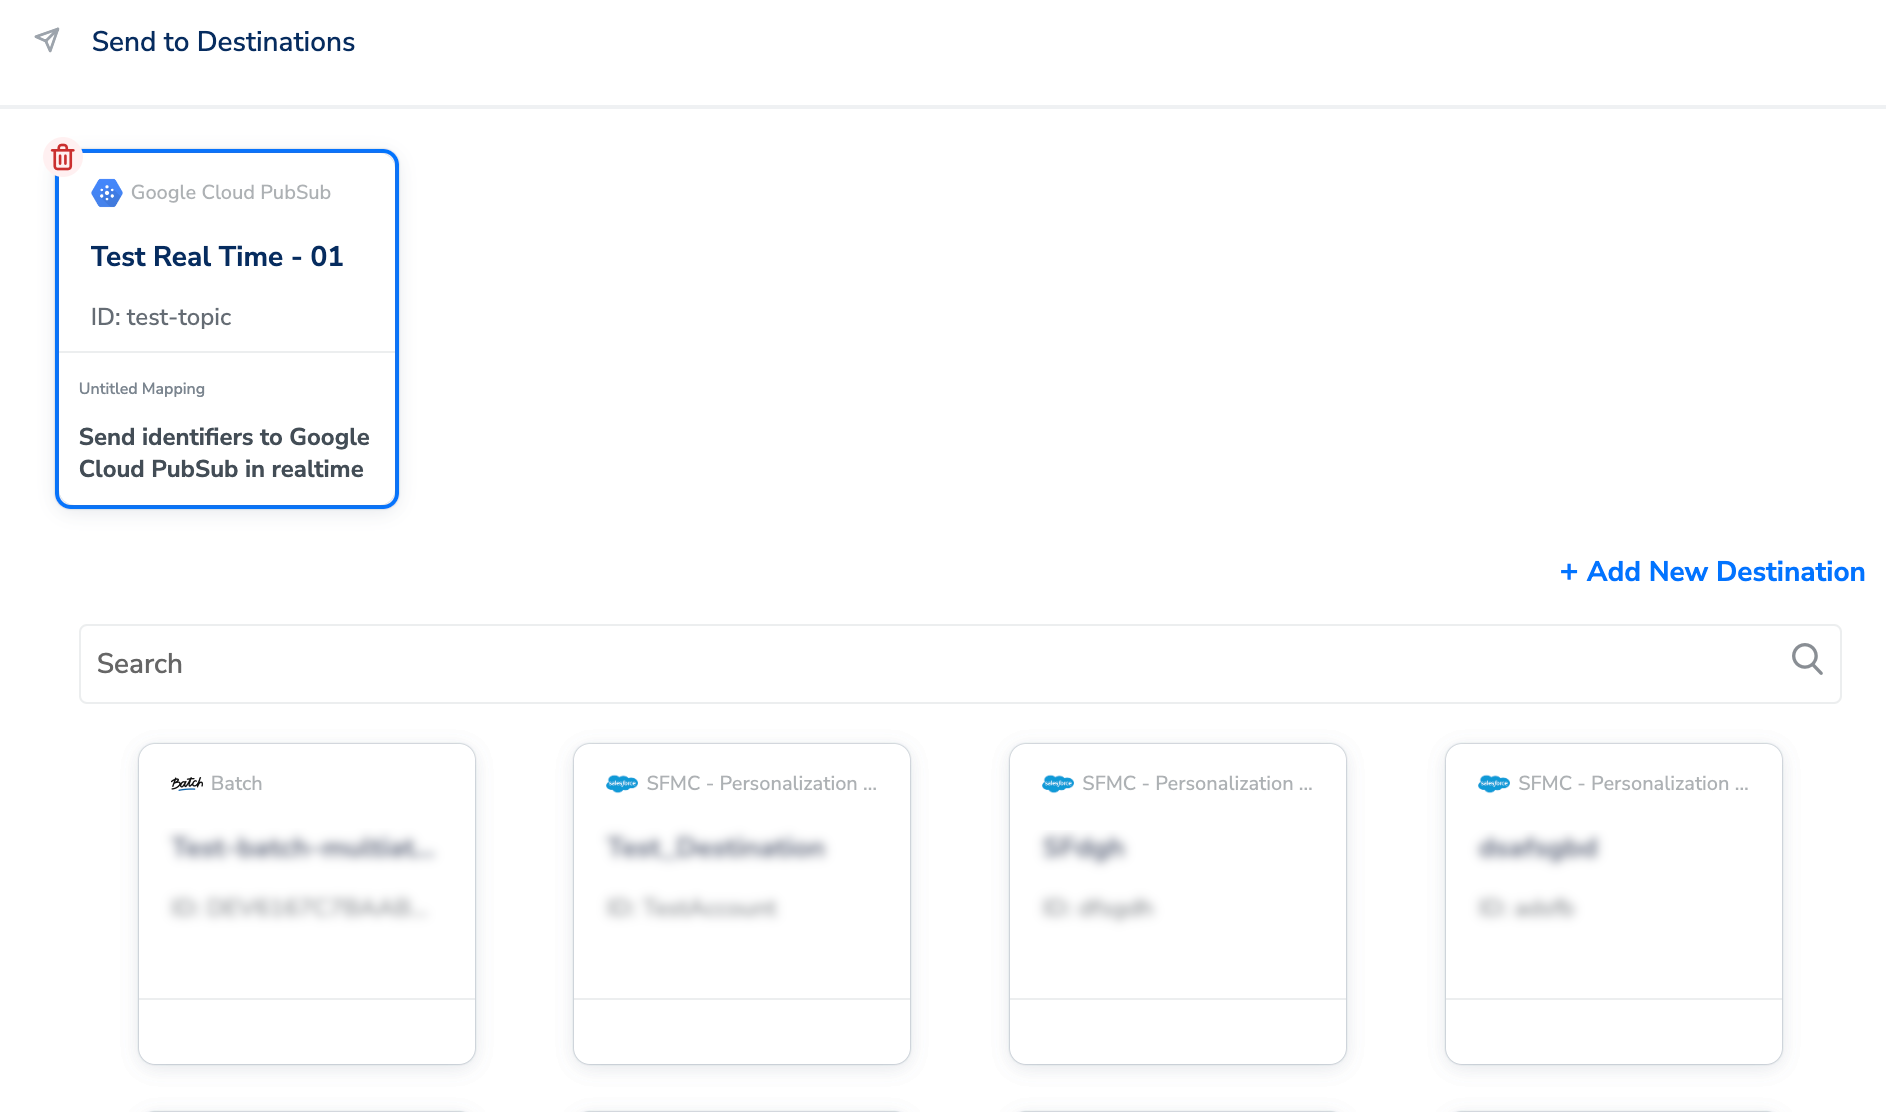
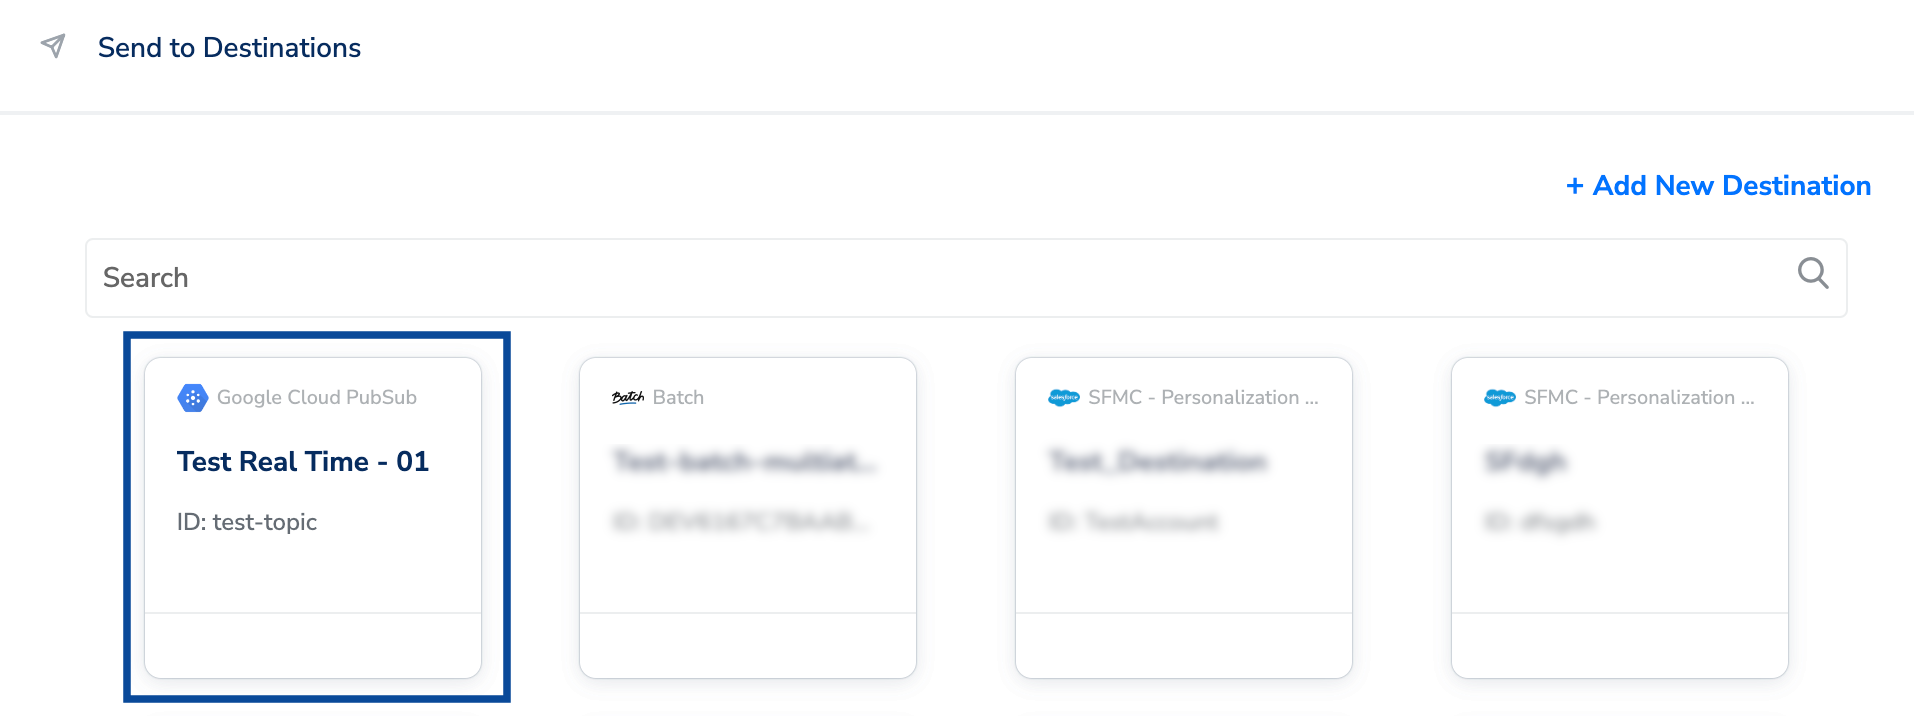
Click Add Destinations at the bottom right corner of the screen. Note that you can also add multiple destinations at this step if needed.
The linked Destinations appear in the Send to Destinations node within the workflow as shown below. Further, you can then build and customise your workflow as needed by clicking ’+’ . Note that you must enter a name for your workflow in the provided text box to save it.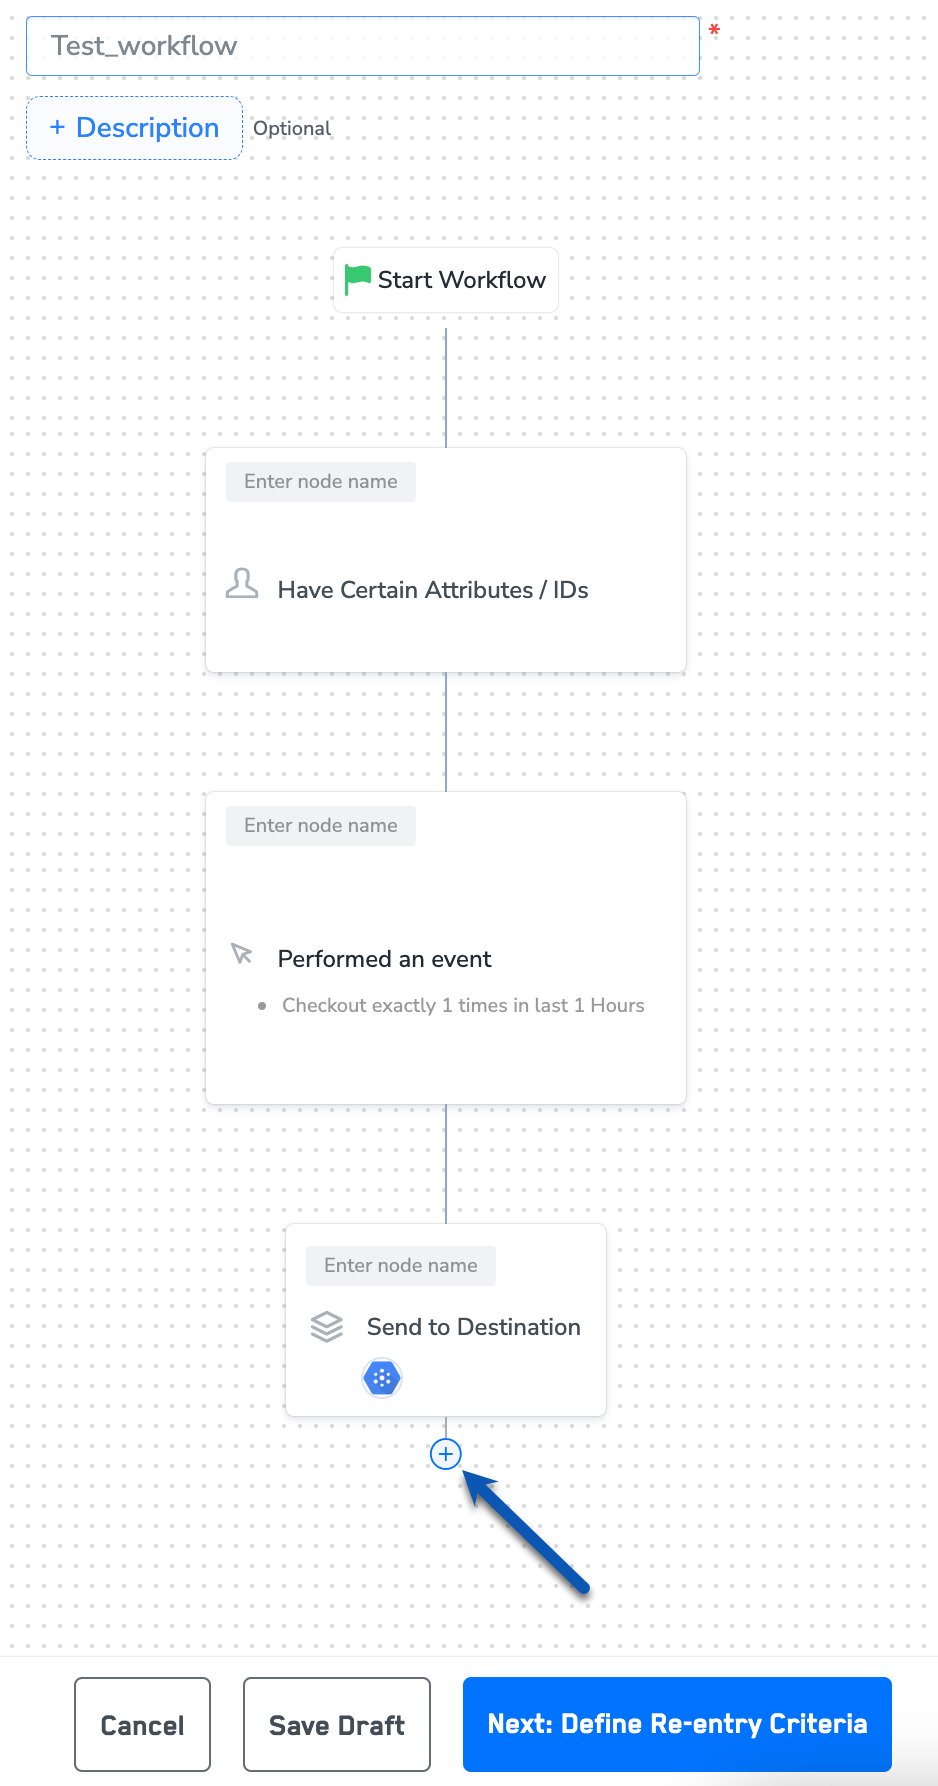
After adding conditions and filters for users, choose one of the following options:
- Save Draft: Enables you to revisit and edit the workflow before publishing.
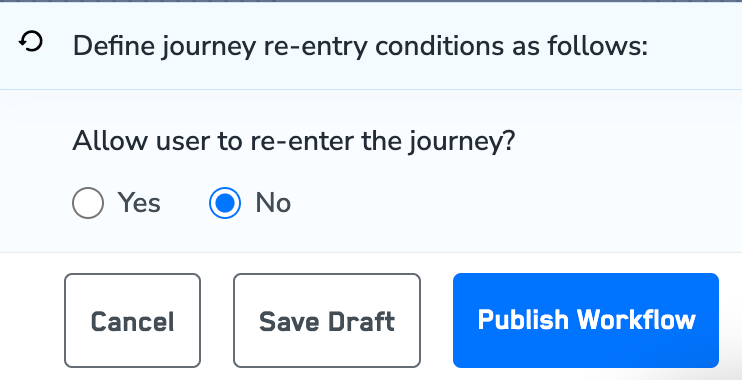
- Next: Re-entry Condition: Determines whether a user can re-enter the same workflow.