Overview
Cleverpush is a web-based platform that enables website owners and developers to send to users who have subscribed to receive them. Integrated with Zeotap CDP, it enables marketers to engage with their customers in real-time and at scale. This integration lets you send notifications through mobile applications, websites and emails.Supported Identifiers
This integration supports Subscription ID and standard attributes such as First Name, Last Name, Gender and Email Address (Raw). You can also send Custom Identifiers and Attributes.Note:Ensure to create the standard and custom attributes in the Cleverpush account before mapping them in Zeotap CDP. Learn more
Components of Cleverpush
Ensure that you have the details about the below components of the Cleverpush account available before creating a Destination.Private API Key
Channel ID
Private API Key
A Private API Key is a unique identifier associated with your Cleverpush account. This is used to authenticate and authorise access to certain features or APIs of Cleverpush. Perform the following steps to obtain the Private API Key from Cleverpush: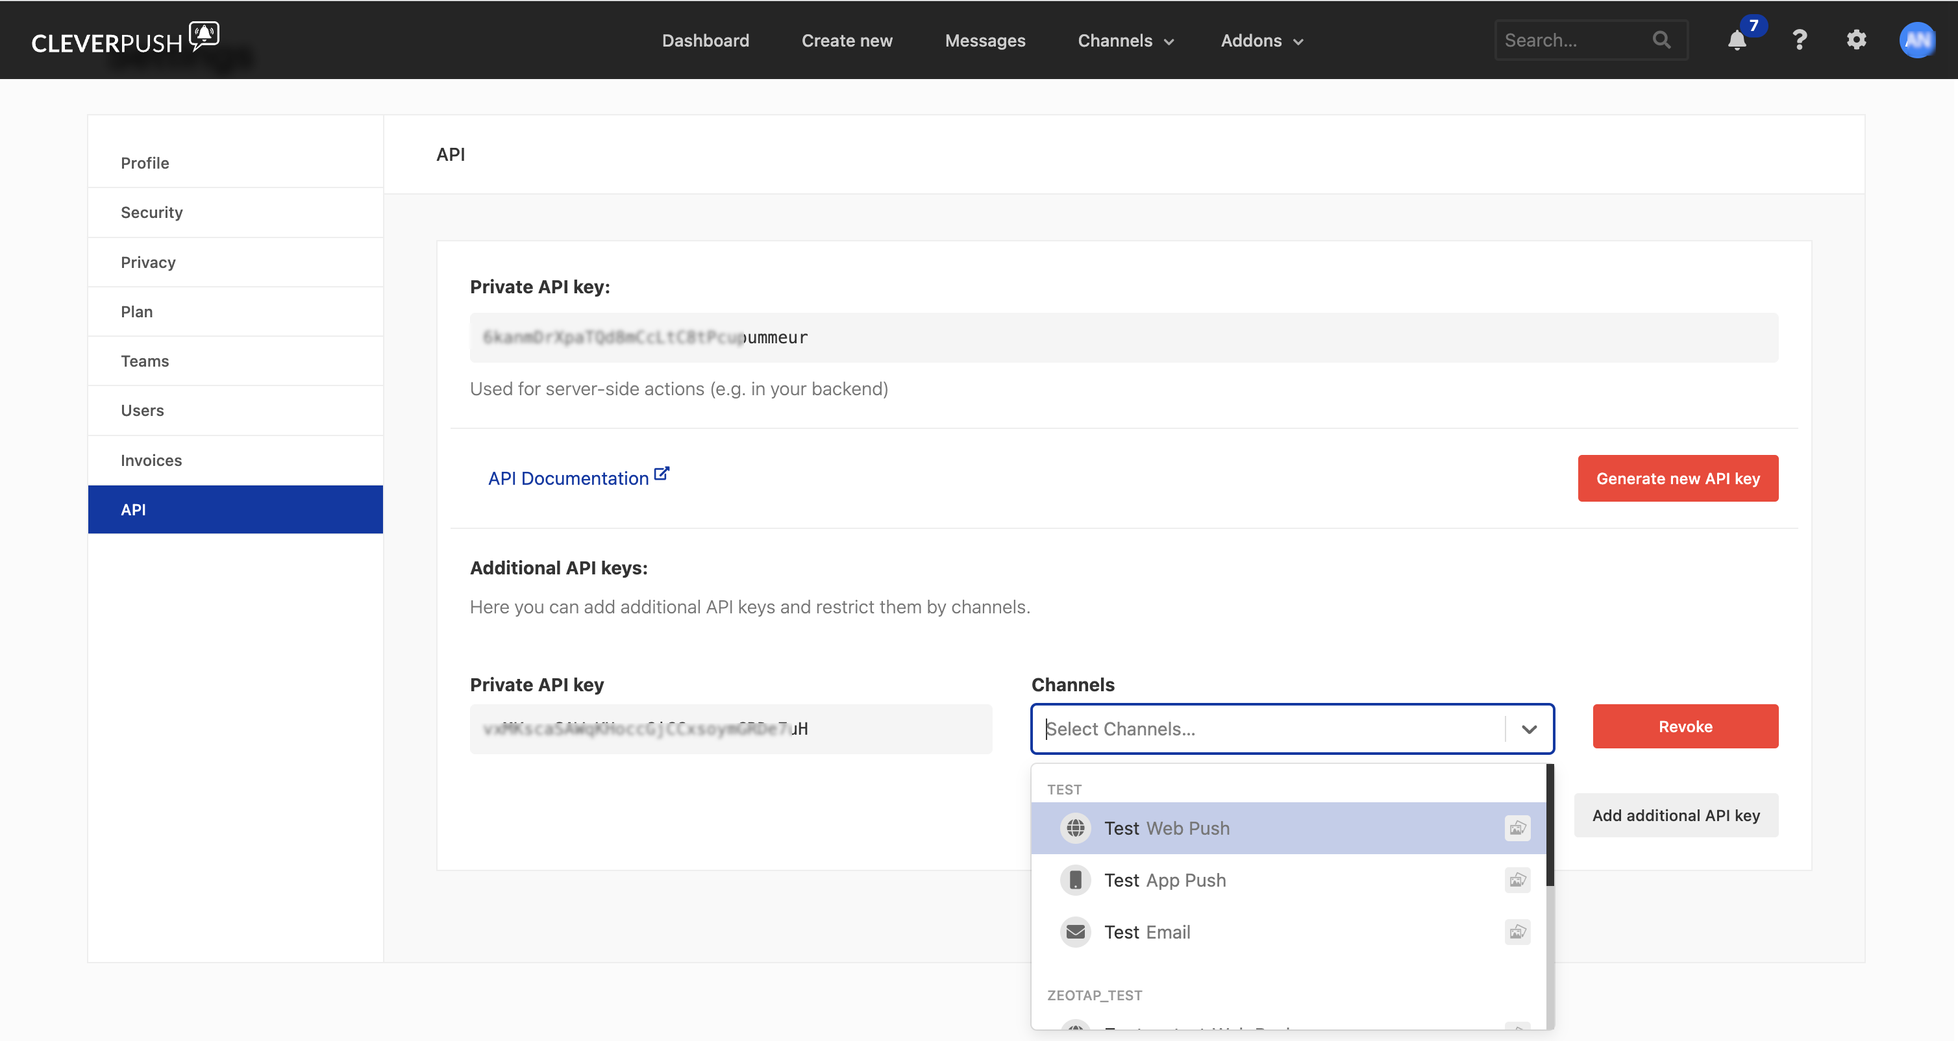
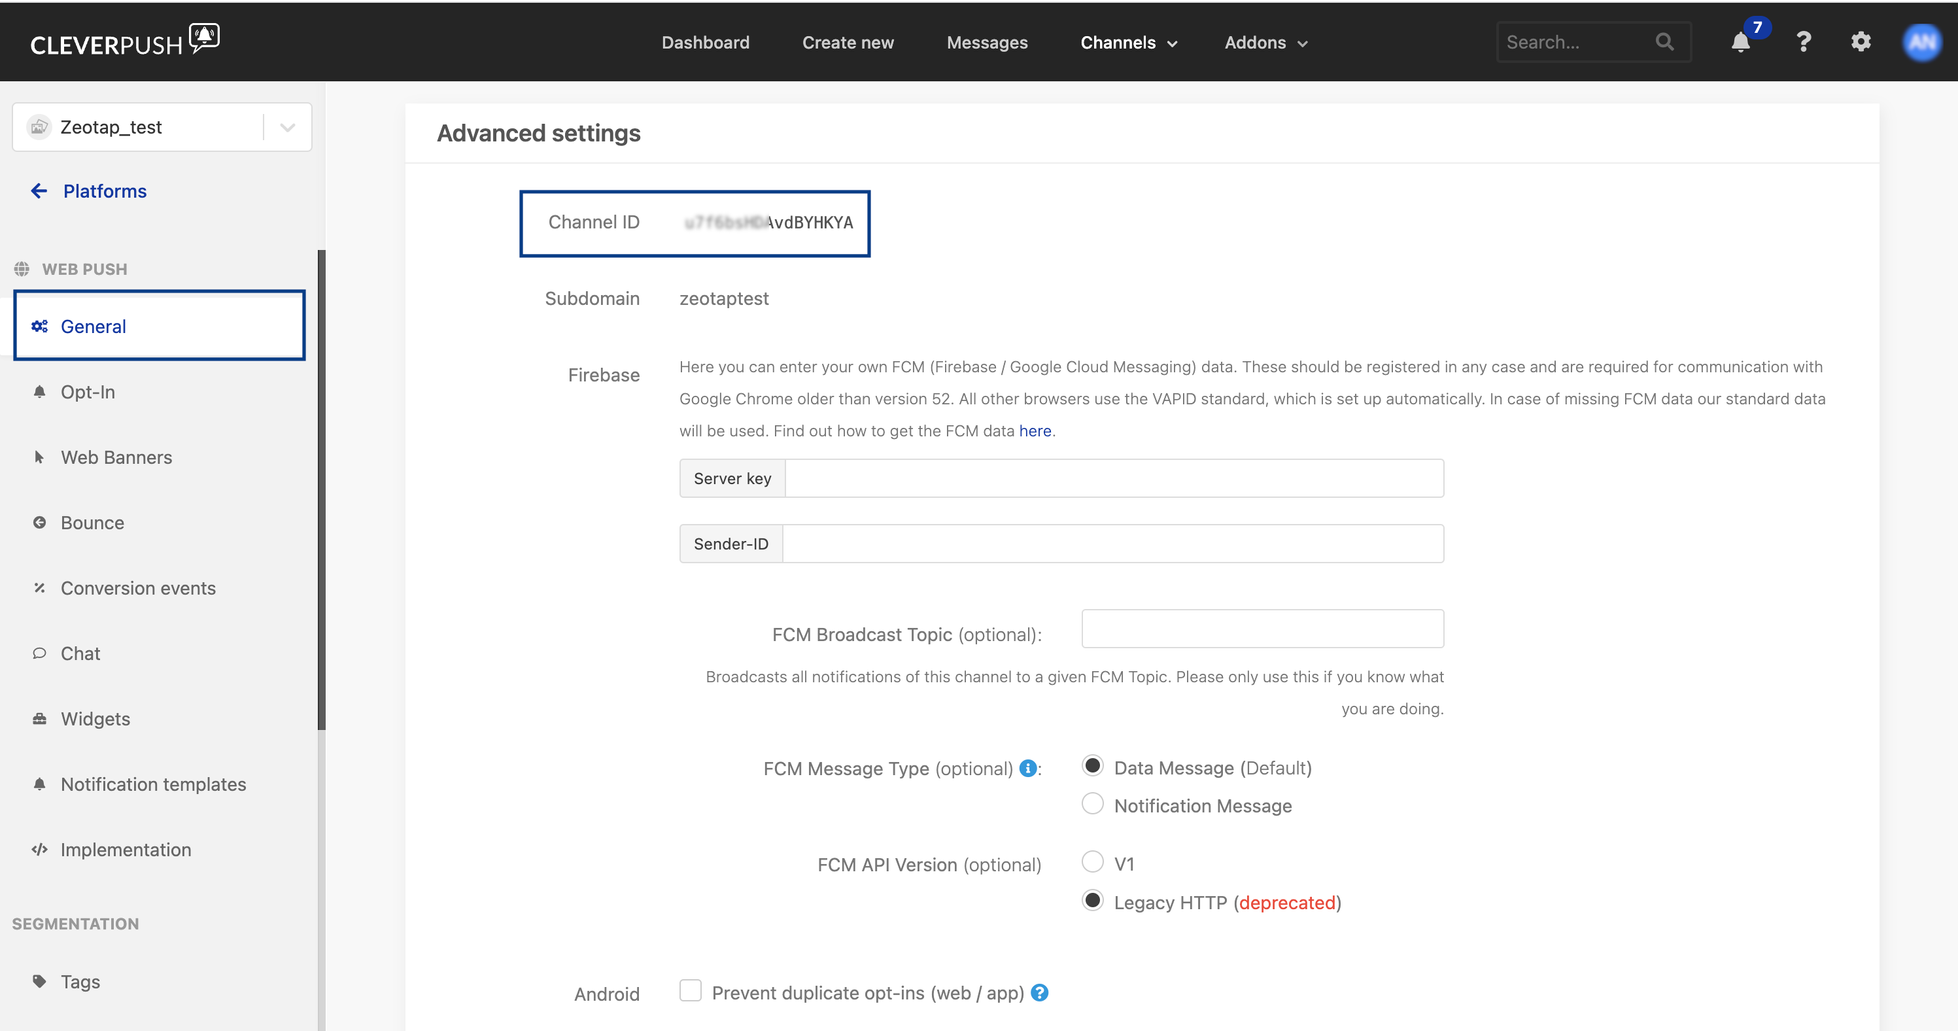
Channel ID
A Channel ID is a unique identifier assigned to the push notification channel that you create within Cleverpush. Perform the following steps to obtain the Channel ID in Cleverpush:Under Channels, click the channel that you wish to use for sending push notifications. If the desired channel is not available, then you can create one by clicking Add Channel from the drop-down menu. For more information on how to create a channel in Cleverpush, refer .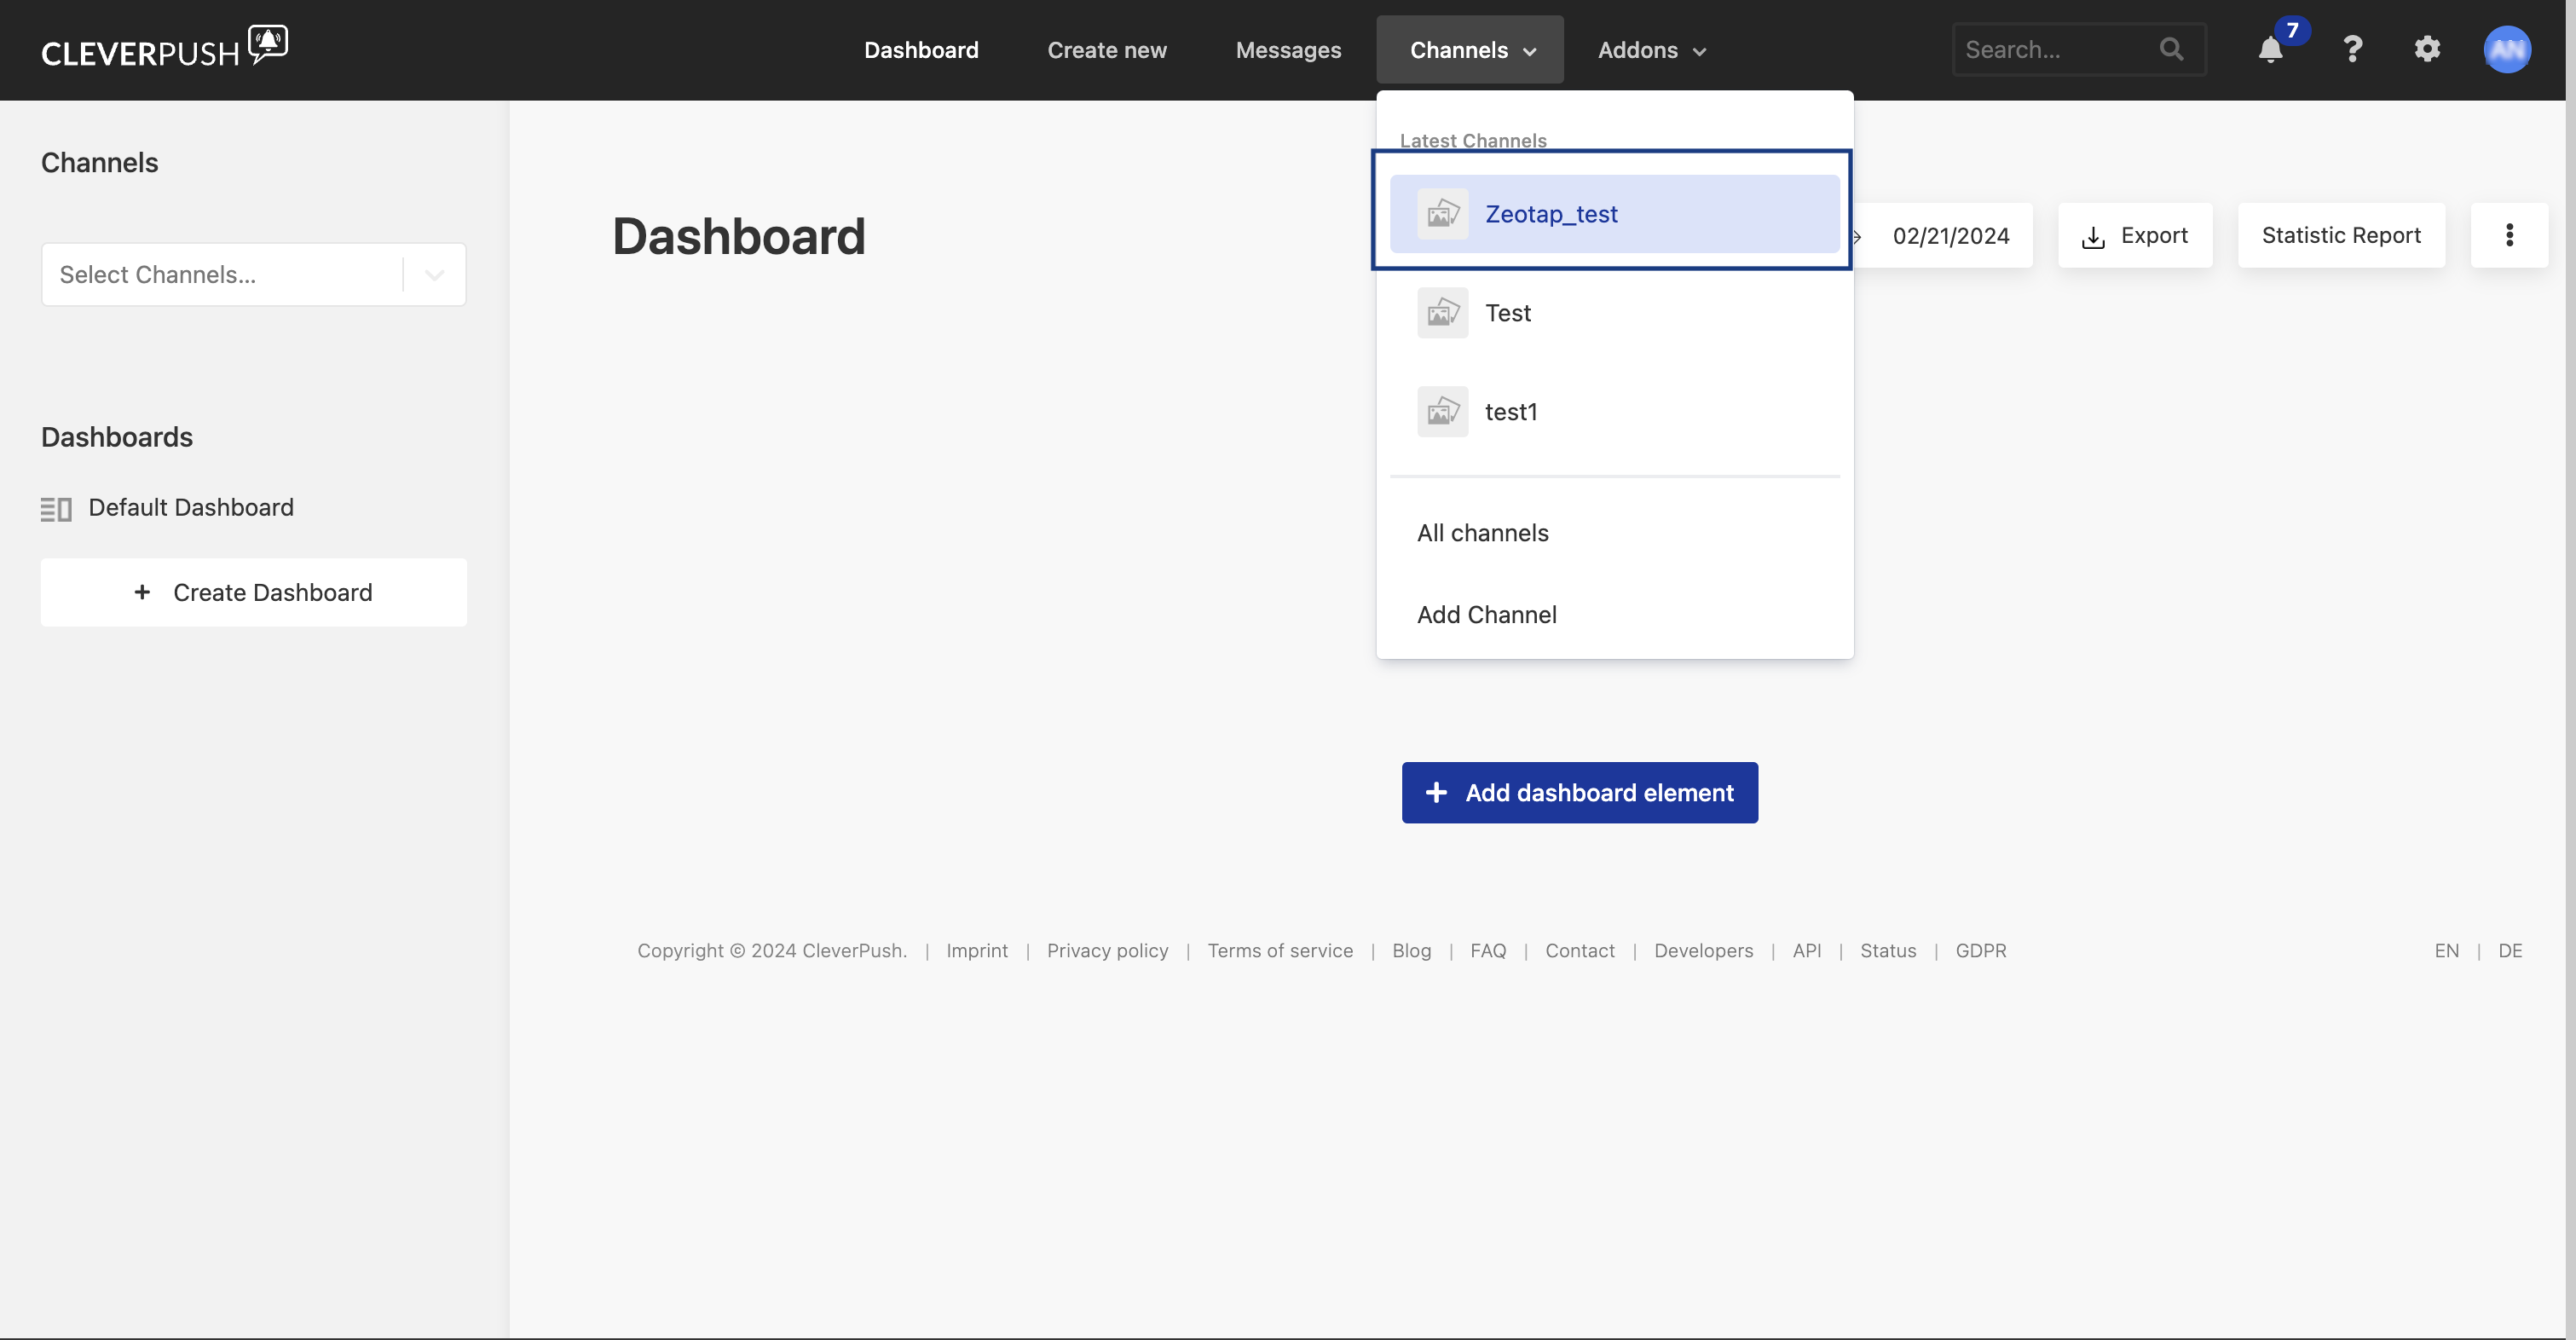
Once the channel is created, you need to setup the platforms on which you want to send notifications. The following are the platforms that Zeotap CDP supports: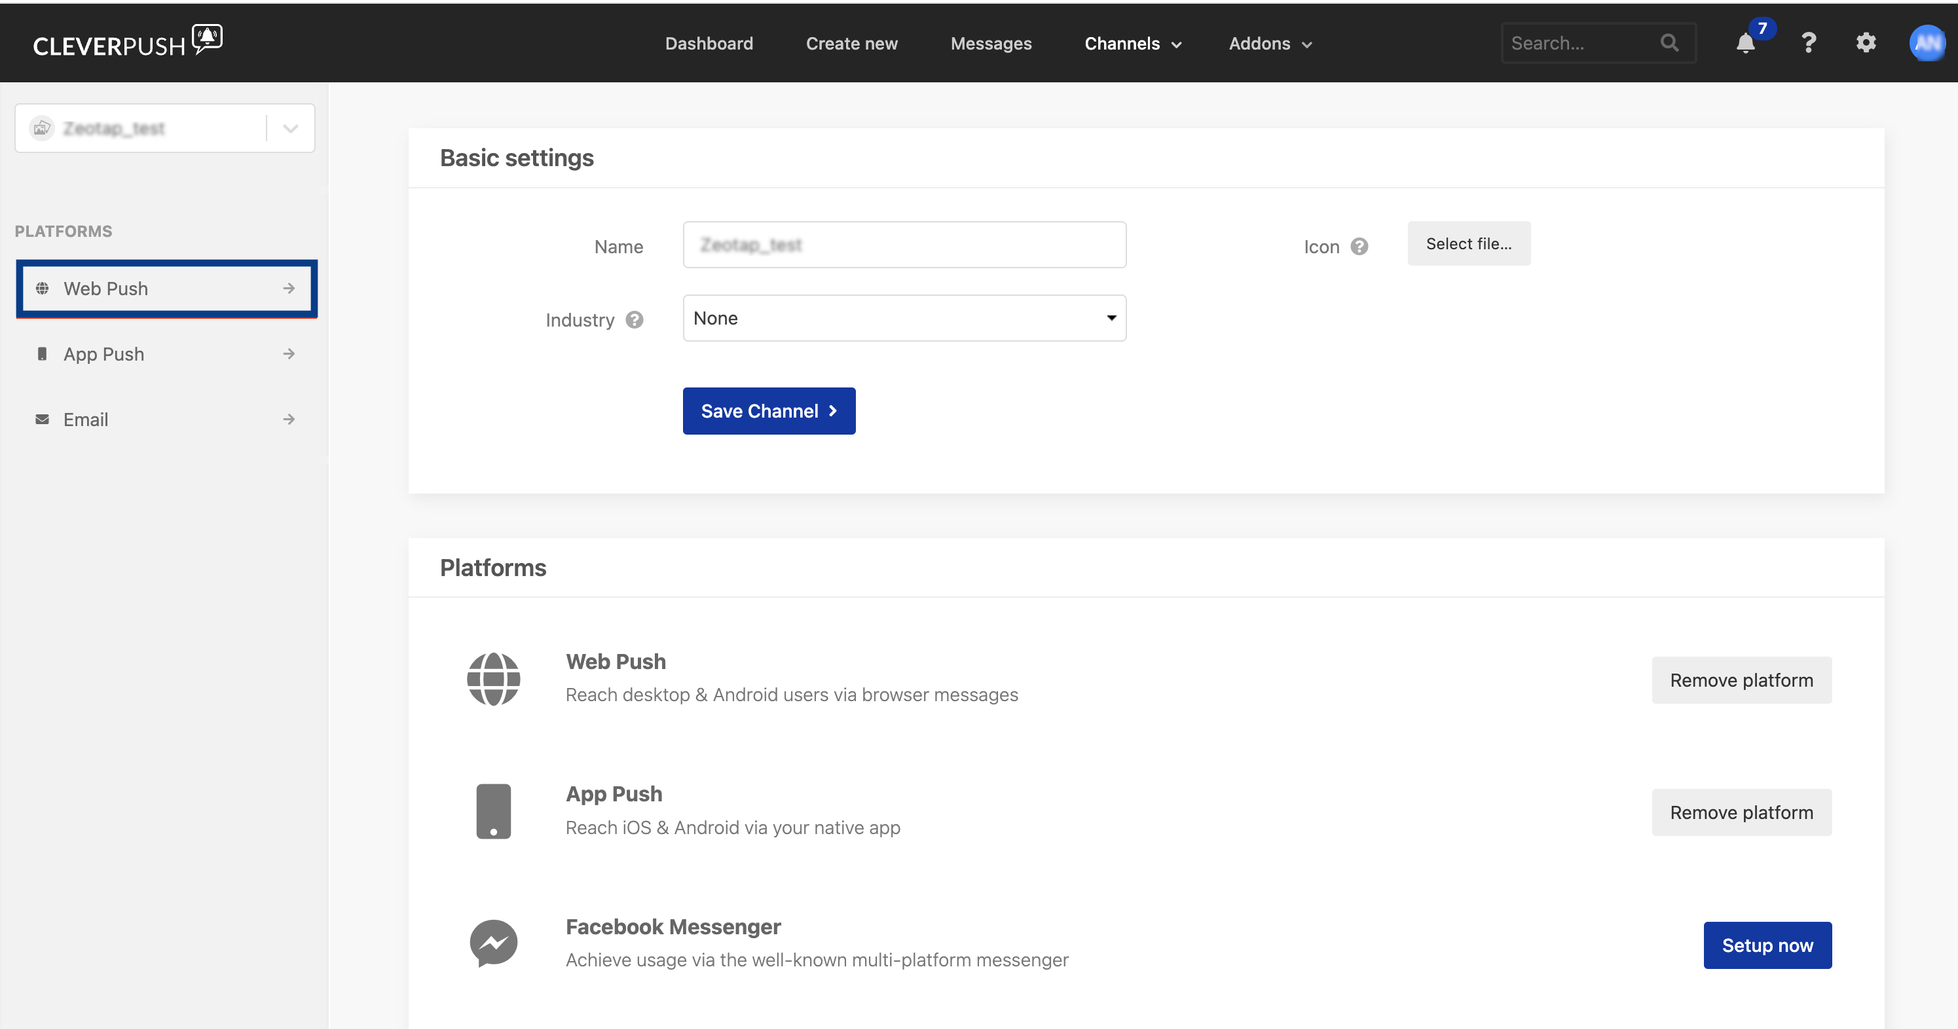
- Web Push
- App Push
- Email Push
Note:For more information about how to set up these platforms, refer .
Prerequisites
Ensure that you add the identifiers in the Cleverpush account before mapping them in the Actions and Mapping screen as explained below. Otherwise, data will not be sent correctly.Add Identifiers and Attributes in Cleverpush
To add the identifiers and attributes in Cleverpush, perform the following steps:Under Channels, click the channel that you wish to use for sending push notifications. For more information about Channels, refer here.
Navigate to your desired platform and go to Attributes as shown in the image below. Under ID, a standard list of commonly used attributes are displayed. You can add any or all of these attributes by selecting them and providing a name for each attribute selected.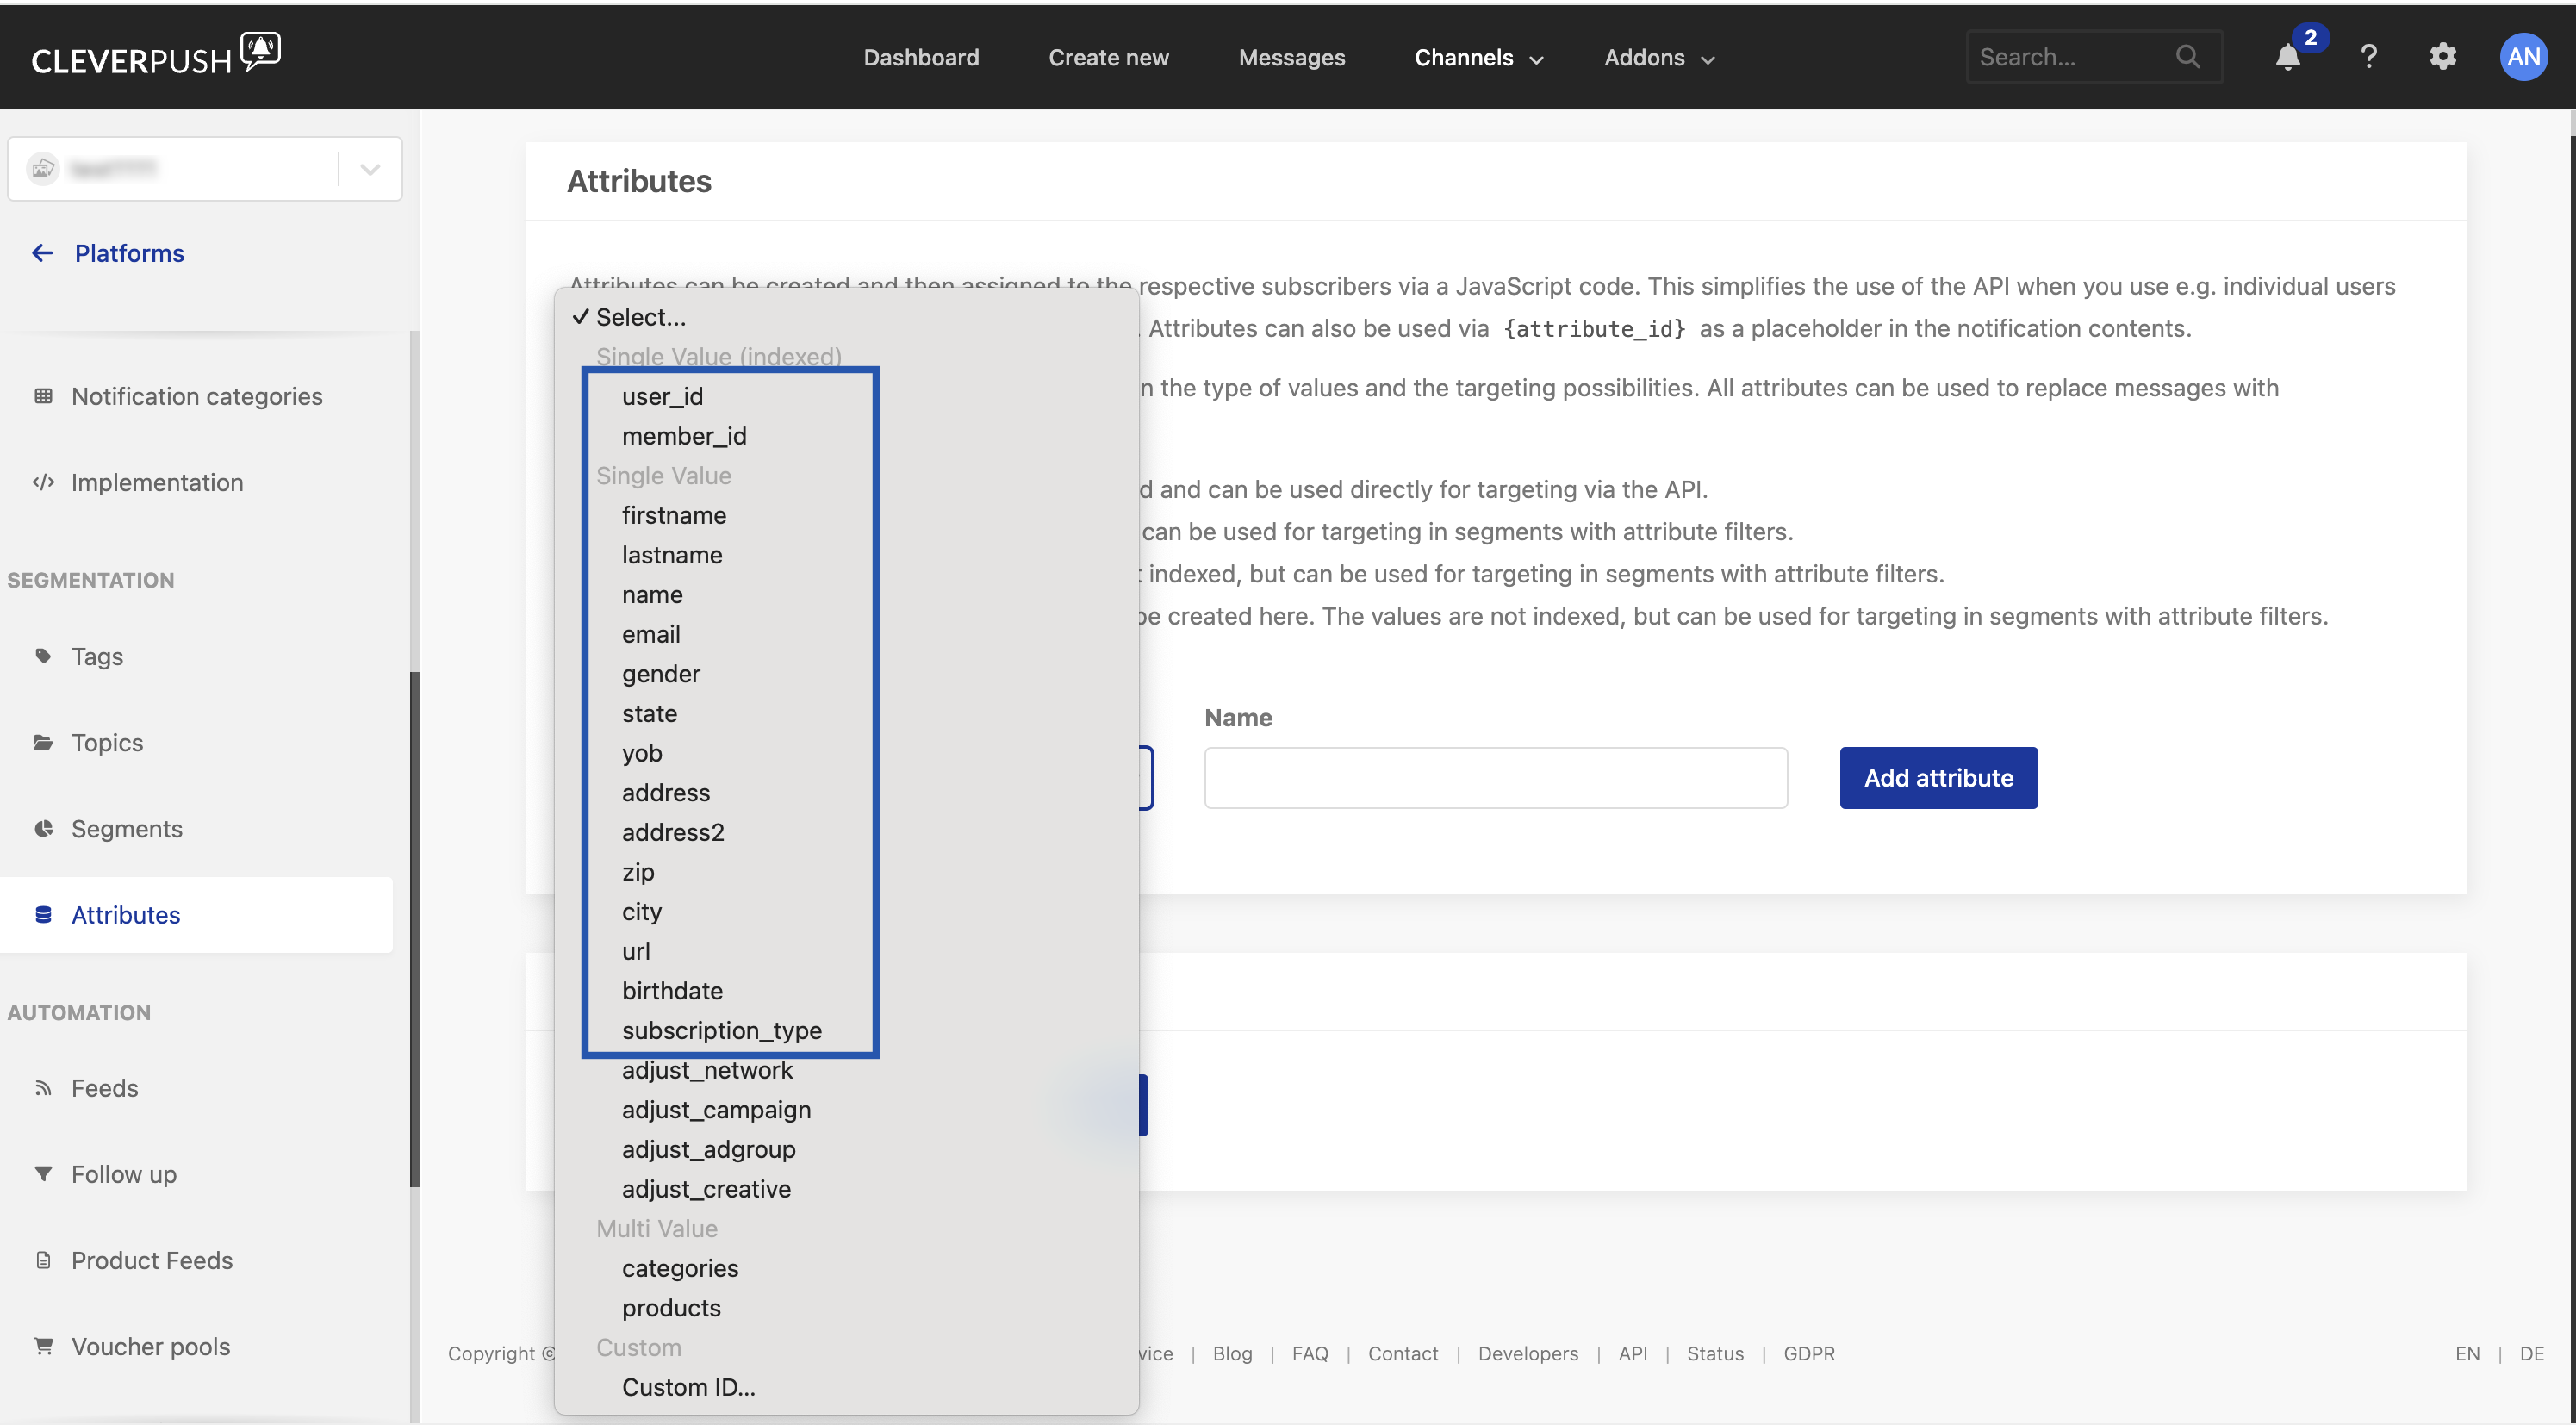
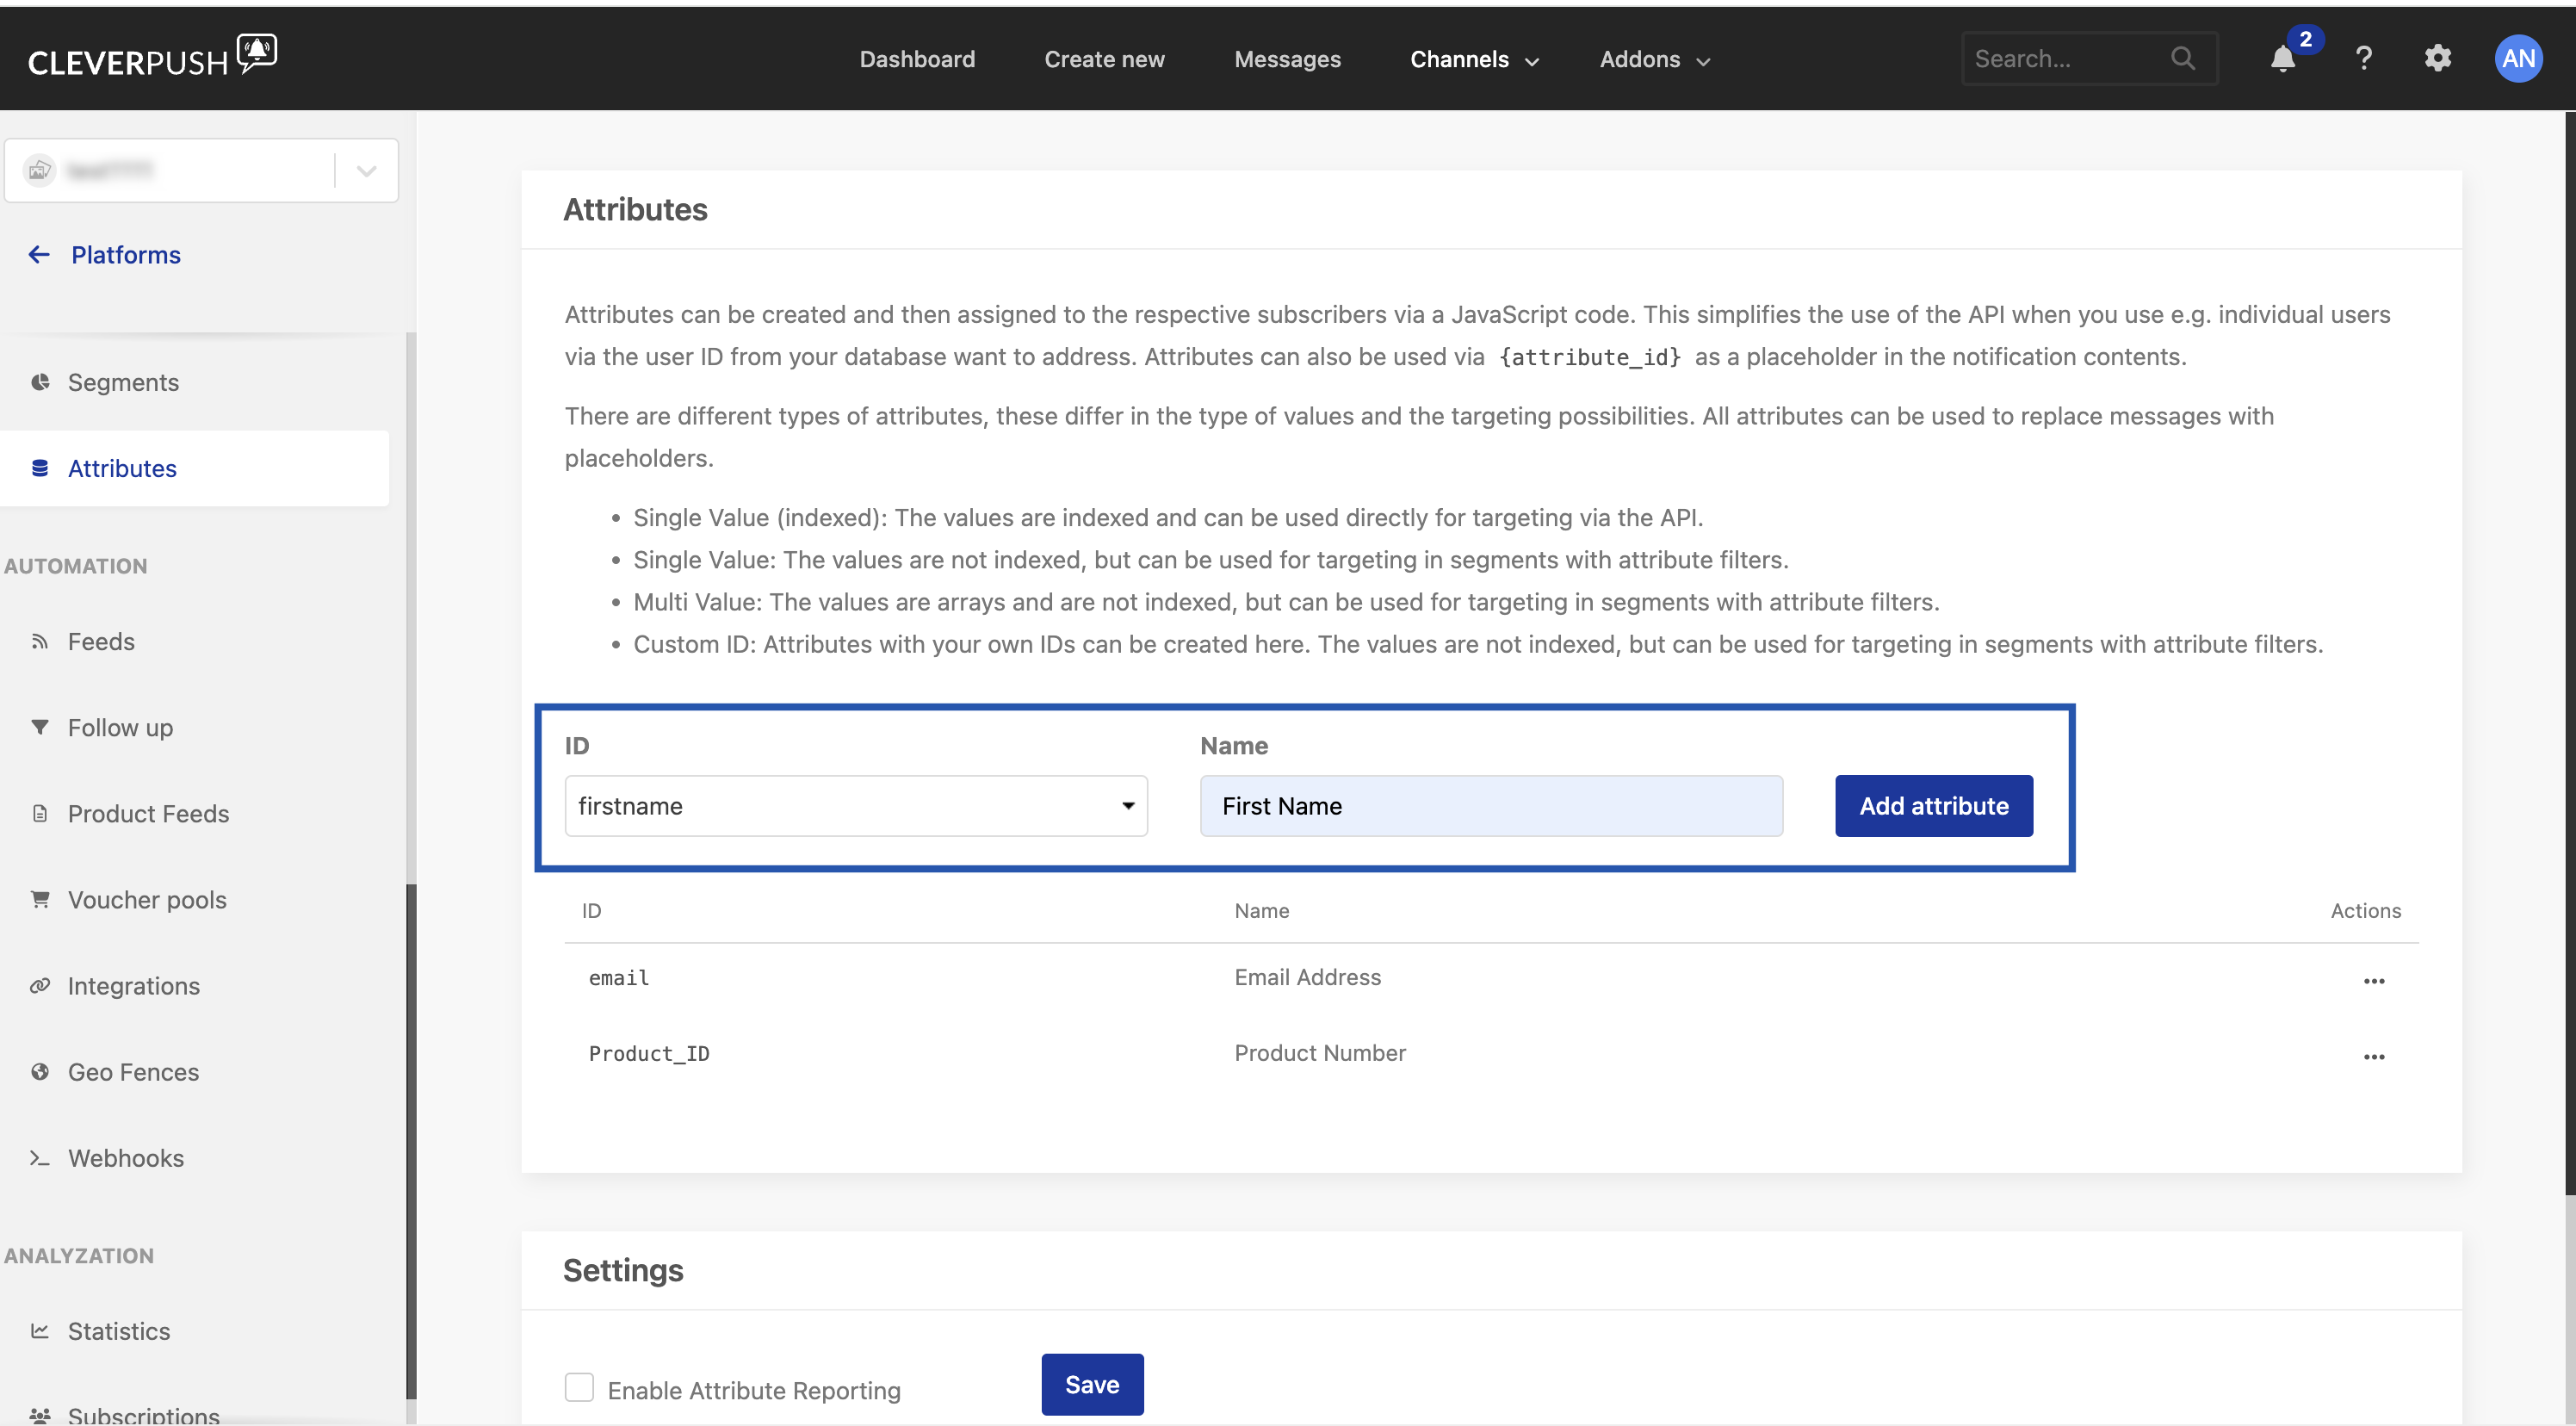
- For example, if you want to add firstname from the standard list, choose firstname from the standard list and provide the display name for the attribute. Here, the display name is First Name. Note that the standard field firstname acts as a connection between the attributes in Cleverpush and Zeotap CDP.
Destination Setup
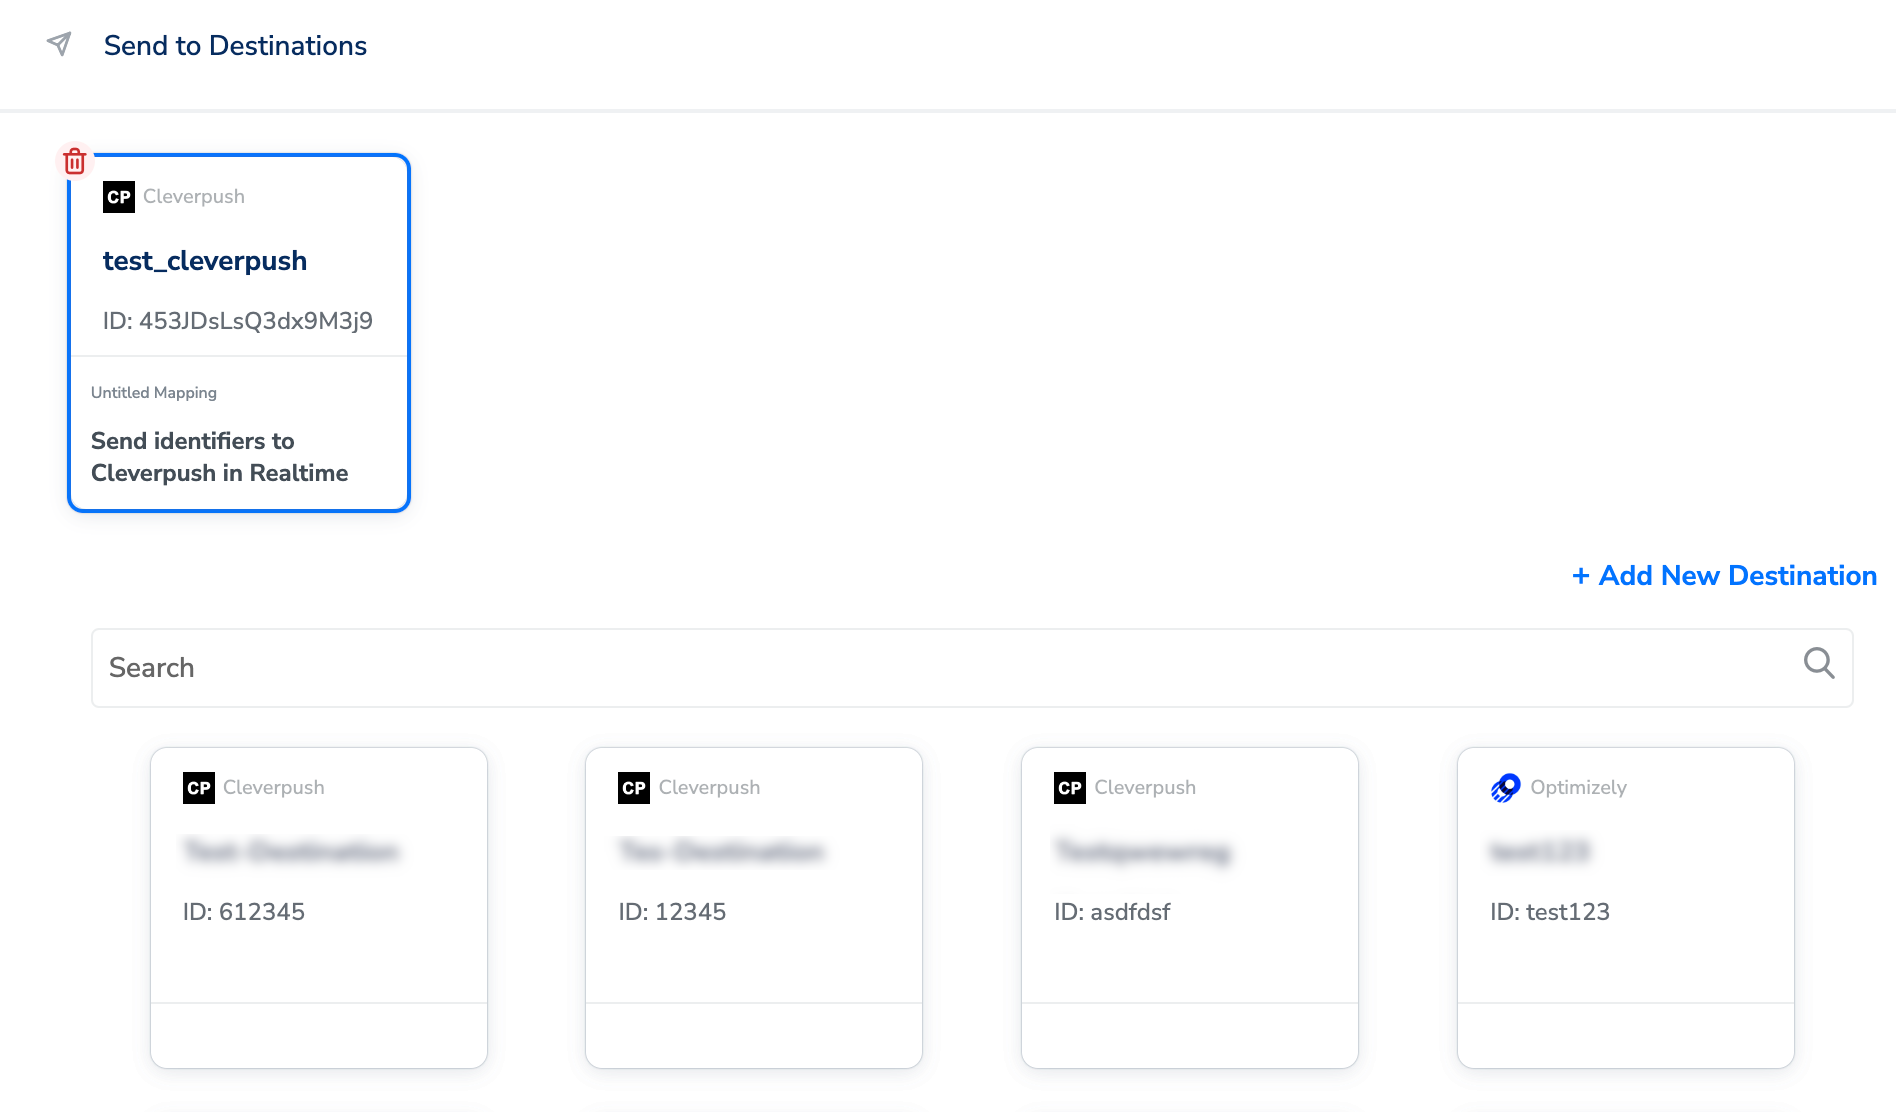
After you have applied filters or added conditions for your users in Journeys, you can activate them in Cleverpush under Send to Destinations. A new window appears, where you can set up your destination. You can use an already existing destination from the list of available Destinations or create a new one by clicking + Add New Destination.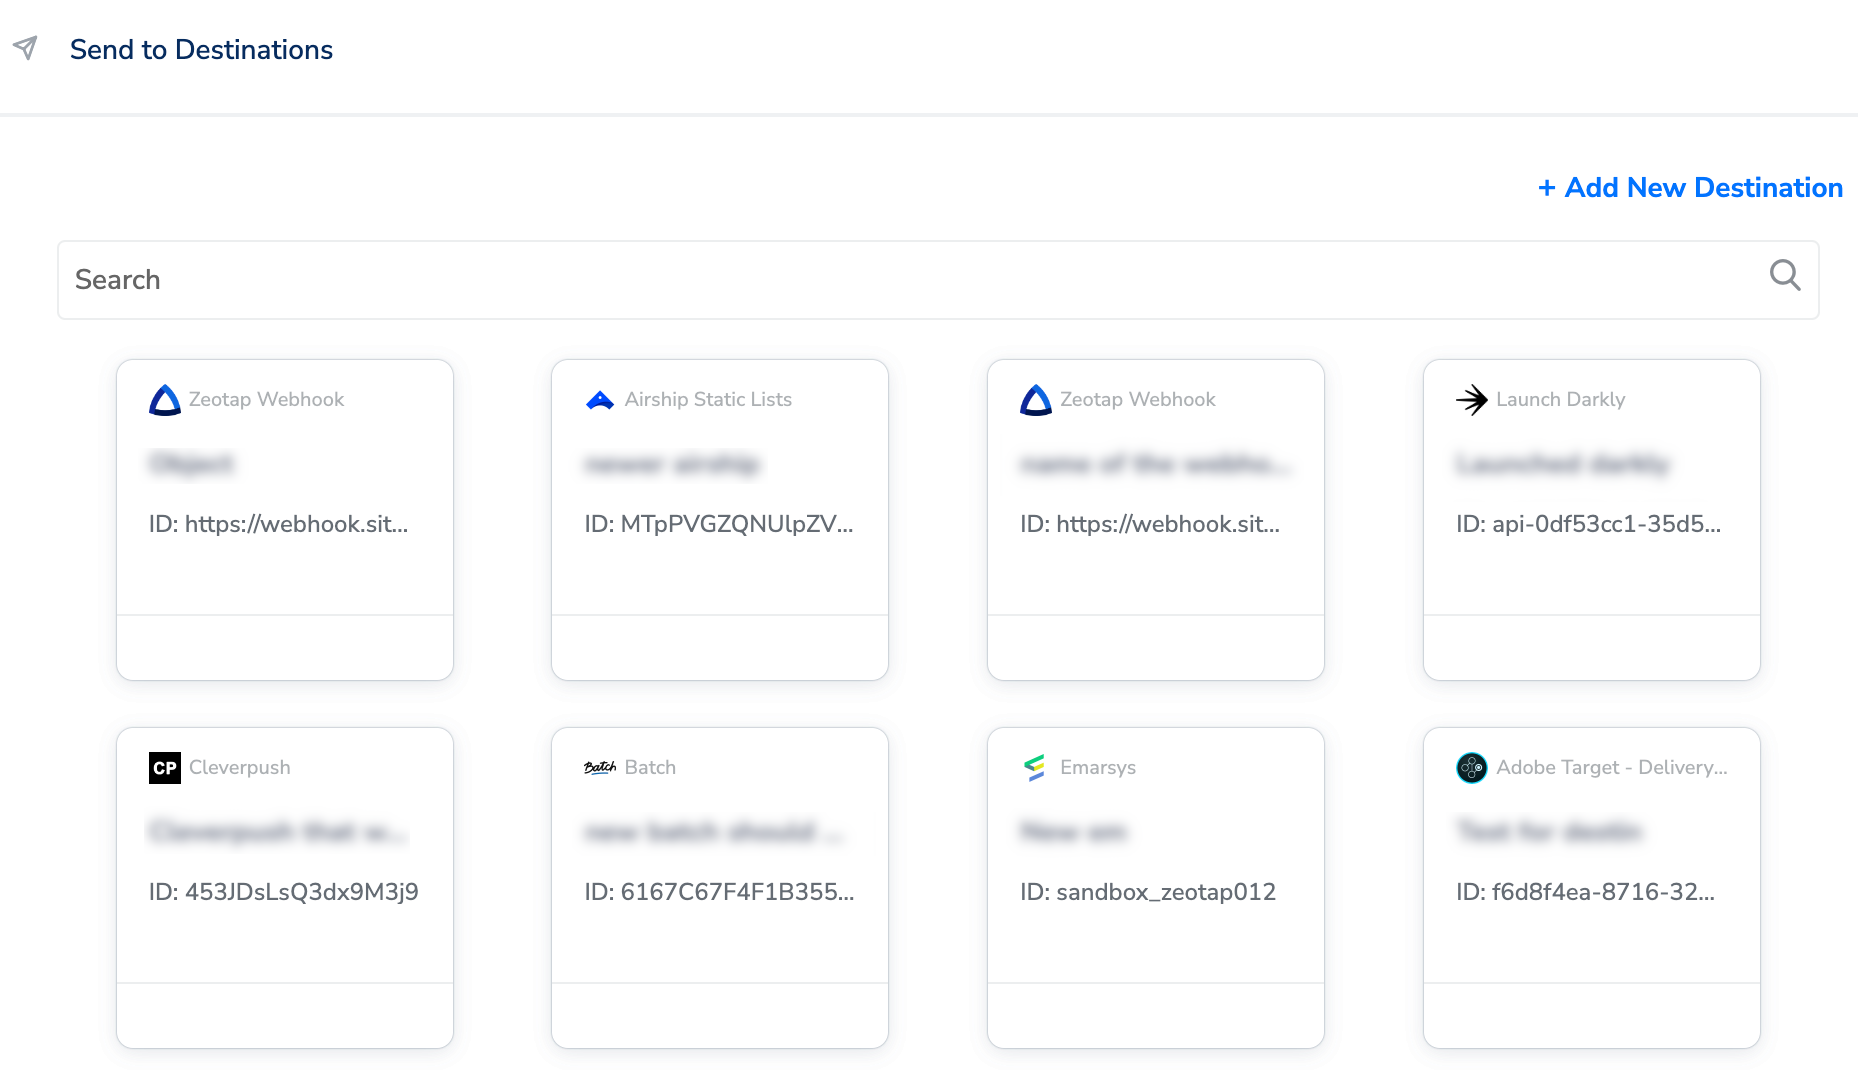
Add New Destination
Perform the following steps to add a new destination:Choose the API Type from the drop-down menu. You can either choose POST or PATCH as per your Enter the Private API Key associated with your Cleverpush account. For information about how to obtain this from Cleverpush, refer to the Components of Cleverpush section.
Enter the Channel ID associated with your push notification channel. For information about how to obtain this from Emarsys, refer to the Components of Cleverpush section.
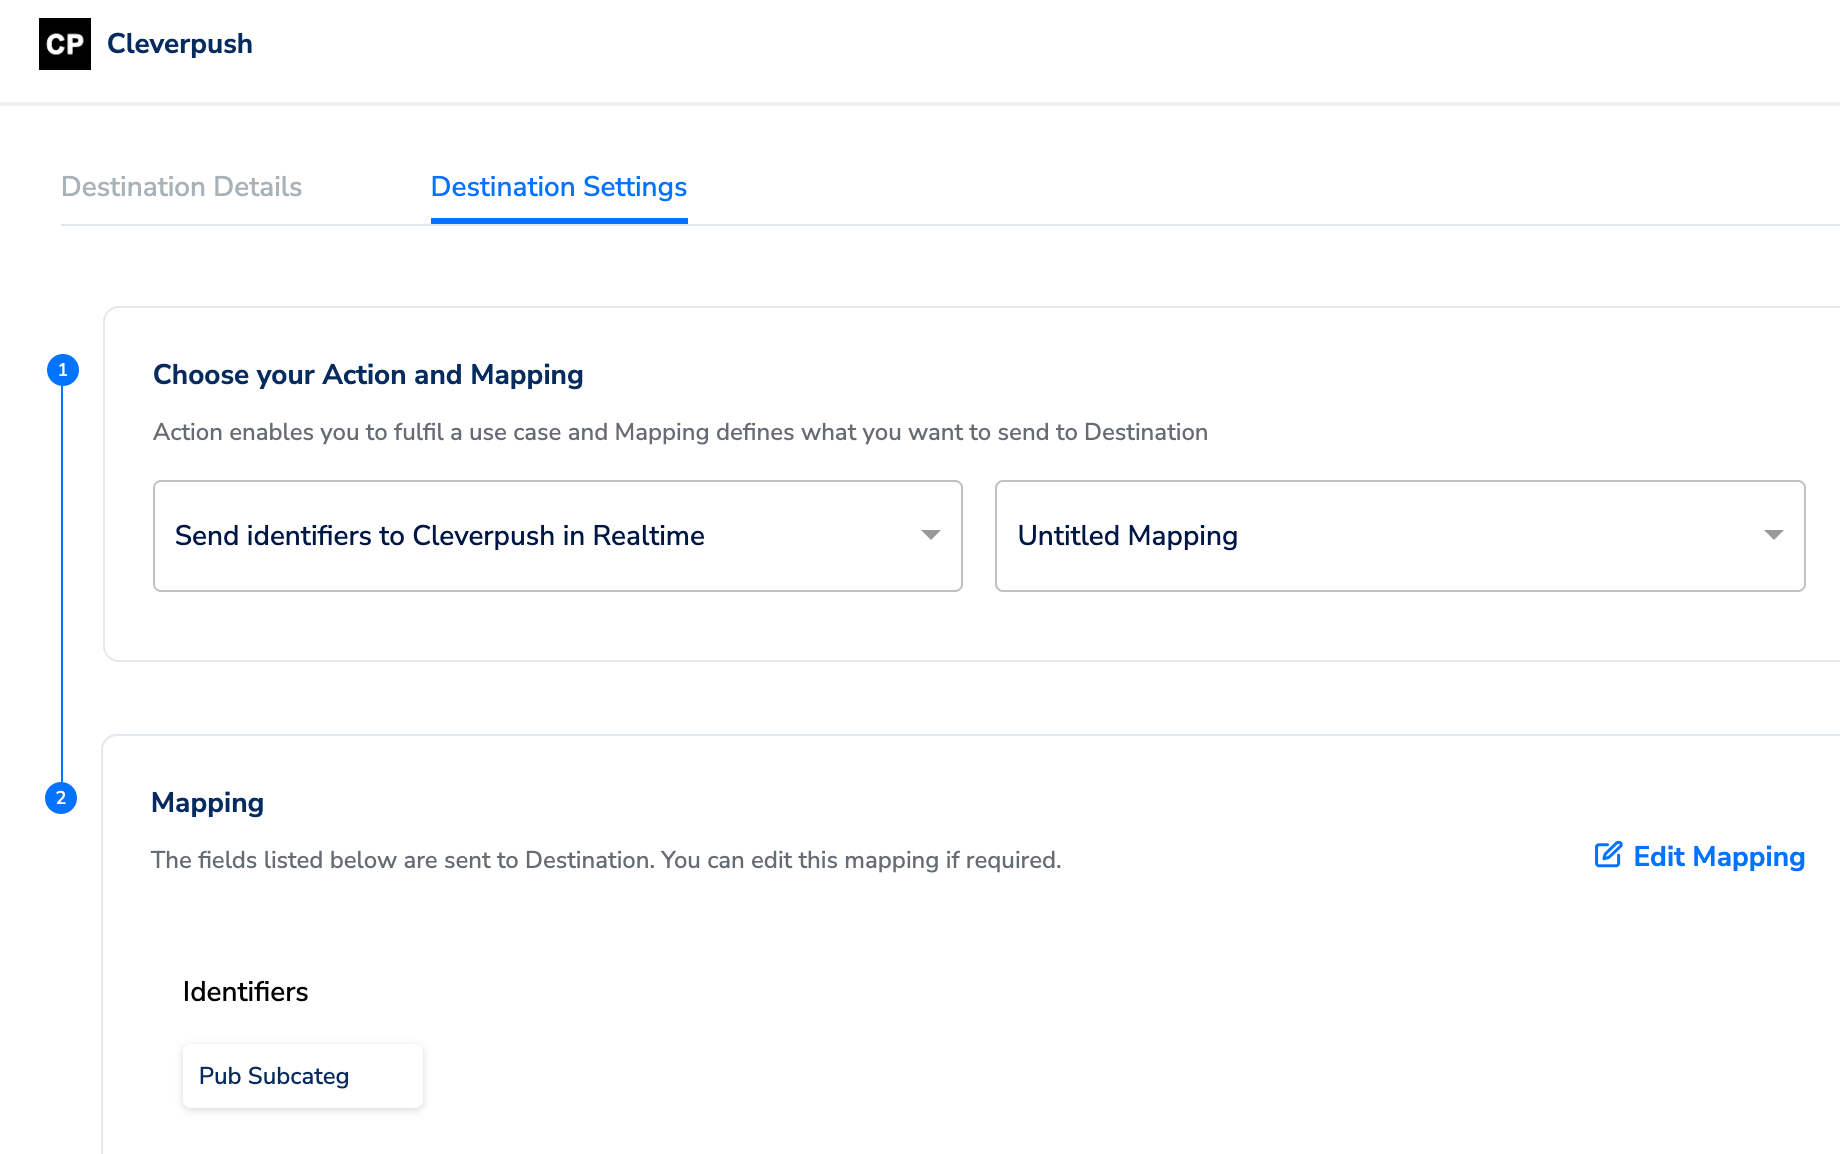
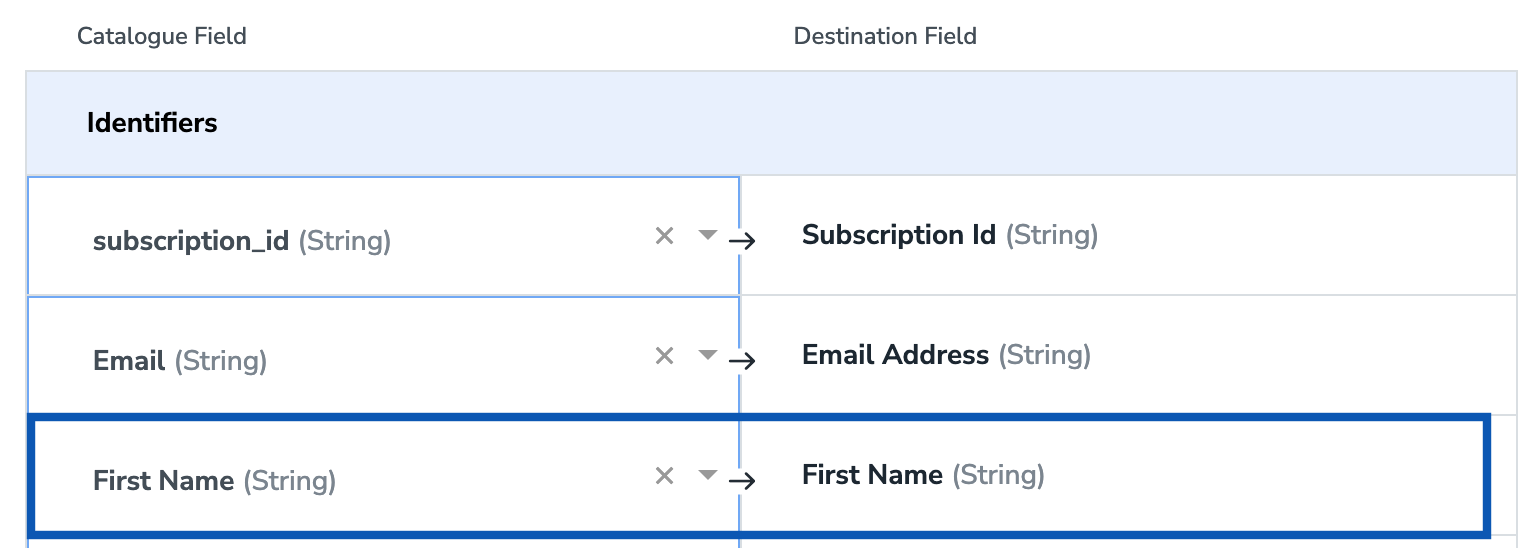
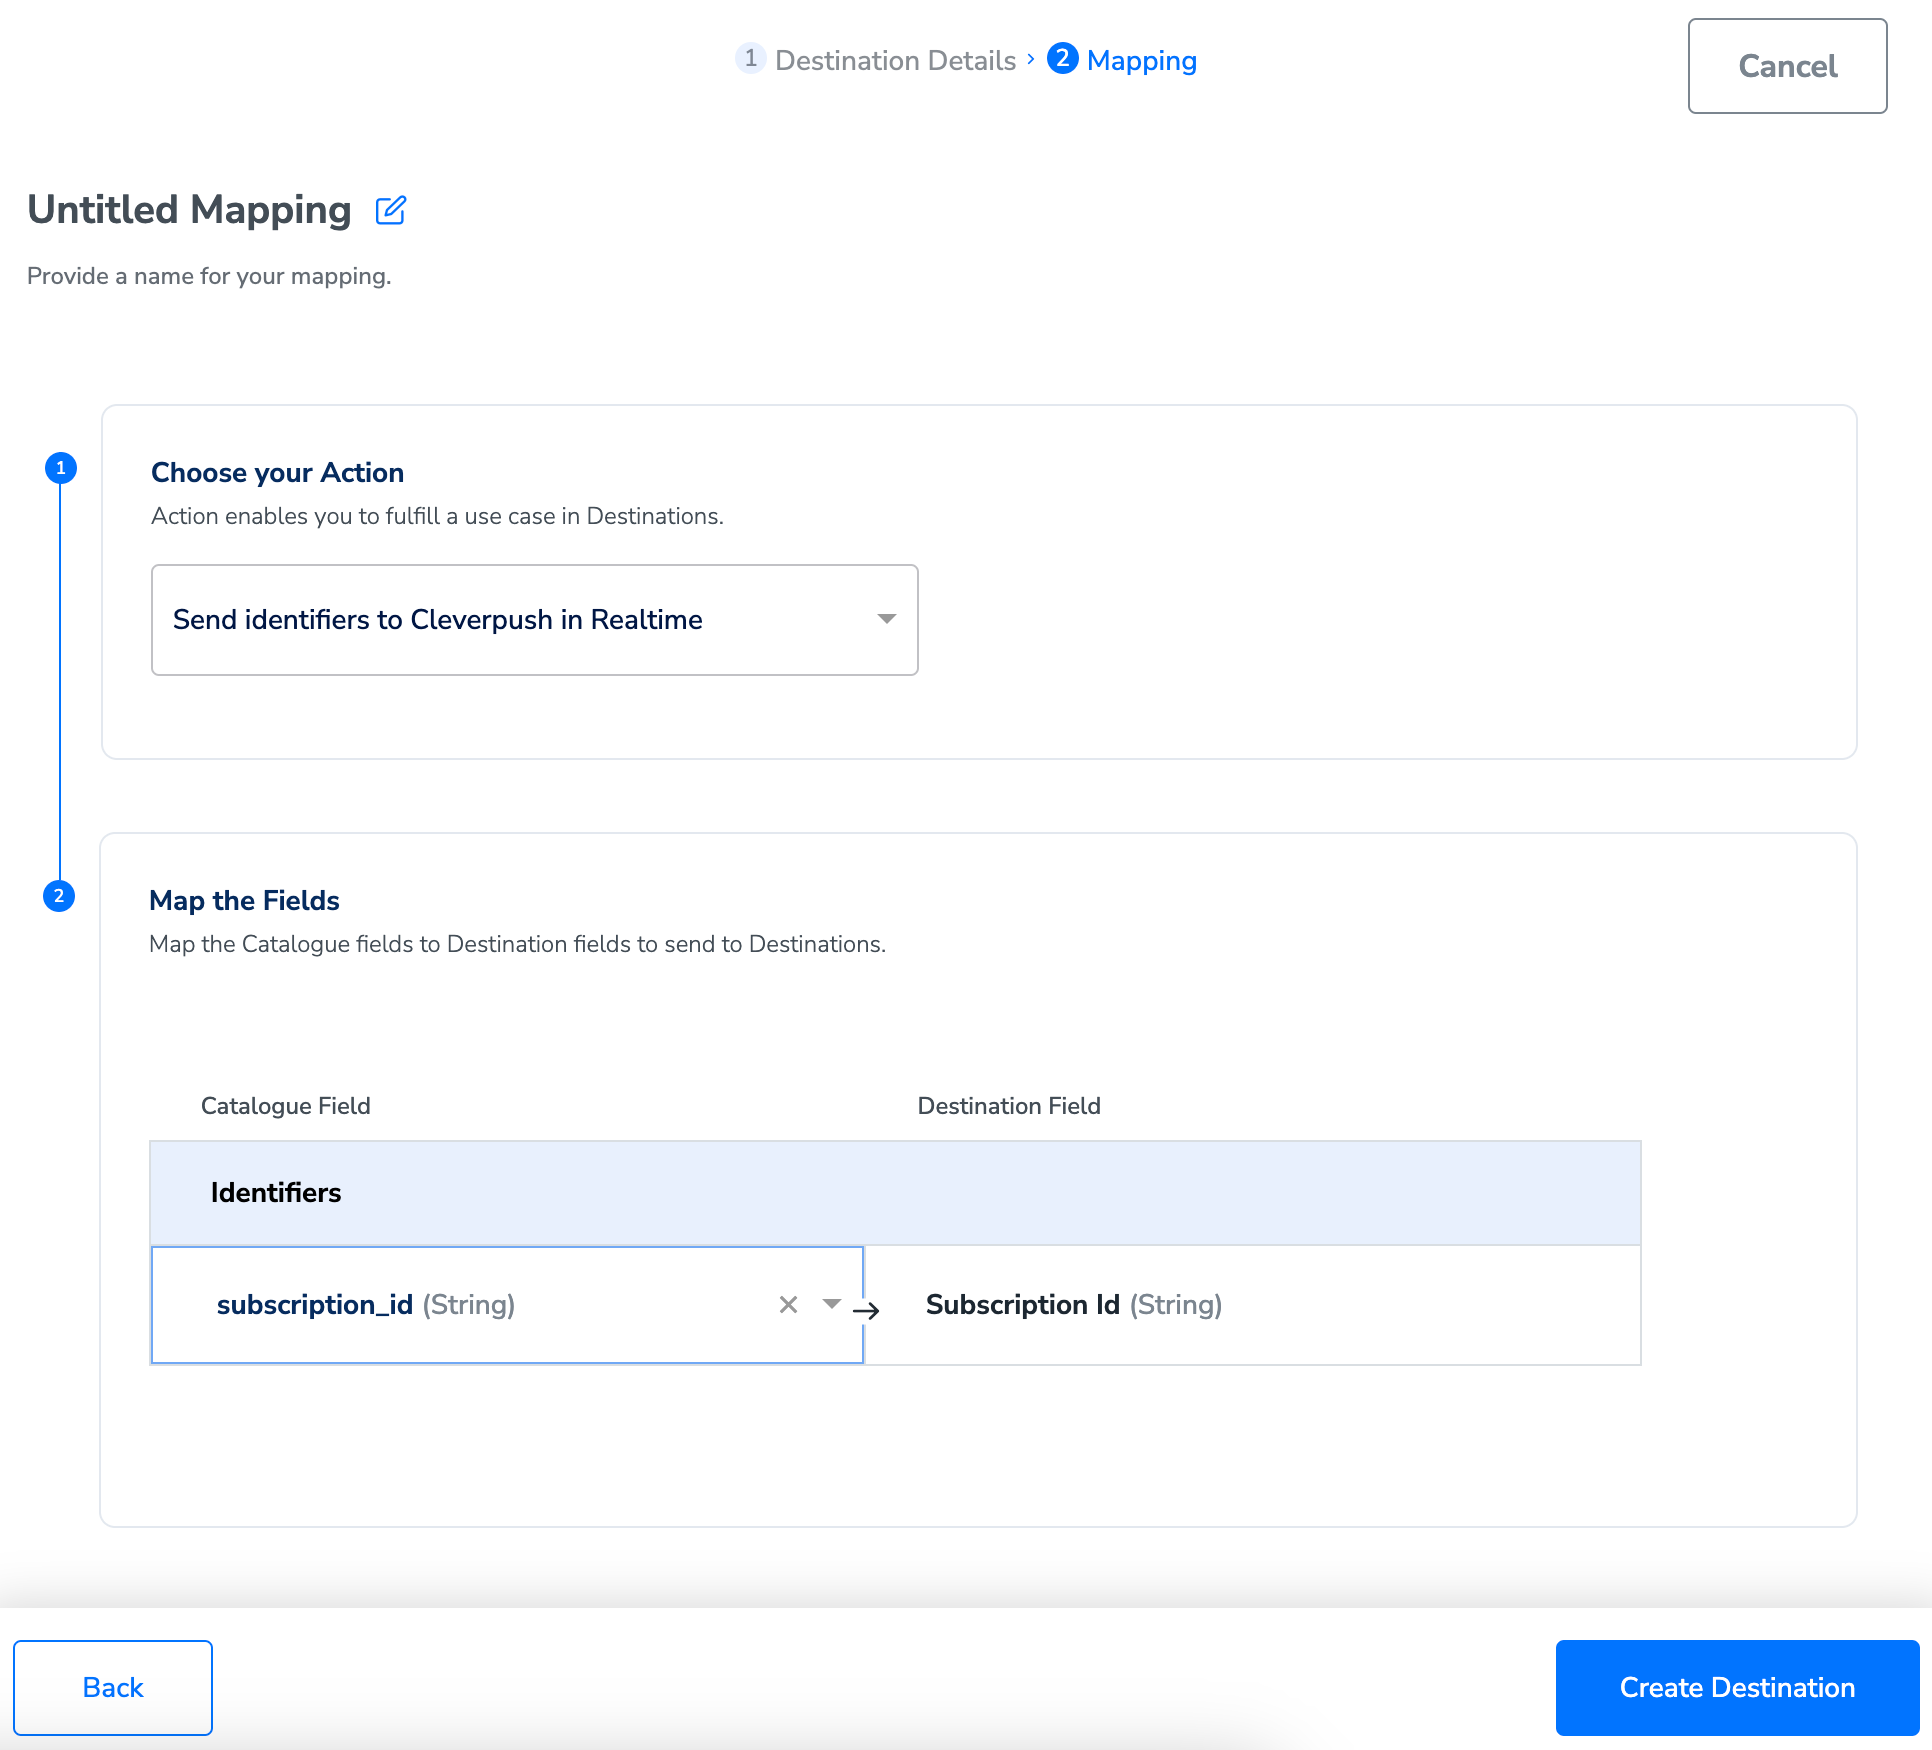
In the mapping screen that appears, under Choose your Action, you can either choose Send identifiers and attributes to Cleverpush in Realtime or Send identifiers to Cleverpush in Realtime as the action for sending data from the workflow created in Journeys.a. If you choose Send identifiers and attributes to Cleverpush in Realtime as your action, then along with the Subscription ID, you can send the standard attributes such as First Name, Last Name, Email Address (raw) and Gender. However, to use them, first, you need to add them in the Cleverpush console. Note that you can also send custom identifiers and attributes to Cleverpush by using + Add Mapping Field shown in the image below. Ensure that even these attributes are added in Cleverpush console before adding it in the Mapping (Zeotap CDP) screen. Otherwise, the data will not be sent correctly. Learn more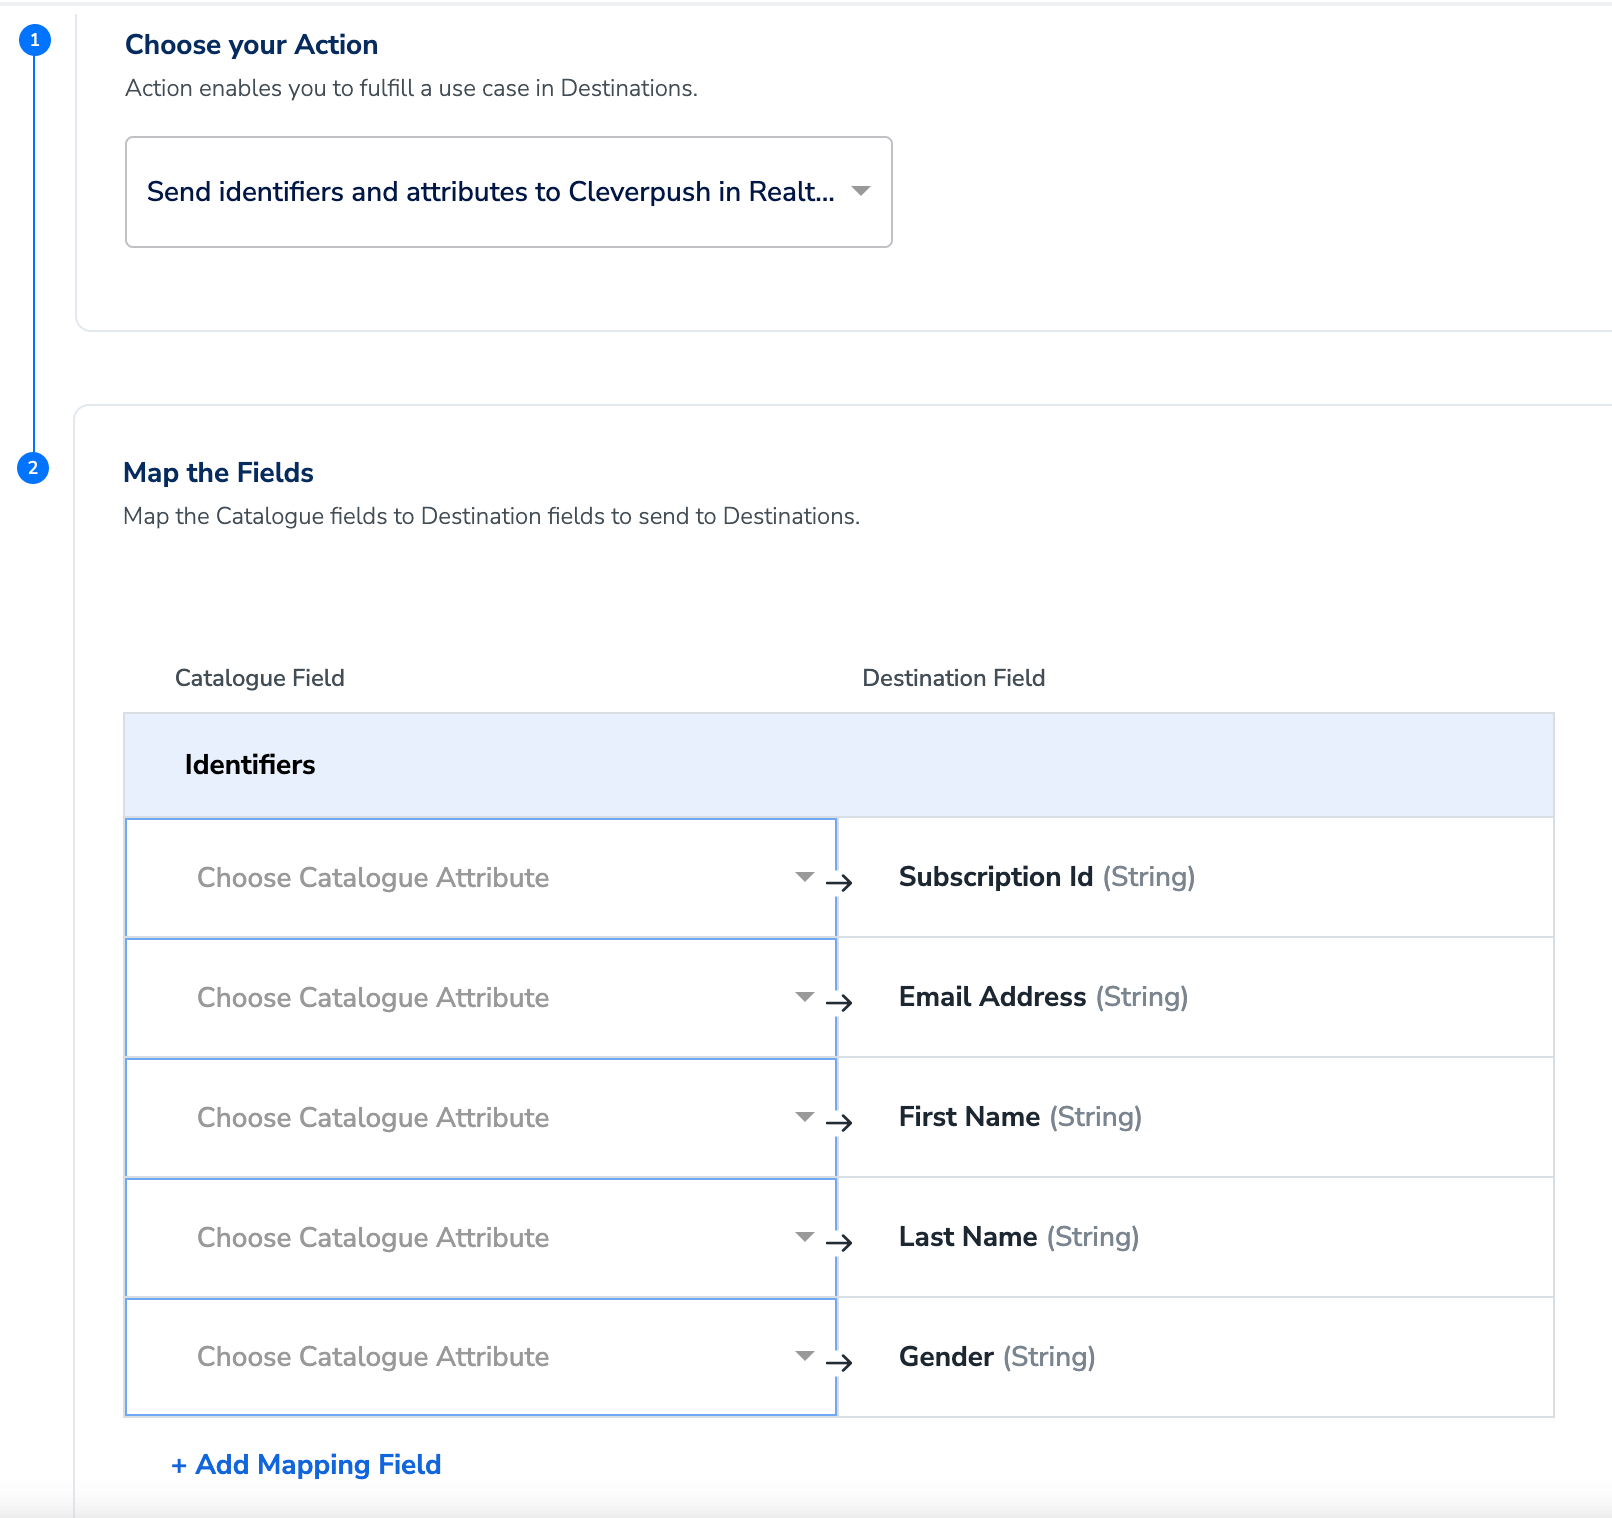
Activate the Destination on Journeys
After creating a destination, next, you have to add workflow-level inputs as mentioned below.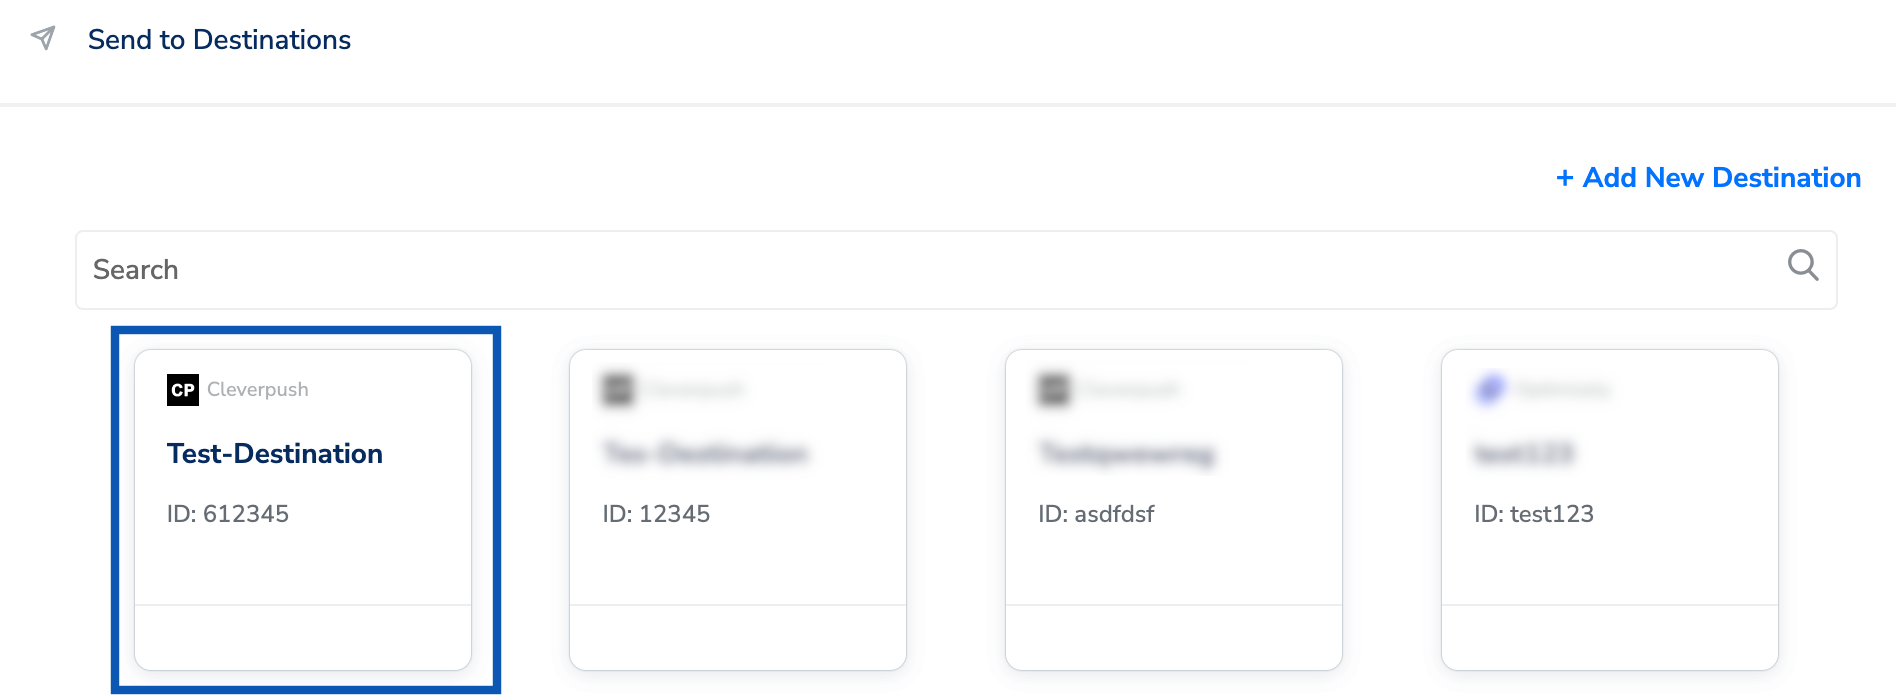
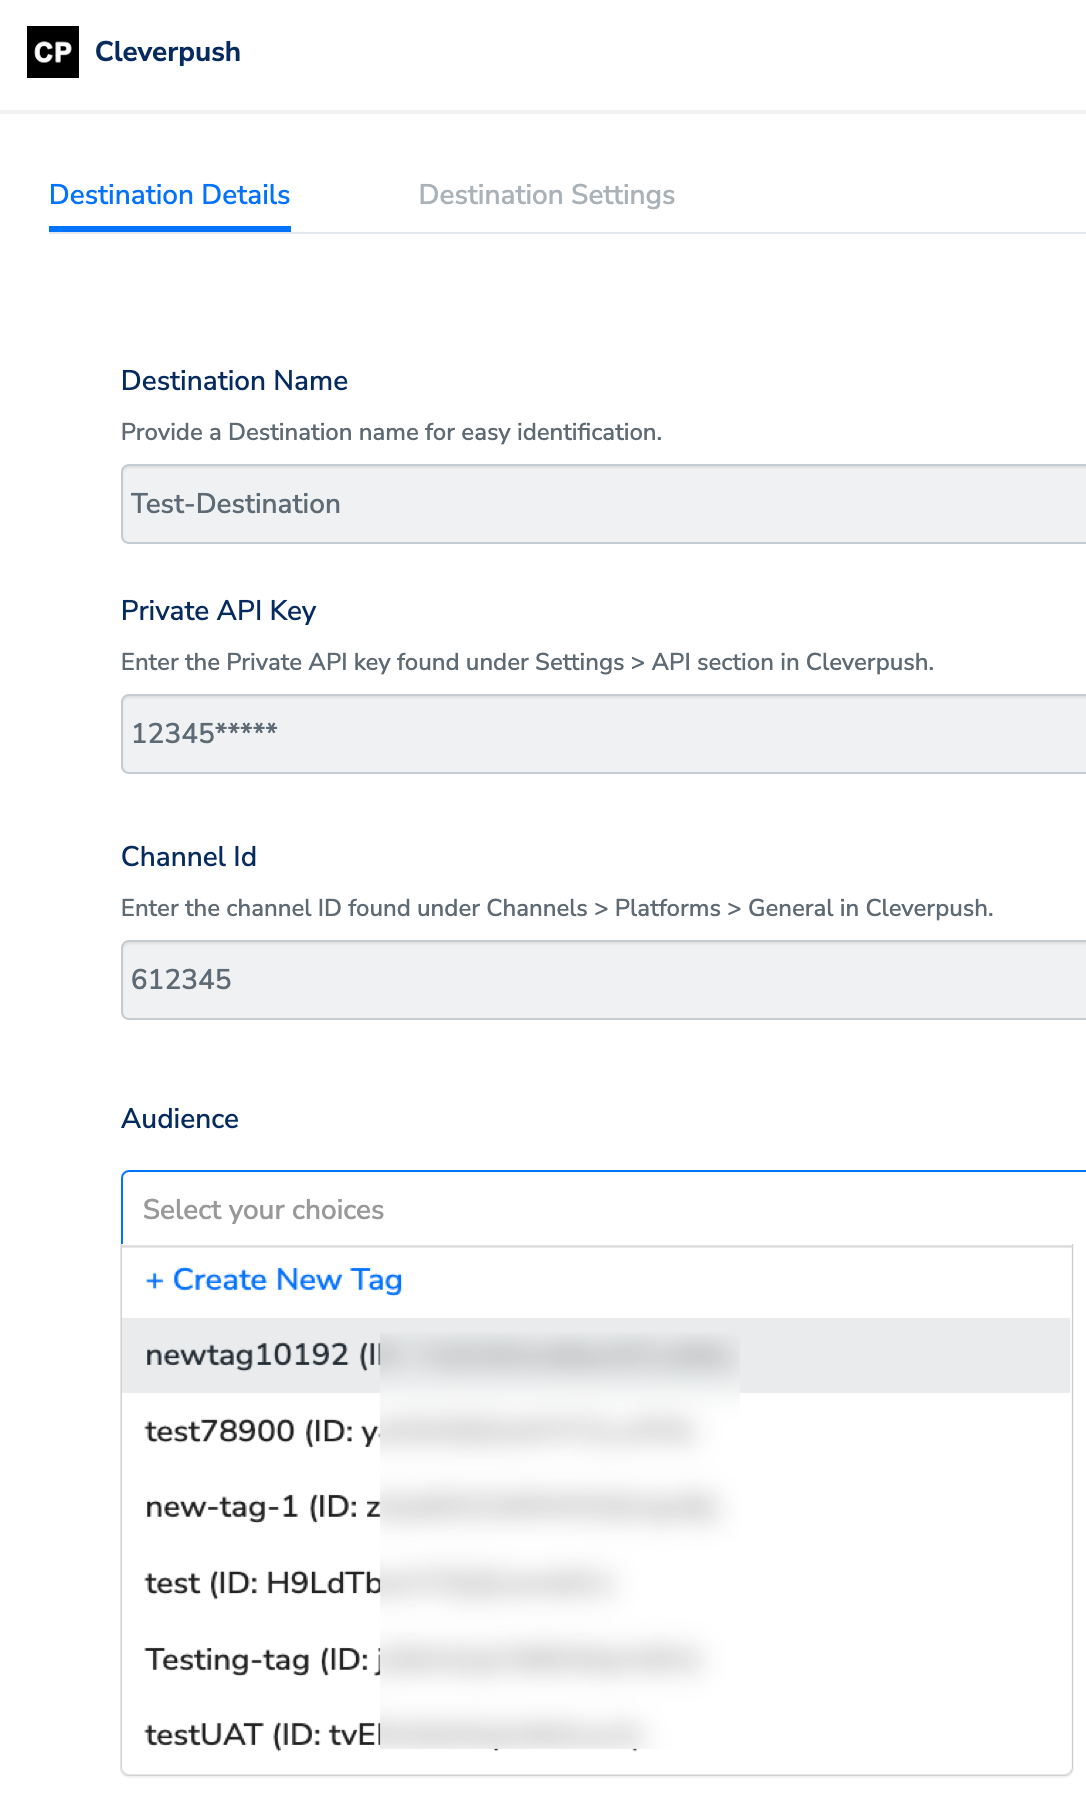
The Private API Key and Channel ID fields are automatically populated based on the value that you had entered while creating the destination.
Under Audience, choose from the drop-down to categorise your users based on specific characteristics related to your workflow. You can either choose from the list of existing tags or create a new one by clicking + Create New Tag option.