Overview
Braze is a customer engagement platform that offers customer-centric interactions between consumers and brands in real-time. It allows the client to power personalised messaging across mobile, SMS, email, web and more. Braze integration allows clients to create real-time orchestrations and run email/push notification campaigns.Note:To create email marketing campaigns, onboard the raw email addresses to Zeotap by mapping them to Email Raw field in the Zeotap Catalogue.
- Send First Name and Last Name through Zeotap, based on which clients can send personalized emails through Braze
- Send Custom Event or a Purchase event in real-time through Zeotap, based on which clients can create campaign triggers within Braze to target their customers
Integration Methods for Braze
This section provides information about the two methods through which clients can integrate with Braze:Method 1
In this method, you have to perform the following tasks:- Integrate the Braze SDK on your website or app.
- Integrate Braze with Zeotap through Symphony.
Note:
- Only User traits must be mapped to the respective Braze fields under the Data To Send tab. If you map the Event and Purchase attributes, it leads to duplication of events within Braze.
- Map External ID to User ID that was configured while setting up the Braze SDK.
Method 2
In this method, you can integrate Braze with Zeotap through Symphony.Note:
- The Braze UI features such as in-app messaging, news feed, content cards or push notifications are not supported in this method.
- Zeotap recommends that you map hashed email available in Zeotap Catalogue to the External ID.
Data flow to Braze and Supported Identifiers
Braze records different attributes using their user track API https://www.braze.com/docs/api/endpoints/user_data/post_user_track/. The following points summarise the data flow:- Zeotap sends user profile attributes, custom attributes, custom events and purchases fields.
- Client maps all the relevant Zeotap Catalogue fields to the Braze fields under the Data To Send tab.
- The data is then uploaded to Braze.
Prerequisites
Ensure that you have the following details available before starting the integration:- Client Name
- API Key
- Instance
Client Name
This is your client name for your Braze account. You can find it by navigating to the Braze Console as shown in the screenshot below.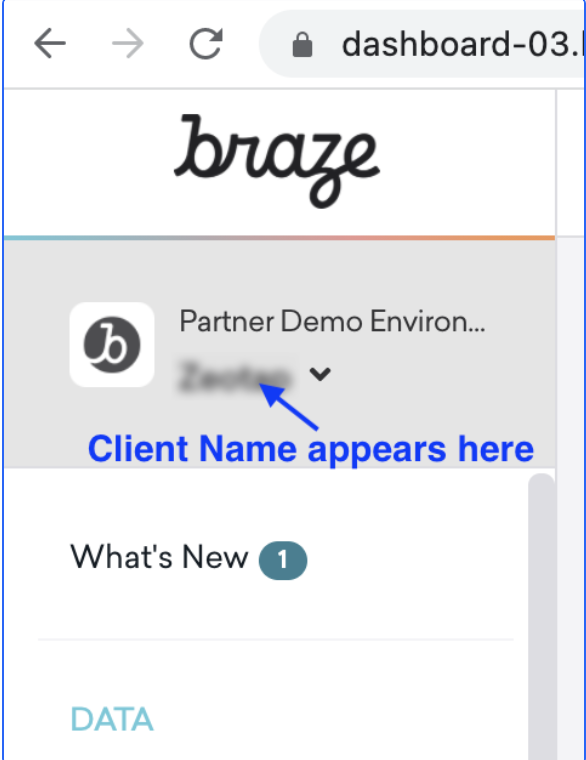
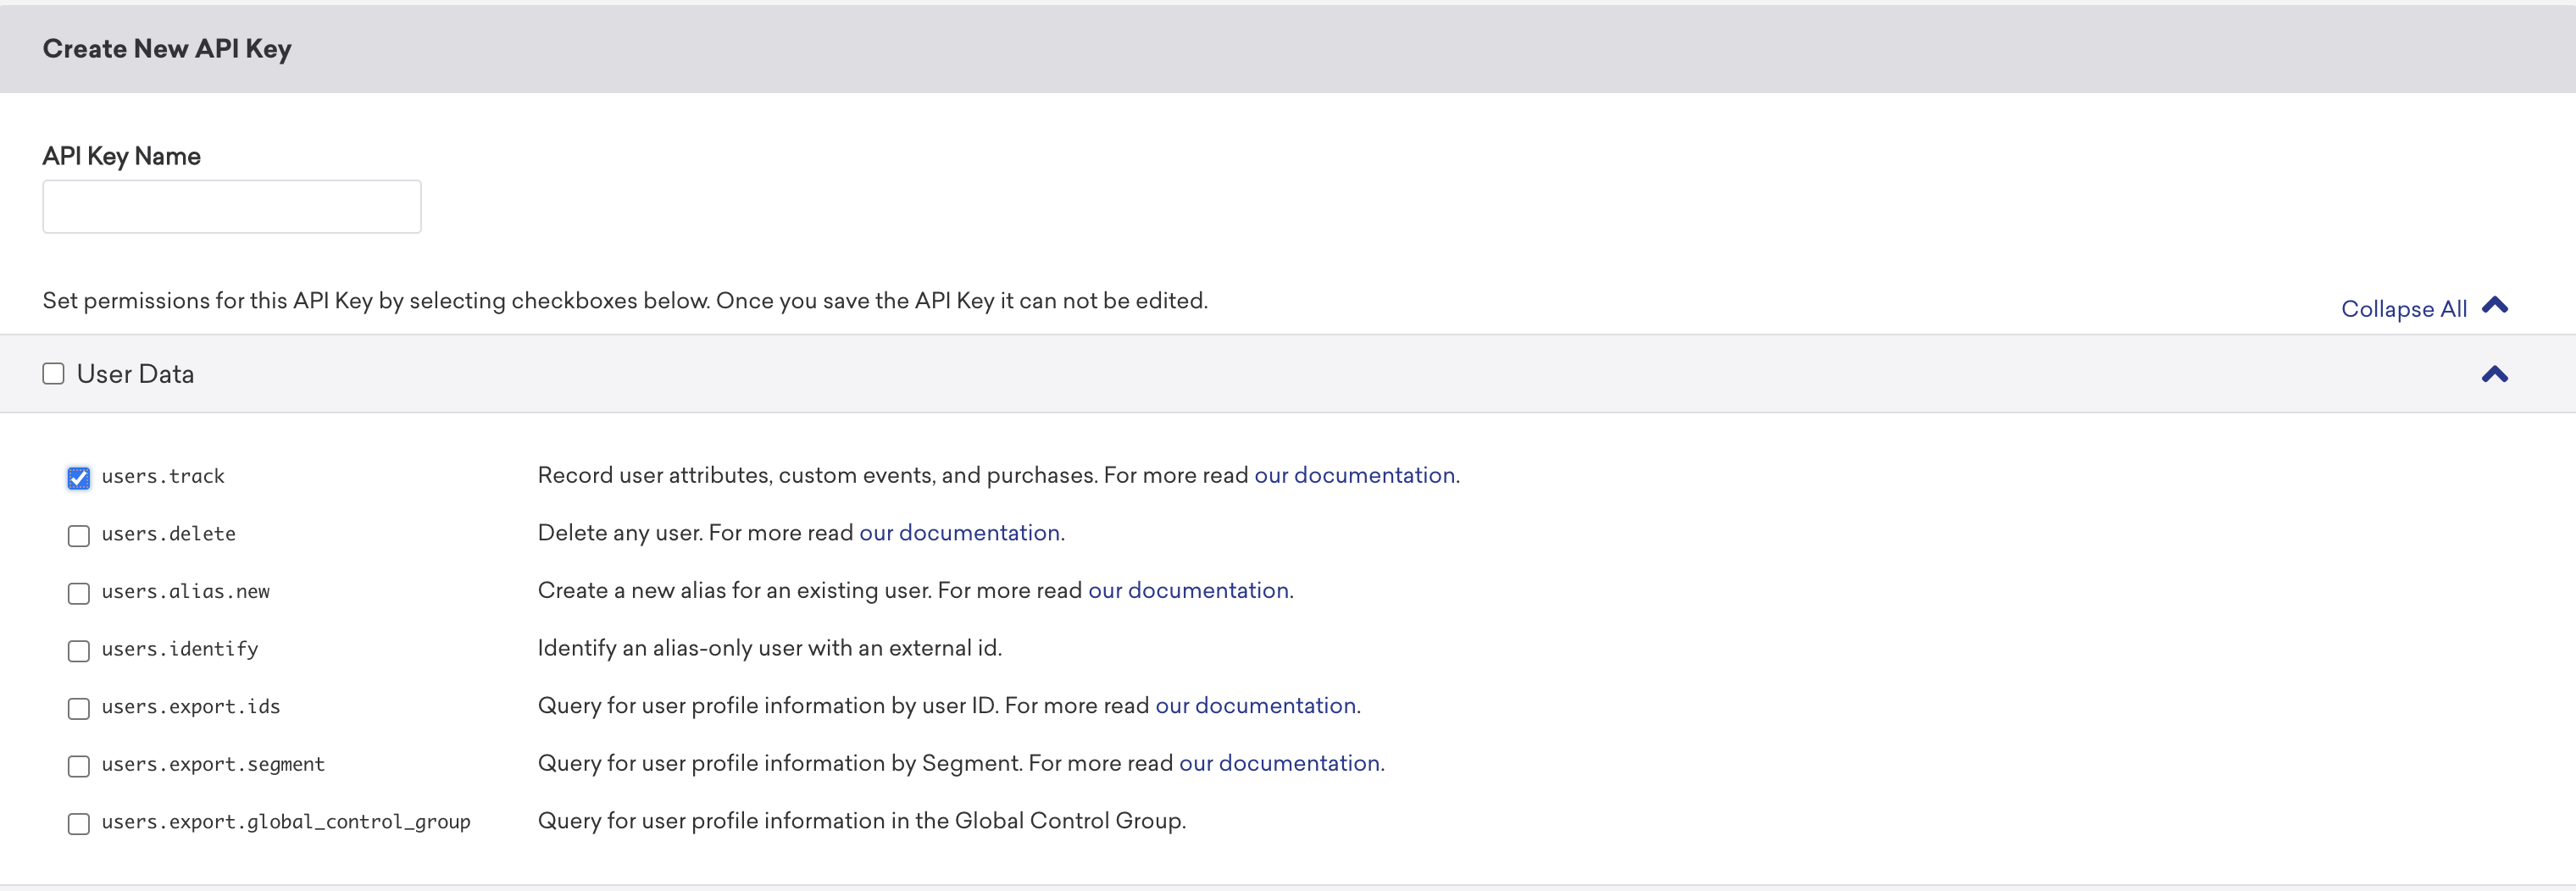
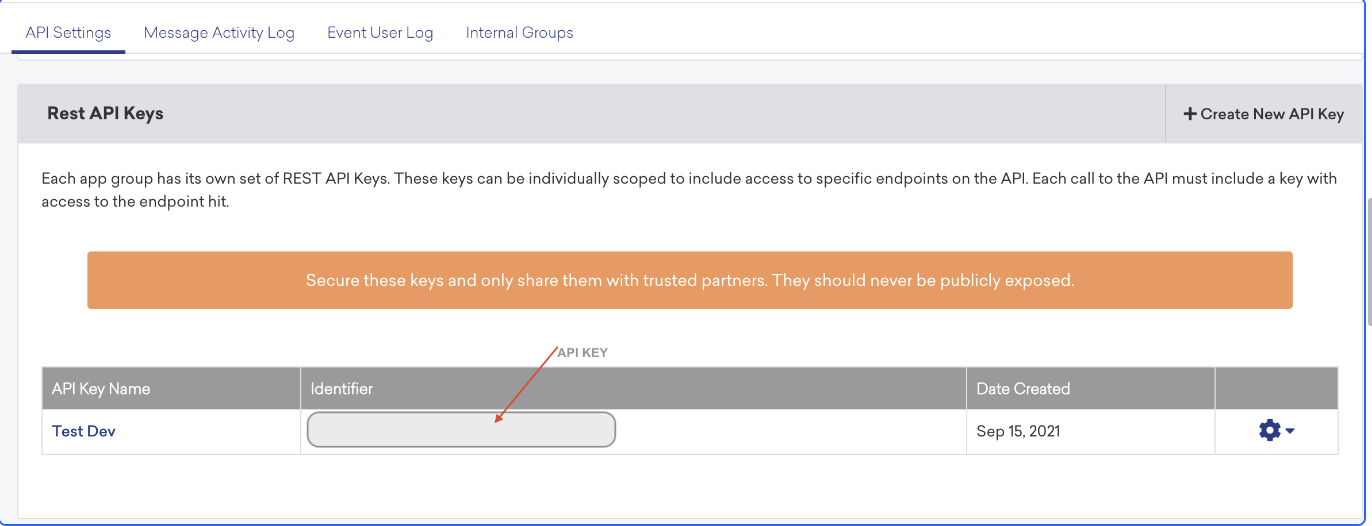
API Key
This is the API Key associated with the Braze account. You can find it in the Braze Console under Settings → Developer Console → Rest API Keys. Your account might already have an existing API key available in this section. However, the User Data Permissions are required for the API key to work. If the existing key does not have the required permissions, create a new key as mentioned below.- Click Create New API key.

- Enter the API Key Name and enable users.track checkbox under User Data as shown below.
Instance
Braze manages a number of different instances for dashboard and REST Endpoints. Once your account is provisioned, it is logged in to one of the URLs mentioned below. Select the correct instance from the drop-down menu based on the mapping mentioned below.Destination Setup
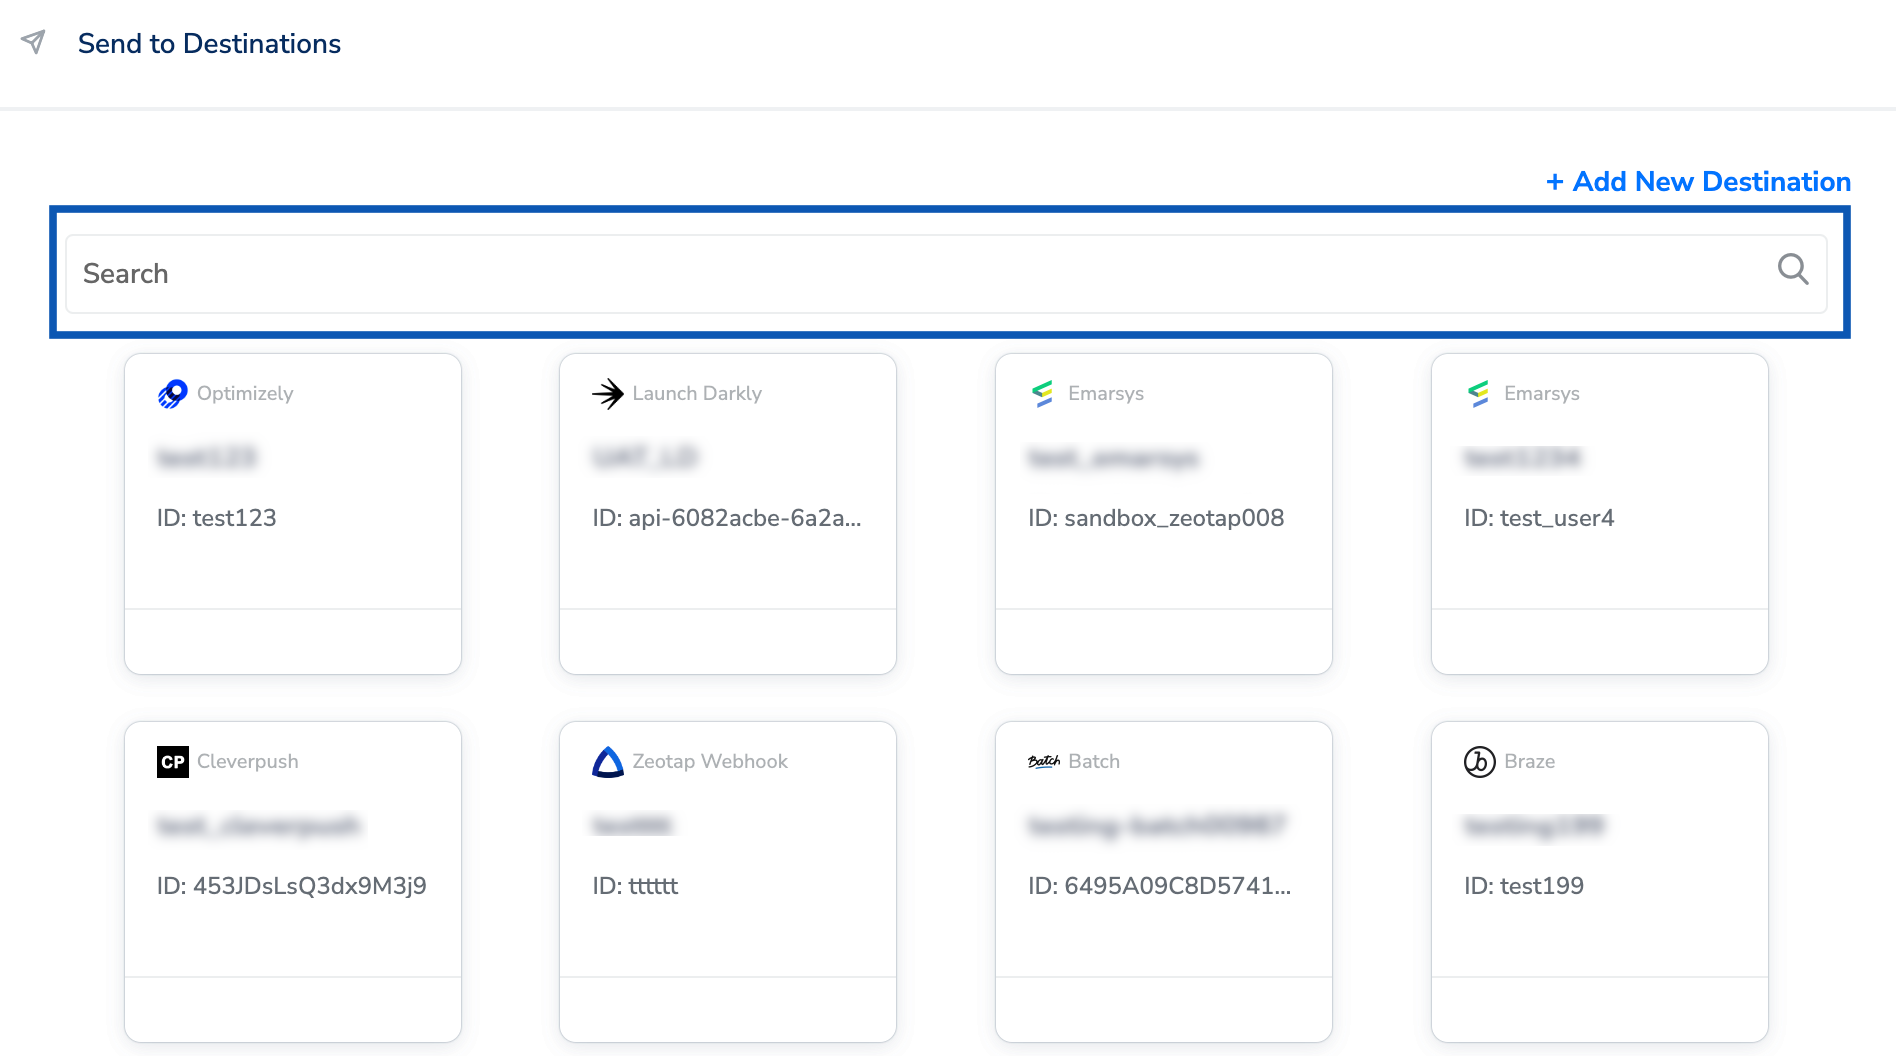
After you have applied filters or added conditions for your users in Journeys, you can activate them in Braze under Send to Destinations. A new window appears, where you can set up your destination. You can use an already existing destination from the list of available Destinations or create a new one by clicking + Add New Destination.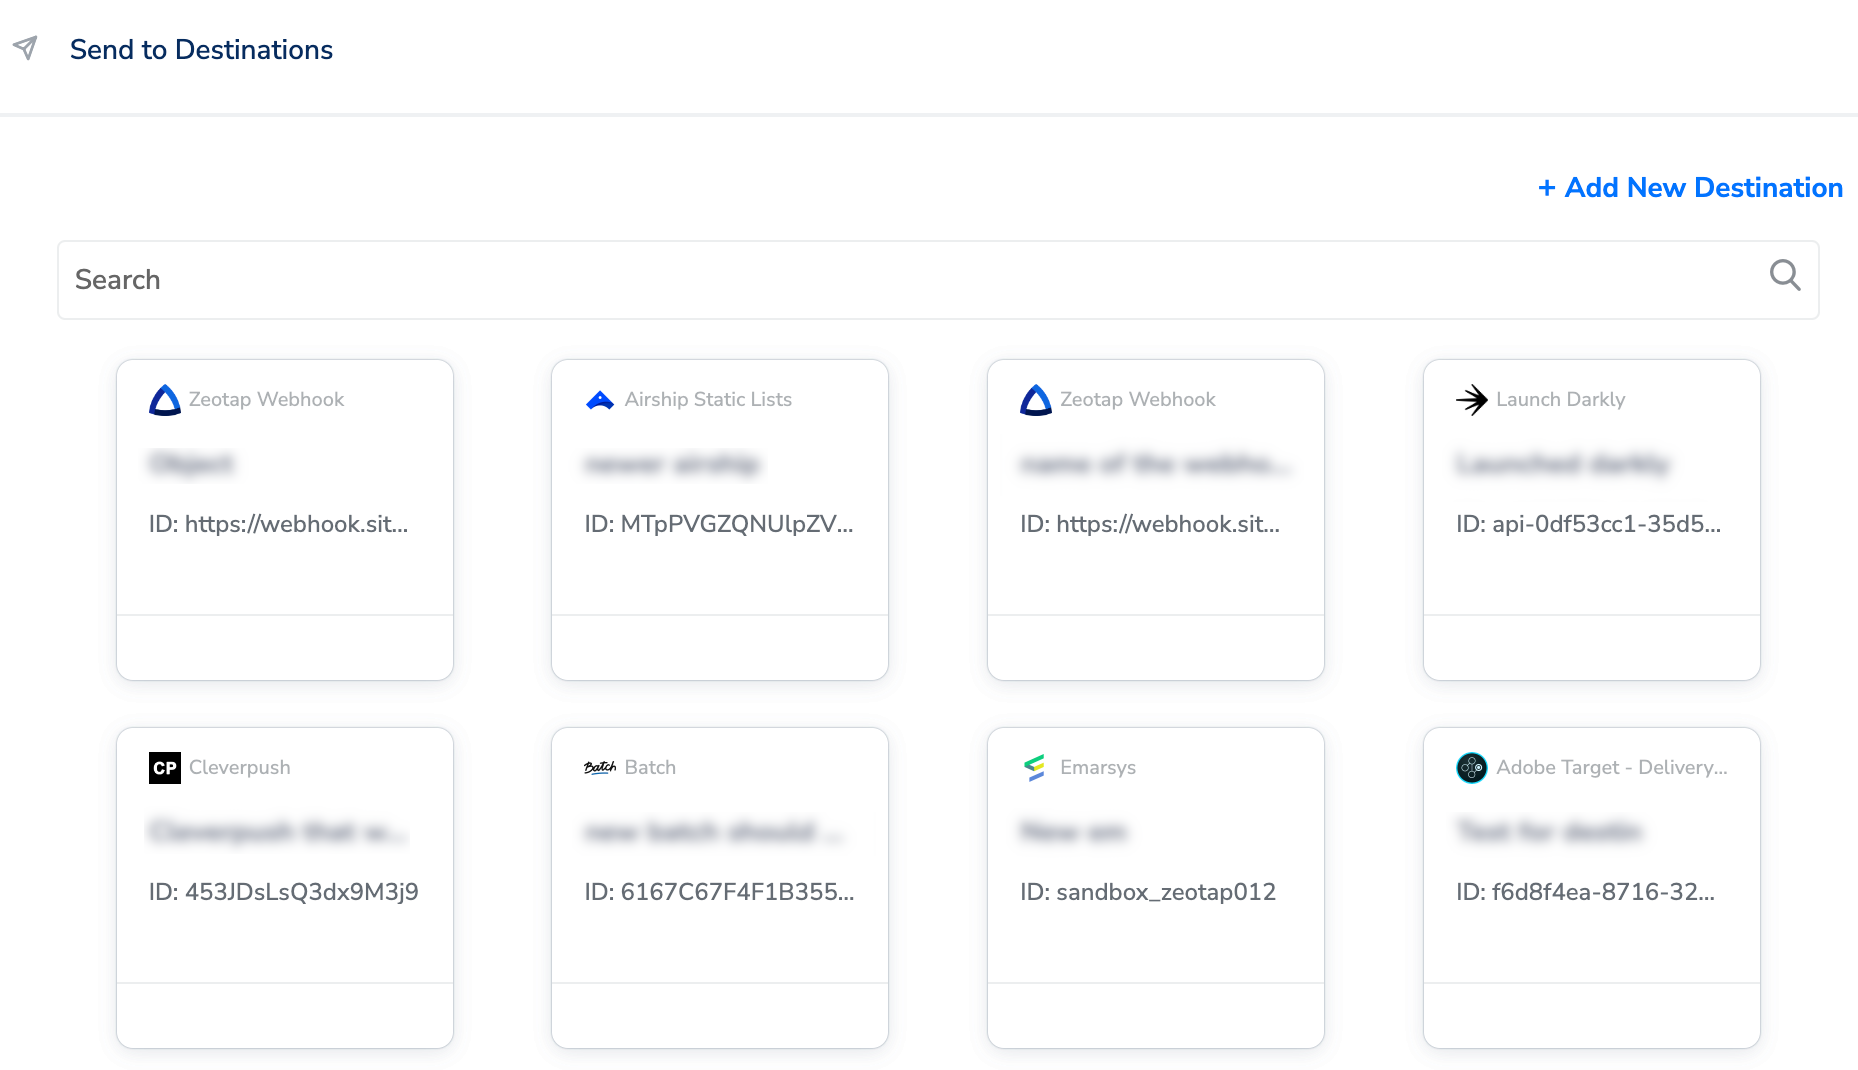
Add New Destination
Perform the following steps to add a new destination: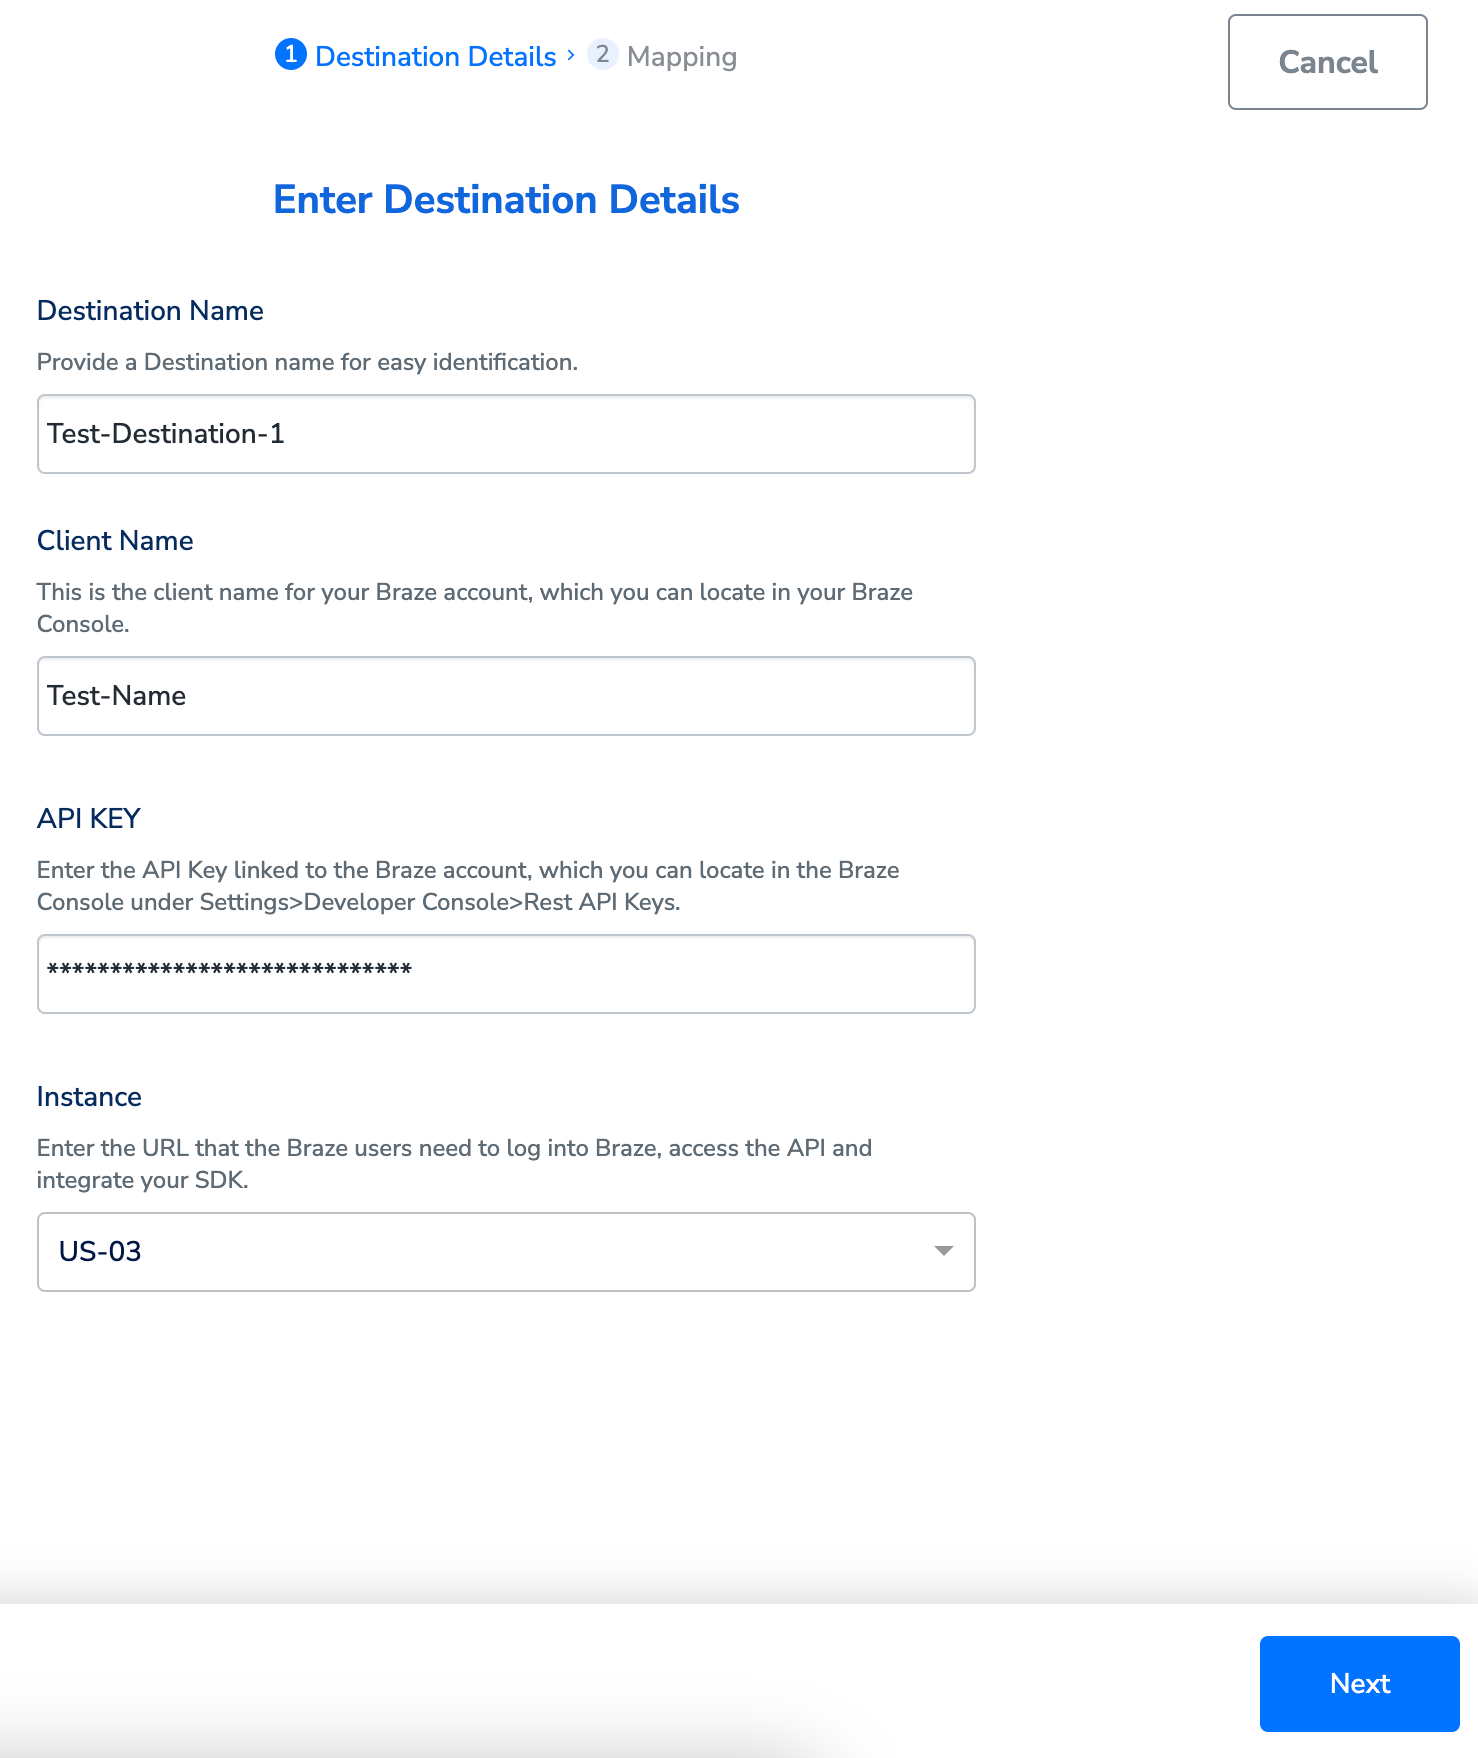
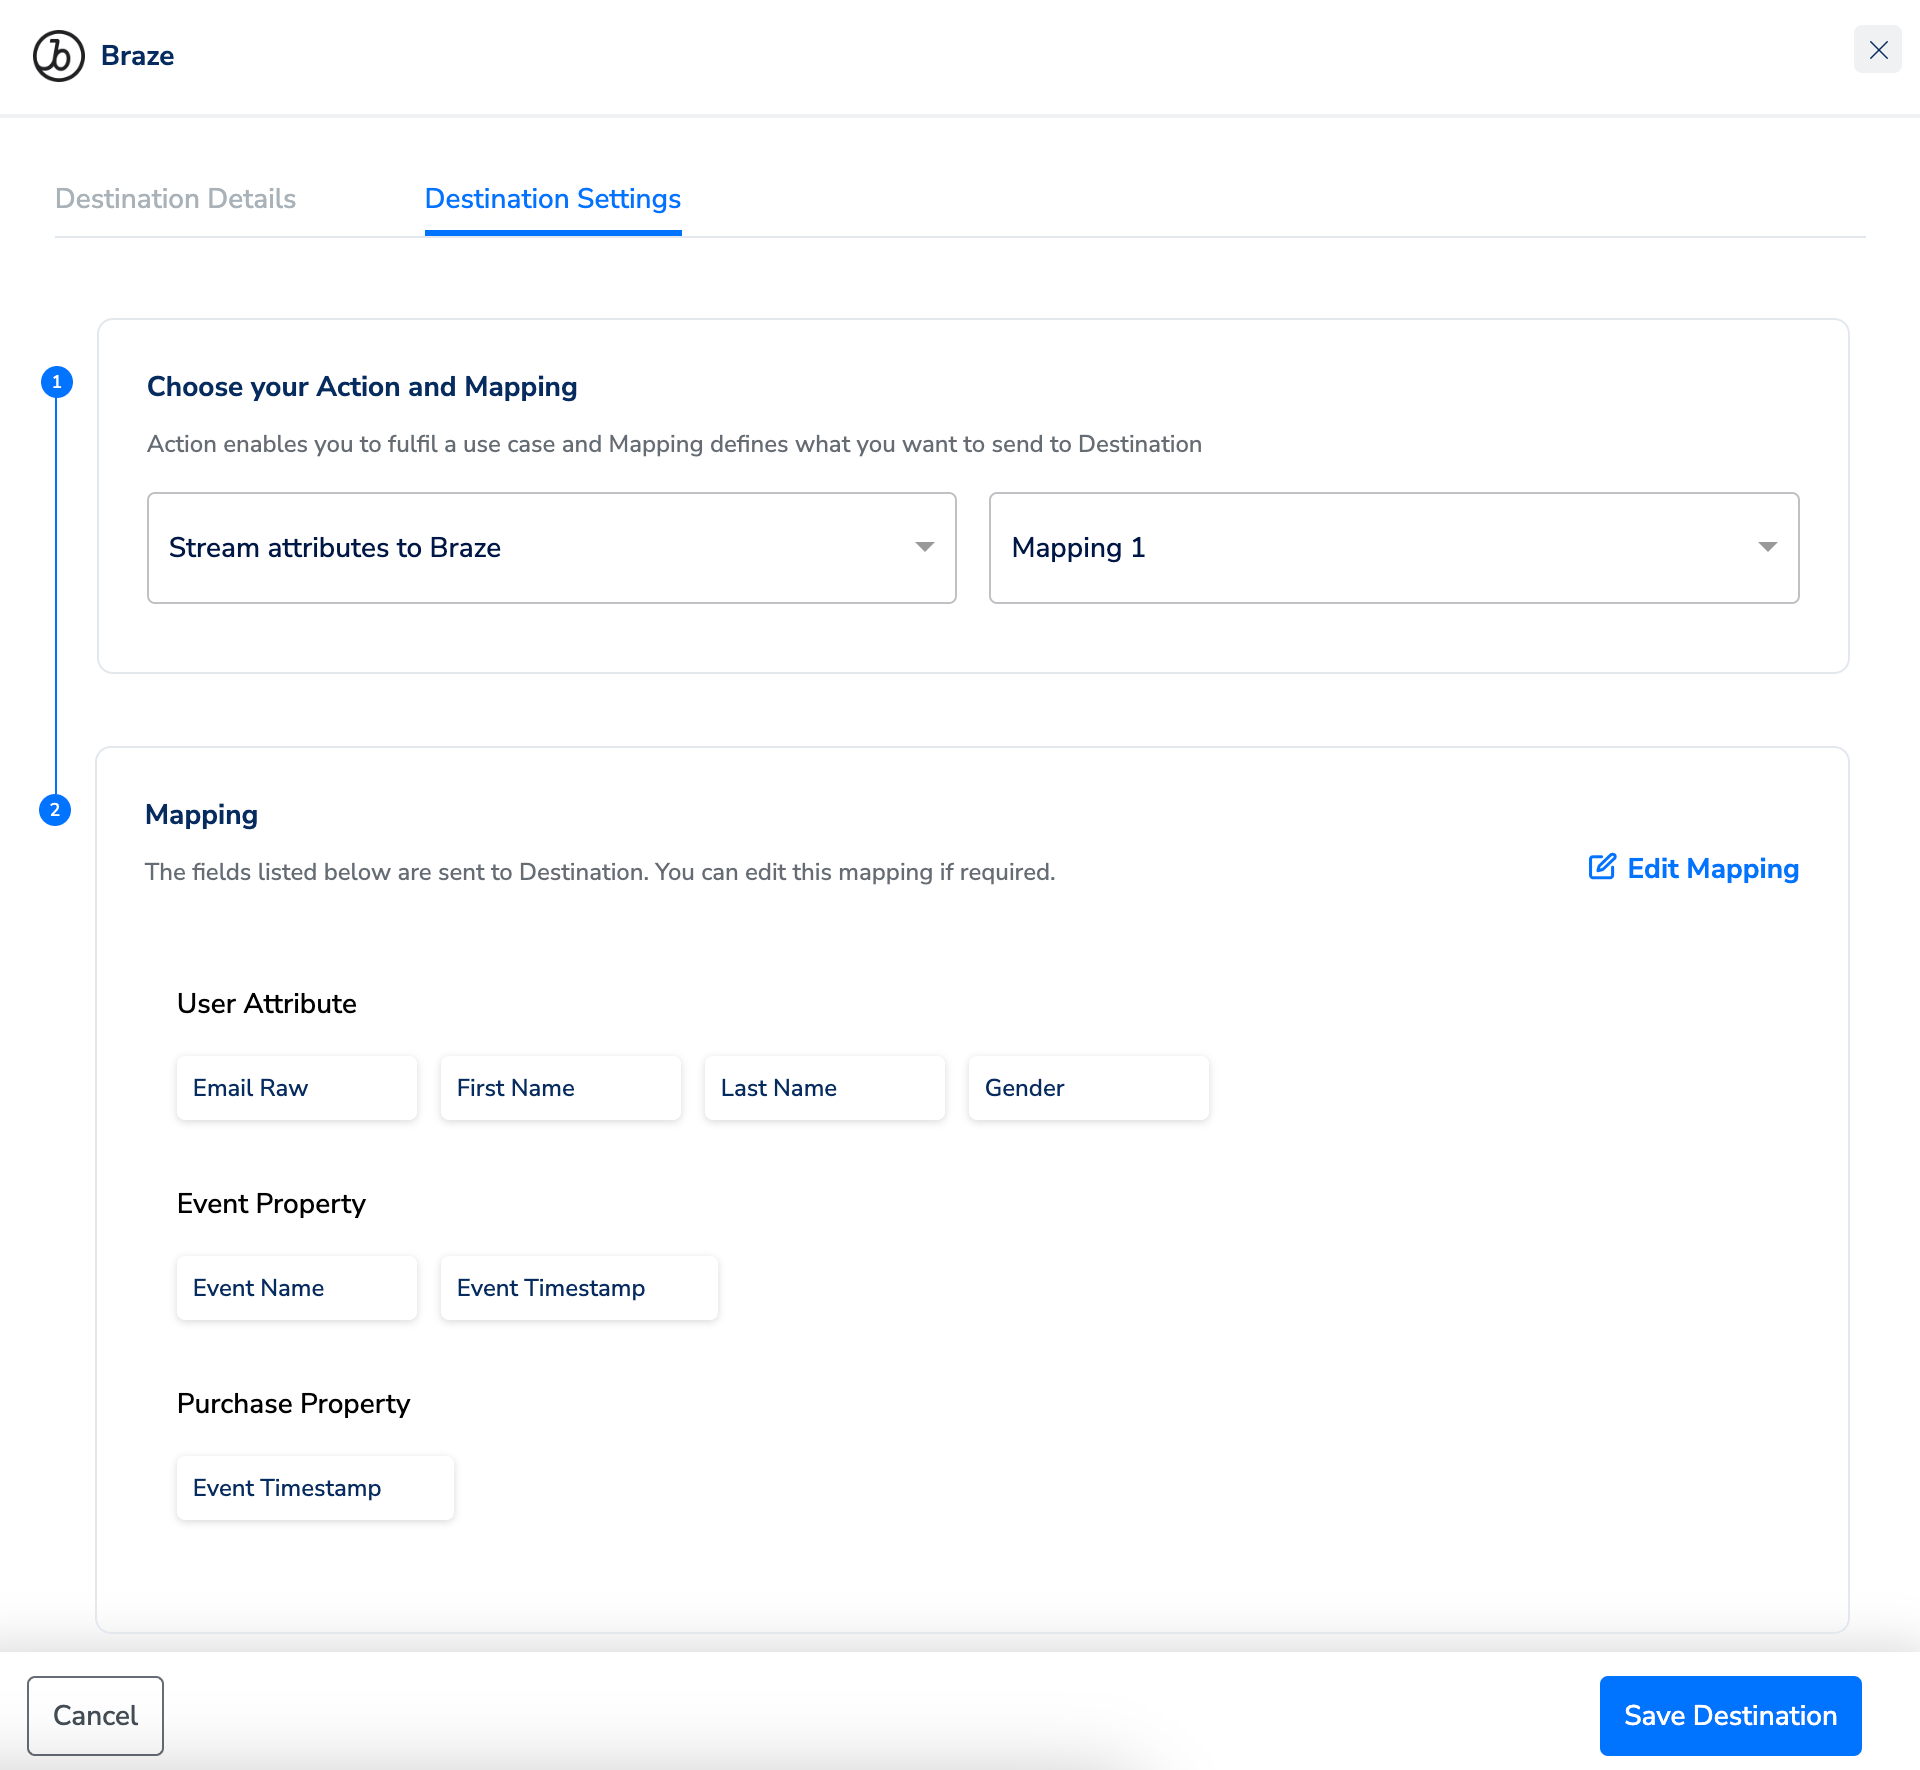
In the mapping screen that appears, under Choose your Action, select Stream attributes to Braze as the action for sending data from the workflow created in Journeys. Under Map the Fields, Zeotap CDP automatically maps certain fields to the relevant Braze fields like Email, Phone, First Name, Last Name and so on. You can edit or remove the mapping as per your requirement.You can also add custom data that can be mapped to the relevant Zeotap field and sent to Braze. You can include custom data as an Event Property, User Attribute or Purchase Property. For example, when sending an event related to renting a movie, you can provide additional event details such as the platform of release, the year it premiered, cast information and more. This allows for a more comprehensive and specific data representation that can now be achieved through Event Property. Similarly, you can send User Attribute and Purchase Property as well.Note that you can only send simple key-value pairs through these fields. For instance, if a customer purchases Nike shoes on Amazon, using a specific email ID and USD as the currency, the associated purchase properties can include key-value pairs like, color: red, checkout duration: 180 seconds, size: 10 UK, brand: Nike and so on.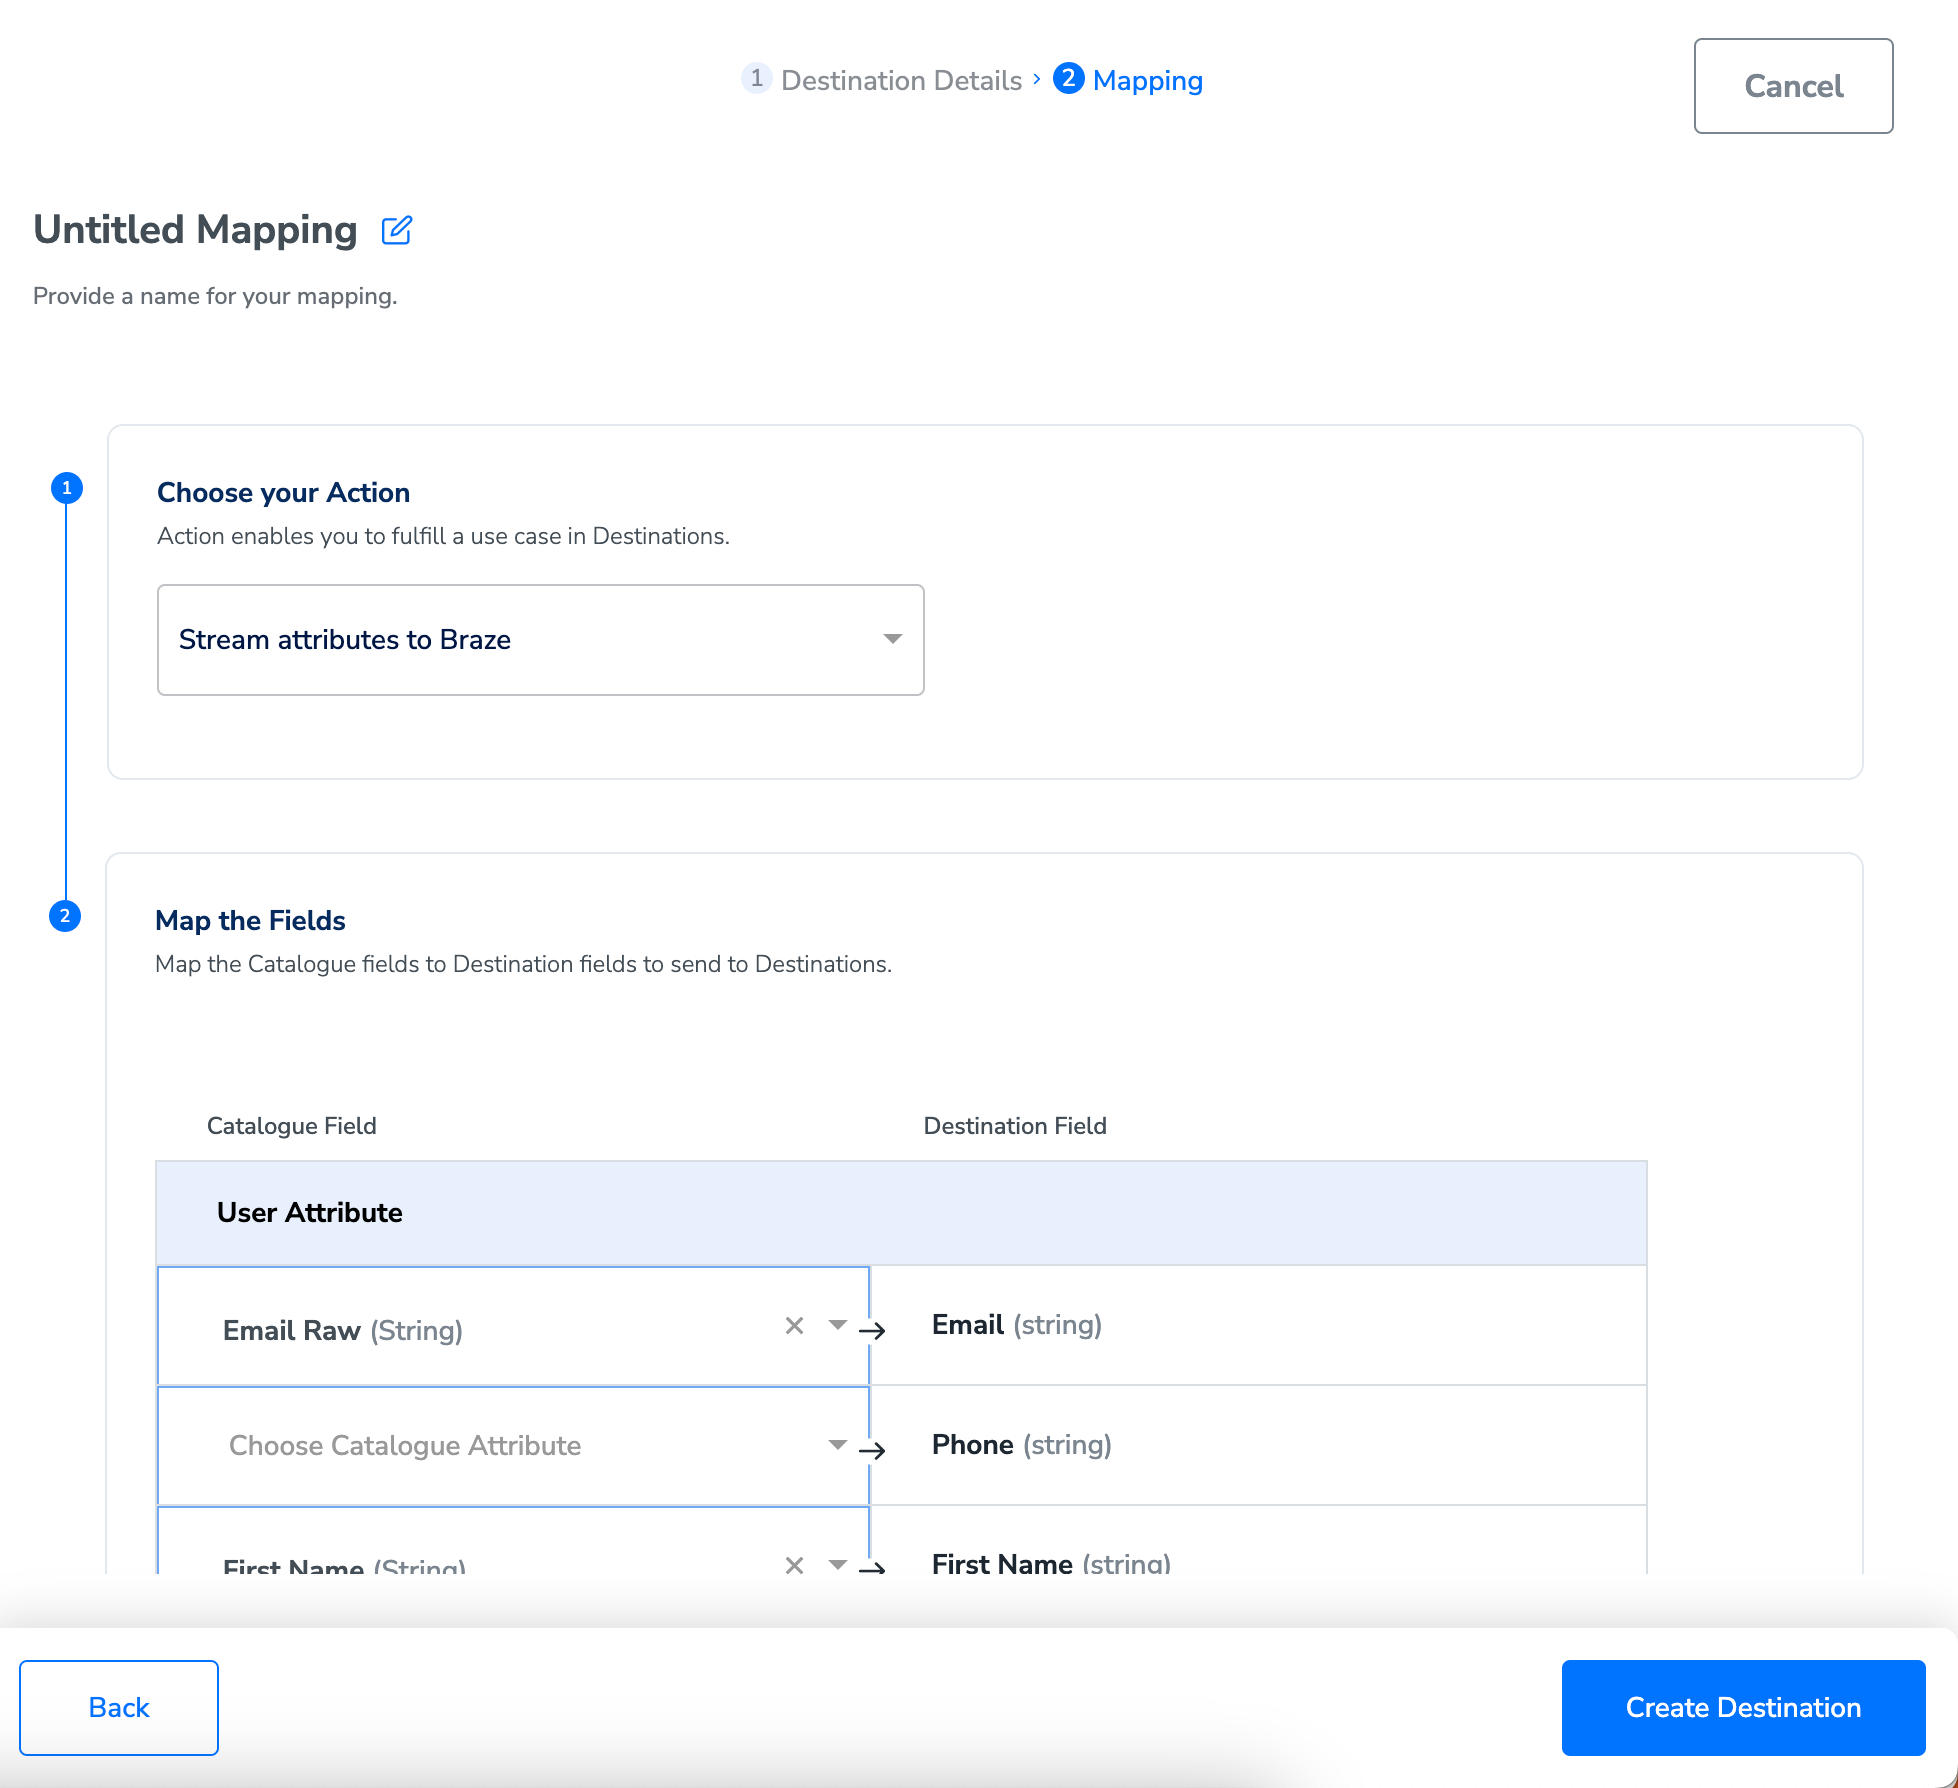
Activate the Destination on Journeys
After creating a destination, next, you need to link it in the Send to Destination node within the workflow, as explained below.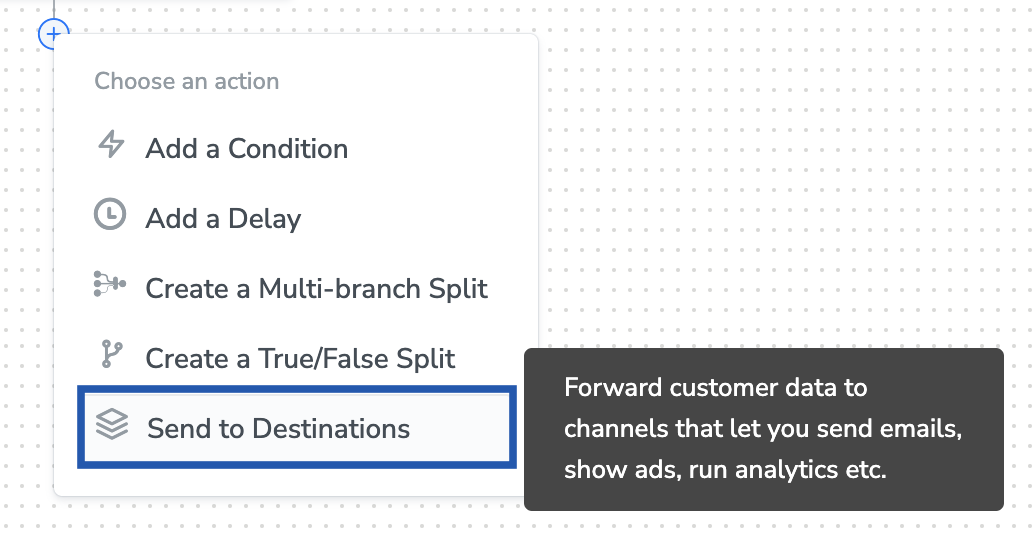
Under the Destination Details tab, the Client Name, API KEY and Instance fields are automatically populated based on the value that you had entered while creating the destination. However, under the Audiences field, you need to enter a name to categorise your users.
Supported Attributes
You can find details of all the Braze fields in this section.| Braze Field | Mapping Type | Description |
|---|---|---|
| External ID | Dropdown selection | This is the persistent User Id defined by you that Braze uses to track users across devices and platforms. We recommend that you map User ID to External ID, otherwise Zeotap may send email as user alias. Zeotap recommends that you map hashed email available in the Zeotap Catalogue to the External ID. |
| Static Mapping | This is mapped to Email Raw in the Zeotap Catalogue. | |
| Phone | Static Mapping | - This is mapped to Mobile Raw in the Zeotap Catalogue. - Braze accepts phone numbers in E.164 format, Zeotap does not perform any transformation. Hence, you are required to ingest the phone numbers in the prescribed format. For more information, check here. |
| First Name | Static Mapping | This is mapped to First Name in the Zeotap Catalogue. |
| Last Name | Static Mapping | This is mapped to Last Name in the Zeotap Catalogue. |
| Gender | Static Mapping | This is mapped to Gender in the Zeotap Catalogue. |
| Custom Event Name | Static Mapping | This is mapped to Event Name in the Zeotap Catalogue. Both Custom Event Name and Custom Event Timestamp must be mapped to capture custom events in Braze. If either one is not mapped, then the custom event cannot be processed. For more information, refer here. |
| Custom Event Timestamp | Static Mapping | This is mapped to Event Timestamp in the Zeotap Catalogue. Both Custom Event Name and Custom Event Timestamp must be mapped to capture custom events in Braze. If either one is not mapped, then the custom event cannot be processed. For more information, refer here. |
| Email Subscribe | Dropdown Selection | Onboard an Email Marketing Preference field and map to it. Zeotap sends the following three values: - opted_in - Indicates that the user has explicitly registered for email marketing preference; - unsubscribed - Indicates that the user has explicitly opted out of email messages; - subscribed - Indicates that the user has neither opted-in nor opted-out |
| Push Subscribe | Dropdown Selection | Onboard a Push Marketing Preference field and map to it. Zeotap sends the following three values: - opted_in - Indicates that the user has explicitly registered for push marketing preference; - unsubscribed - Indicates that the user has explicitly opted out of push messages; - subscribed - Indicates that the user has neither opted-in nor opted-out |
| Email Open Tracking Enable | Dropdown Selection | Map the relevant Marketing Preference field. When set to true, it enables open tracking pixel from being added to all future emails sent to this user. |
| Email Click Tracking Enable | Dropdown Selection | Map the relevant Marketing Preference field. When set to true, it enables click tracking for all links within all future emails sent to this user. |
| Product ID | Dropdown selection | - Identifier for a purchase action (Product Name/Product Category). For more details, refer here. - Onboard the relevant attribute to the Zeotap Catalogue and map to it. Product ID, Currency and Price must be mapped mandatorily to capture purchase events in Braze. If any of the three is missed, then purchase event cannot go through. For more information, refer here. |
| Currency | Dropdown selection | - Currency attribute for purchase action. - Supported format is ISO 4217 Alphabetic Currency Code. - Onboard correctly formatted Currency Data to the Zeotap Catalogue and map to it. Product ID, Currency and Price must be mapped mandatorily to capture purchase events in Braze. If any of the three is missed, then purchase event cannot go through. |
| Price | Dropdown selection | - Price attribute for purchase action. - Onboard the relevant attribute to the Zeotap Catalogue and map to it. Product ID, Currency and Price must be mapped mandatorily to capture purchase events in Braze. If any of the three is missed, then purchase event cannot go through. |
| Quantity | Dropdown selection | - Quantity attribute for purchase action. - Onboard the relevant attribute to the Zeotap Catalogue and map to it. |
| Country | Dropdown selection | Map to the Country Catalogue field you are onboarding. |
| City | Dropdown selection | Map to the City Catalogue field you are onboarding. |
| Language | Dropdown selection | - The accepted format is ISO-639-1 standard (e.g., en). - Onboard correctly formatted language and map to it. |
| Date of Birth | Dropdown selection | Map to the Date of Birth field you are onboarding. |
| Custom Attribute | Custom Data Input | Map any user attribute to a custom data input and it is then sent to Braze. |
Viewing Data on Braze console
After you have mapped the relevant attributes to be sent and published the workflow, the events start flowing to Braze based on the criteria defined. You can search by Email ID/External ID on the Braze console. The user dashboard appears as shown below.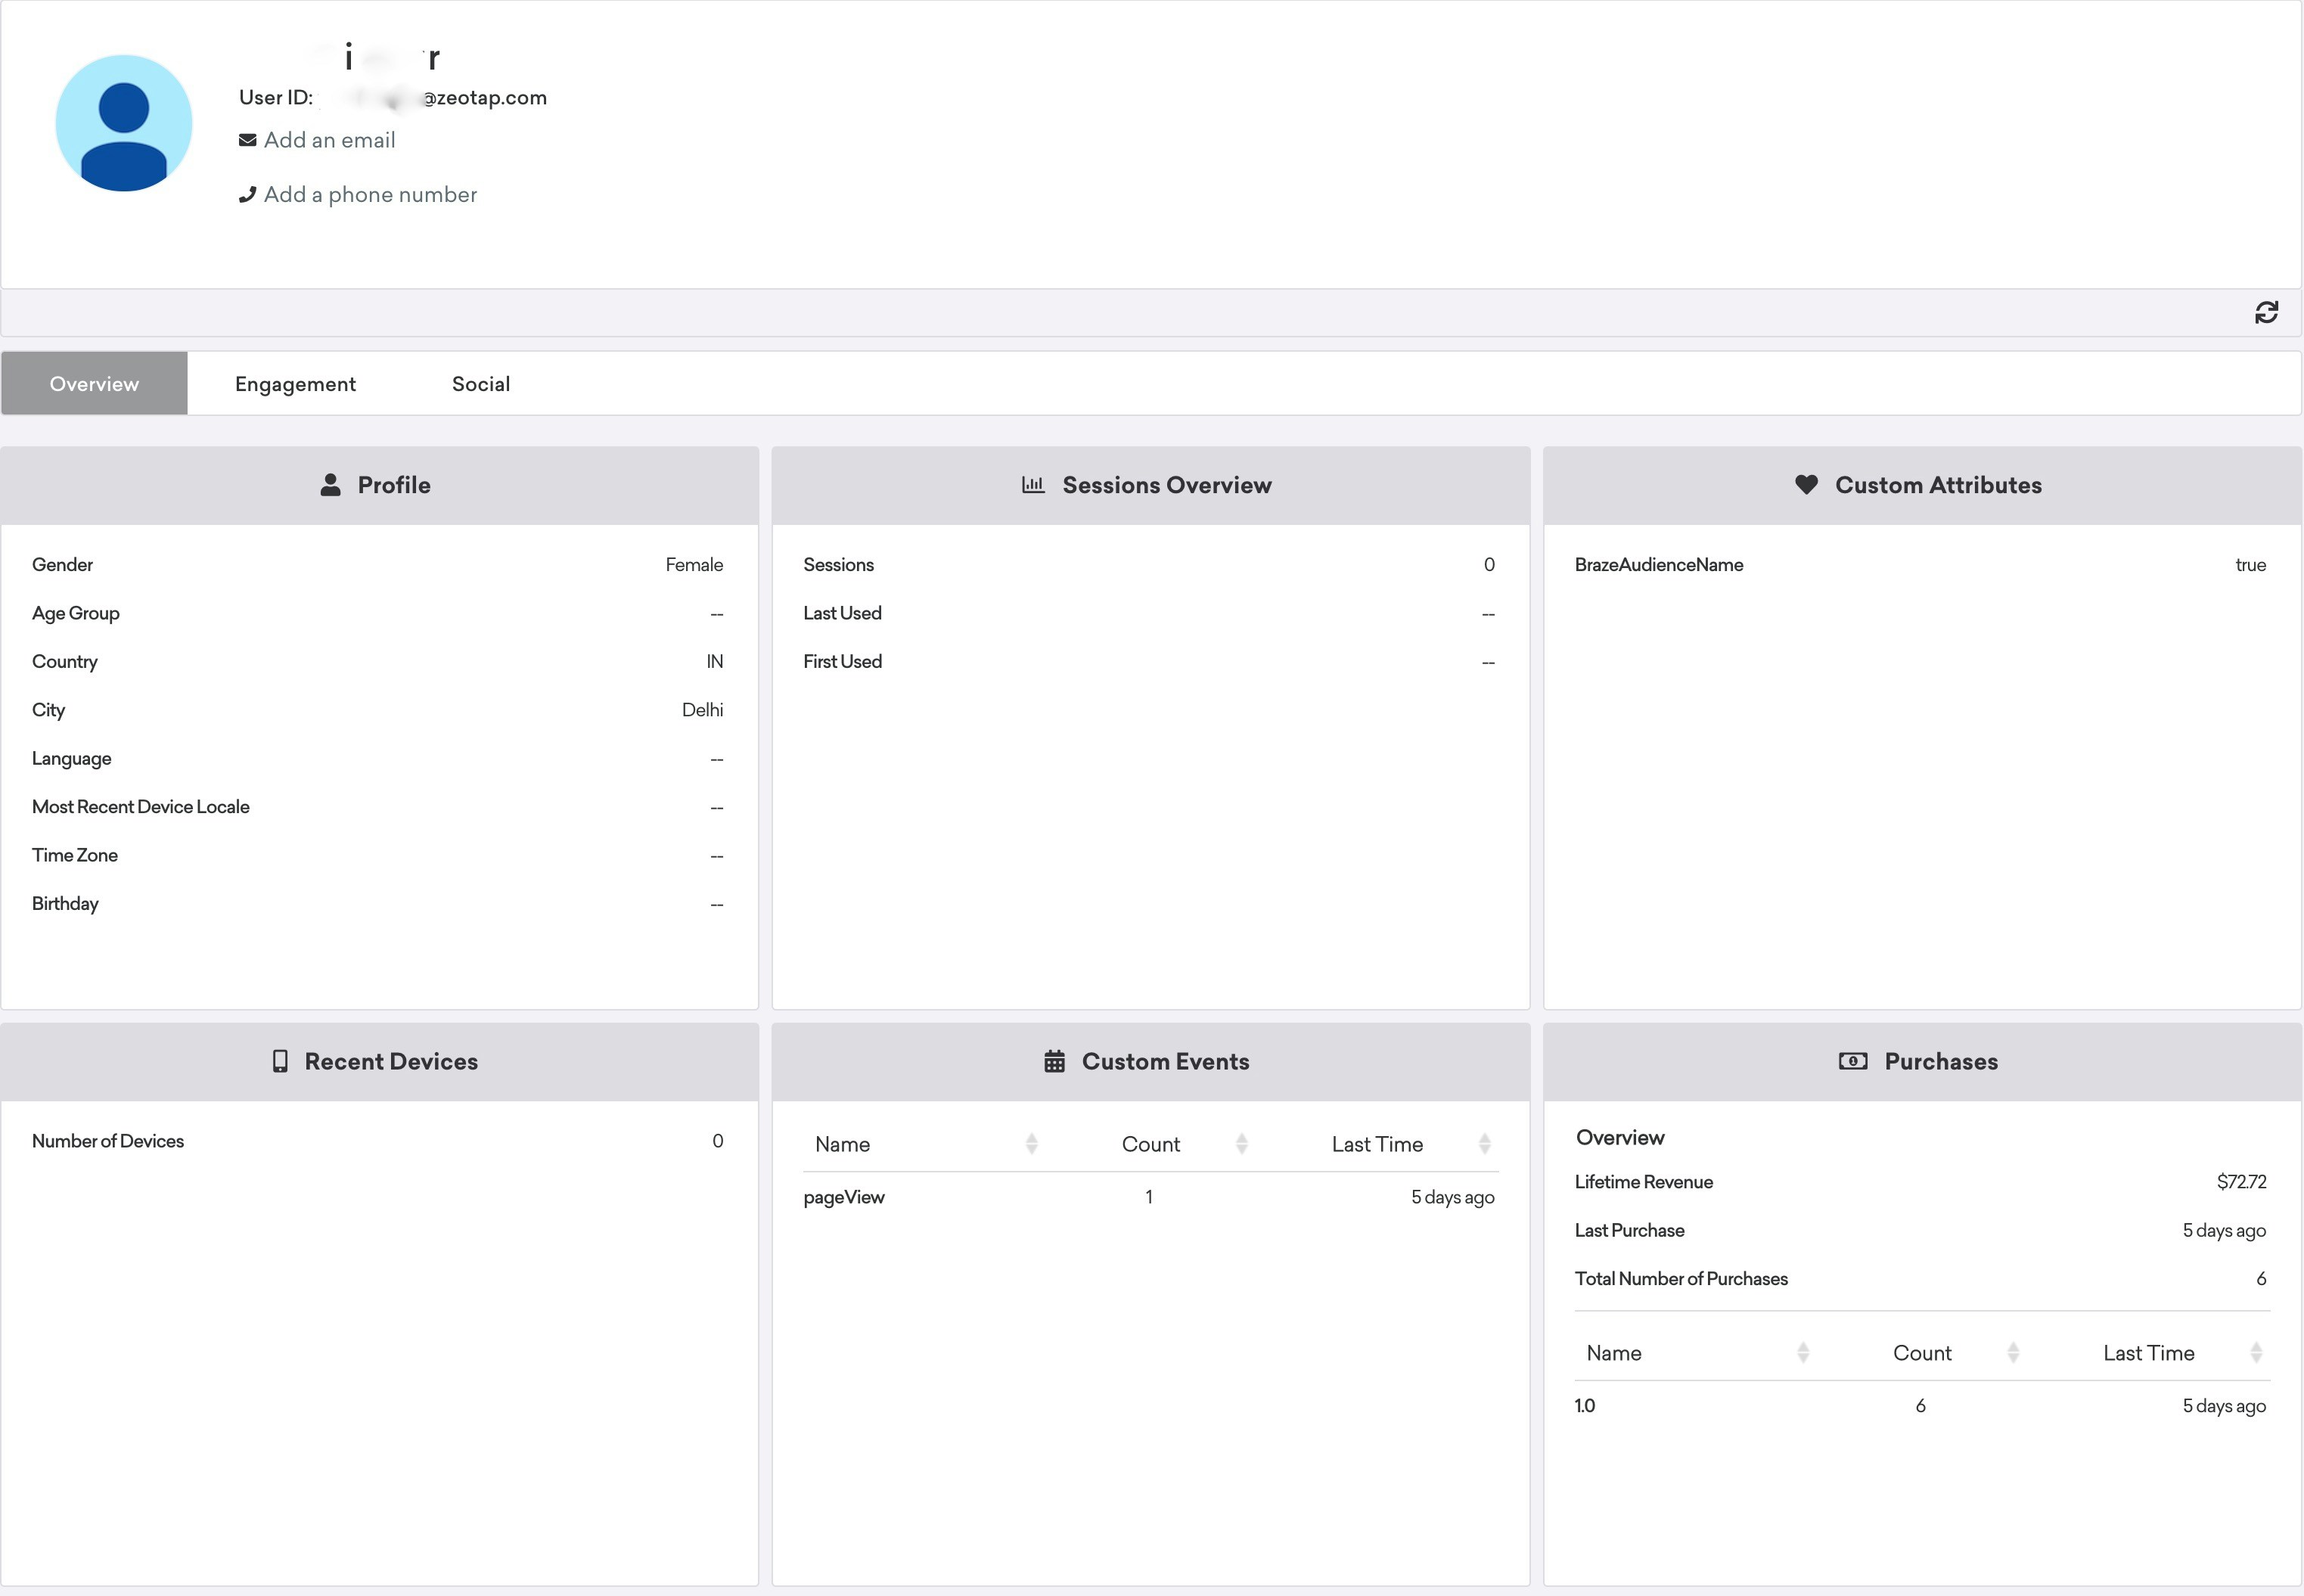
- The Profile tab contains the user attributes.
- The Custom Attributes tab contains the custom attributes defined by the user.
- The Custom Events tab contains the custom event defined by the user.
- The Purchases tab contains the purchases done over a period of time by the user.
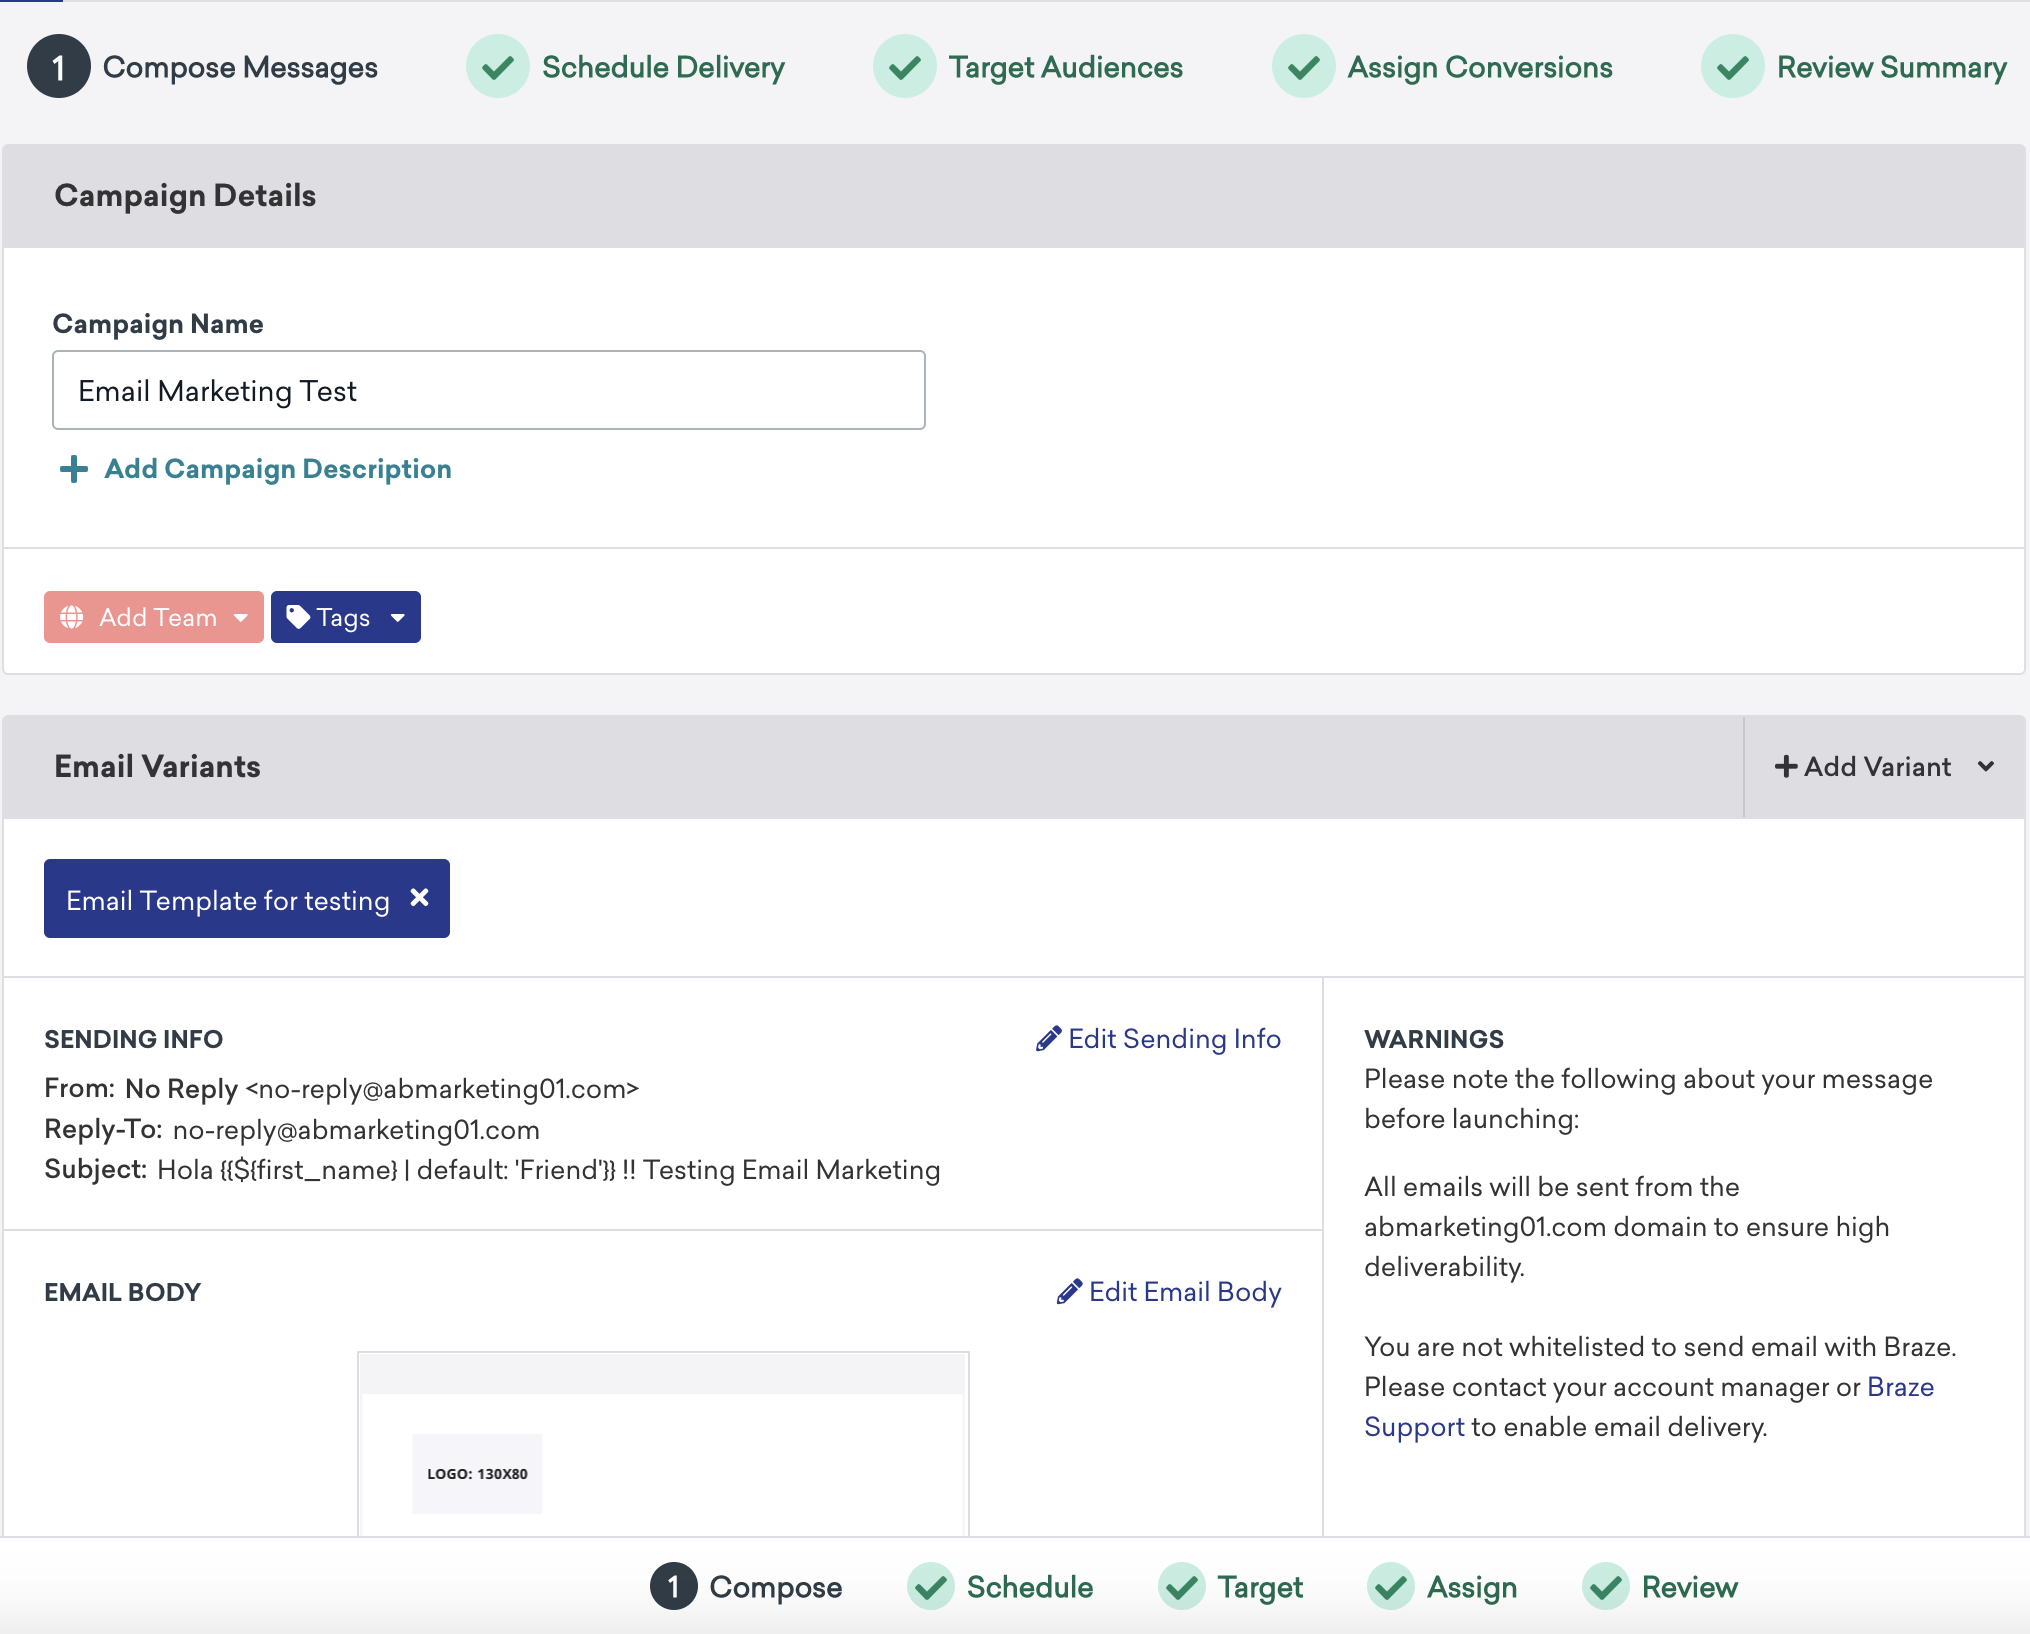
Campaign Creation
Users can create campaigns within Braze and activate users in real-time or based on the scheduled time. Campaigns can be triggered based on the actions performed by the user (custom event, purchase) or user attributes. You can find details in the screenshot below.