1
In the below screen, you can find all the destinations that are available for your organisation. You can drag and drop the Destination to which you wish to push your Audience. If the desired Destination is not available, then create a new one by using + Create Destination. To learn more about how to create a new Destination, refer here.
2
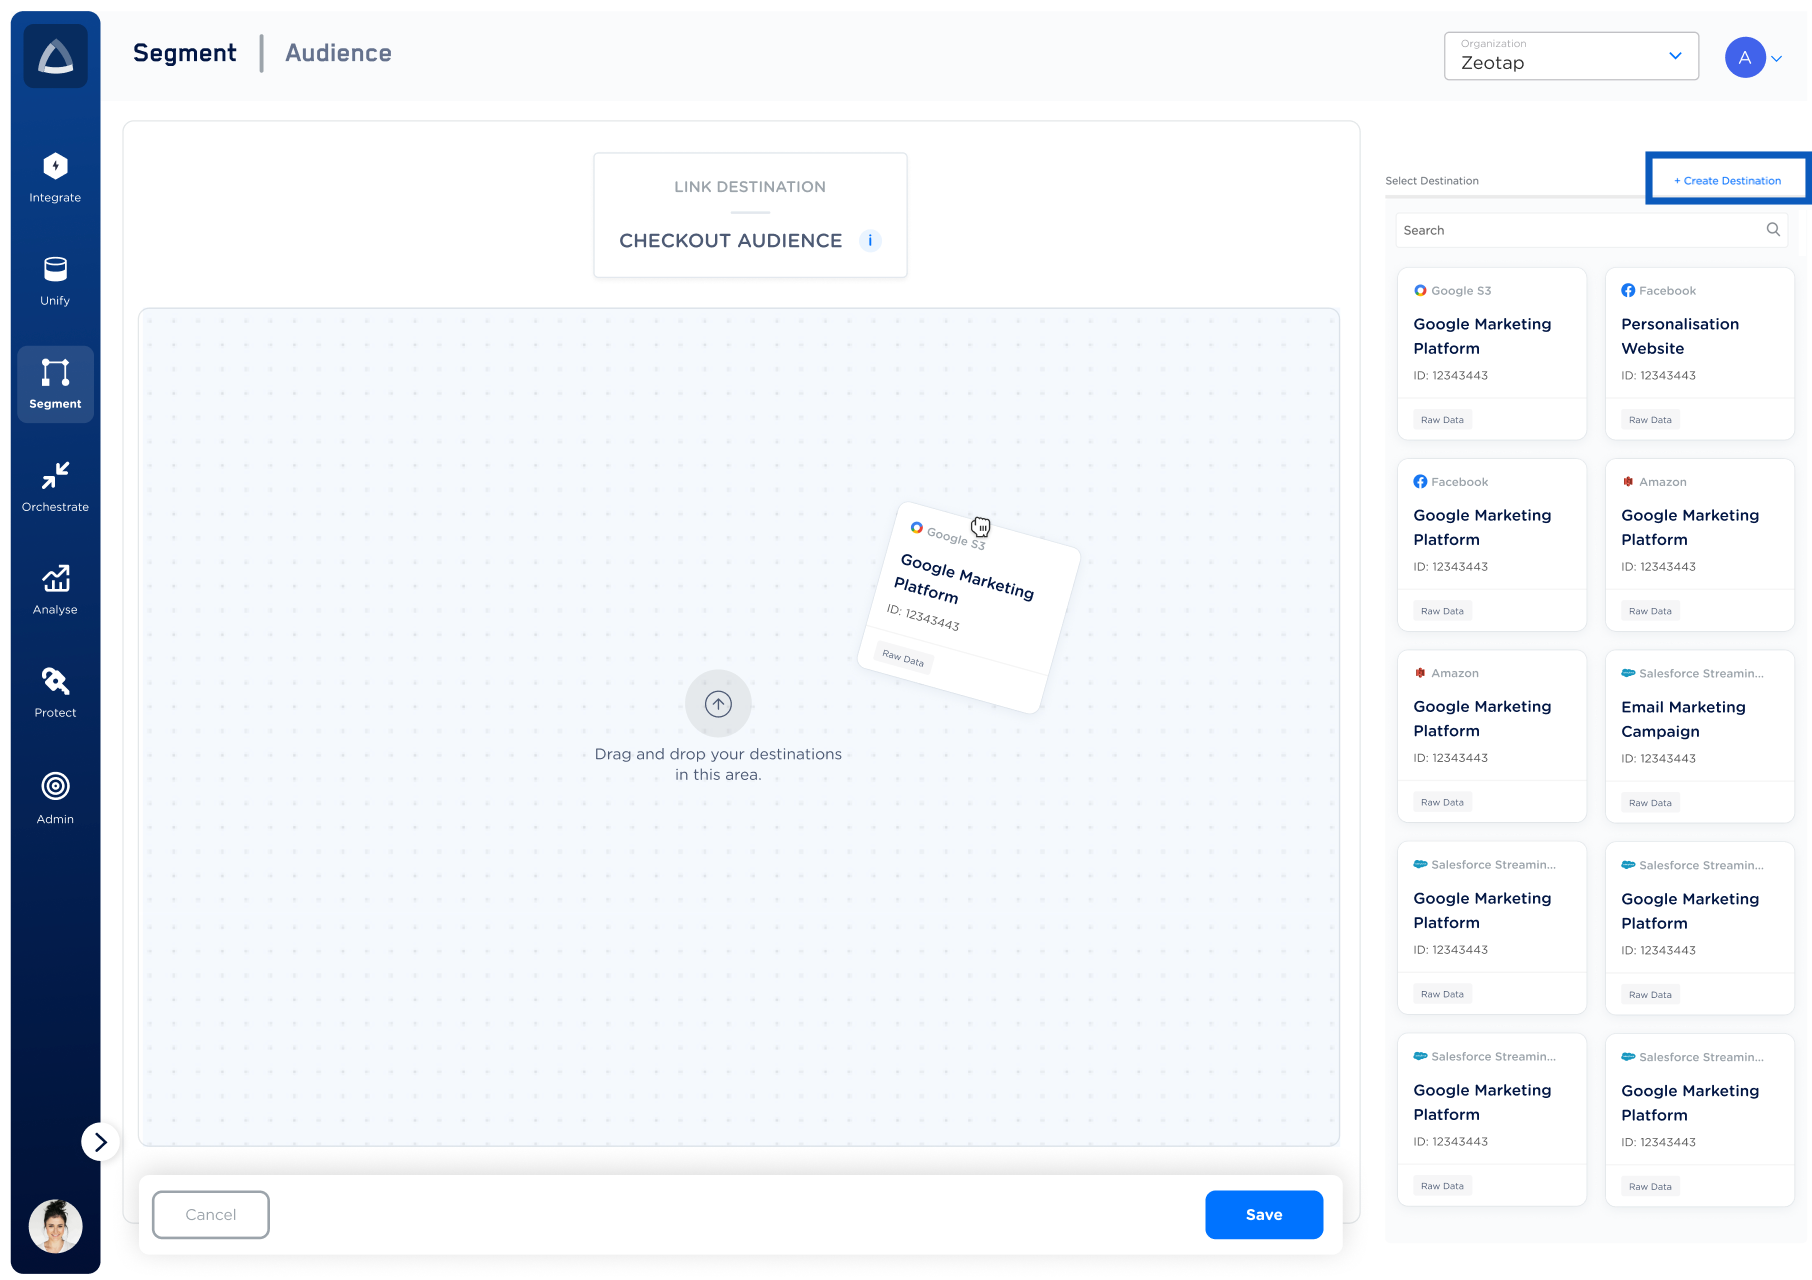
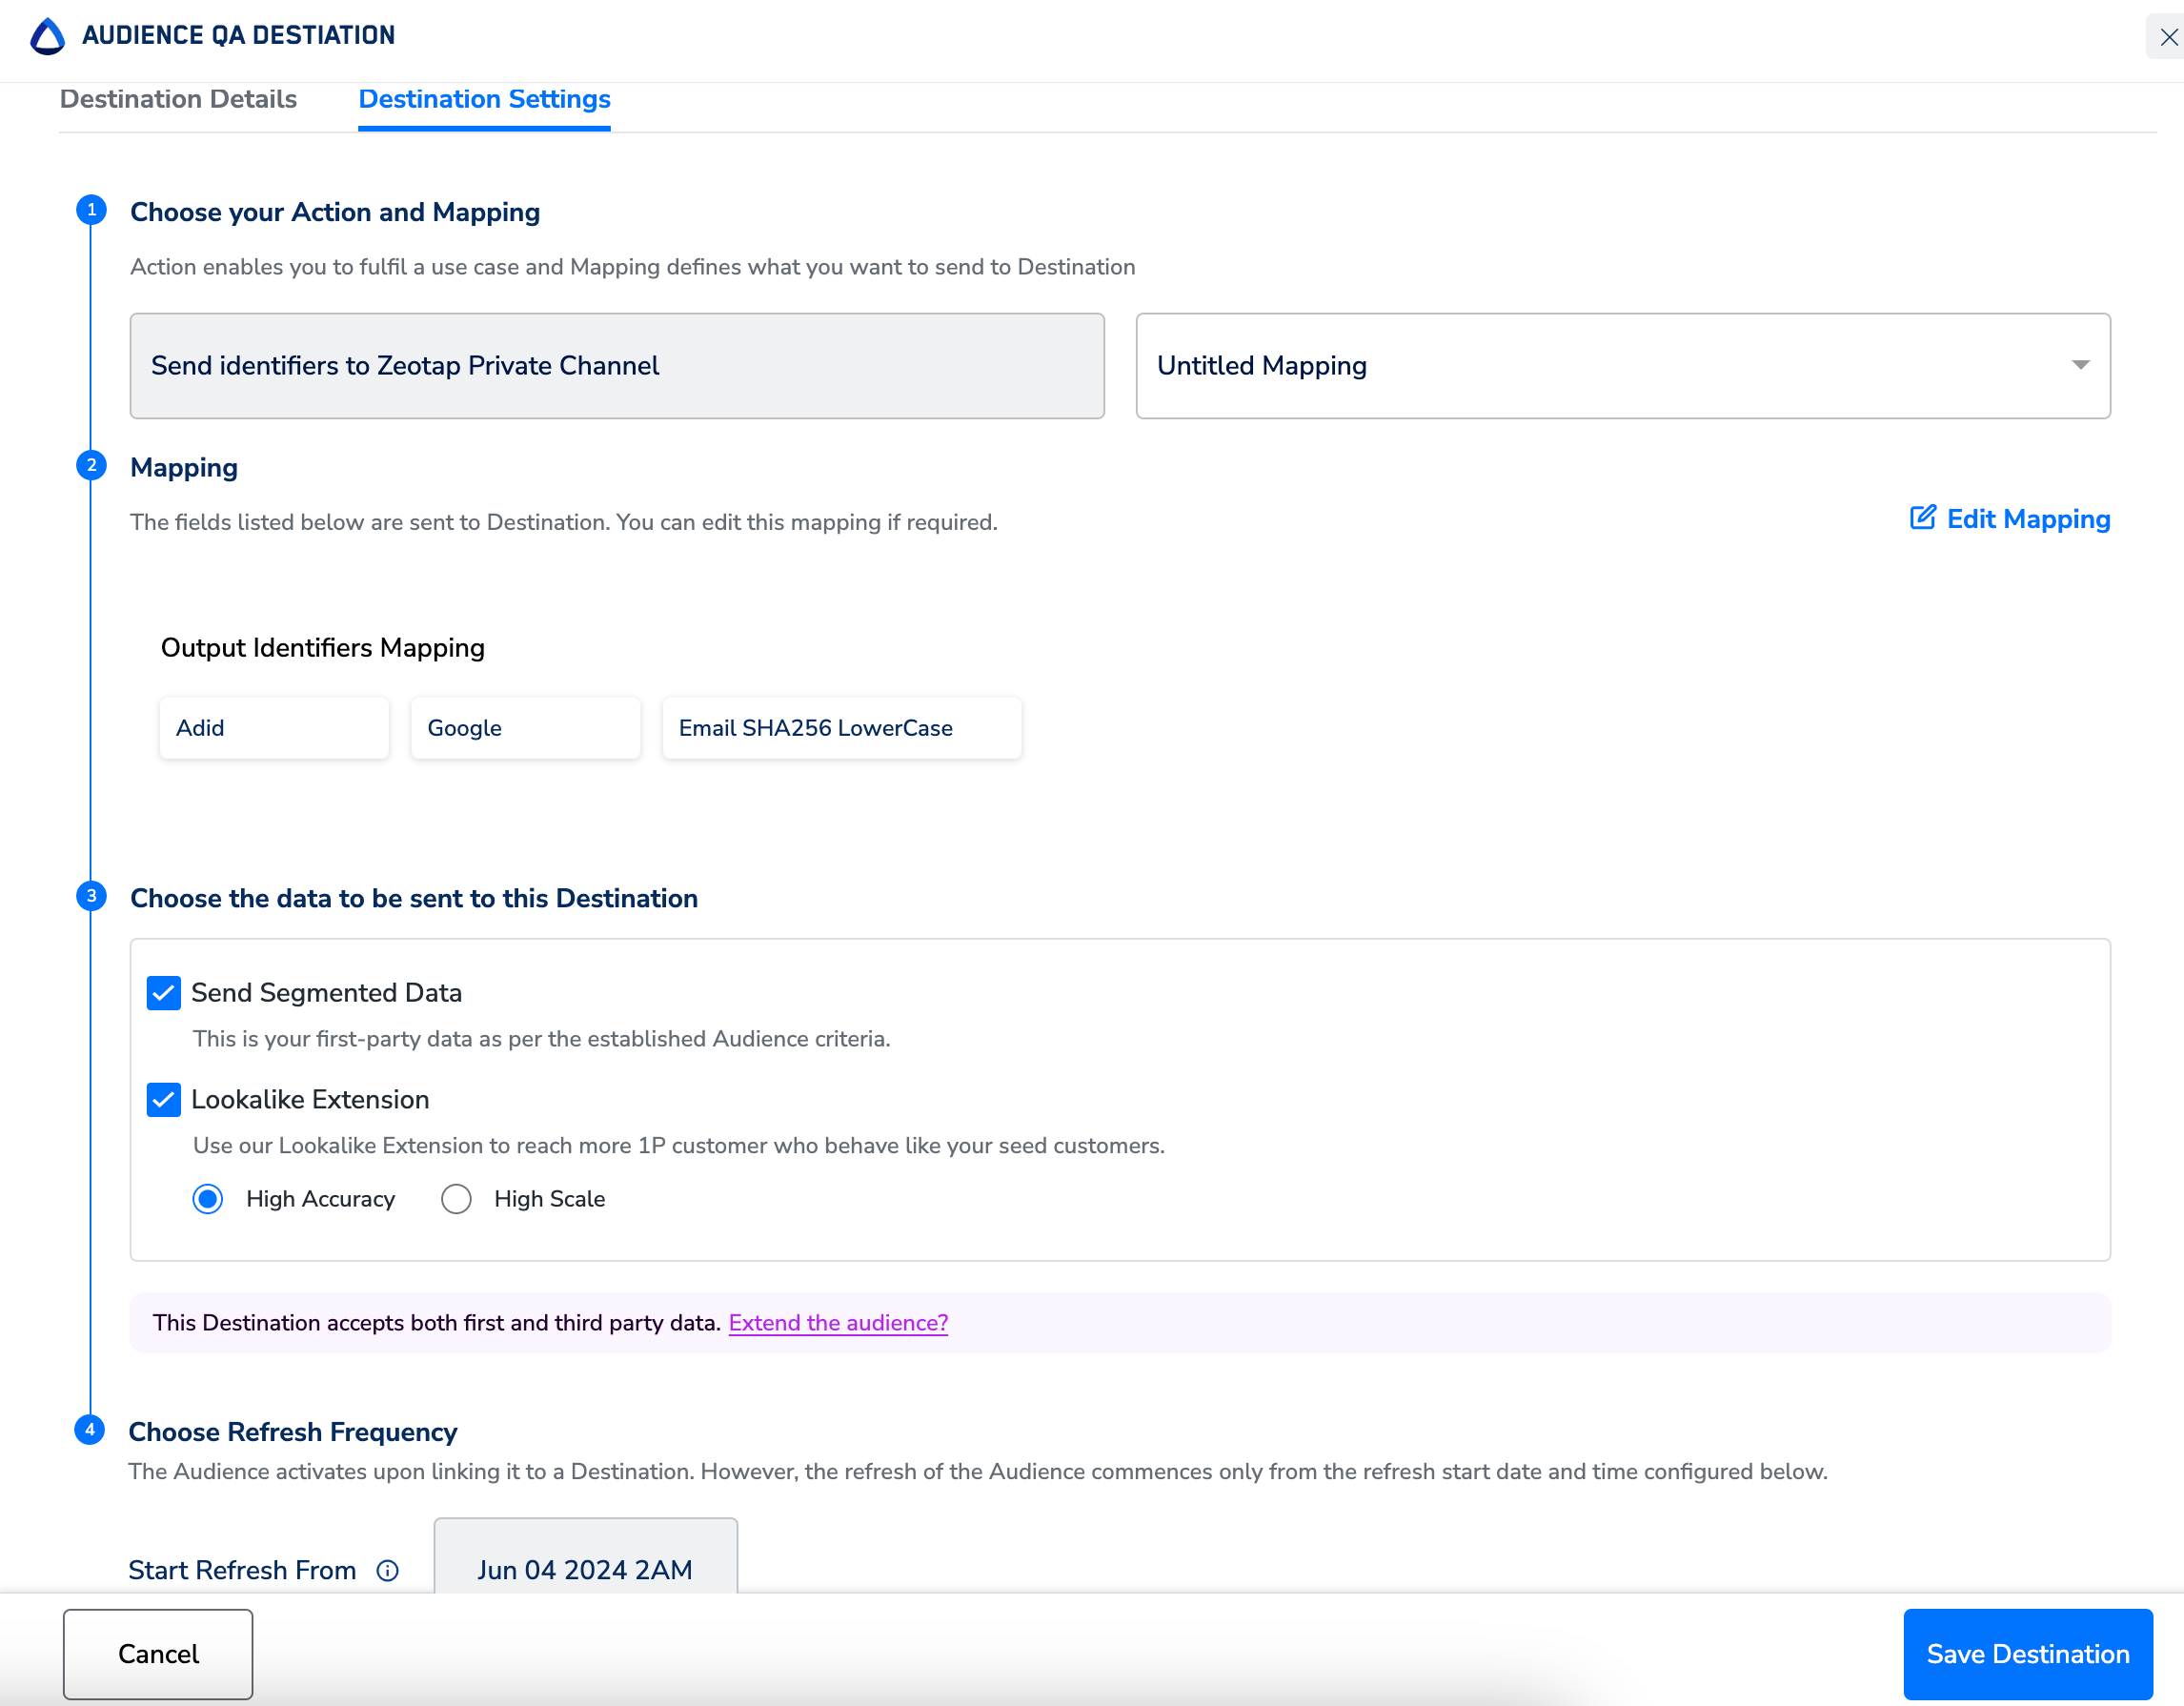
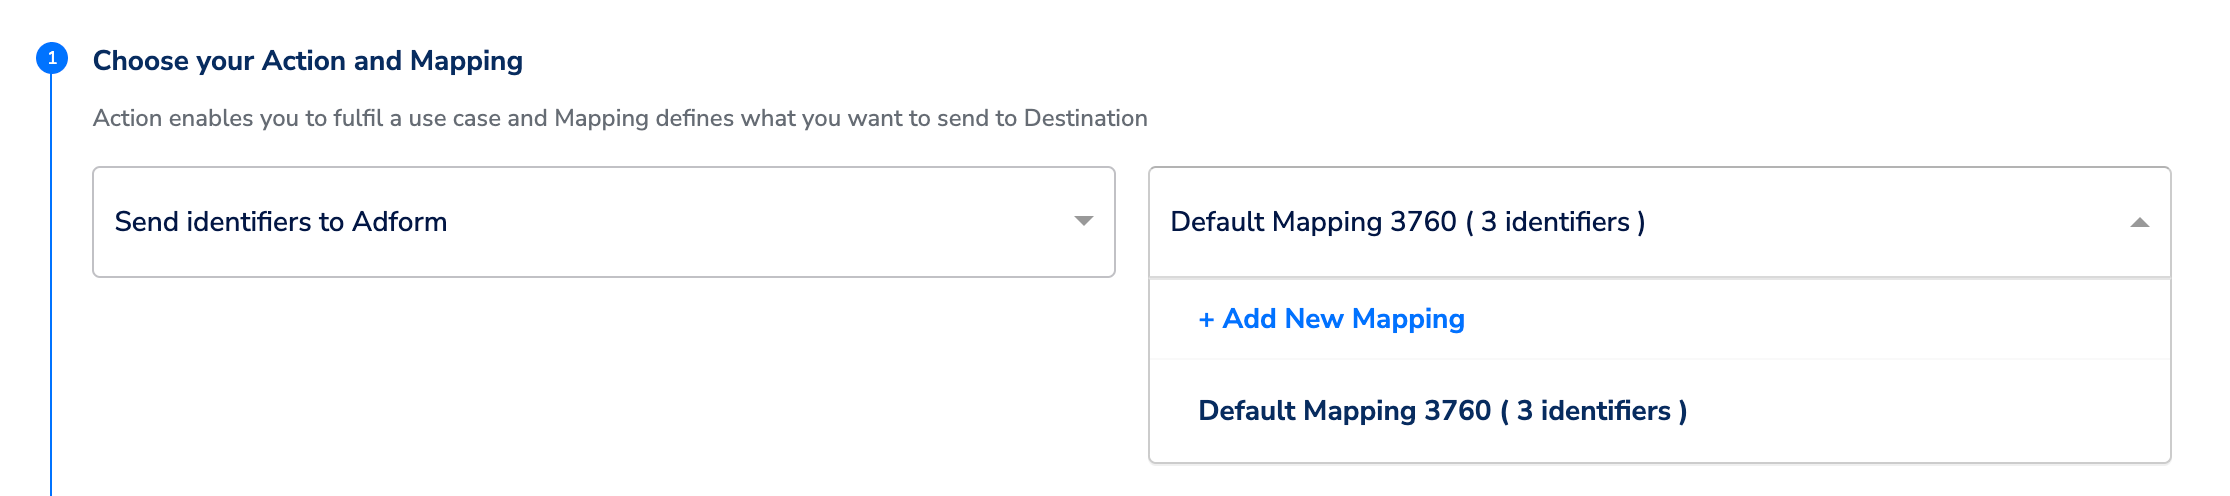
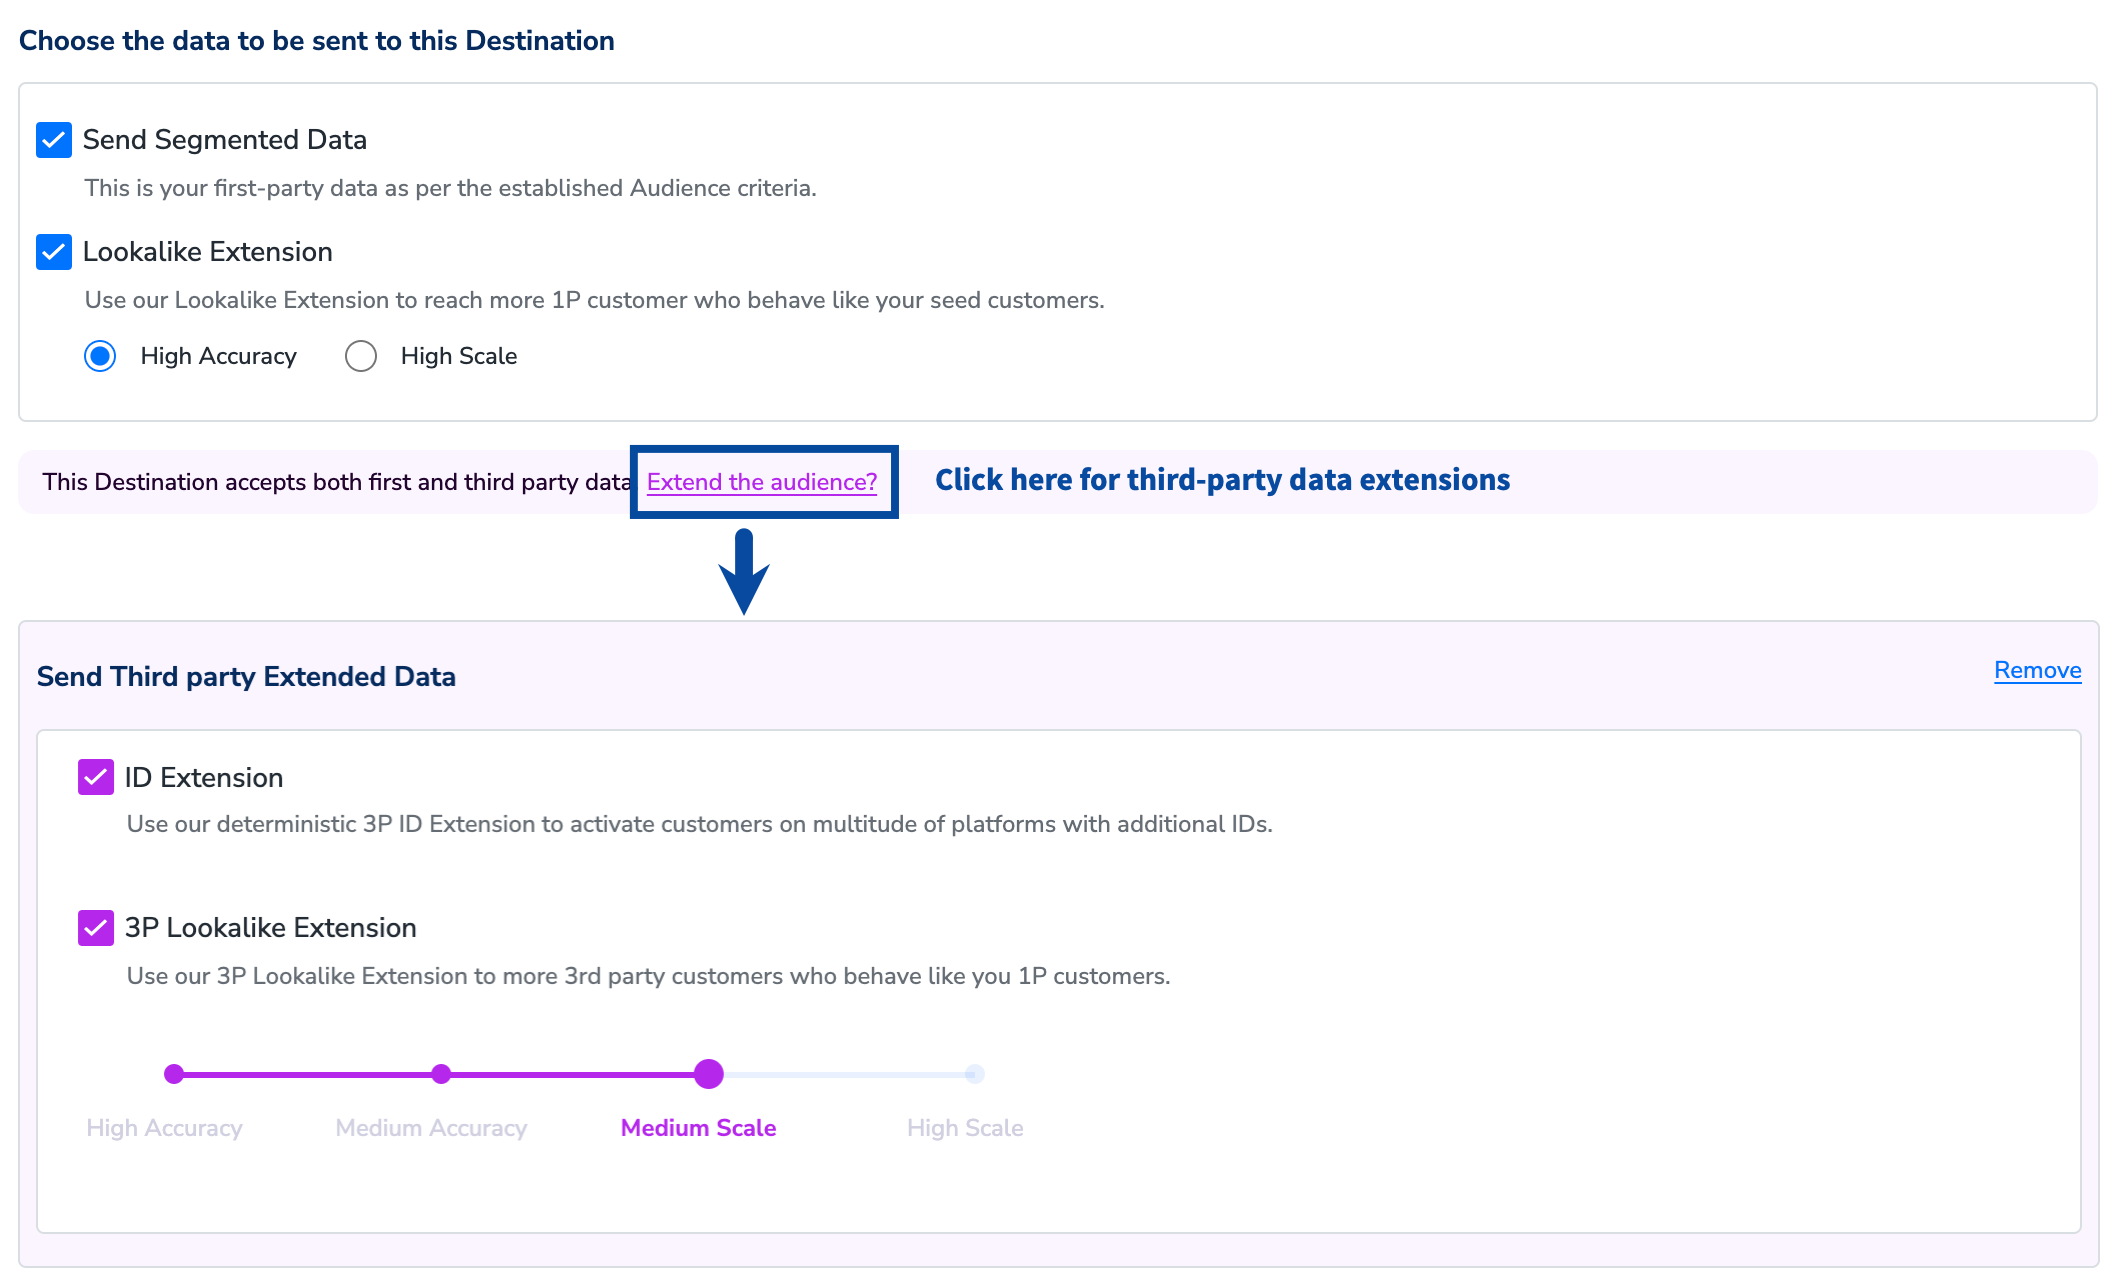
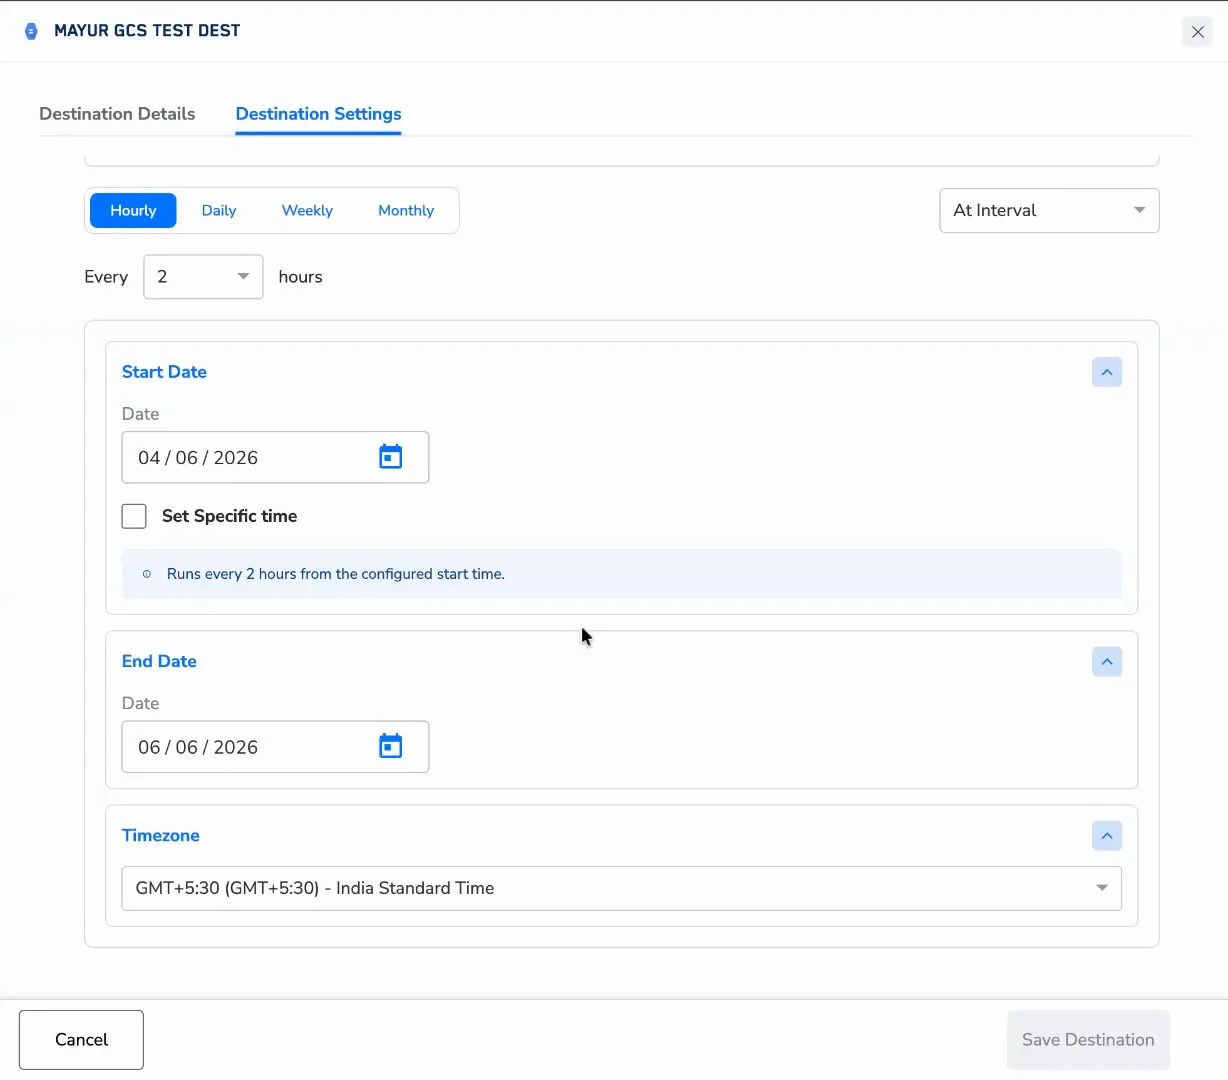
In the Destination Settings window, perform the following steps:
a. Under Choose your Action and Mapping, choose the desired use case from the left drop-down menu and then choose the corresponding mapping from the right drop-down menu. If the desired mapping is not available, then create a new one by using + Add New Mapping.
b. By default, the Output Identifiers that are attached in the particular mapping are displayed under Output Identifiers Mapping. If you want to edit or remove an identifier from the mapping, then click Edit Mapping. Note that only the displayed identifiers are sent to the Destination.
c. UnderChoose the data to be sent to this Destination, the Send Segmented Datacheckbox is selected by default. This enables you to share your first-party data as per the established Audience criteria. You can use Zeotap’s extensions such as Lookalike Extension (first-party or third-party) for expanding your audience with similar customer profiles and ID Extension for obtaining online identifiers. This is solely based on the data acceptance policy of the Destination you want to link with the Audience. To know more about these extensions with use cases and how to enable them, refer here.
d. Under Choose Refresh Frequency , you can choose the frequency at which the Audiences are refreshed and sent to Destinations. Use Start Refresh From to set the refresh start date and time (hours only), Refresh Until to set the refresh end date and Refresh Every to set the frequency of the refresh. You can choose intervals in days, weeks or months.
Note that the Audience is activated upon linking it to a Destination. However, the subsequent refreshes of the Audience commences from the configured refresh date and time only. In addition, the refresh can commence within four hours from the designated refresh start time. For example, in the below image, the refresh is scheduled to commence on Jan 24th, 2024, at 12 AM. Therefore, after considering the buffer time of four hours, the refresh may begin anytime between Jan 24th, 12 AM and 4AM.
e. After you make all the necessary configurations in the Destination Settings screen, click Save Destination. This transitions the Destination to In Progress status, which triggers the uploading of the IDs to the platform. Once all the IDs are successfully uploaded, the Destination status changes to Success.
f. Note that you can remove a linked Destination from the Audience by using the Delete icon shown below.
Last modified on February 26, 2026