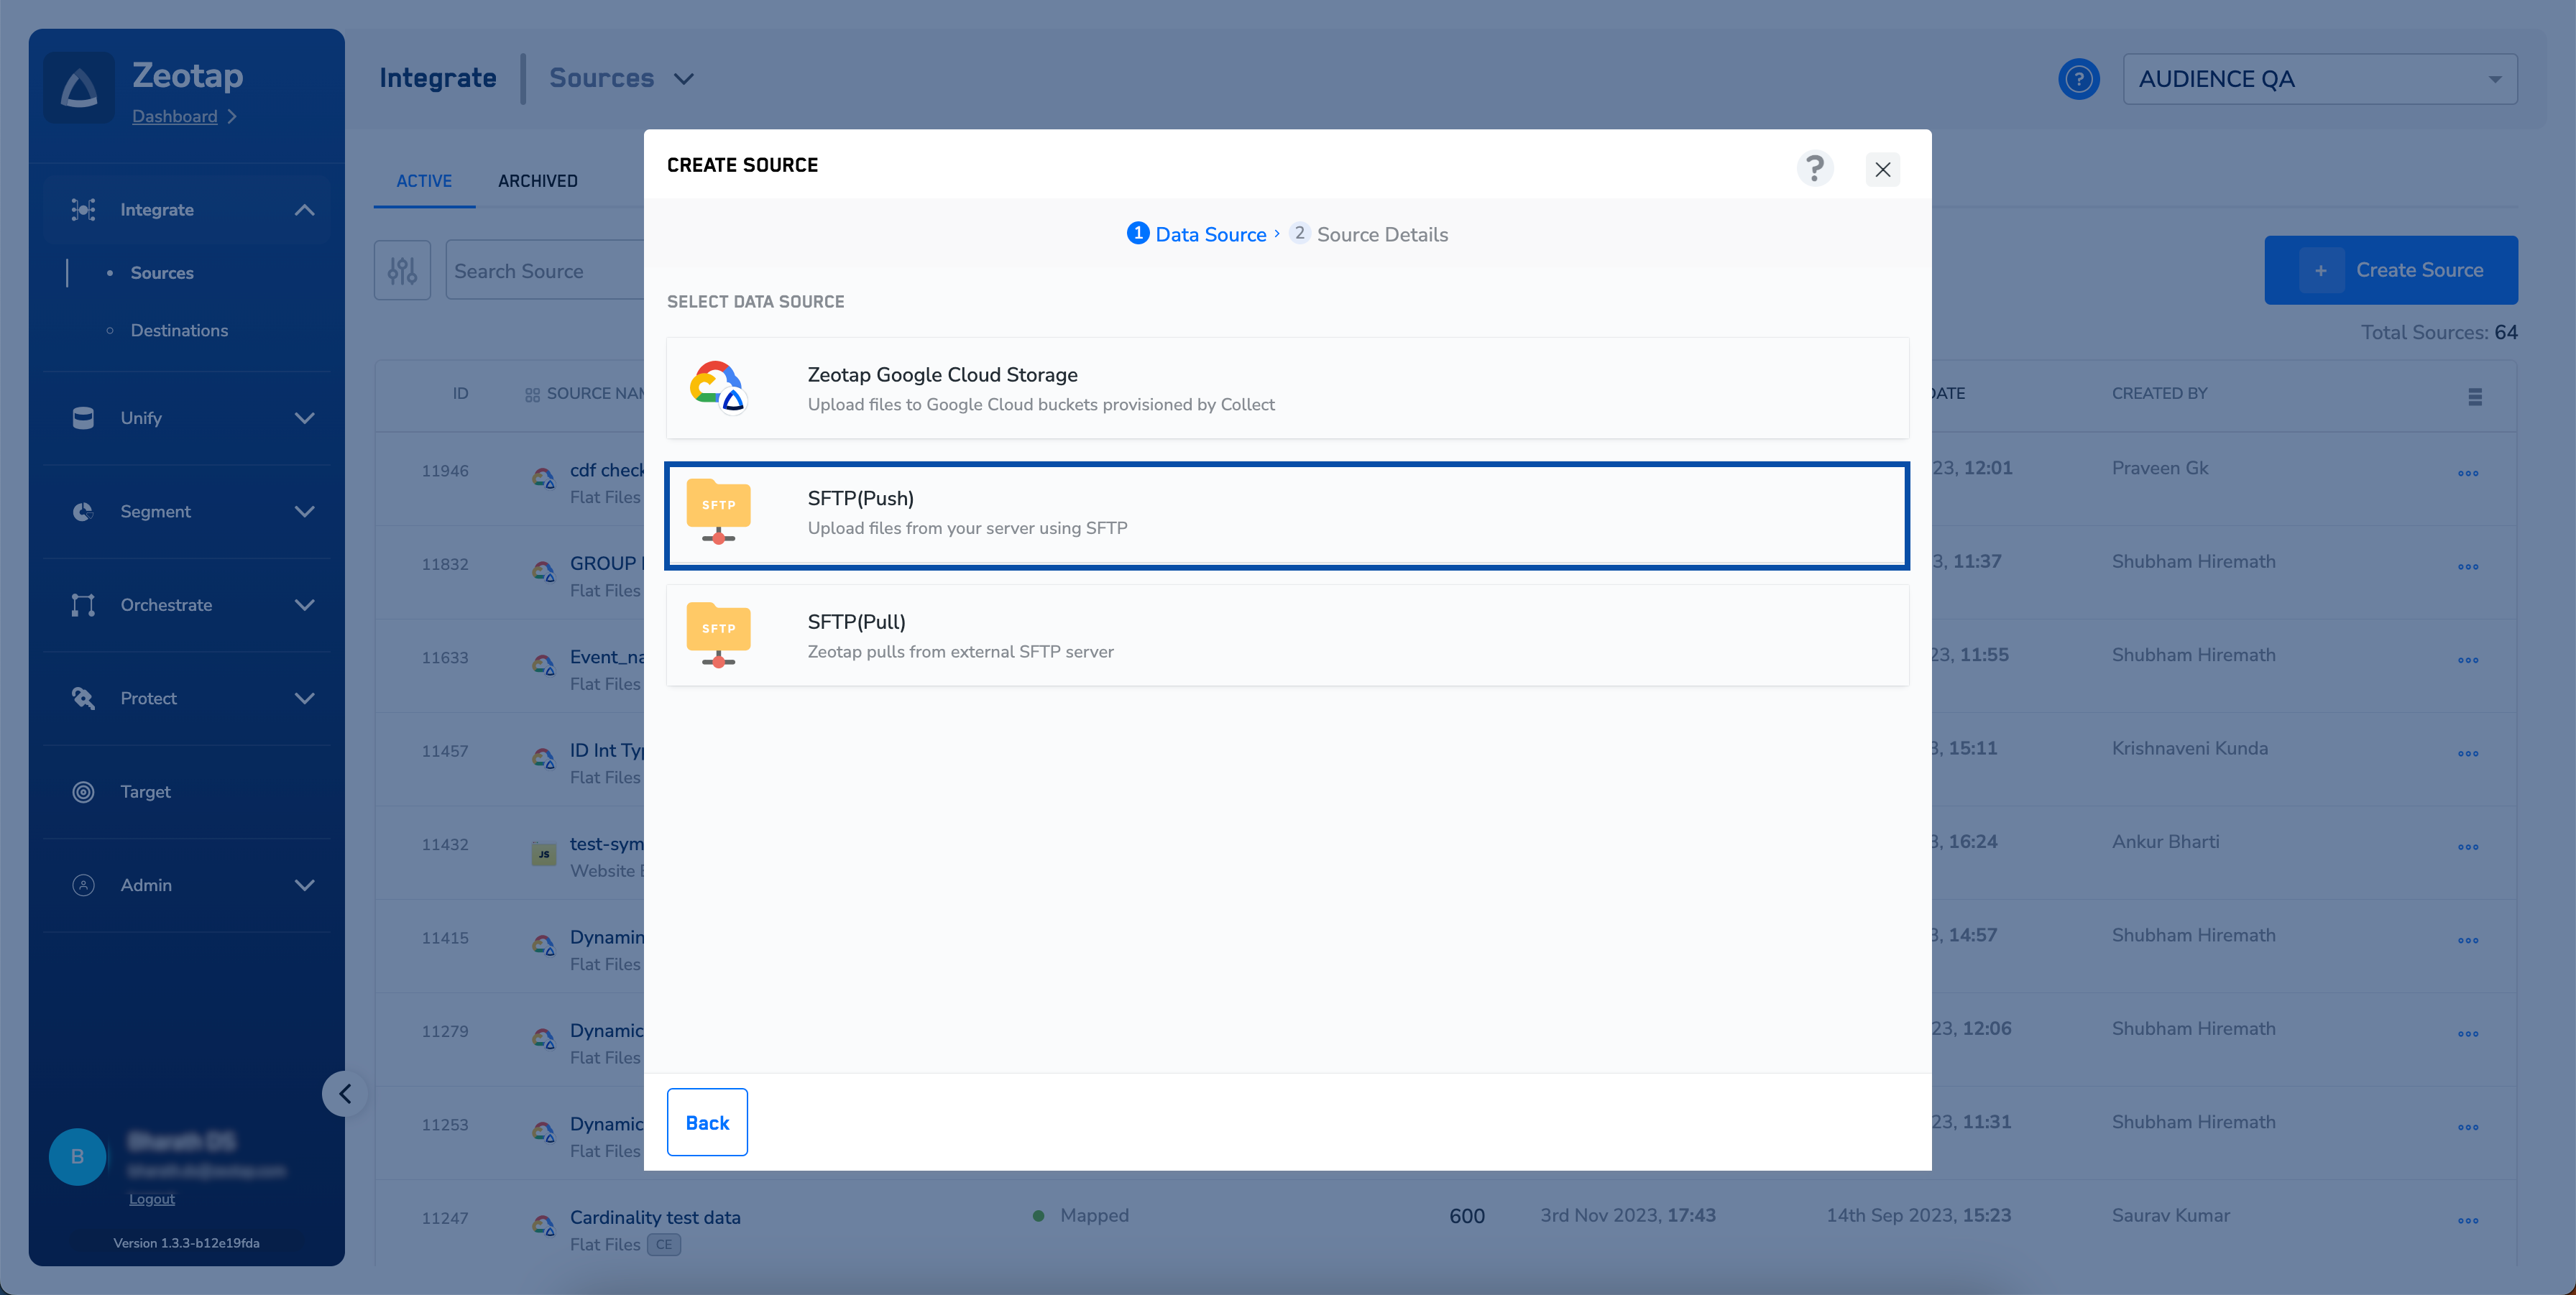
Note:Refer to SFTP Source to know more about this source.
In the new window that appears, provide the following details:a. Enter a short and descriptive name for the source.b. Choose the file format for sending data to Zeotap CDP using the drop-down menu.c. Choose the delimiter and region of upload.d. Under Data Entity, depending on the type of data that you want to ingest, choose either Customer Data or Non Customer Data and proceed with the source creation. To know more about Customer Data and Non Customer Data, refer here.e. Under PGP Encrypted, select True or False, depending on whether you want to encrypt your data before sending it to Zeotap CDP. If you select True, then you can download the PGP Public key from the Implementation Details tab after source creation. To learn more about PGP encryption, refer here.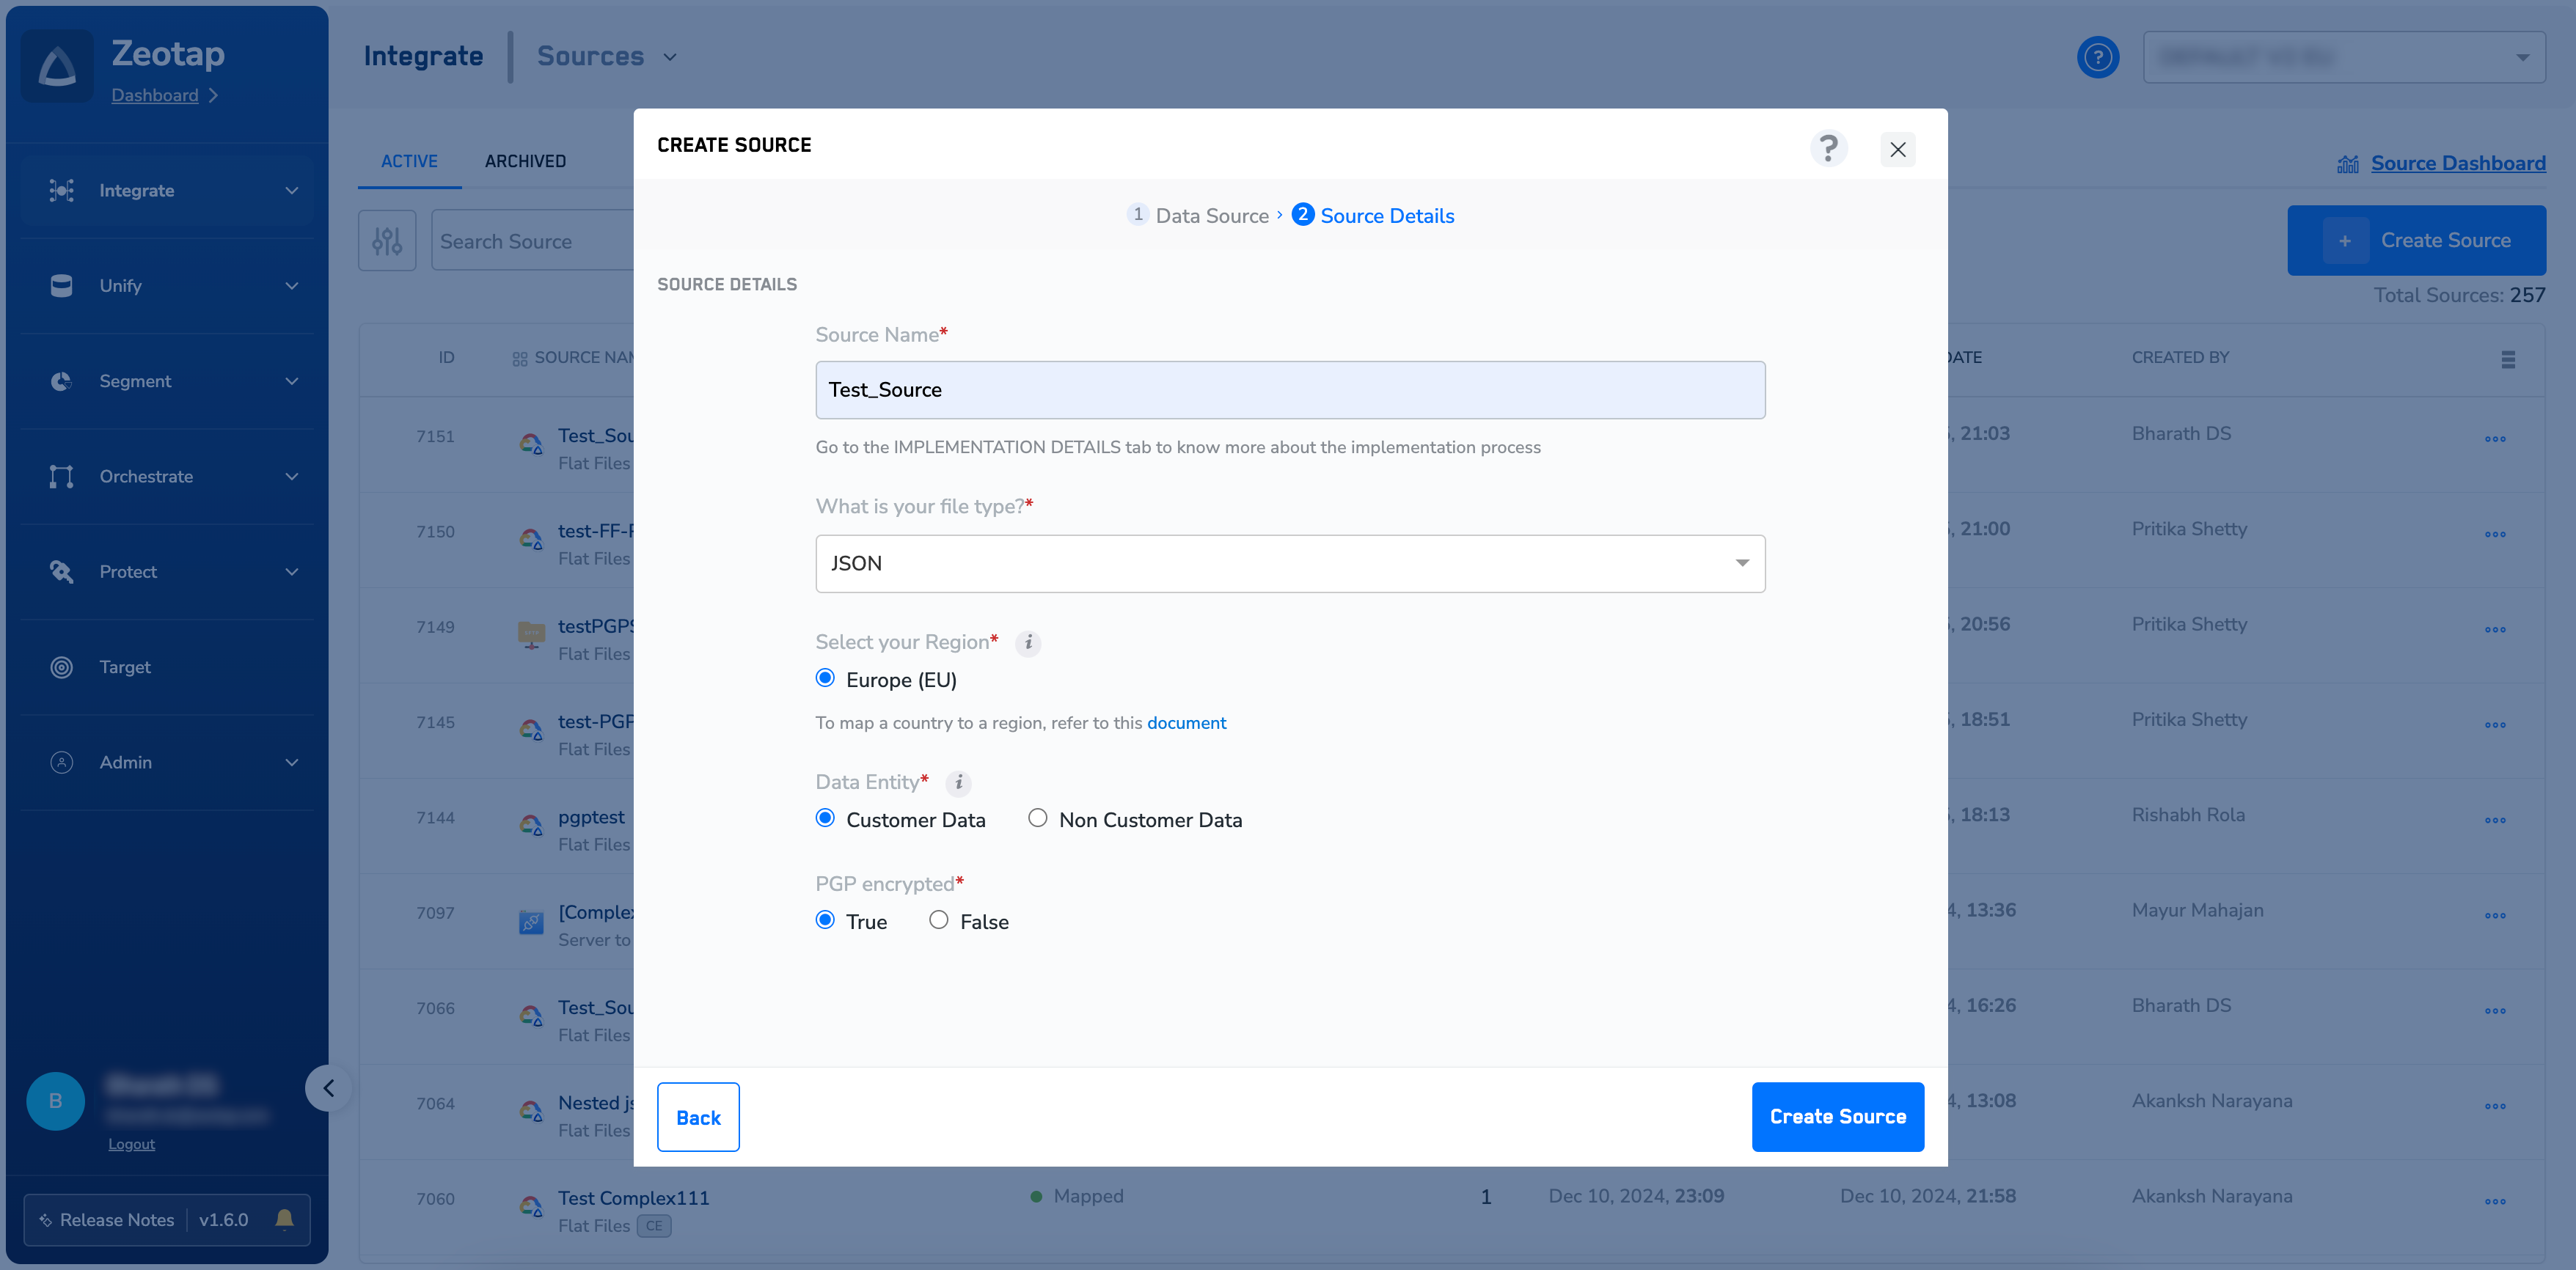
Note:Follow these guidelines for successful source implementation:
- After you have created an SFTP source, ensure to raise a ticket with Zeotap’s Support Team to complete the source creation process. To know more about how to implement an SFTP Source, refer to Implementing SFTP Source.
- Note that you can create a maximum of five NCE sources in an account. This default limit applies to both archived and active NCE sources within an organisation.
Related Topics
- For information about how to map the Catalogue for Customer Data (CE), refer here.
- For information about how to map the Catalogue for Non-Customer Entity (NCE) data, refer here.
- For information about how to add a Non-Customer Entity (NCE) attribute in the Catalogue, refer here.
- For information about Join Key Enricher and how to configure it, refer here.