Click the three dots next to the source in the Integrated state and choose Map to Catalogue from the drop-down menu, or select the source, go to the PREVIEW DATA tab or the CATALOGUE MAPPING tab, and then click MAP TO CATALOGUE.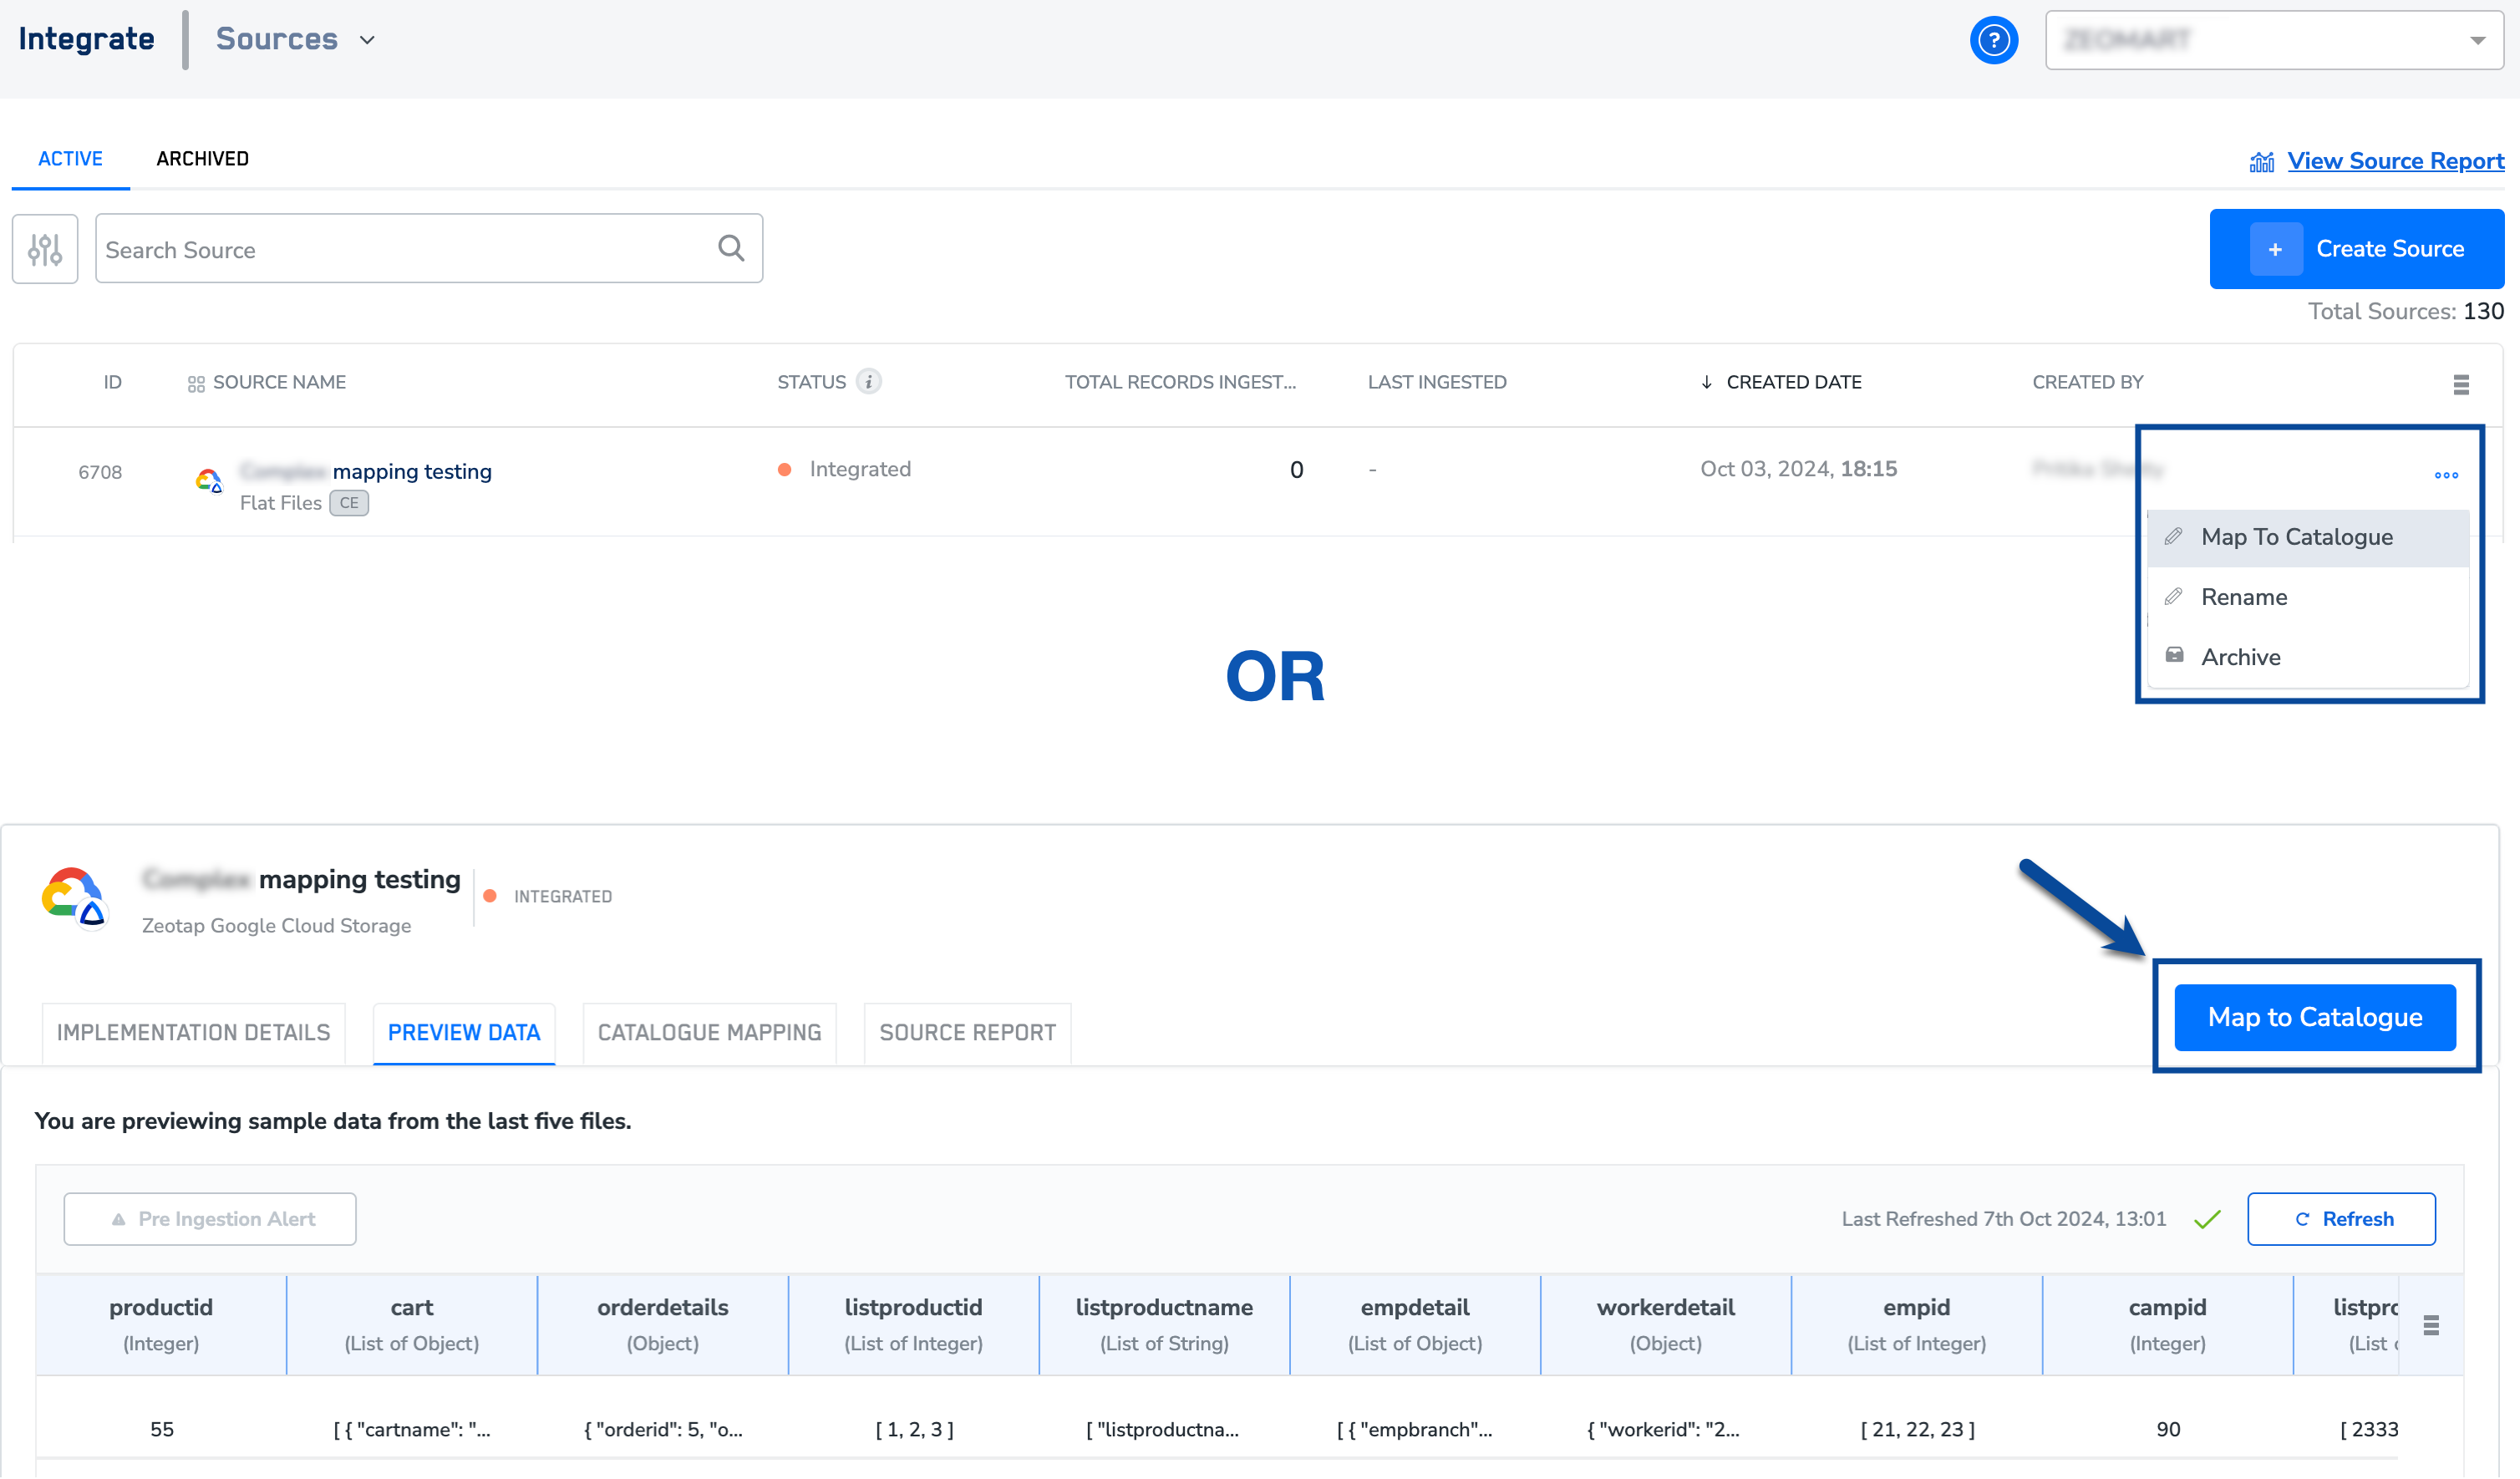
Map the country and add Country Enrichers - For every source, except native streaming sources (like Web JavaScript, Pixel, Android and iOS SDK sources) where Zeotap is collecting data wherein the country is mapped internally, it is mandatory that a Country is provided. If the country is not part of your incoming source data then you can use our Hardcode Enricher to define the country for your incoming data.
Map the identifiers - Mapping the identifiers is a mandatory step and at least one ID must be mapped for every source. We recommend that this ID is the one that you have used in ID stitching.Exception in case of one or all the below reasons: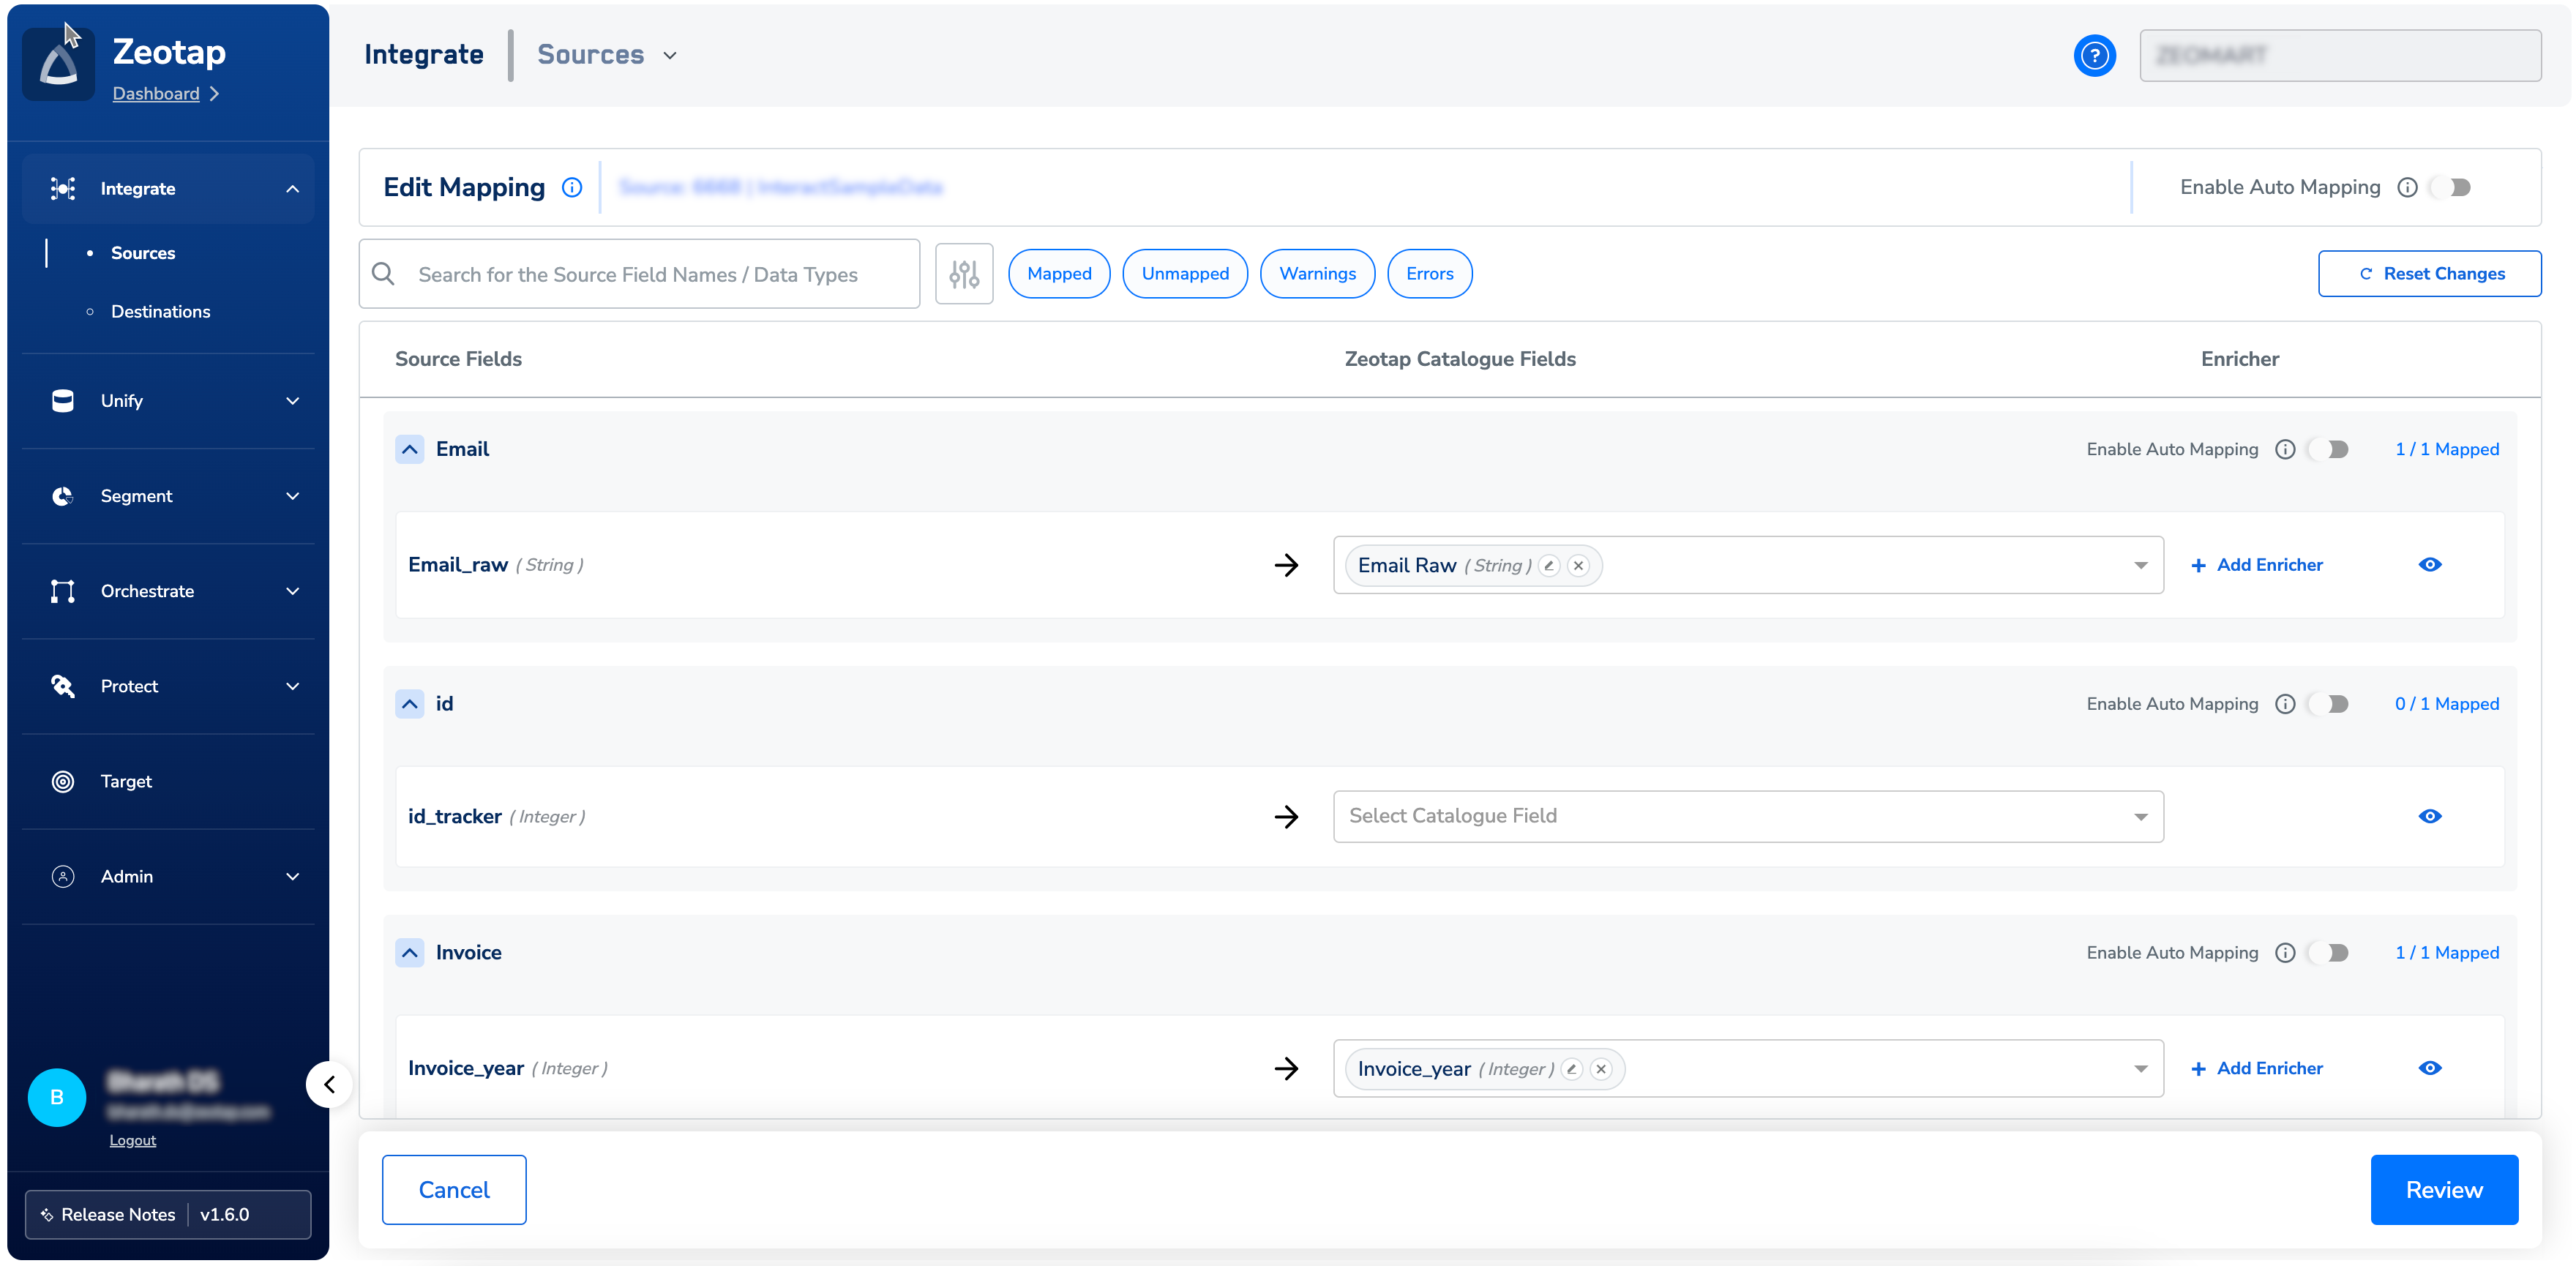
- If Zeotap’s Web JavaScript, GTM, Pixel or SDK source is integrated, then the first-party cookie or natively tracked identifiers are mapped internally. In this case, the ID is mapped internally.
- If the internally mapped IDs are classified as Disabled IDs. To know more about Disabled IDs, refer here.
Use the Enable Auto Mapping toggle to turn auto-mapping of source and catalogue fields on or off. Auto mapping uses the catalog name and previous mappings to automatically map source fields to catalog fields. Note that auto-mapping is available at both the source level and the individual category level. To learn more about how auto-mapping works, refer here. 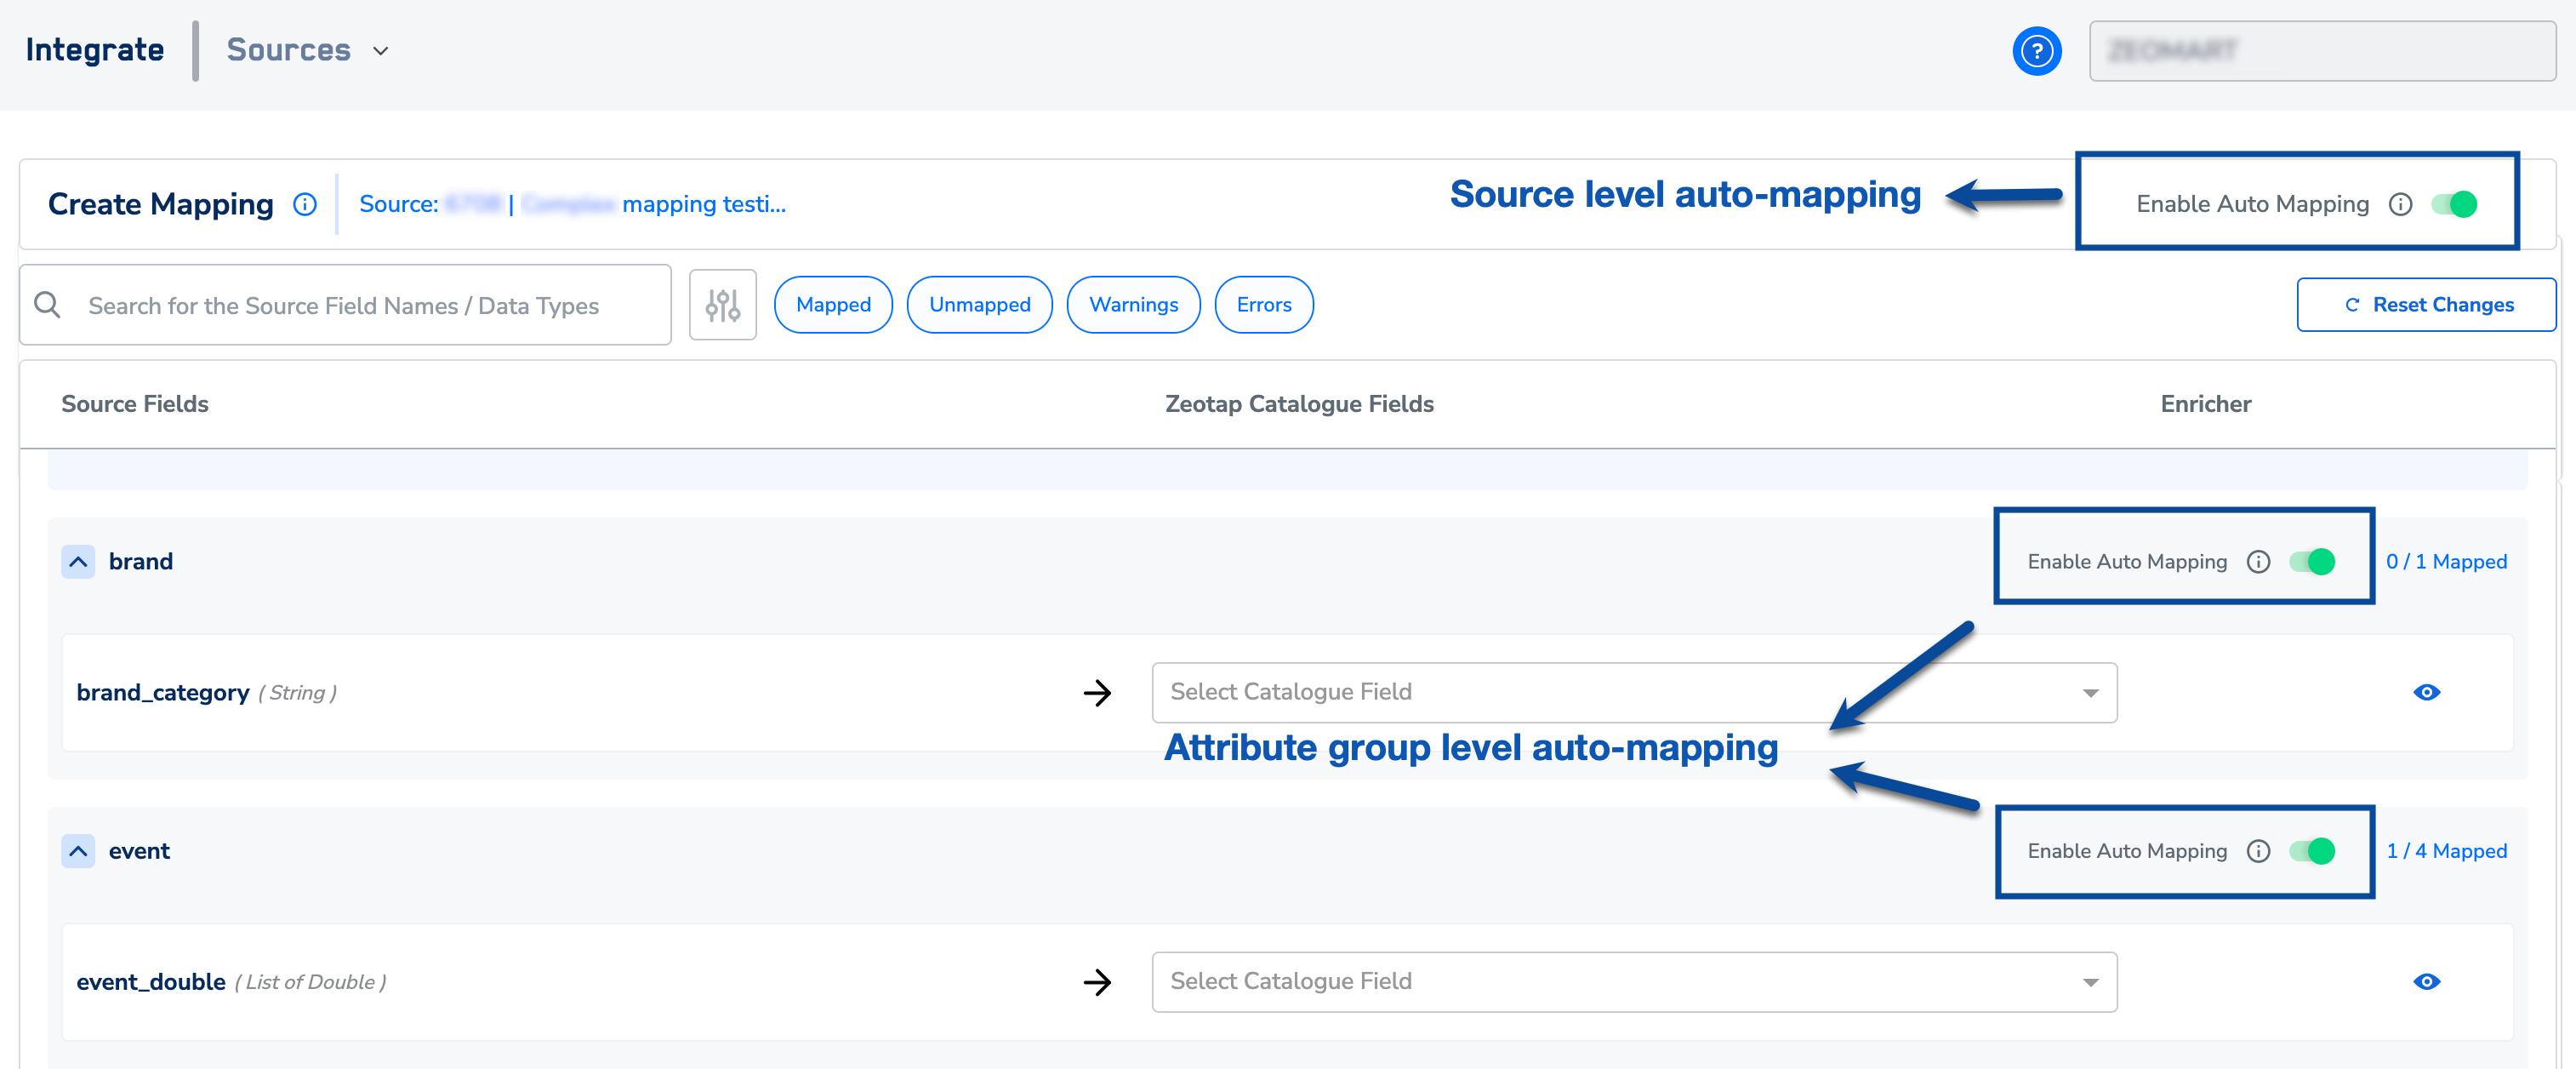
You can also search for a field using the search box or filter fields by status. To filter, select the desired status next to the search box. The available statuses are Mapped, Unmapped, Warnings, and Errors.
However, if you find any field with no mapping, then the system identifies it as a new field. In such case, you need to define the mapping. To do so, in the drop-down, click + Add Catalogue Field as shown in the image below. For information about how to create a new catalogue field, refer here.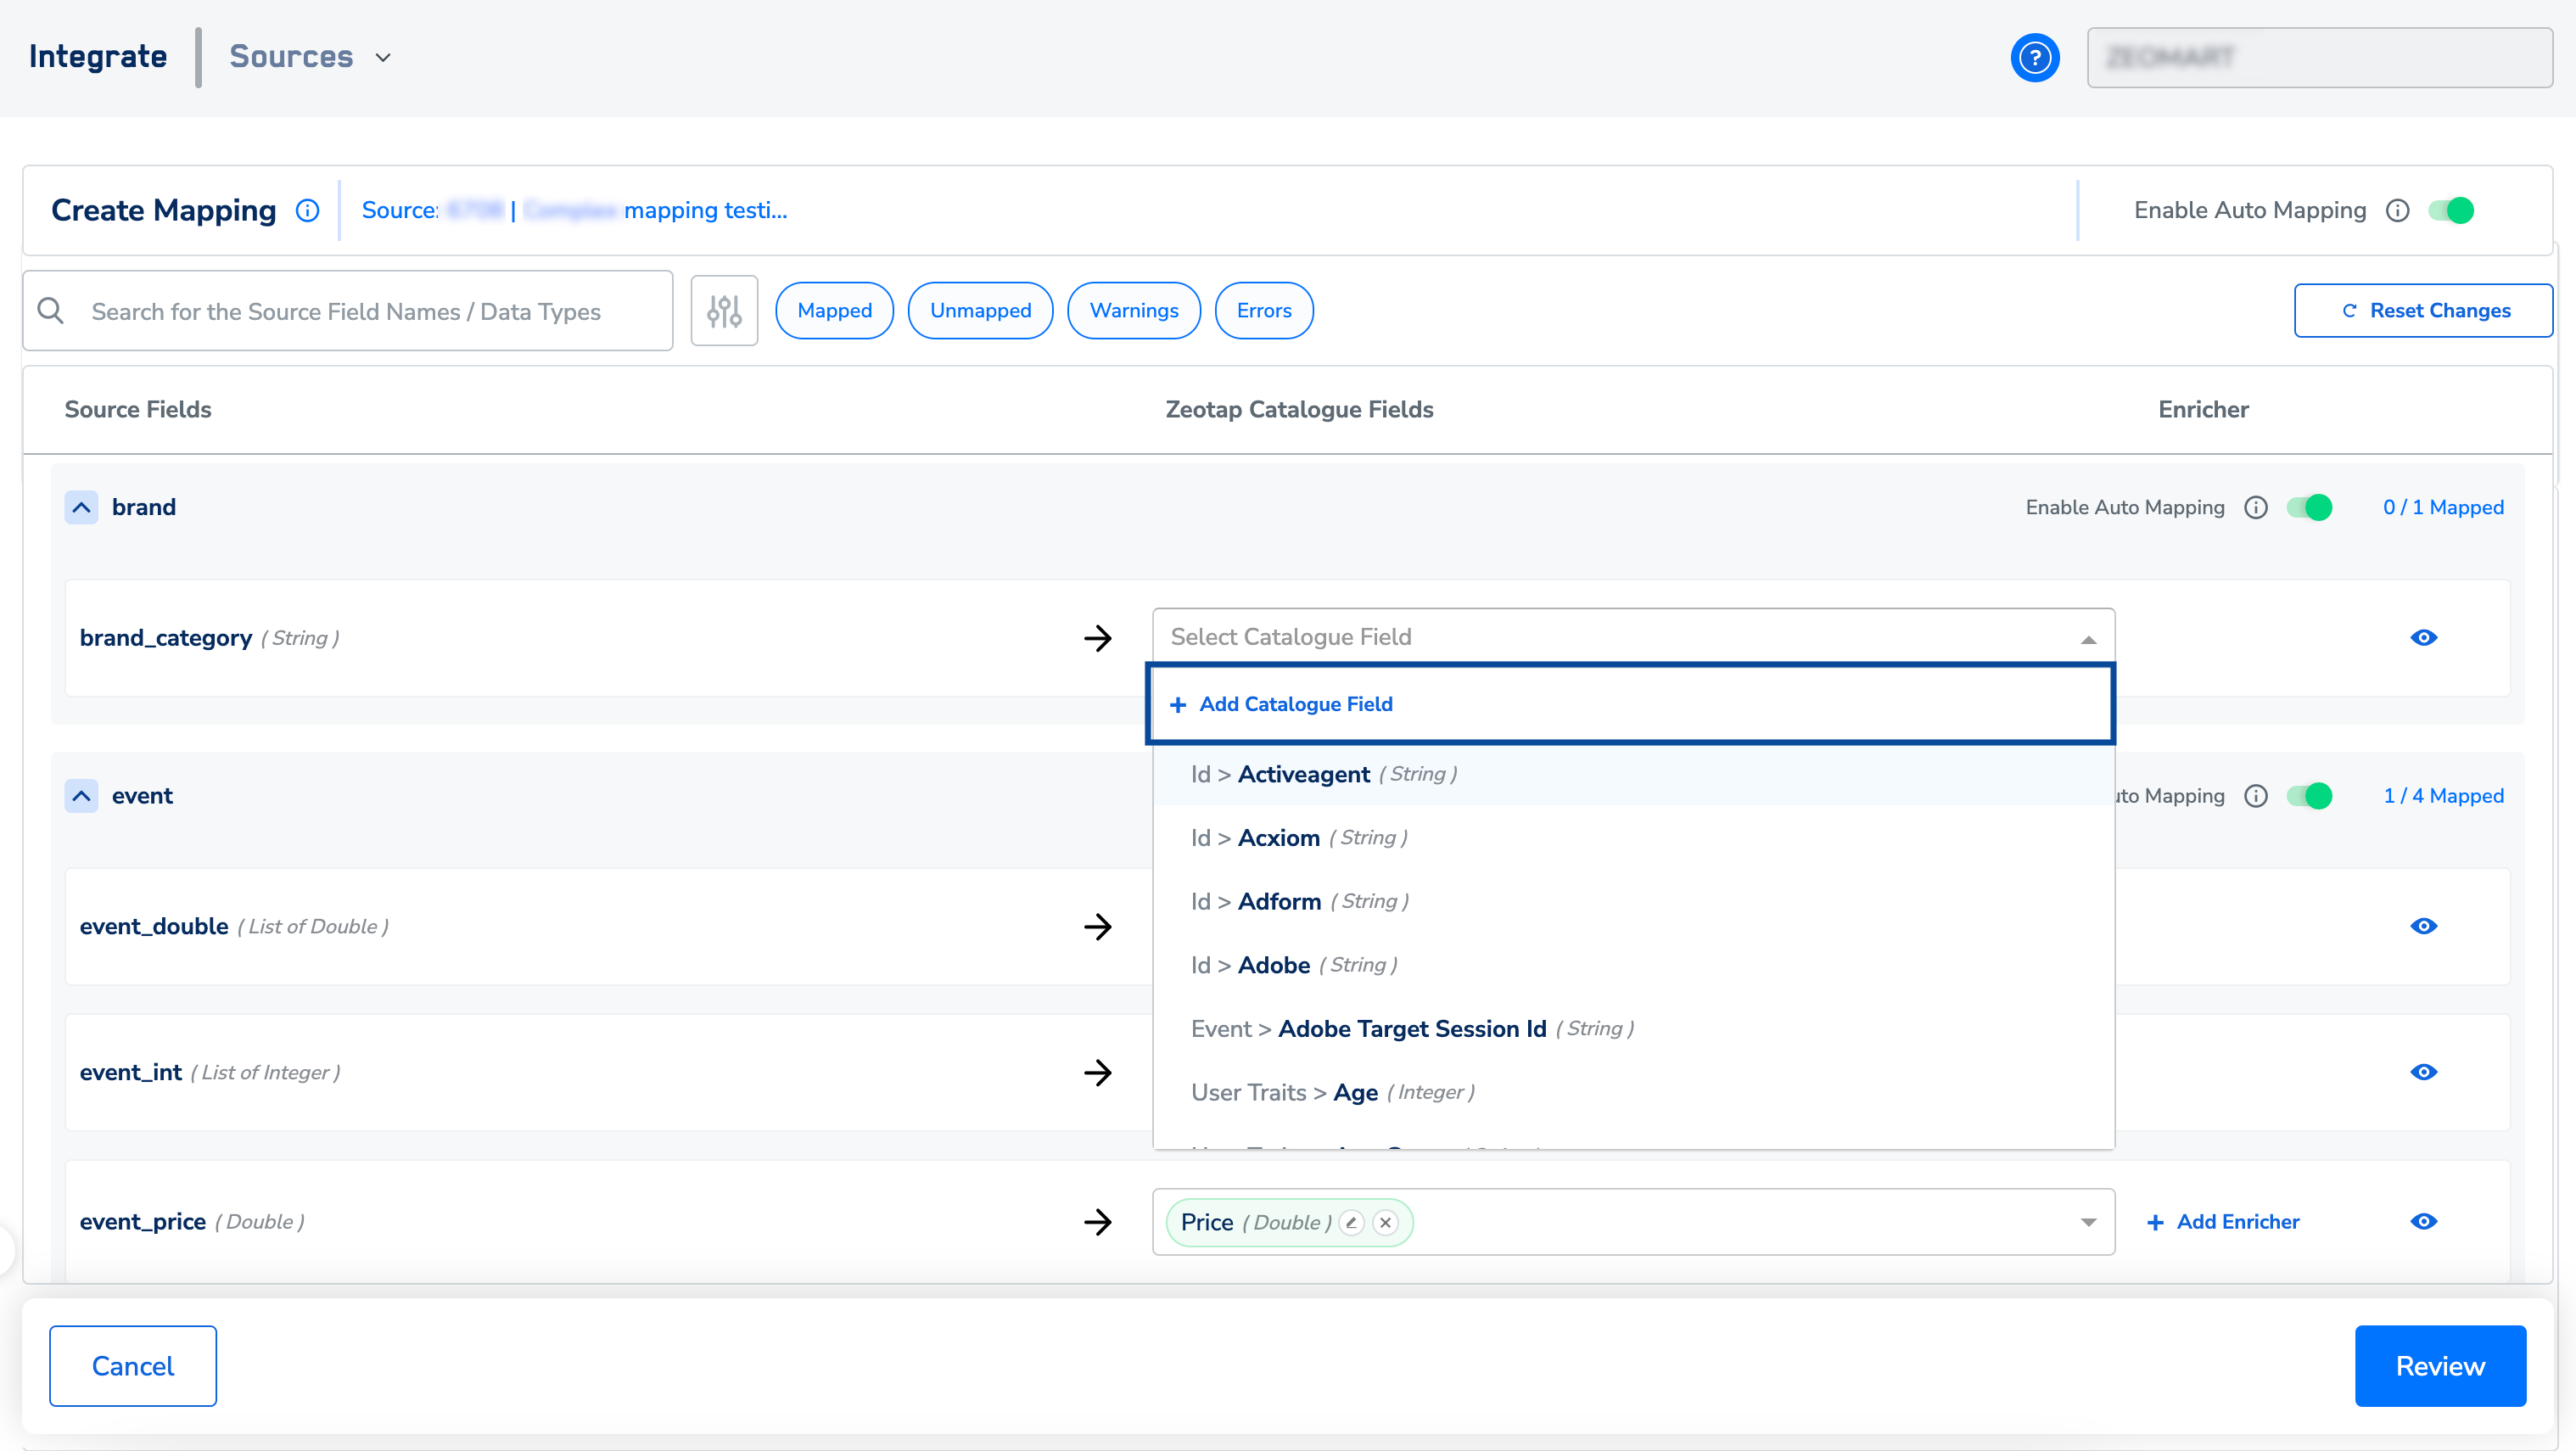
If there is a data type mismatch between the incoming source field and the catalogue field, then the system displays a warning to fix the data type to prevent ingestion failure. In such cases, you can perform one of the following actions:
- Choose the data type that matches the source data
- Add an enricher while mapping the source to align incoming data with catalogue fields
- Override the source data type to your desired data type. For information about how to override and edit an override, refer here.
Map the Consent Purposes - If a source has consent data, then click Add mapping and select the incoming consent field and map it to the relevant Zeotap consent field. Add Enricher to standardise the incoming consent field to a binary value (Yes/No) to use it across the downstream modules. To know more about the Value Mapper Enricher, click here.If there is no incoming consent source field, then click Add custom field and choose the relevant consent catalogue field followed by which, add the Hardcode Enricher, specifying that all the incoming records are consented by your customer.
Map the Marketing Preferences - Capturing marketing preferences along with consent gives clarity and assurance to the marketing team while designing the campaign for the right audience.Explain the mapping procedure. If a source has marketing preference data, then click Add mapping and select the incoming marketing preference field and map it to the relevant Zeotap marketing preference field. Add Enricher to standardise the incoming consent field to a binary value (Yes/No) to use it across the downstream modules. To know more about the Value Mapper Enricher, click here.If there is no incoming consent source field, then click Add custom field and choose the relevant marketing preference field followed by which, add the Hardcode Enricher, specifying that all the incoming records are consented by your customer.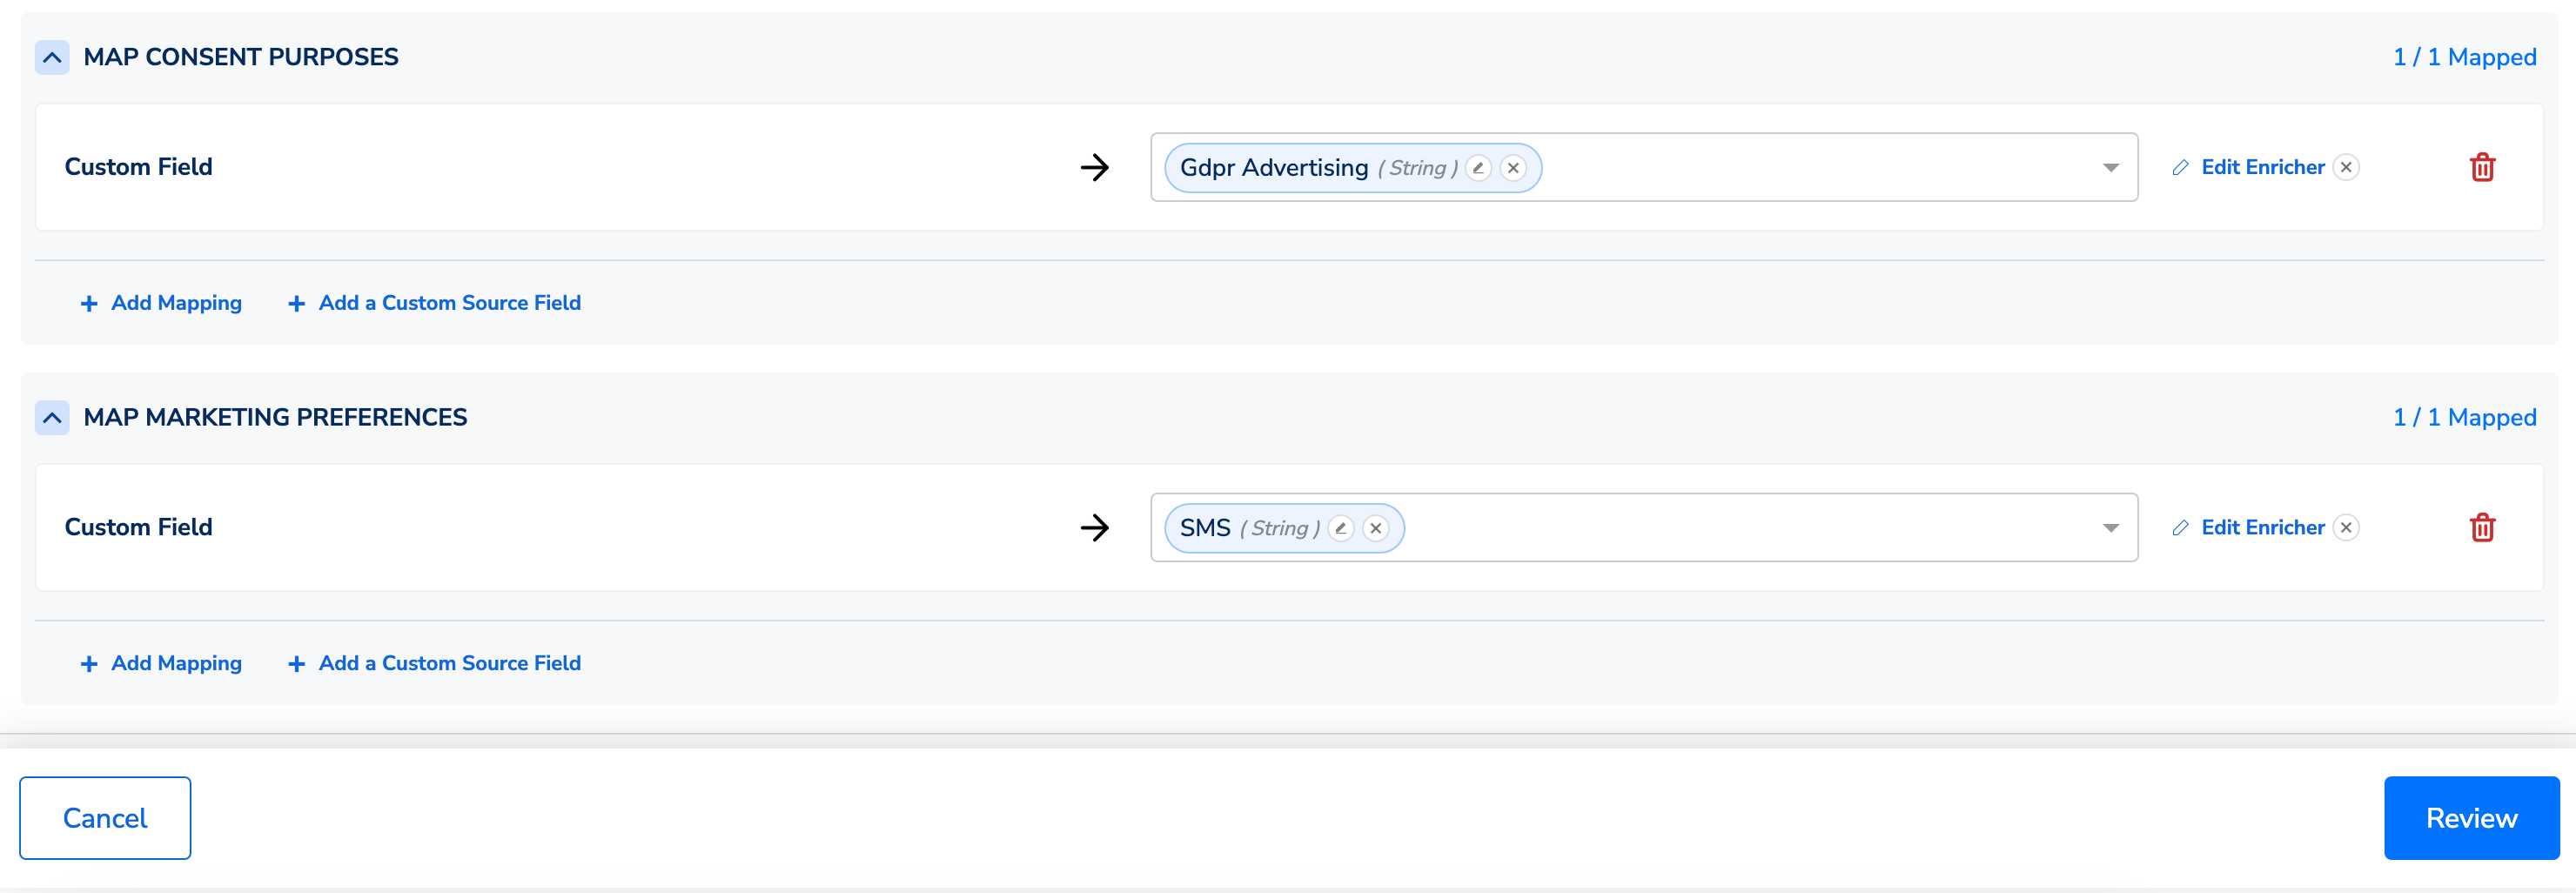
Click REVIEW.In the REVIEW MAPPINGscreen that appears, you can find warnings along with error logs that provide a description of the issue for incorrectly mapped fields. Once you have corrected these fields, the system automatically refreshes, allowing the warning to disappear.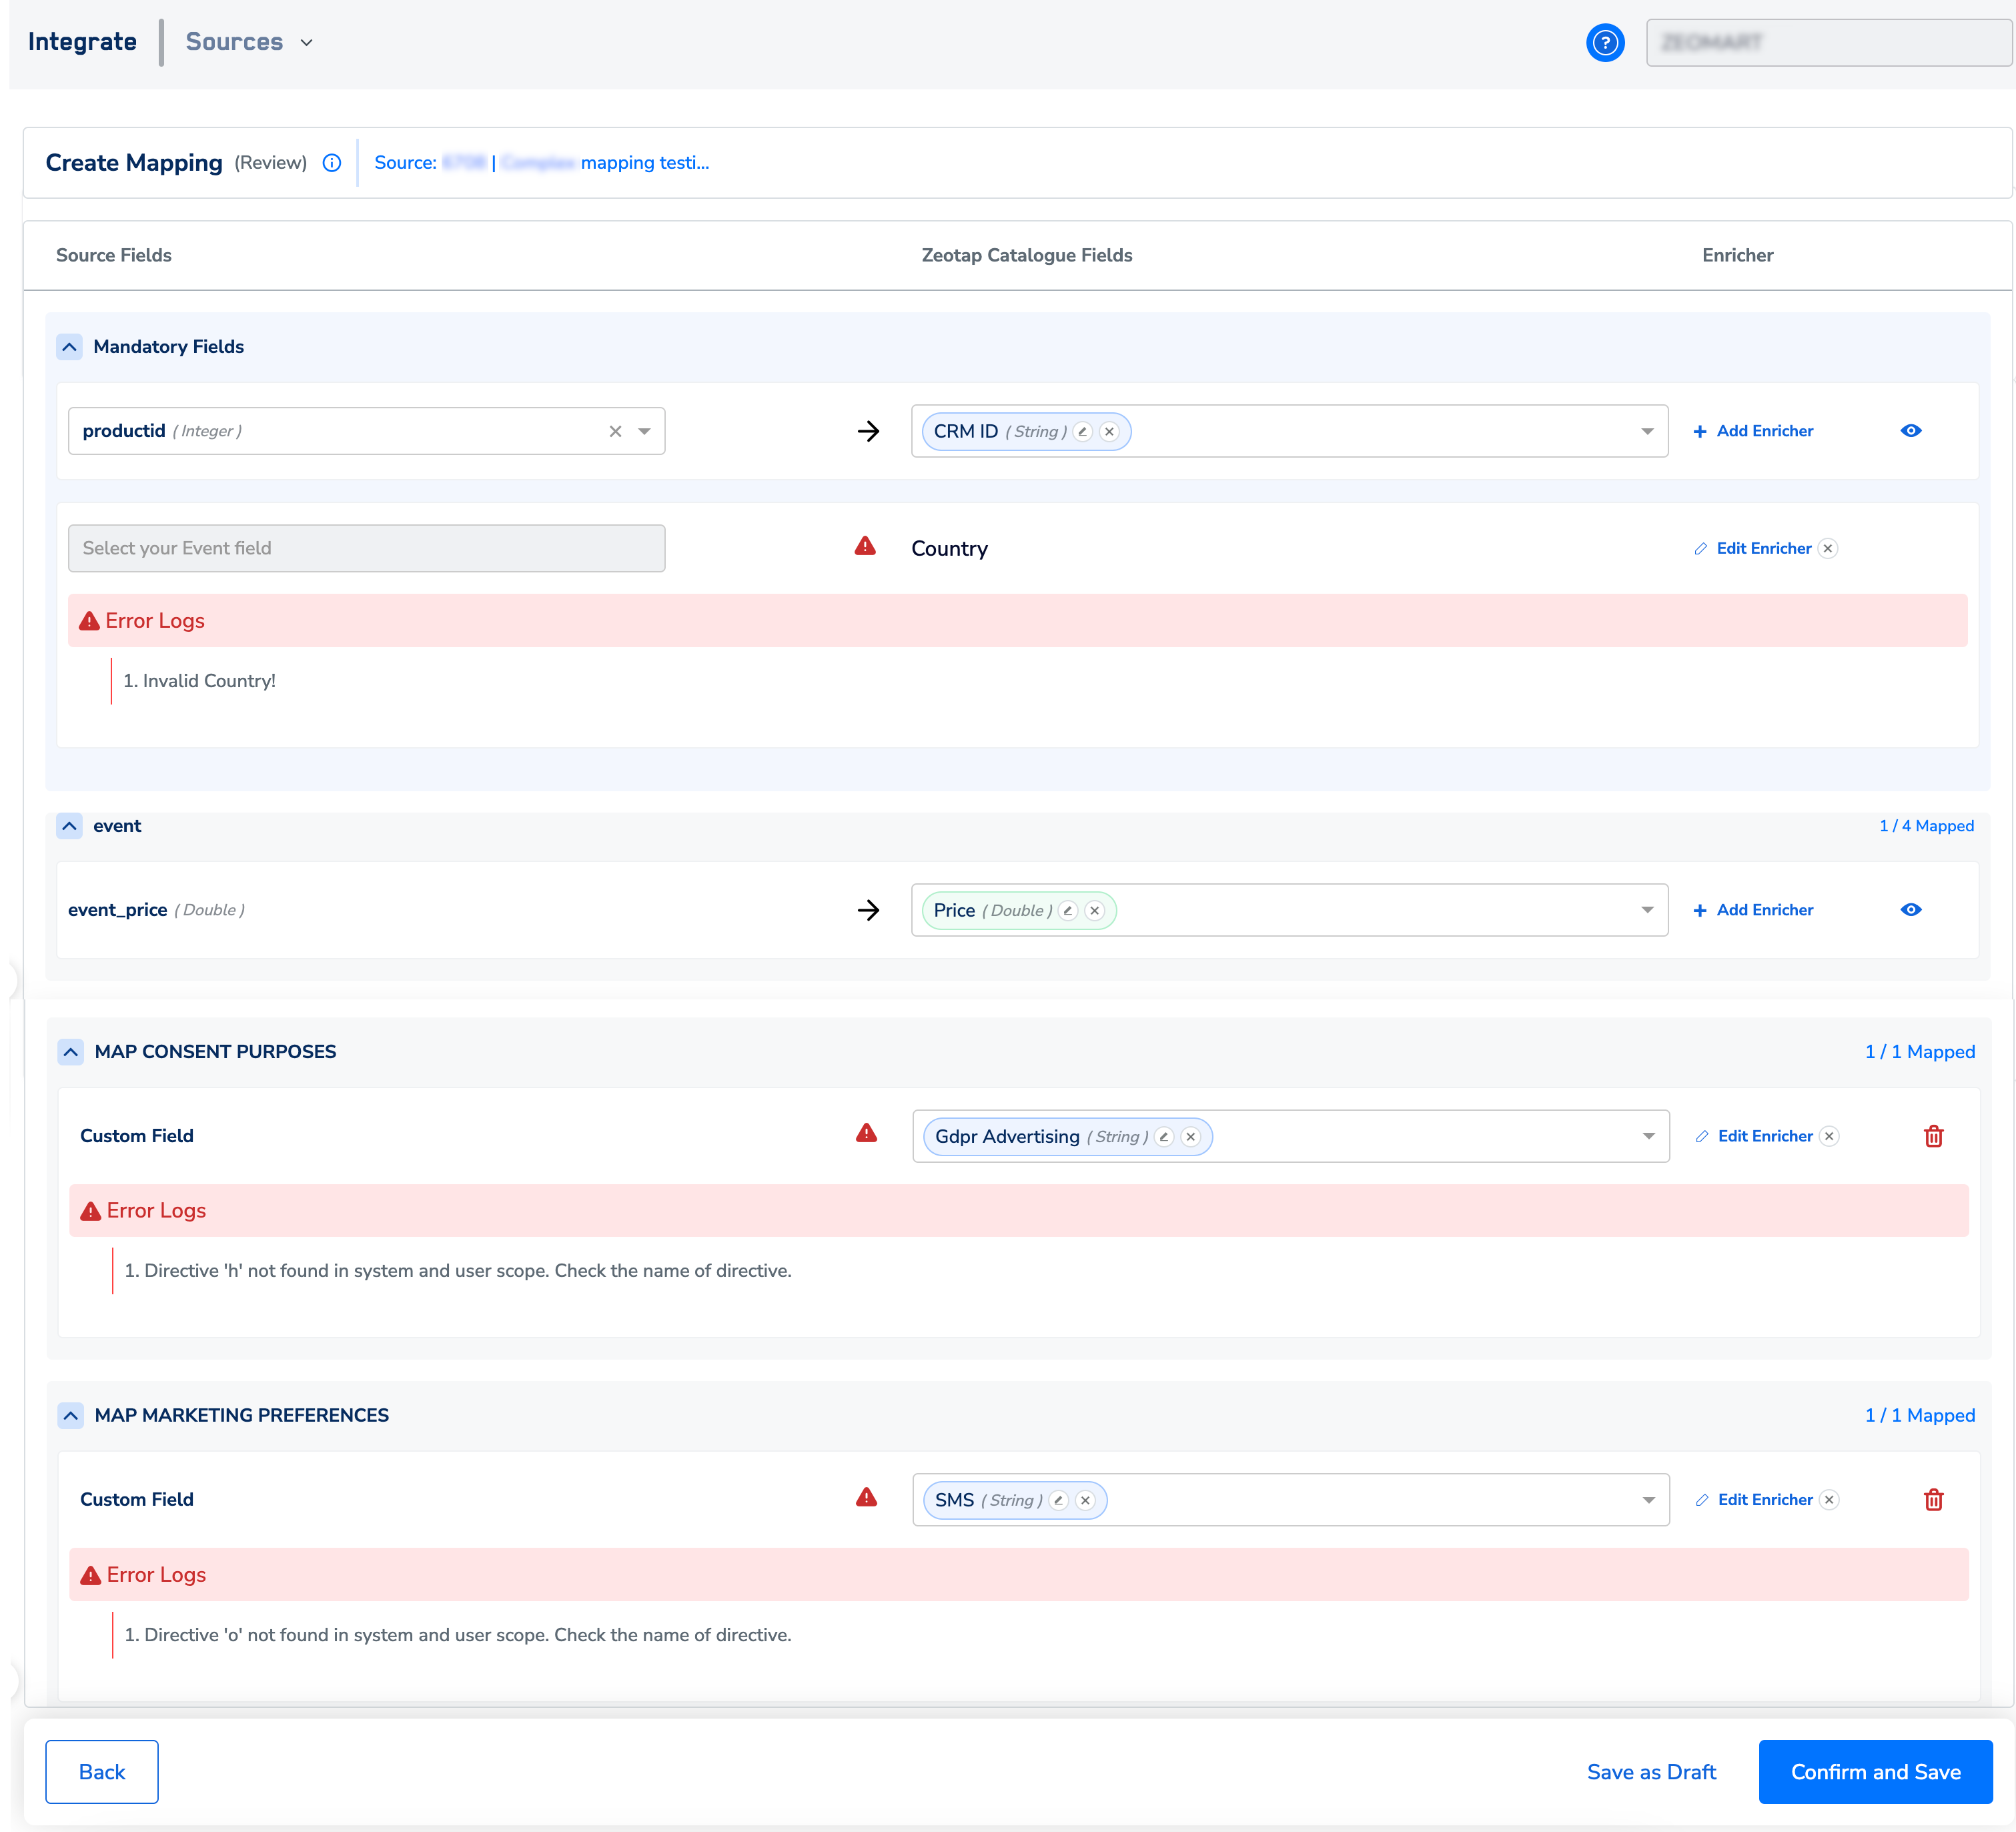
| CASE | MITIGATION |
|---|---|
| If there is conflicting mapping. That is, more than one source field is mapped to one catalogue field. | * Keep the mapping only against the correct source field and remove it for the others. * Map the other source fields with a new or any of the other unmapped catalogue fields. |
| If there is a mismatch found between the source field data type and the mapped fields data type. | Either correct the value in your source data to match the catalogue data type or create a new catalogue field of the matching data type. |
NoteEnsure that you consider the following points while reviewing the mapping:
- We highly recommend that you define consent for each source to comply with your privacy regulations
- Note that the checks that are done during the Review Mapping stage are just preliminary validation performed on the sample dataset. This does not provide a complete view of the source ingestion.
- We do not allow mapping an incoming
Stringfield to anIntegerfield. However, we do allow mapping an incomingIntegerfield to aStringfield in the Catalogue. For example, you can map an incomingStringfield “Age” to aStringfield in the Catalogue. On the other hand, mapping the same field to anIntegerfield in the Catalogue is not allowed. This may lead to ingestion errors in specific cases, which you have to be aware of. - We recommend that you fix all the errors that appear on the Review Mapping screen before proceeding with source ingestion.
After the review is complete, you can choose either Save as a Draft or Confirm and Save.

- Save as a Draft allows you to save the mapping as a draft and revisit later for modifications. This serves as a checkpoint for verifying the mapped fields with an expert. Note that when you save a mapping as a draft, the status of the source remains in INTEGRATED. In addition, a DRAFT tag gets added below it as shown in the image below.
- Confirm and Saveconcludes the mapping process, preventing further modifications to the mapping.