In the Catalogue Field, look up for the field that you want to add. If the field is present in the system, then you are prompted to use the existing field and you are taken to the details page. However, if the existing field is not as per your requirement, then you can create a new field. While creating a new field, you can go with the system recommendation or add your own field.
NoteIf you are able to create a catalogue field with the same name as an existing catalogue field, that could be because the underlying DB field name is different. The requirement is to have a unique DB field name in the DB schema, but the
display name may repeat. However, this is not recommended by Zeotap CDP.
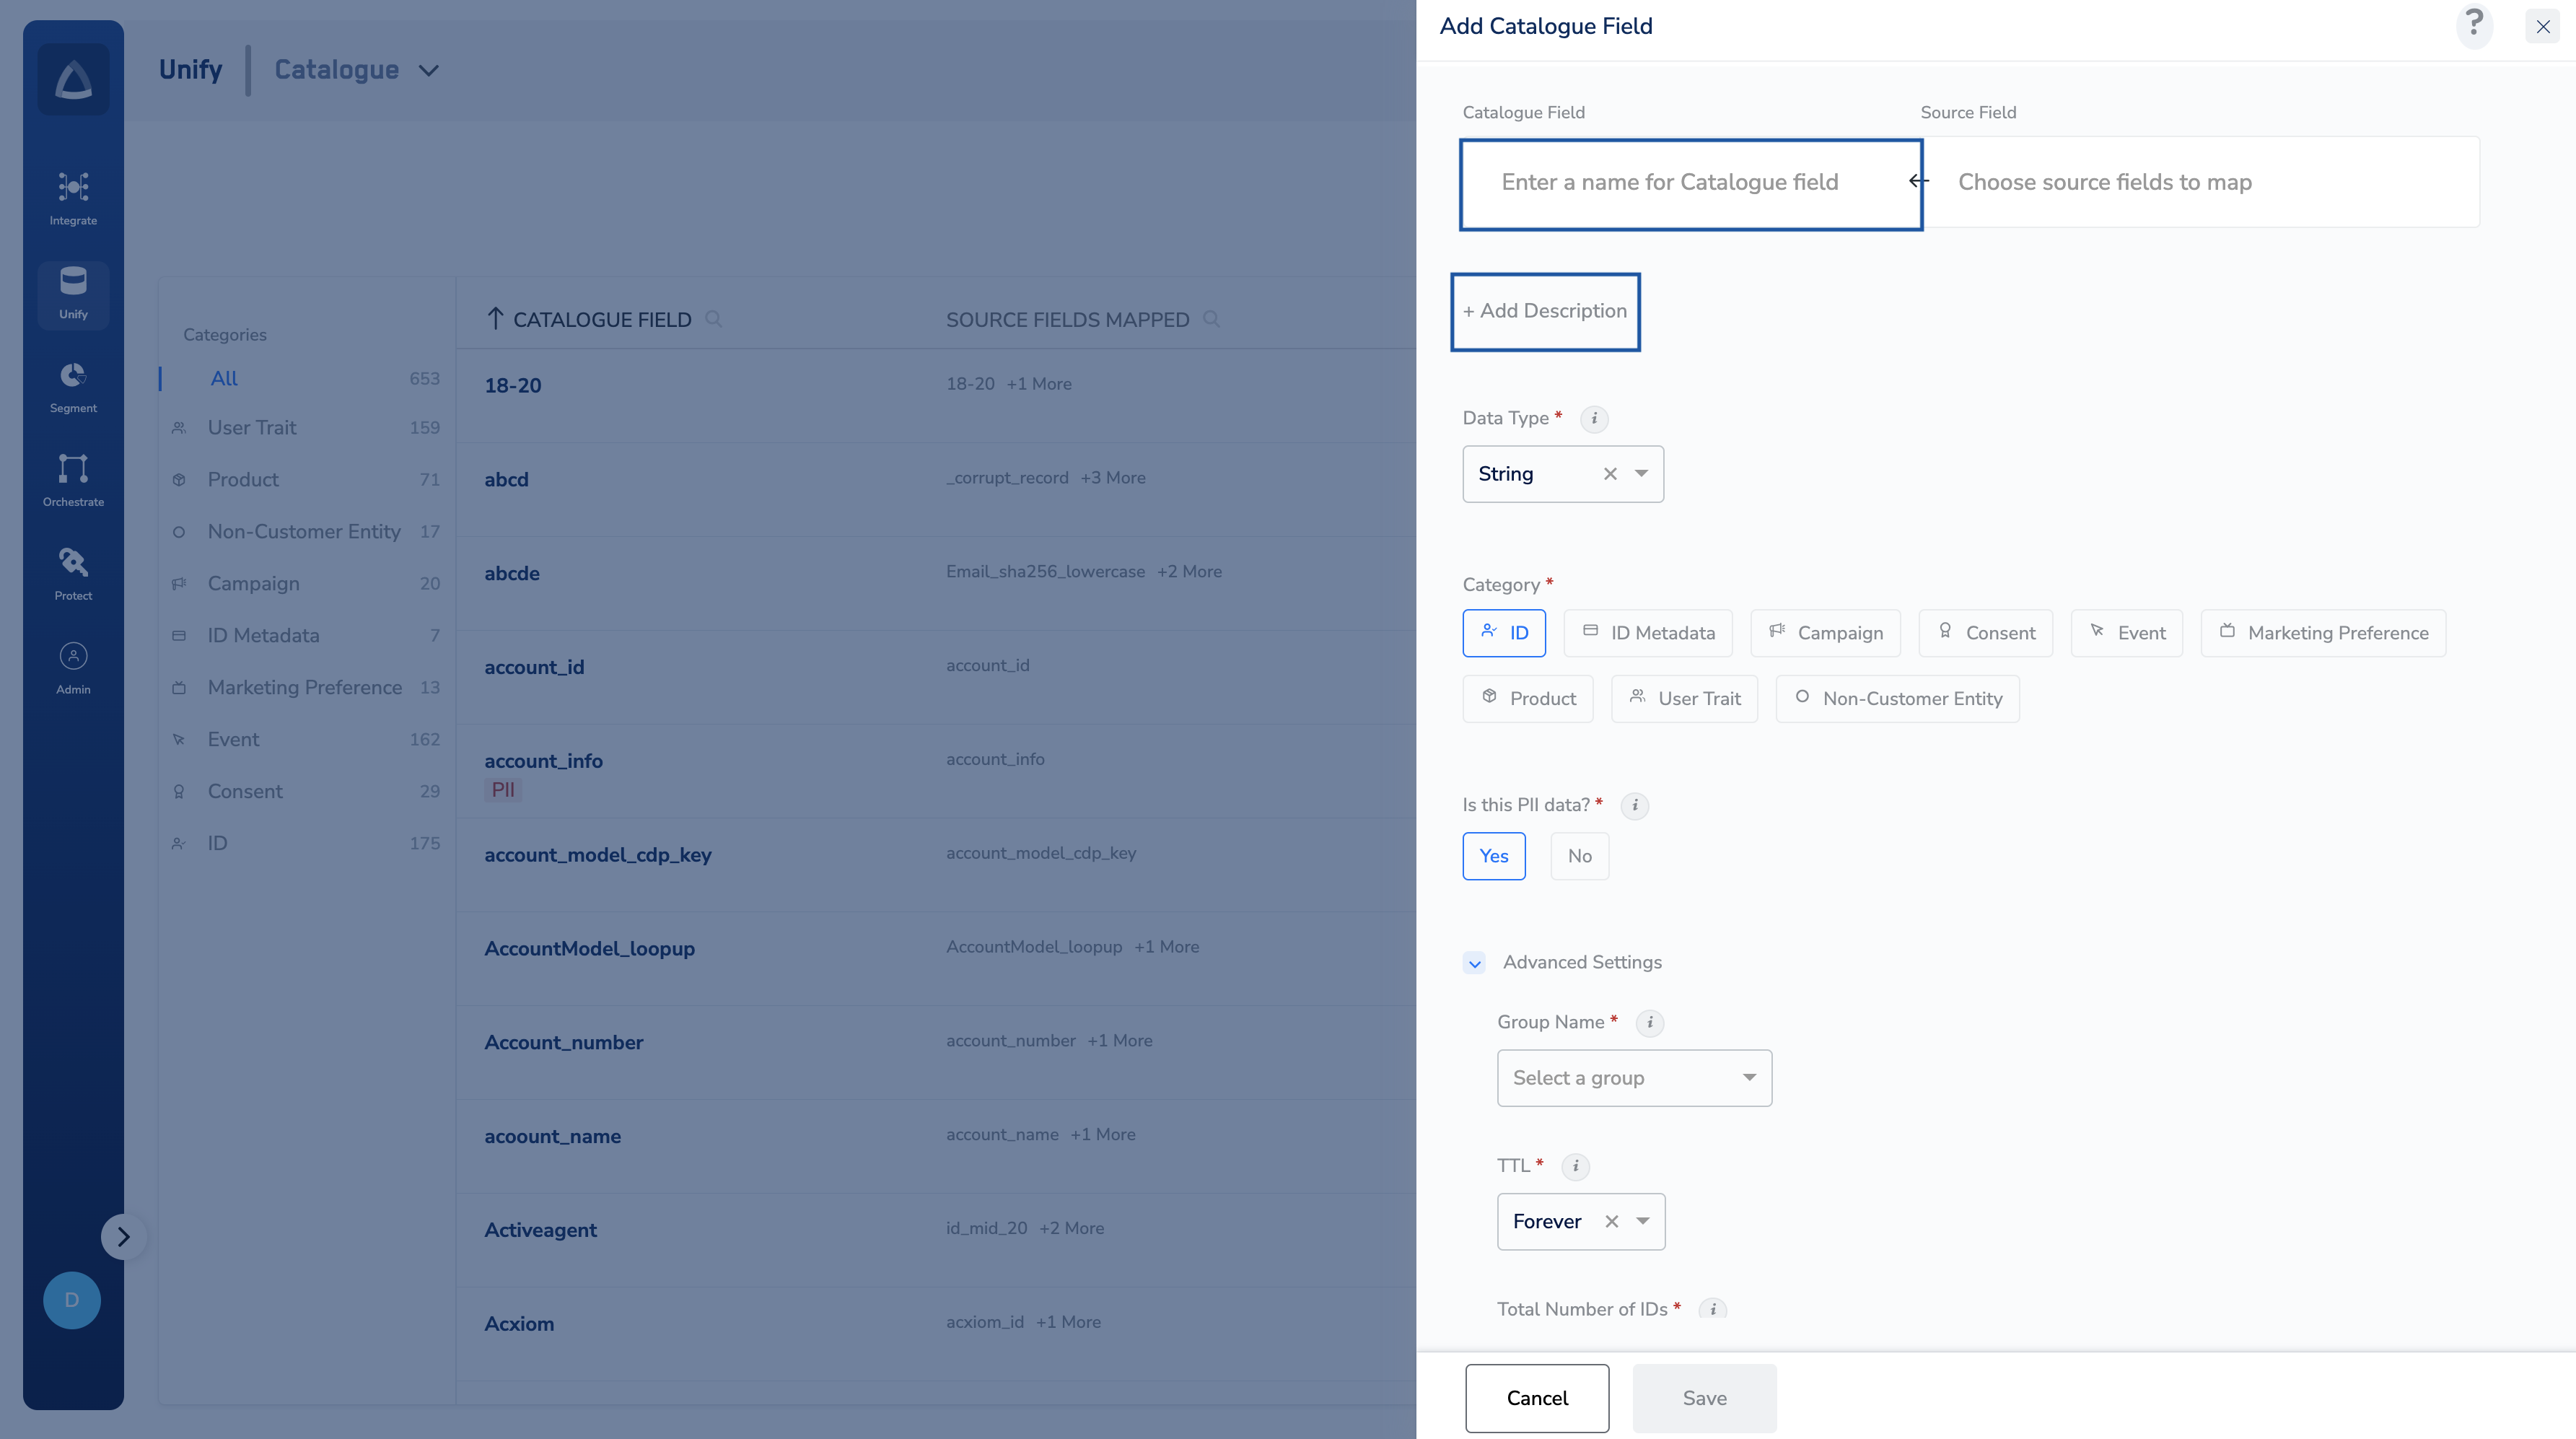
In the Source Field, define the name of the field in your source that has to be mapped to this catalogue field. While typing the name of your source field, the system first looks up in the list of unmapped fields. If already available, then select the same.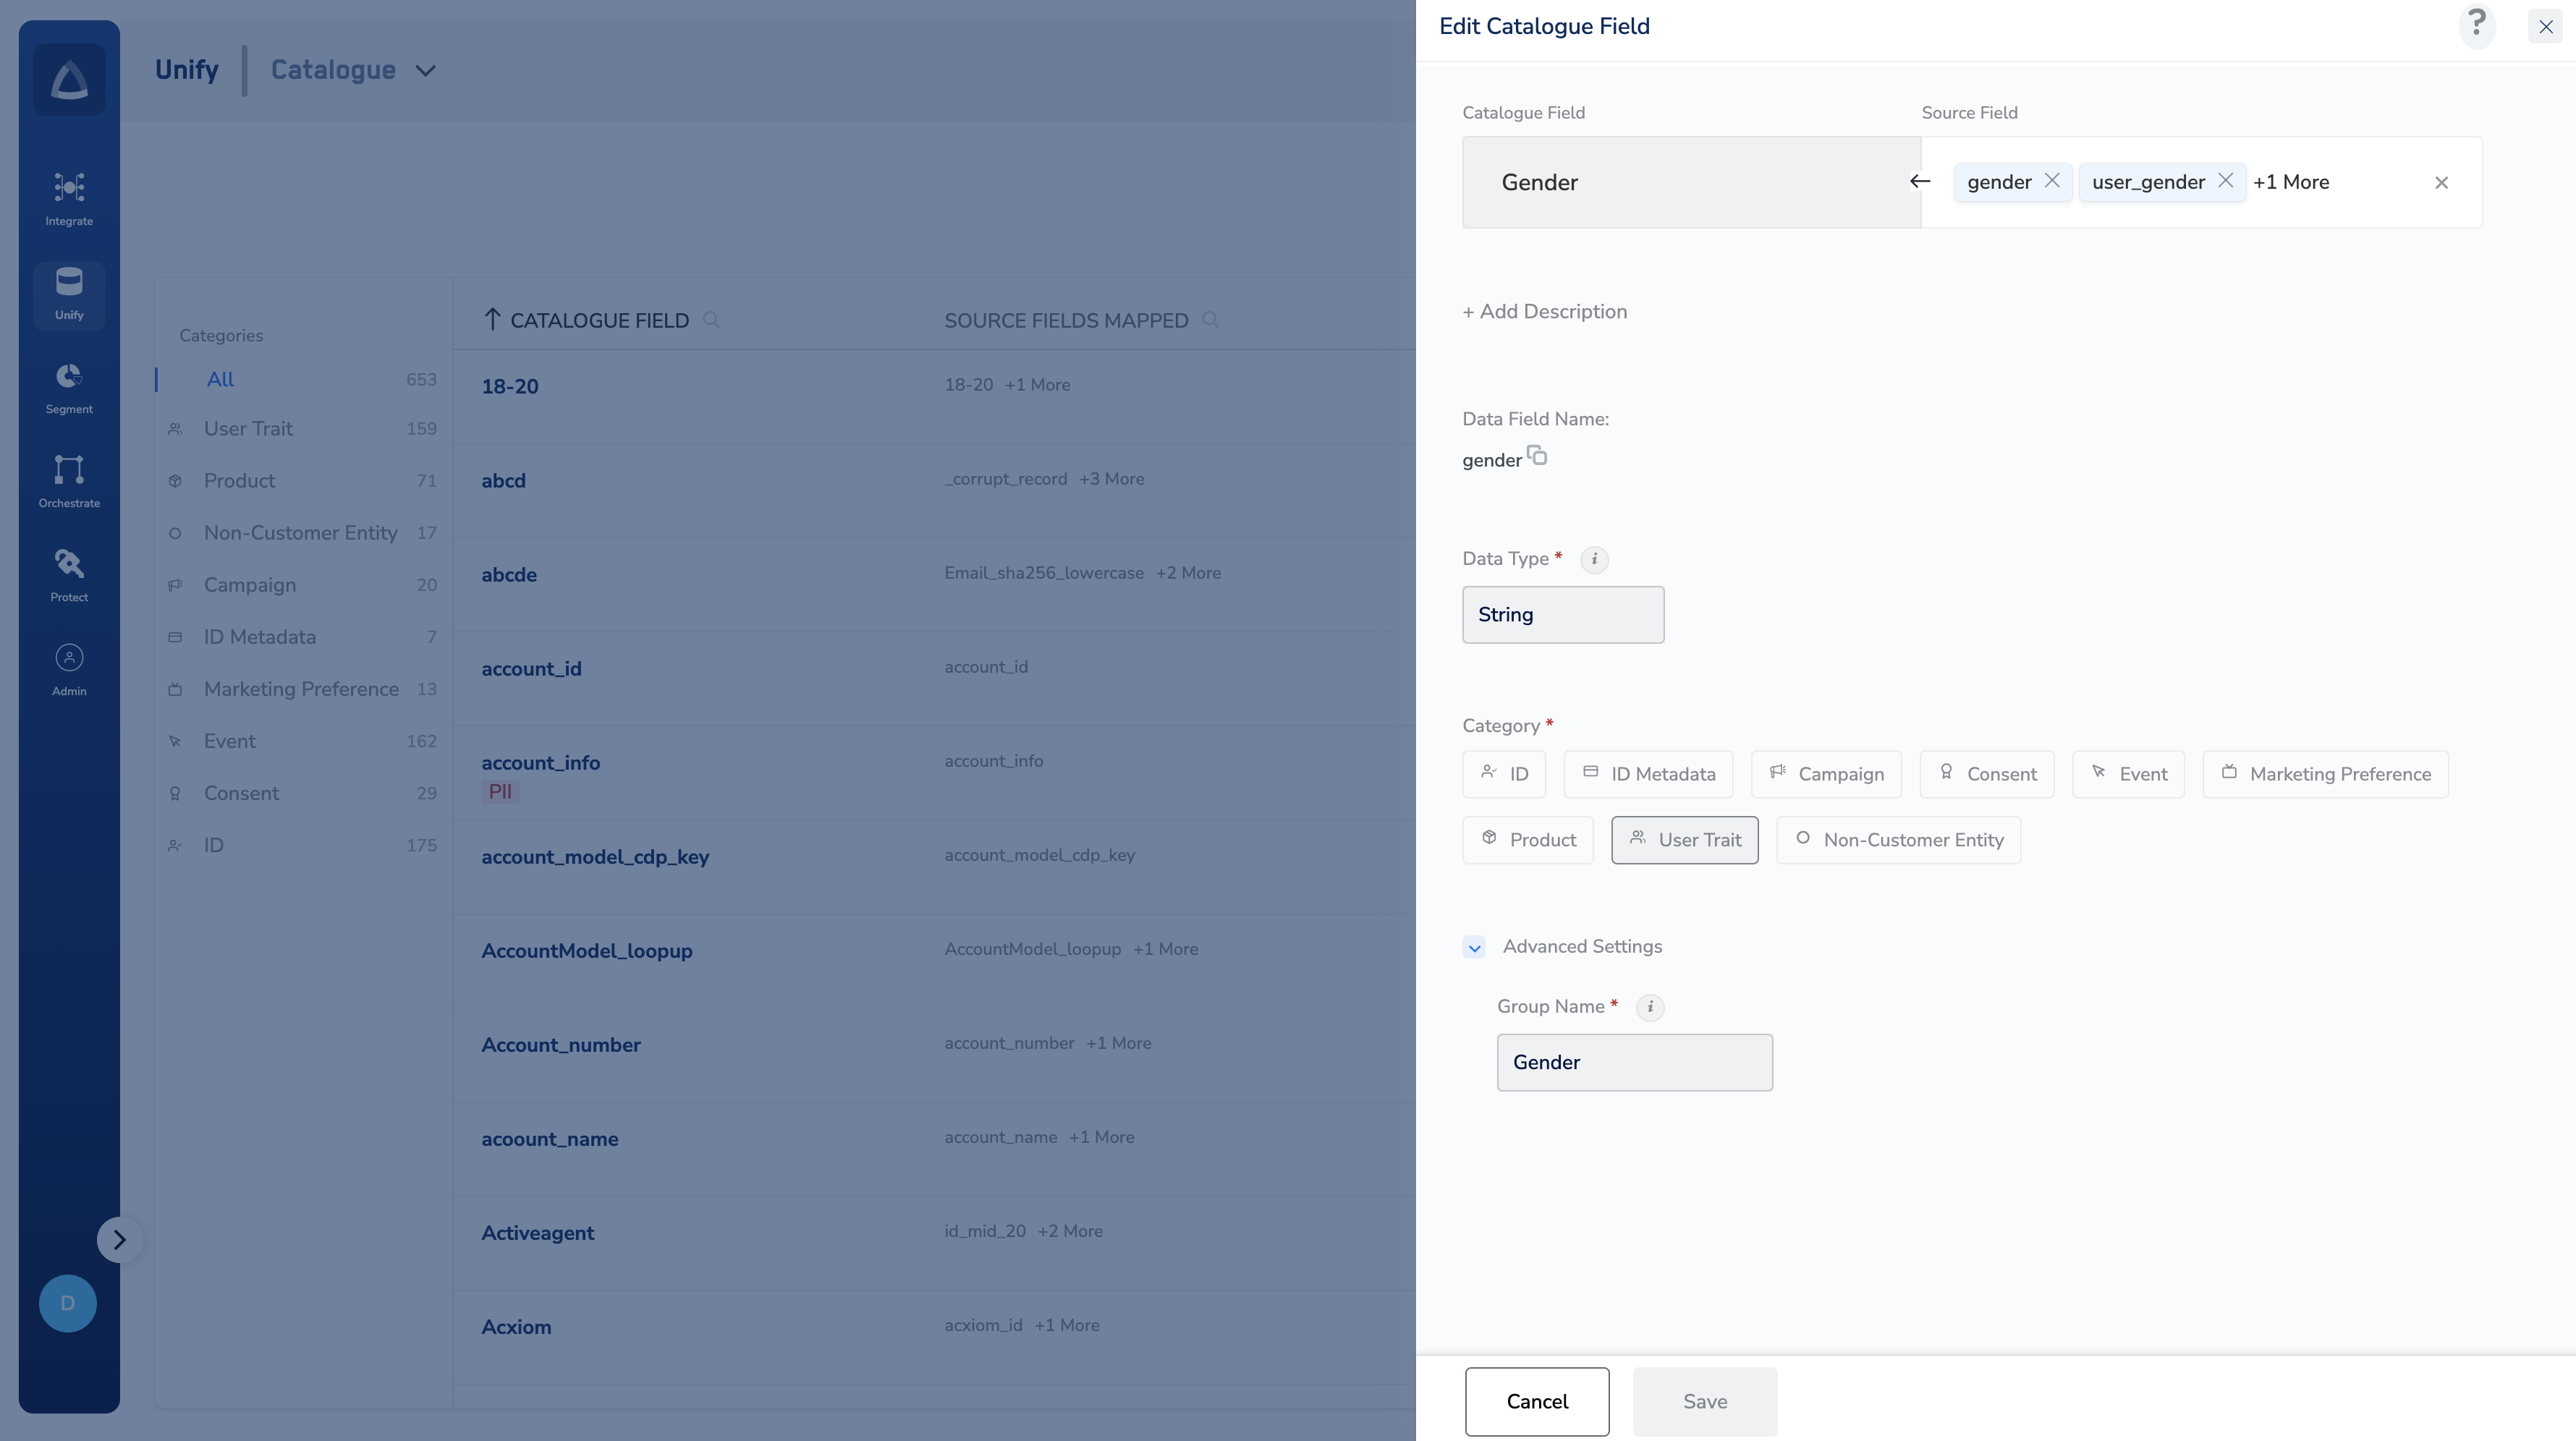
Choose one of the categories for your catalogue field.
Review your selections and click Save. Upon saving, the (auto) mapping defined here gets reflected when a source is onboarded and if the same source field name appears in your source (in the source’s Catalogue Mapping section).
NoteIn the next topic, you can learn about the
categories in which you can create the catalogue fields.