Note:This document provides all the information that you as a client require to implement the SFTP (Push) source.
Upload Files in Sources
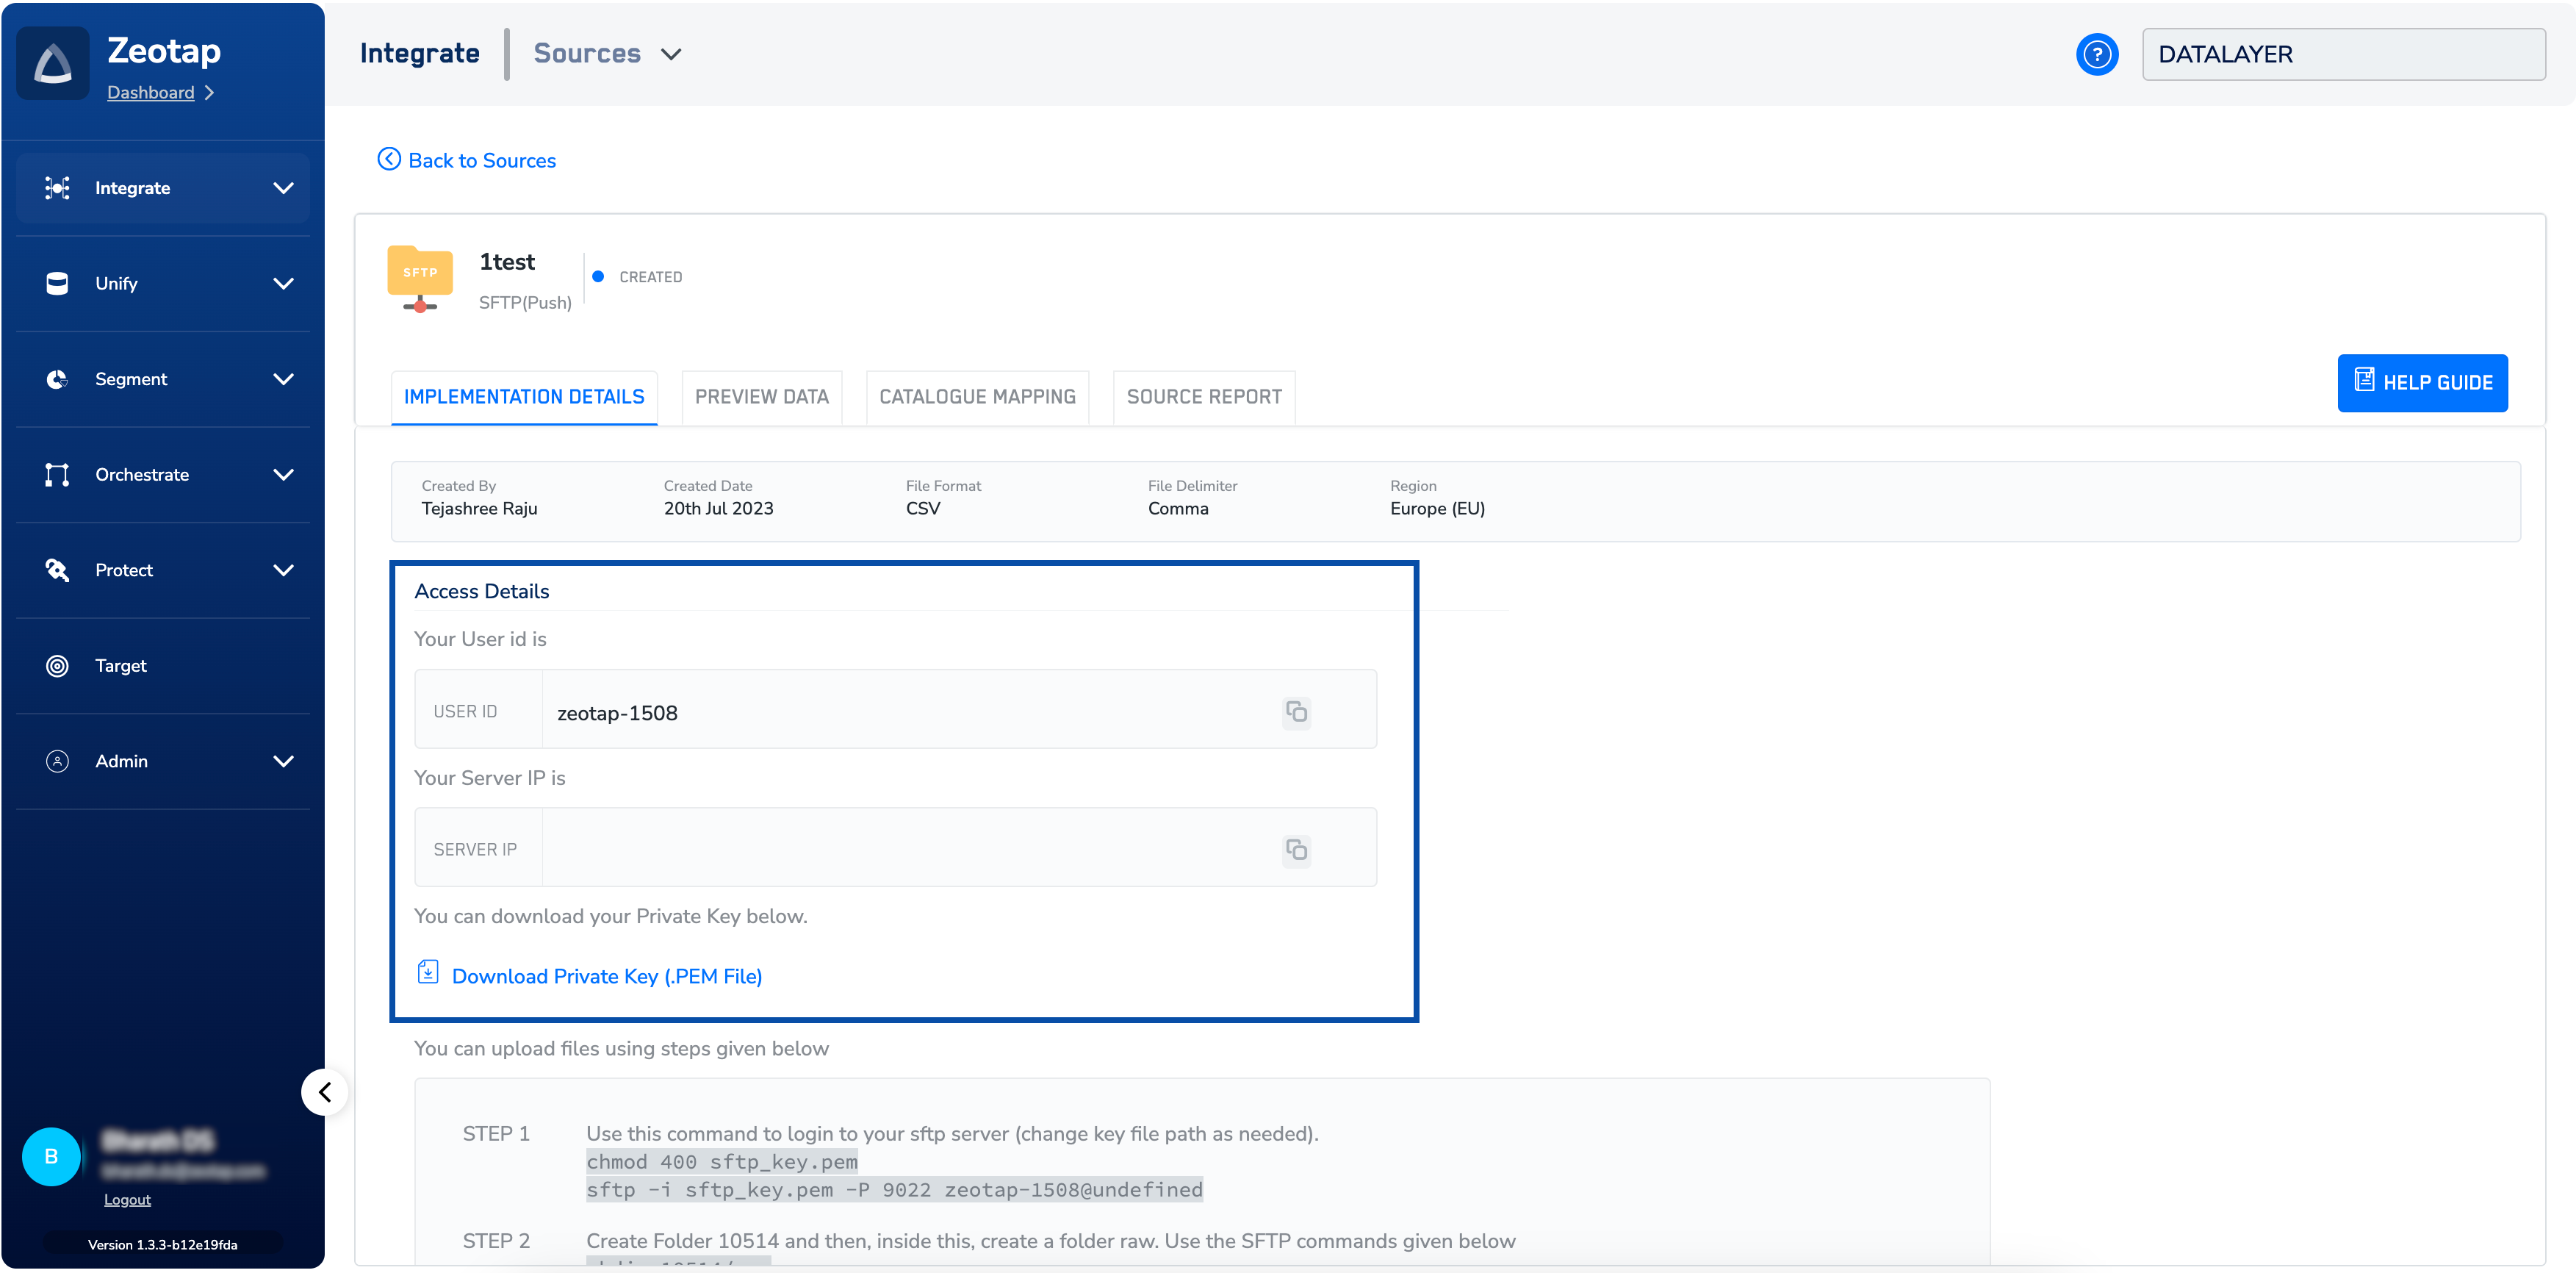
After creating the source, navigate to the IMPLEMENTATION DETAILS tab. On this page, find the following details under the Access Details section:- User ID
- Server IP
- Link to download the Private Key
Note:Download the Private Key and keep a note of the User ID and Server IP. These are required in the later stages of the implementation.
Methods to Upload Files
Ensure that your Zeotap Admin has whitelisted your IP. You cannot proceed with the integration if your IP is not whitelisted.Note:For PGP-encrypted sources, upload files only in the
.pgp format.Upload Files using Command Line Interface
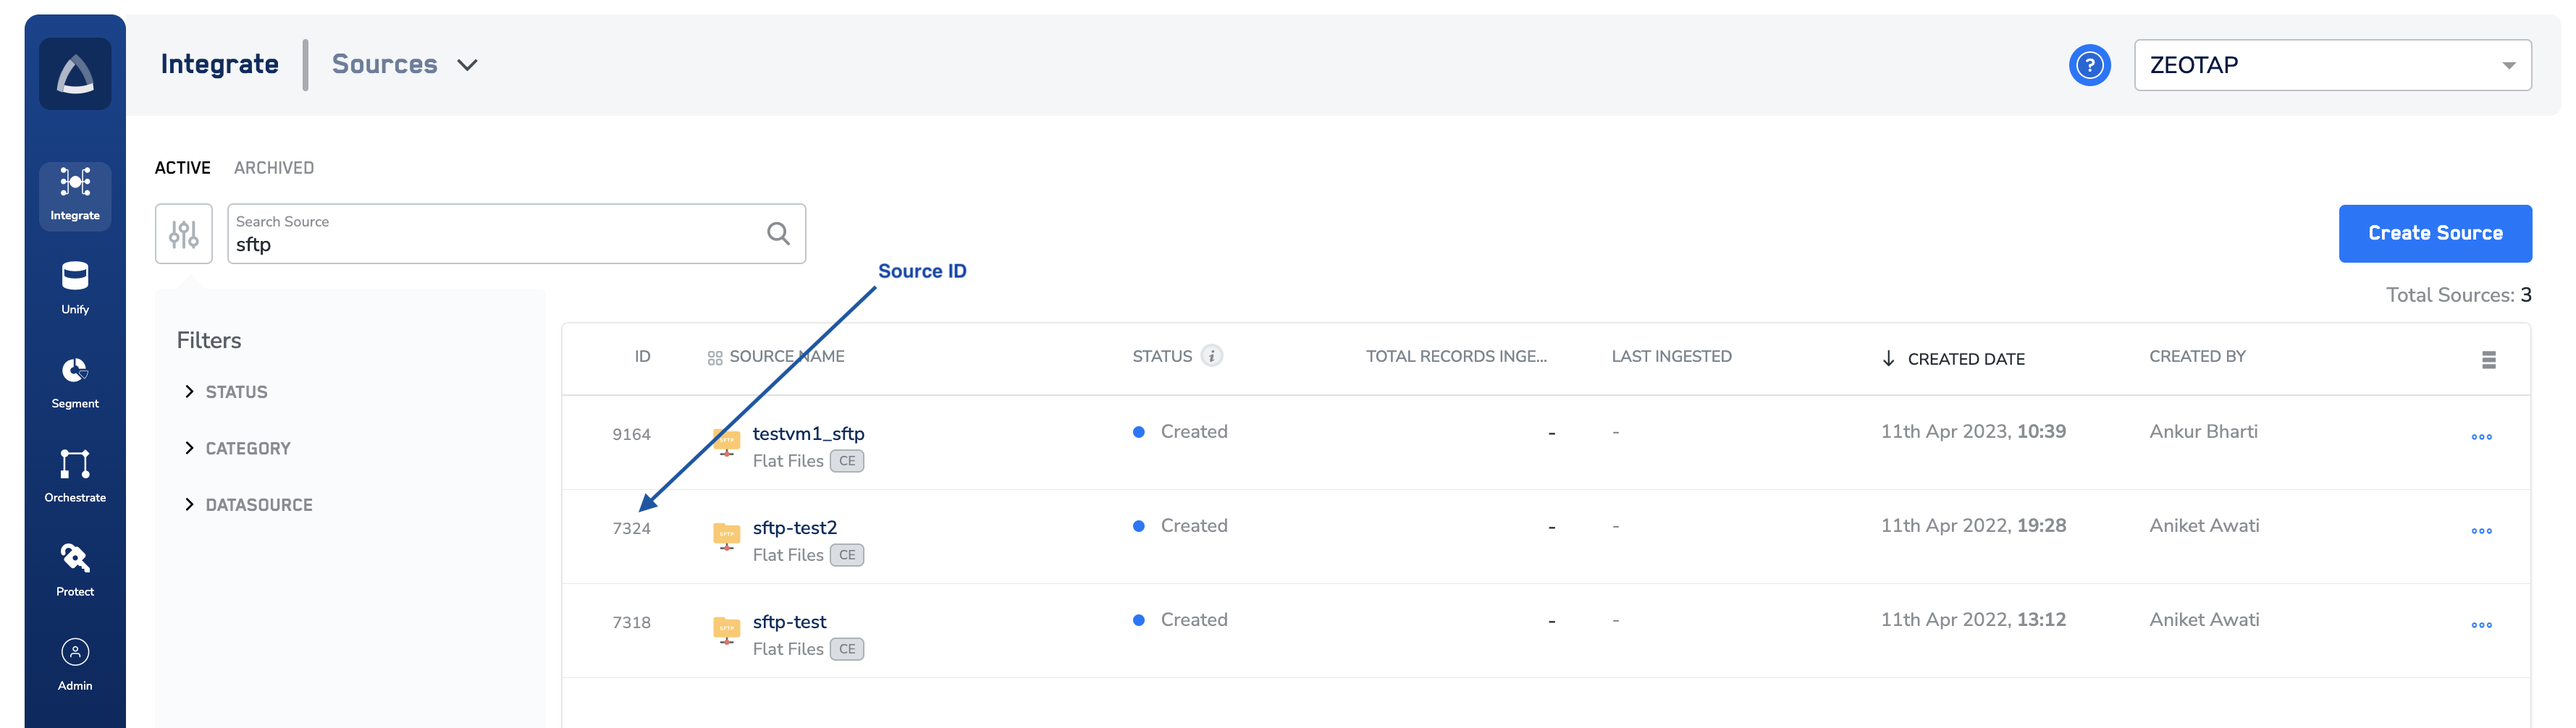
Perform the following steps to upload a file using Command Line Interface (CLI) commands:After the successful source creation, navigate to the the Implementation Details tab and download the Private Key.
Launch the Command Line Interface and enter the path of the directory where the private key was downloaded.
Once you are inside the directory, connect to the port using the User ID and Server IP. You can find them under the IMPLEMENTATION DETAILS tab.
To proceed with the integration, create child directories inside the main directory based on your encryption settings:a. Without PGP encryption: Use the folder structure 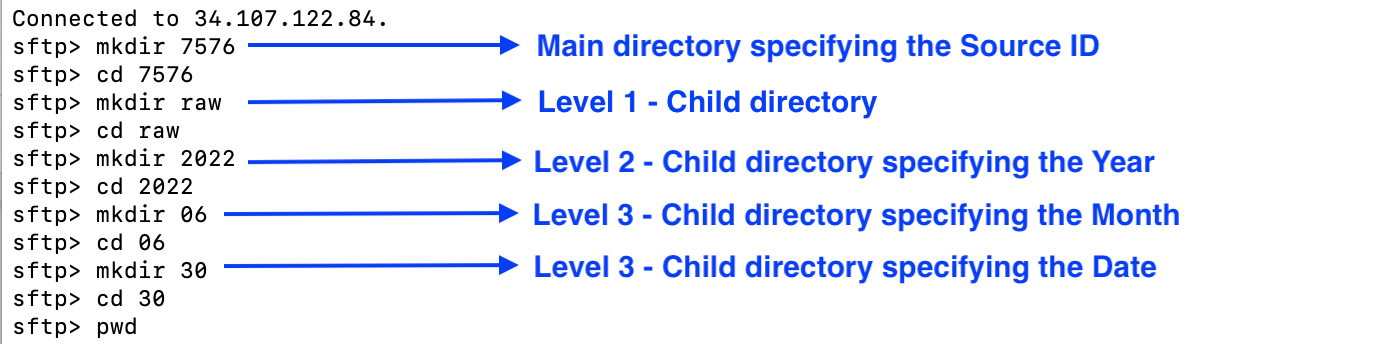
/sourceid/raw/yyyy/mm/dd (for example, 5121/raw/2025/01/15).pgpencrypted/sourceid/raw/yyyy/mm/dd (for example, pgpencrypted/5121/raw/2025/01/15).Upload Specifications
While uploading the files, ensure that you take care of the specifications mentioned below.Supported Regions
Currently, we support the uploading of files in the following three regions:- EU – Upload all the EU countries’ data to the bucket provisioned for you in the EU
- US – Upload all the NORAM and LATAM countries’ data to the bucket provisioned for you in the US
- IN – Upload all the Indian data to the bucket provisioned for you in IN
Supported Formats
Currently, you can upload files of the following formats:- Text files with field delimiters such as comma, tab or semicolon
- Record delimiter like newline
- Text files with JSON records
.csv.txt.txt.gz
Supported Size
When uploading files from the Collect UI, ensure that every file is less than 100 MB in size. Currently, there is no size restriction for files that are uploaded directly to the bucket using any of the methods mentioned above.Supported Schema
There is no restriction on the schema of the files that you upload. While creating the corresponding collection(s), you can map the columns to the standard catalogue. For CSV files, we treat the first row as column headers. Therefore, the first row of the file must always be the column name with the proper casing. Ensure that all the headers are present. Also, note that except space and (_) underscore, no other special characters are allowed. Any mismatch with the above requirement can lead to an ingestion failure. We support files with multiple schemas if they logically belong to the same source (for example, user and event data from a campaign source) as long as the file format and delimiter remain the same. Refer to the Zeotap Catalogue section and name your fields accordingly. You can also use it to define the data type of your source data fields.Supported PII
Zeotap accepts both hashed and Raw PII (Personally Identifiable Information) into your Zeotap account. For hashed emails and cell phone numbers, adhere to the hashing guidelines. You can also use our hashing tool to convert your IDs to the right hashes before uploading them to Collect. For raw personal identifiers (PII), we mask the PII information across the UI for all roles once you classify them in your organisation’s catalogue. Flagging the raw PII fields in your org’s catalogue is a critical step and is the responsibility of the org. The encrypted data is only available to the downstream systems for activation purpose.Note:We use the RSA Encryption Algorithm.