- Folders
- Search Audience
- Audience Filters
- Columns such as ID, Audience Name, Audience Status, Destination Status, Unique Customer Count and Last Updated On
- Other Actions such as Audience Lifecycle, Audience Insights, Link to Destination, Set A/B Test, Enable Membership, Edit Audience, Duplicate Audience, Pause Audience, Archive Audience and more
Folders
You can organise and manage your growing Audience effectively using folder and sub-folder structure. This functionality allows you to group your Audiences into manageable cohorts for easy accessibility and management. You can further categorise the Audience using subfolders. For example, as a marketer running a daily campaign, you can create a folder for each day of the week and subfolders for the respective targeted Audience. This way, you can easily locate and manage Audience for each day’s campaign. This ensures that the right message is delivered to the right Audience. Similarly, you can use this functionality for weekly and monthly campaigns. To learn more about how to work with Folders, refer here.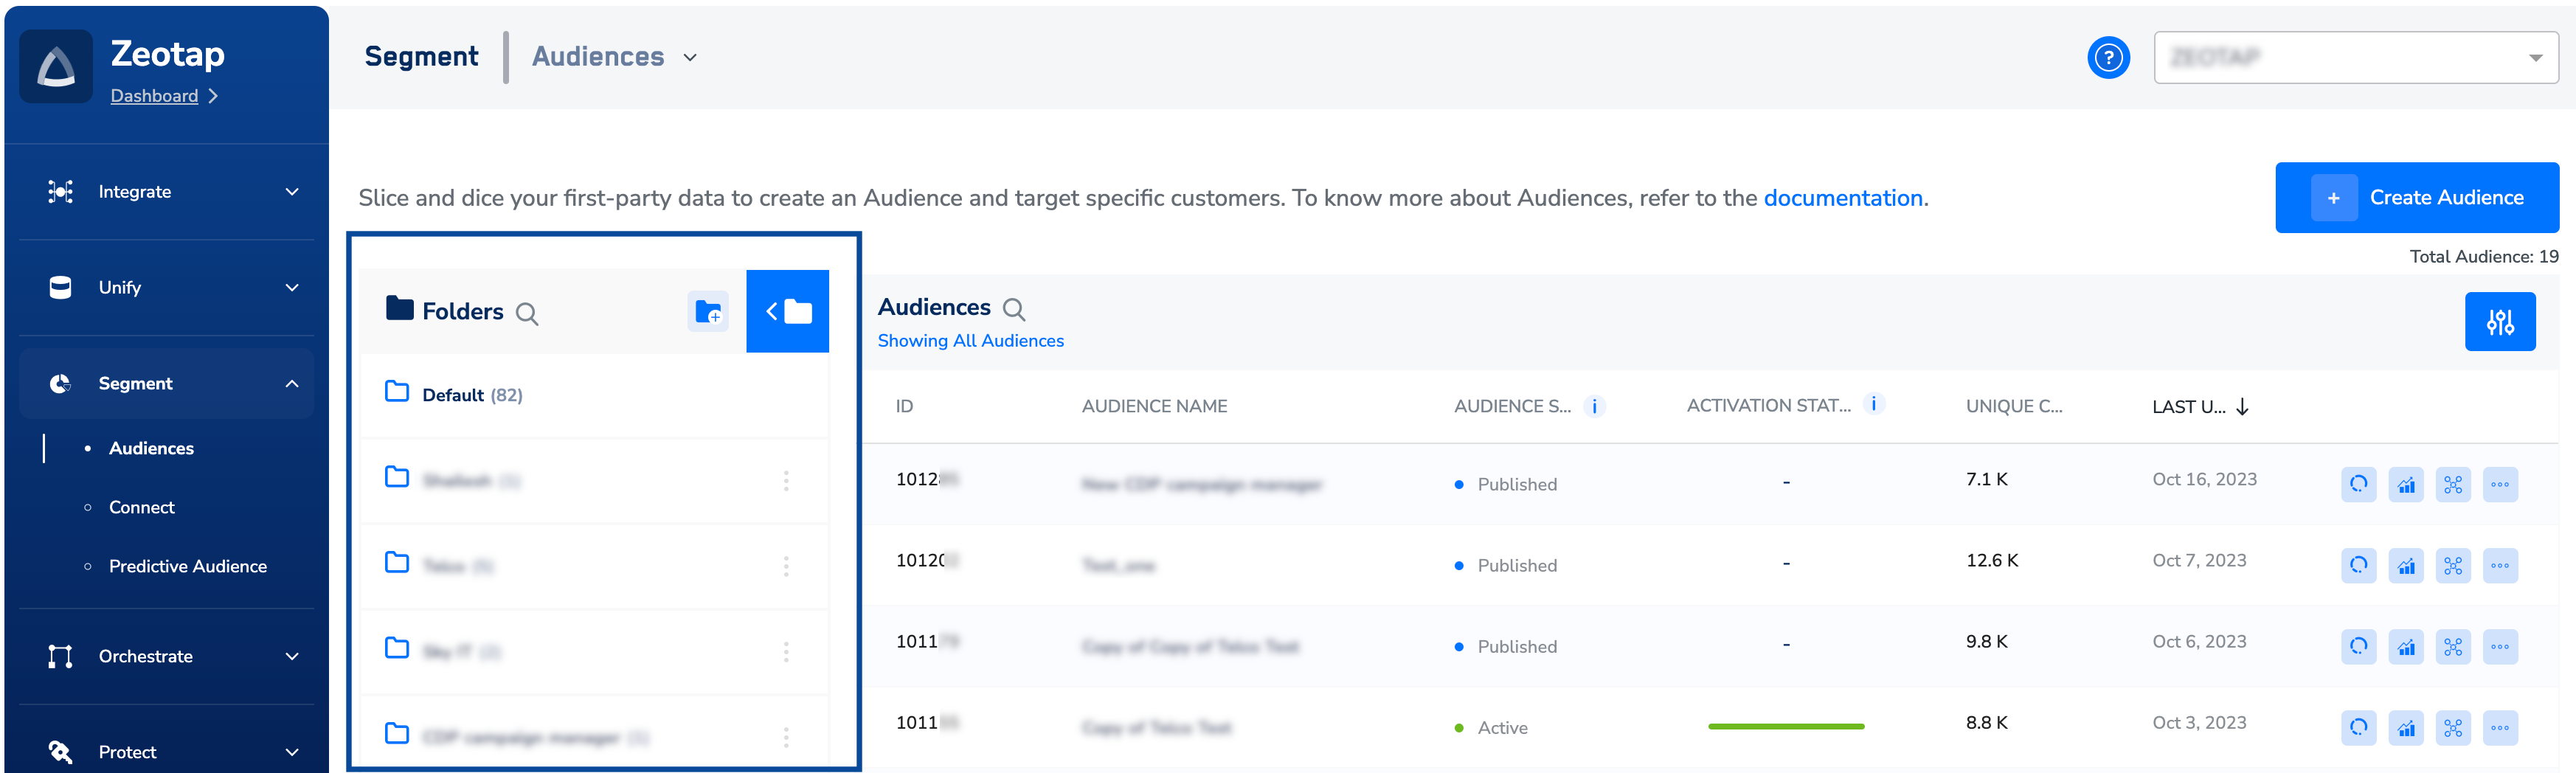
Search Audience
You can find a specific Audience by using the search function. Simply click the search icon and enter the name of the Audience that you are looking for. This displays all the Audiences that match your search query.
Audience Filters
Filters allow you to refine your search results by applying different criteria such as, Audience Status, Platforms and Tags. Use this feature to narrow down your search and find the Audience that you are looking for. For example, let’s say you want to find a particular High Value Audience associated with the Platform, Blueshift. By using the options available under Filters, you can refine your search to only show Audiences with a particular status, associated with the Blueshift platform and tagged as a High Value Audience.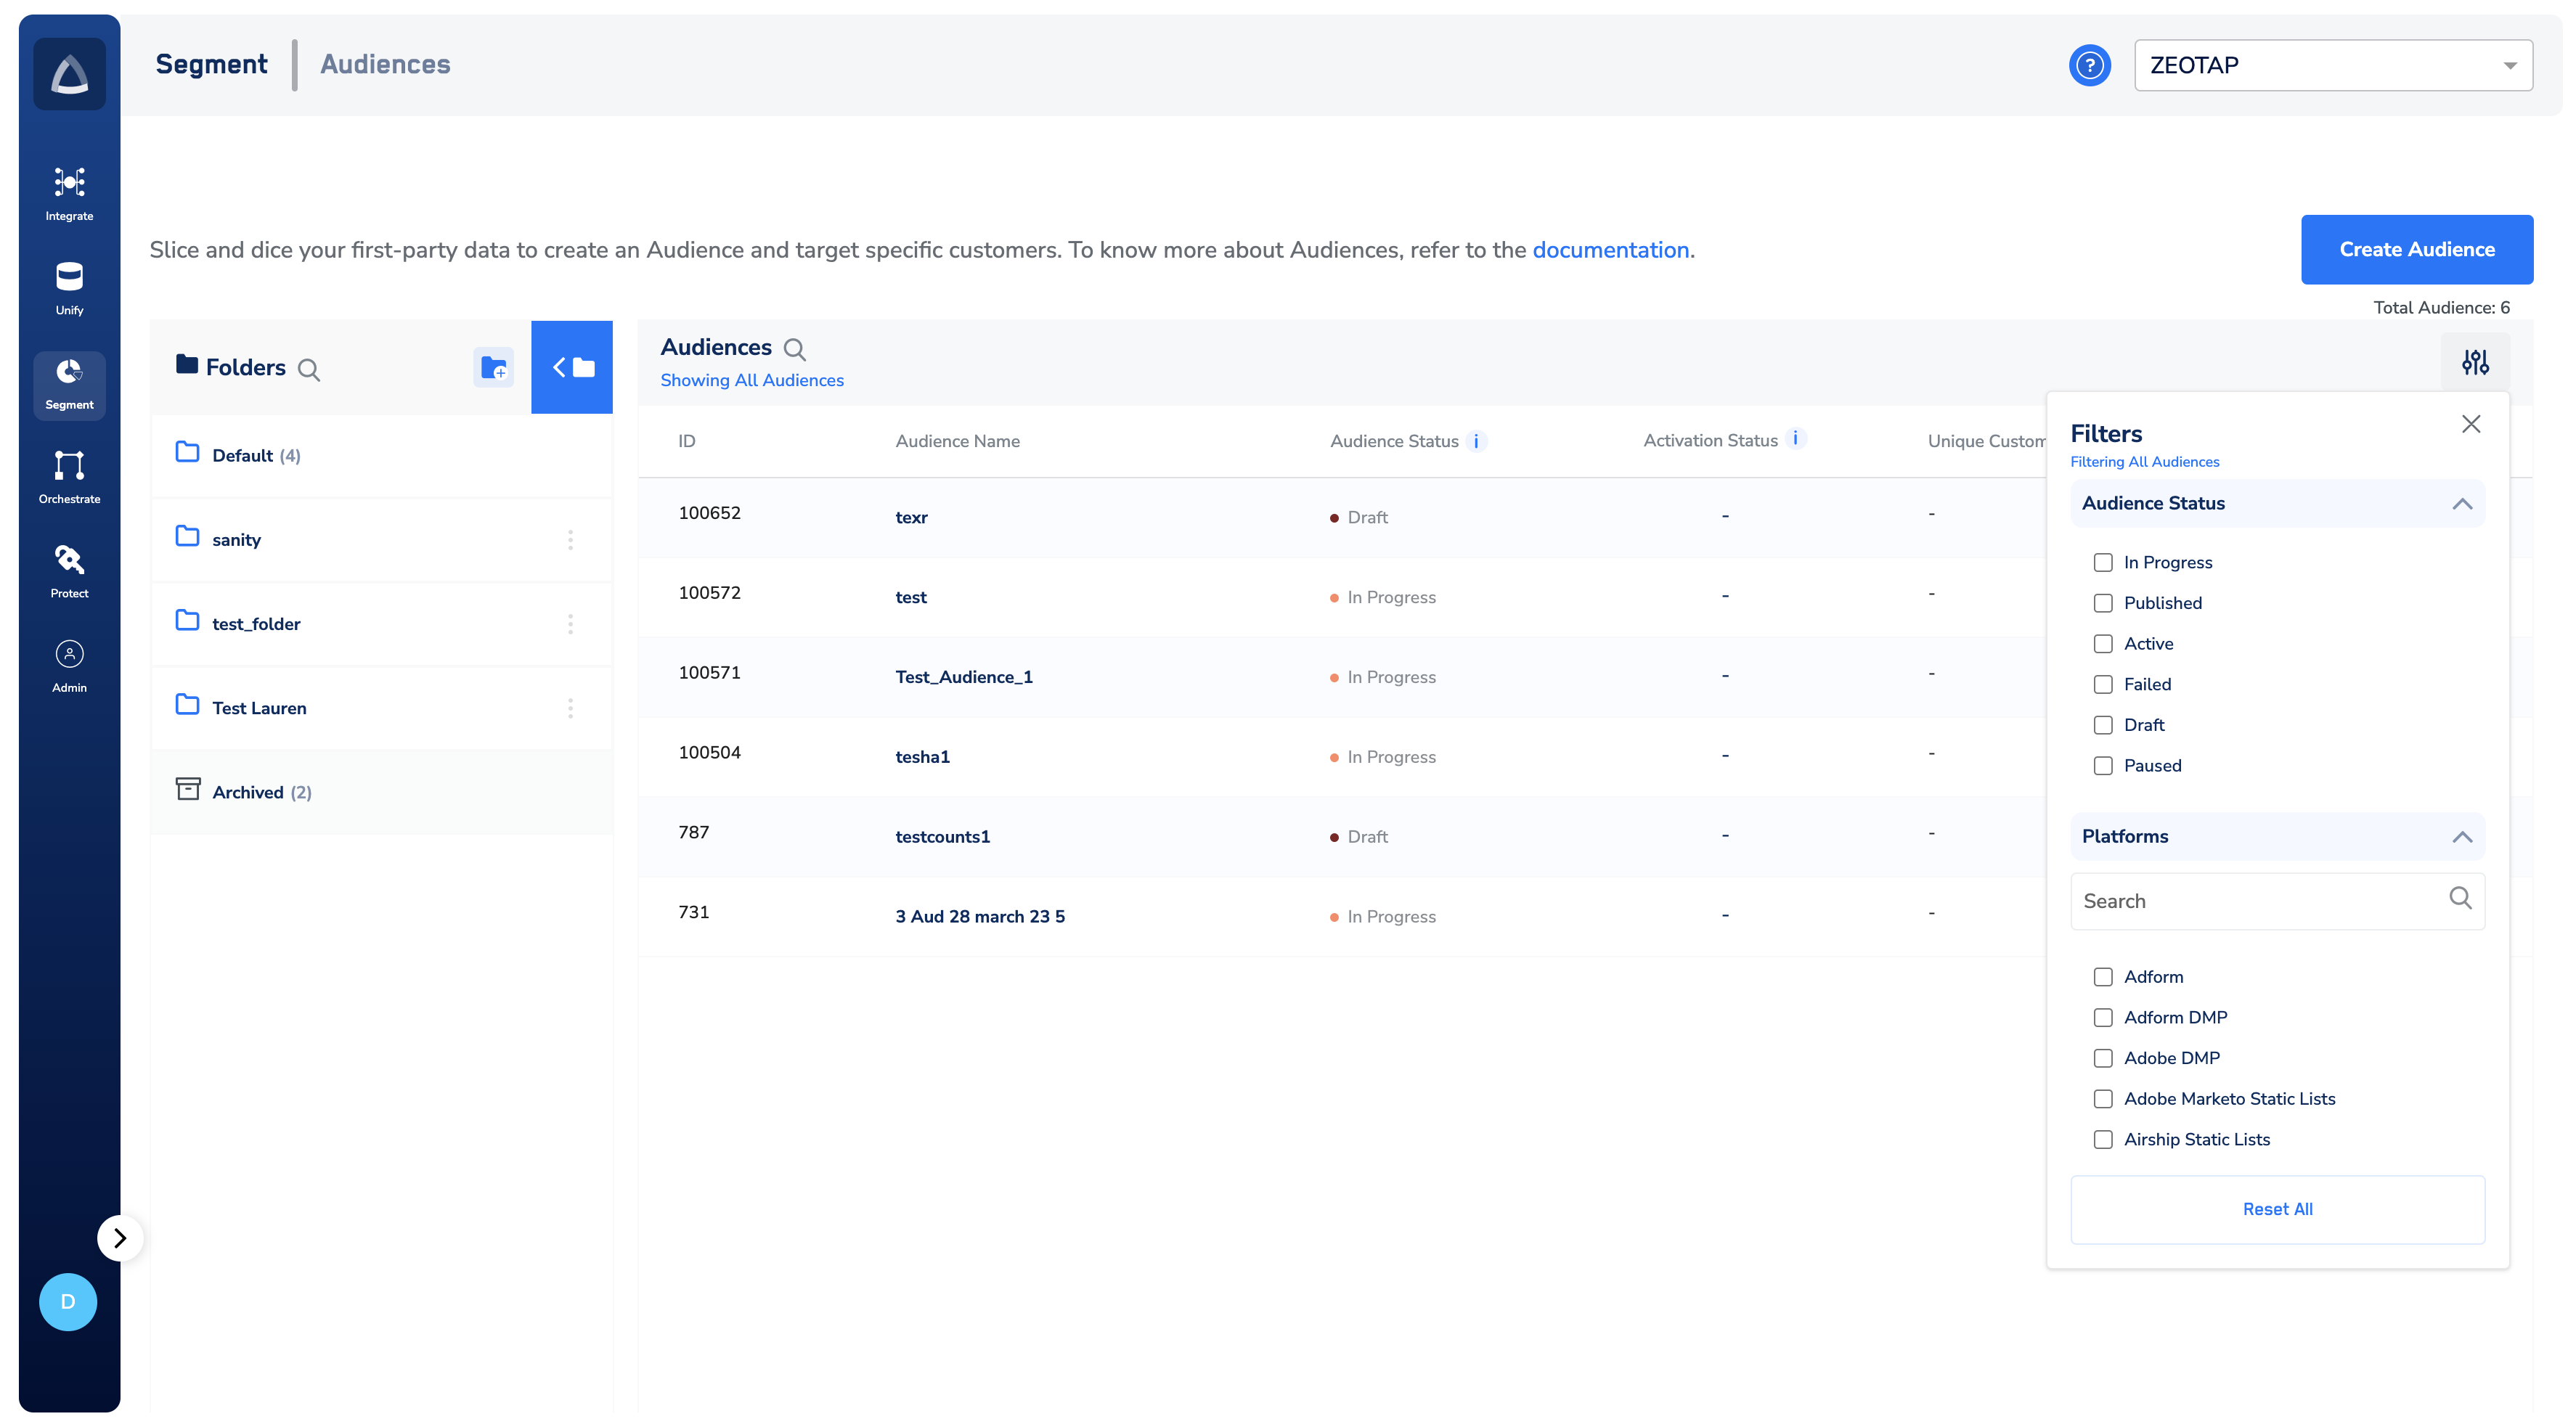
Note:Ensure that you are aware of the following concepts, while working with the Filters:
- Platforms are advertising channels like Facebook, Adform, Twitter and others that offer a variety of advertising features and targeting options to effectively reach a specific cohort of customers.
- Tags are labels assigned to specific audiences to categorise them based on common characteristics or interests. These tags can be used to filter and search for specific audiences, making it easier to locate and manage them. For example, a tag of “High Value” can be applied to audience that have a higher likelihood of converting or generating revenue.
Download Audience Report
You can easily download your audience report in CSV format for various purposes. This report provides key metrics about your audience, helping you make informed marketing and business decisions. Perform the following steps to download your audience report:1. Select the audience(s) using the checkboxes.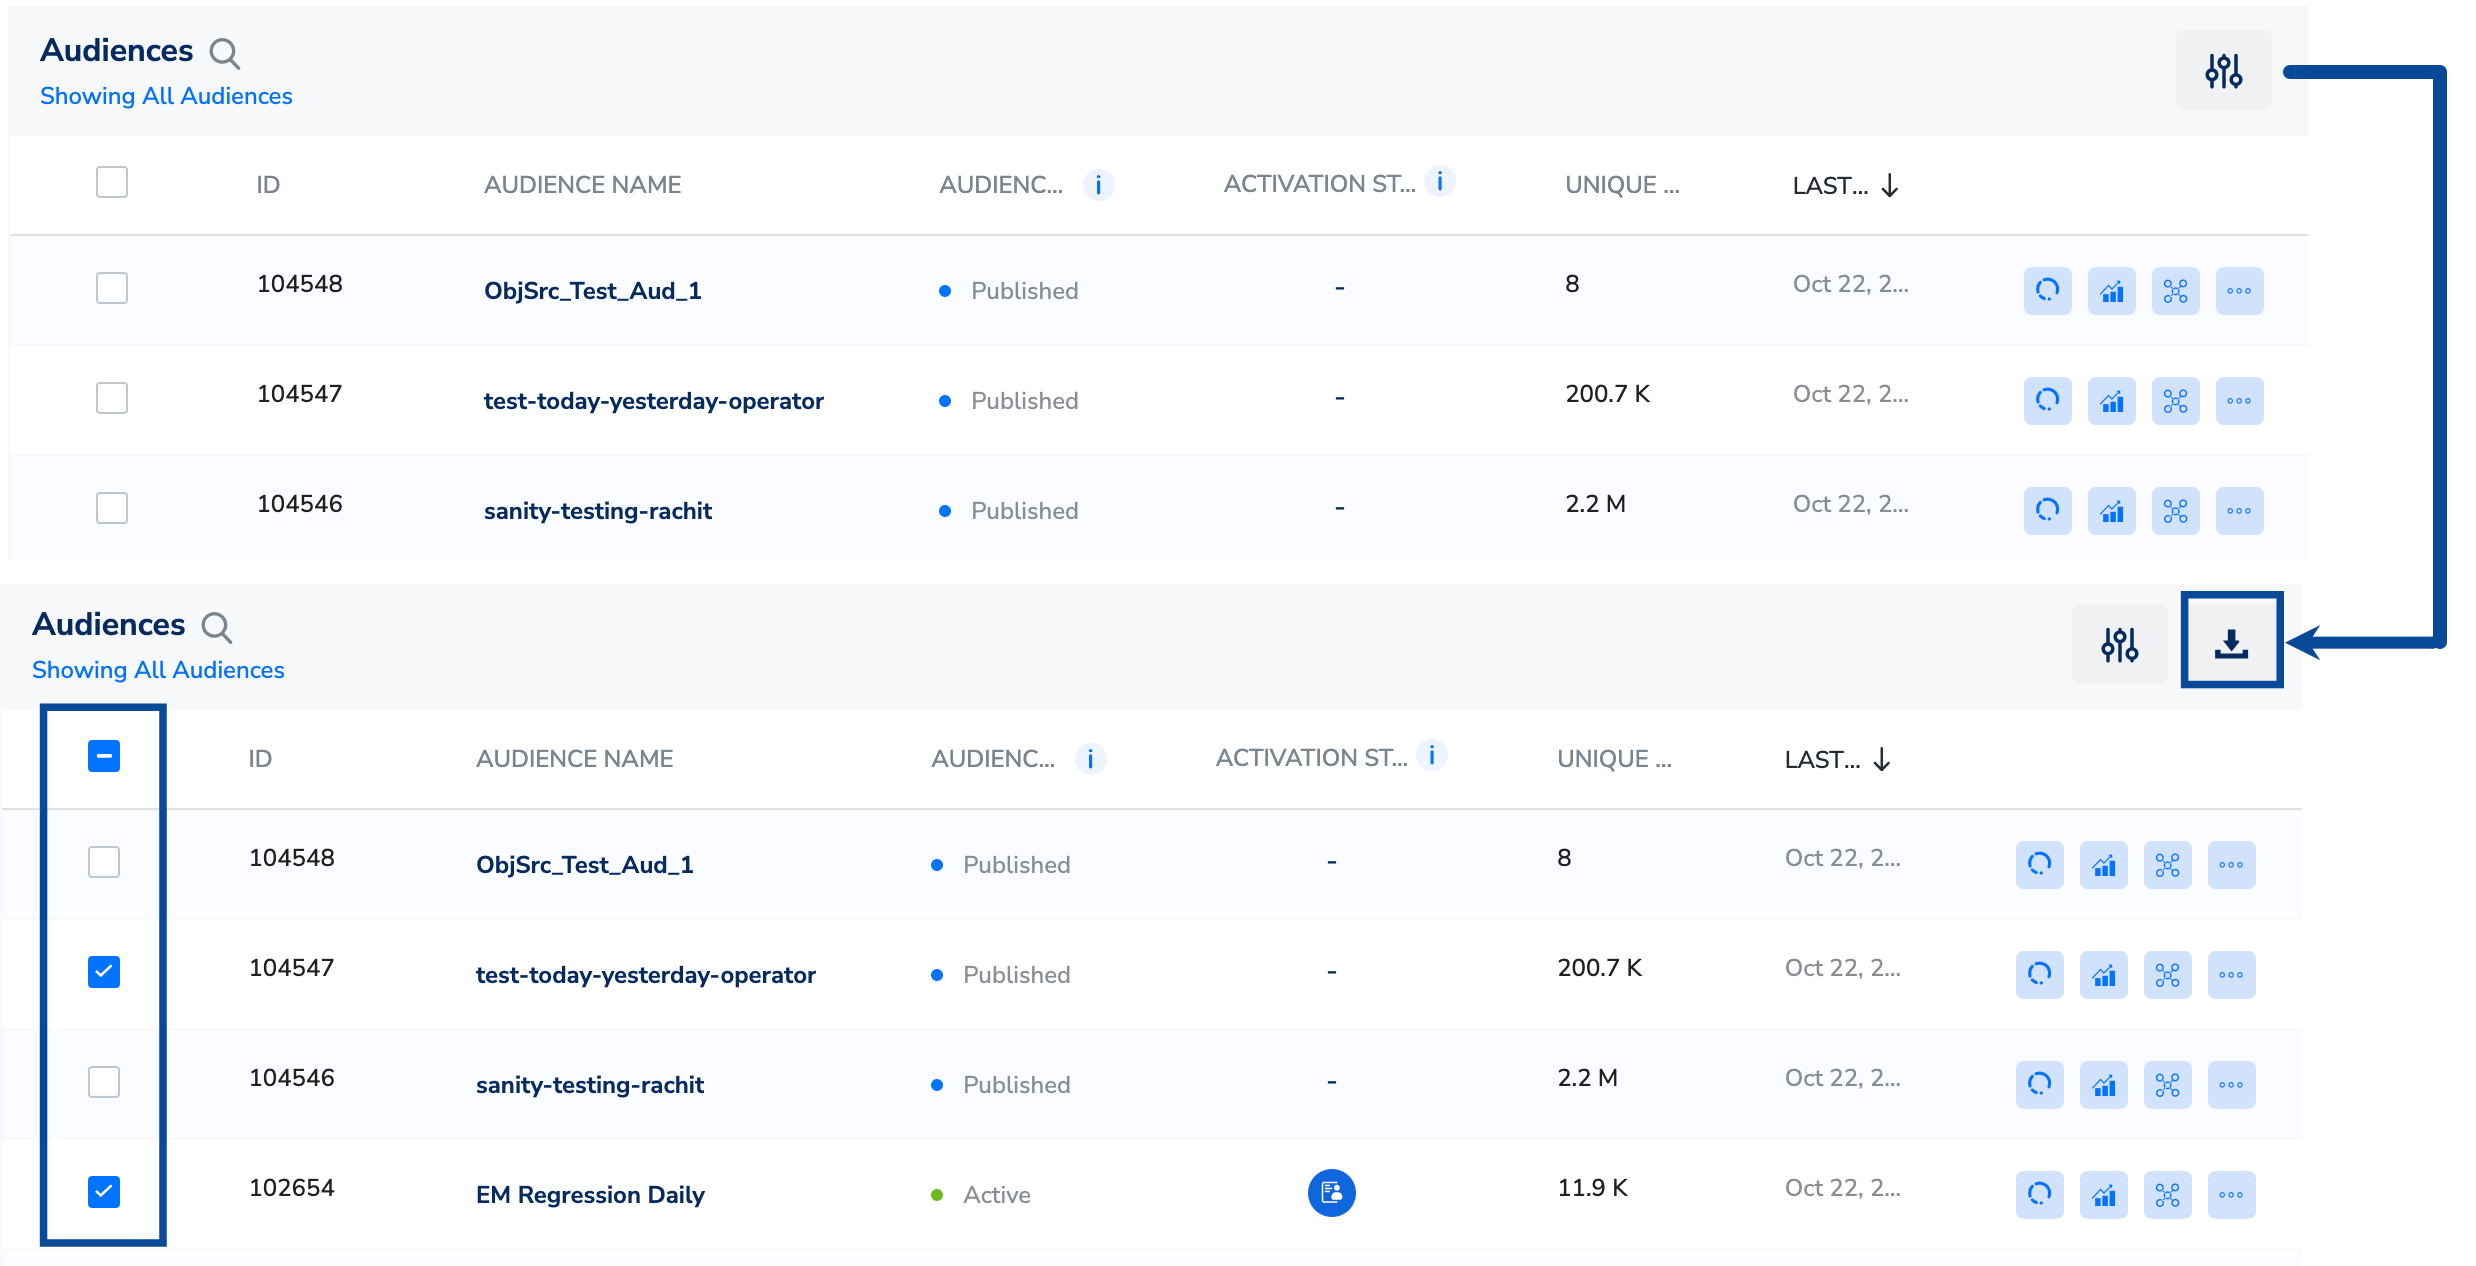
Click the Download icon and select the fields to include in the report. The available fields include Audience ID, Audience Name, Unique Customer Count, Status, Activation Type, Destination Name, Mapping Name and more.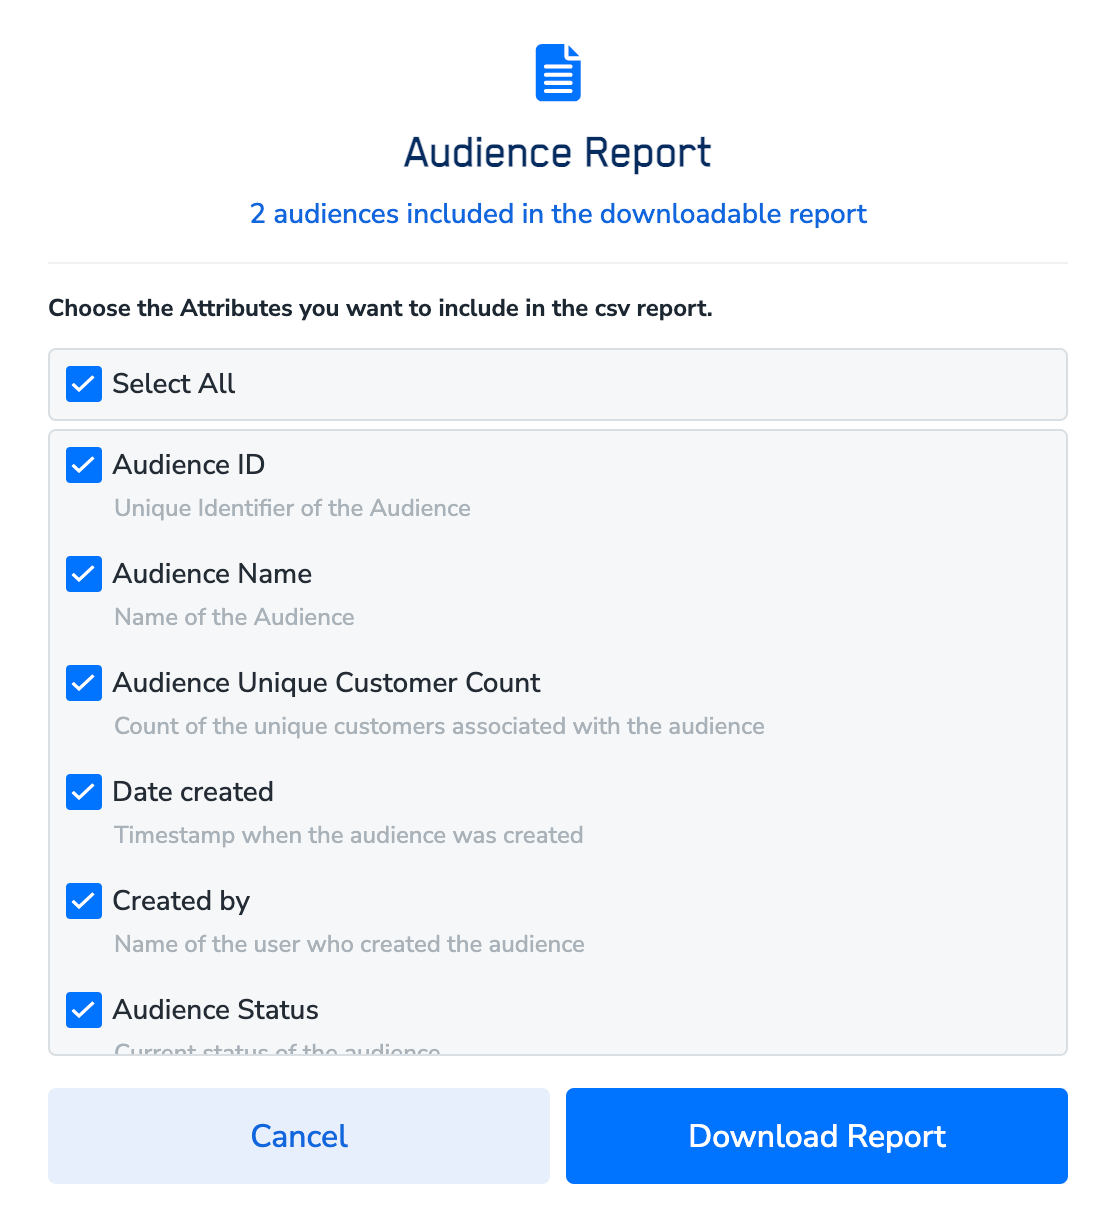
Columns
This section provides some key information about the Audience. The following are the key topics in this section: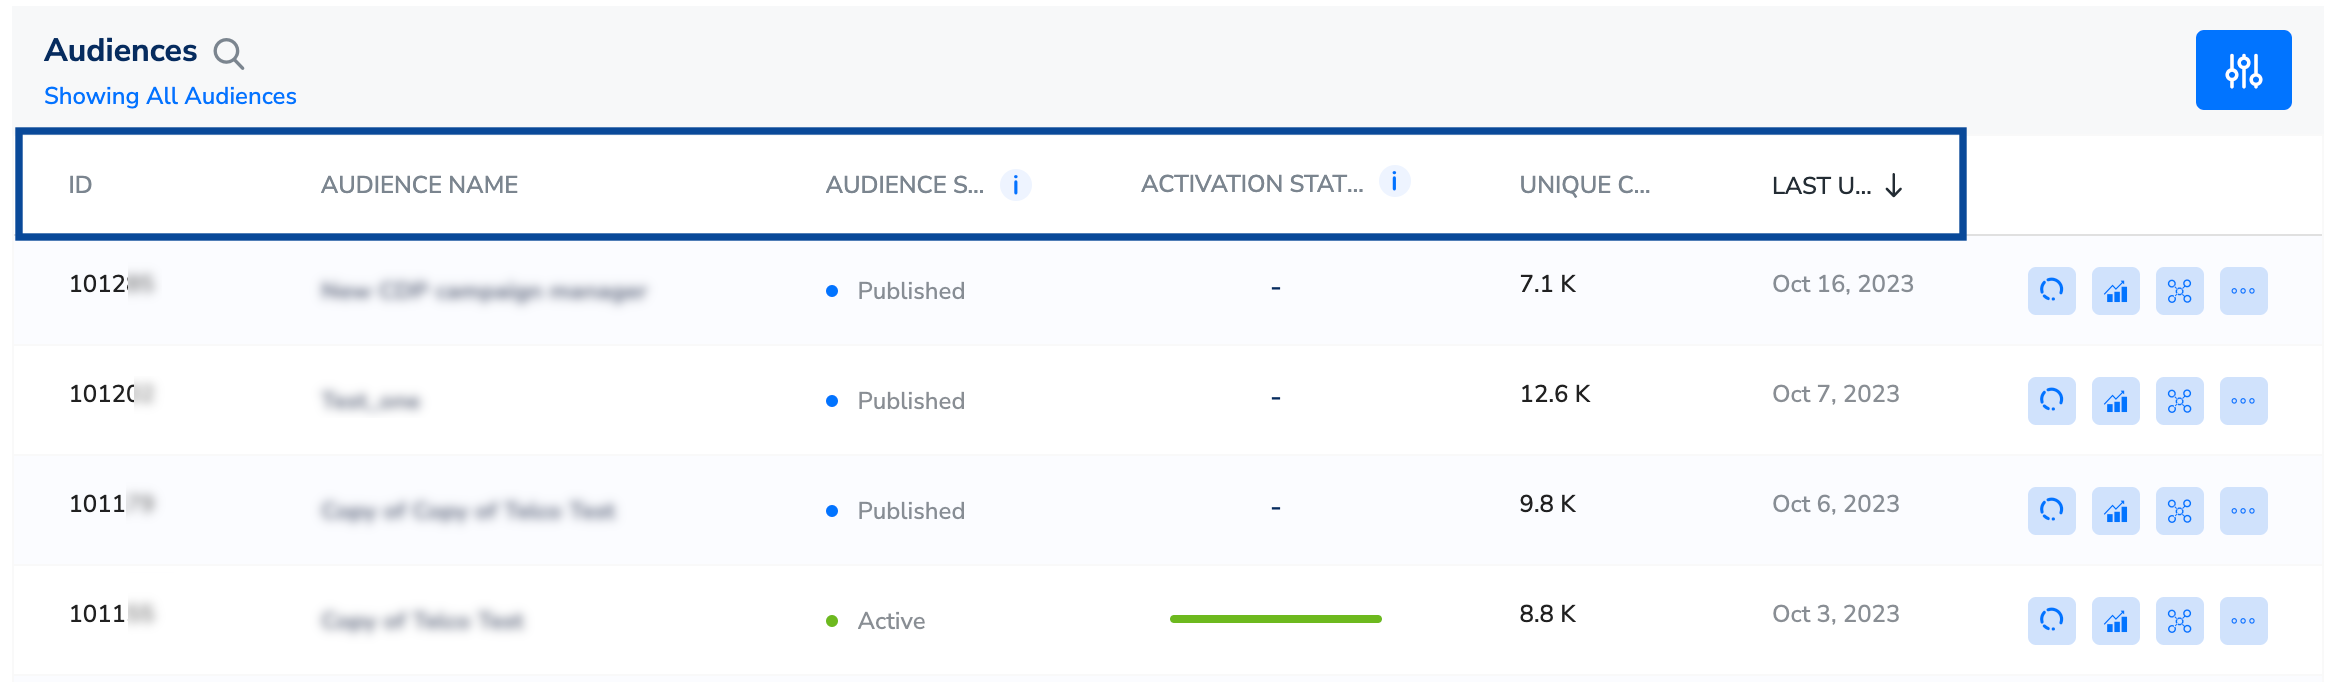
- ID – This is a unique ID generated after creating an Audience.
- Audience Name – This is the name that you have given to an Audience while creating it.
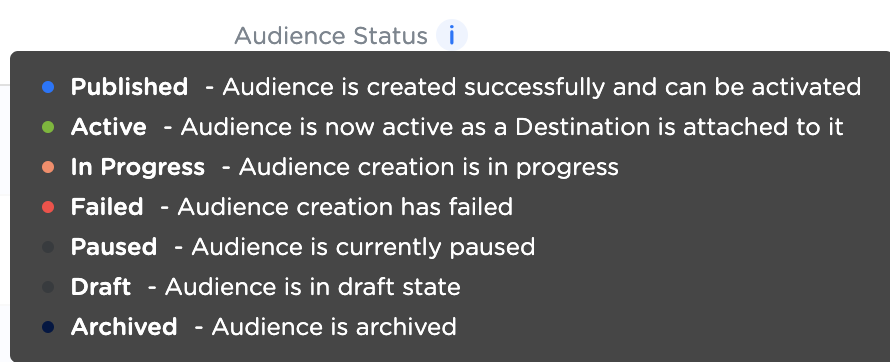
- Audience Status – Under this column, you can see the Audience status as Published, Active, In Progress, Failed, Paused, Draft and Archived. Click the info icon that appears next to the Audience Status column to know more about each status. For more information about the Audience Status, refer here.
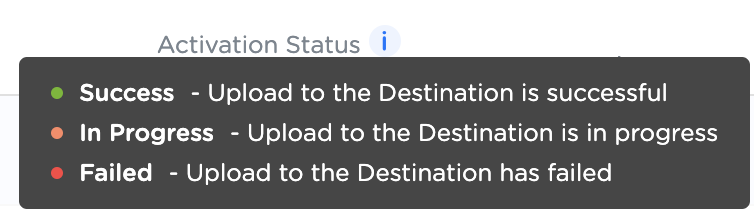
- Activation Status – Under this column, you can see the status of the destinations linked to an Audience, which can be In Progress, Success, Failed and Paused. The Activation status is denoted by a colour-coded bar. For more information about the Activation Status, refer here.
- Unique Customers – This refers to the number of individual customers who are added to an Audience after applying consent orchestration rules. For more information about Unique Customers, refer here.
- Last Updated On – This indicates the last date on which the Audience is updated.
Audience Lifecycle
Click the Audience Lifecycle icon shown below to view all events related to your audience, including timestamps and the individuals responsible for each event. You can also see the current activation state of your audience. This feature is currently in beta and activated only on request. To enable it for your account, reach out to your Zeotap POC. For more Information about Audience Lifecycle, refer here.
Audience Insights
Click the Insights icon shown below to view the valuable information about a created Audience, such as Total Unique Customers, Input Identifiers and Output Identifiers associated and more. This helps you to know the identifiers that are associated with the Audience, providing valuable input for refining marketing strategies and evaluating campaign performance. For more Information about Audience Insights, refer here.
Audience Activation Actions
Click the Audience Activation icon shown below to perform actions such as Link to Destination, Set A/B Test, Enable membership and more.

- Link to Destination: Use the Link to Destination option to link your Audience to the destination of your choice. For example, let’s say you have created an Audience for a Facebook advertising campaign. By using the Link to Destination option, you can link the Audience to Facebook, ensuring that your ads reach the intended audience on the platform. For more information about how to activate your Audience, refer here.
-
Set A/B Test - A/B Testing allows you to divide a group of individuals into different variations and establish separate connections with each variation. For more information about how to set A/B testing, refer here.
- View A/B Test - This option gets enabled only on those Audience where A/B testing is already active.
-
Enable Membership - This option takes you to a window, where you can set the refresh frequency for your Audience without it being linked to a Destination. For more information about the Membership Calculated Attribute, refer here.
- Edit Membership - Use this option to edit an active membership on an Audience.
- Disable Membership - Use this option to disable an active membership on an Audience.
Other Actions
The following are the additional actions that you can perform from the Audience Listing page by clicking the three dots shown in the image below:
Note:Note that the availability of these options depends on your Audience status.
- Edit: Use this option to make changes to the Audience, such as modifying the criteria applied while creating the Audience, modify the Destinations attached and more. Note that you can only edit an Audience that is in the Active or Failed status. For example, let’s say you have created an Audience for a targeted email campaign. However, upon reviewing the criteria, you realise that you need to modify the age range and interests to better align with your target audience. In such scenarios, you can use the Edit option and easily make these changes.
- Duplicate: Use this option to create a new Audience based on the structure of an existing one and make any required modifications. For example, suppose you have developed a complex Audience with precise targeting criteria that has shown success in your marketing campaigns. Now, you wish to create a similar Audience with slight modifications to target a slightly different objective. Rather than starting from scratch, you can utilise the Duplicate option and save time and effort.
- Pause: Use this option to temporarily halt an Audience for a specific duration. This prevents the Audience from being updated or refreshed until you choose to resume it. In Addition, it stops sending data to the platform it is linked with. For example, suppose you are running a limited-time promotion that is set to end on a certain date. After the campaign concludes, you want to pause the Audience associated with it to prevent any further updates or activations. In such scenarios, you can use the Pause option and ensure that the Audience remains unchanged (inactive) until you decide to resume it.
- Resume: Use this option to resume an Audience that is in the Paused state. For example, let’s say you have temporarily paused an Audience due to certain reasons. You can now choose to resume it, which allows you to continue building and refining the Audience without starting from scratch. This helps you save time in the process.
- Archive: Use this option to remove an Audience from your list of active Audiences, when you no longer need it. Note that this is an irreversible action. However, you can view the archived Audiences in the Archived folder. For example, let’s say you have an Audience that was created for a specific marketing campaign or time-limited promotion. Once the campaign or promotion ends, you can choose to archive the Audience to declutter your workspace and maintain a clear overview of active Audiences.
- Continue Build: Use this option to resume the creation of an Audience, that is in the Draft state. This allows you to continue building the Audience by defining the attributes, activating the Audience and more. For example, let’s say you were in the process of creating an Audience for a particular campaign, but had to pause due to other priorities. With the Continue Build option, you can easily pick up where you left off and continue to build your Audience.
- Delete: Use this option to delete an Audience that is in the Draft state. For example, if you no longer need an Audience that is still in the process of being created, then you can choose to delete it permanently. This action helps declutter your workspace and removes any unnecessary or incomplete Audience drafts.