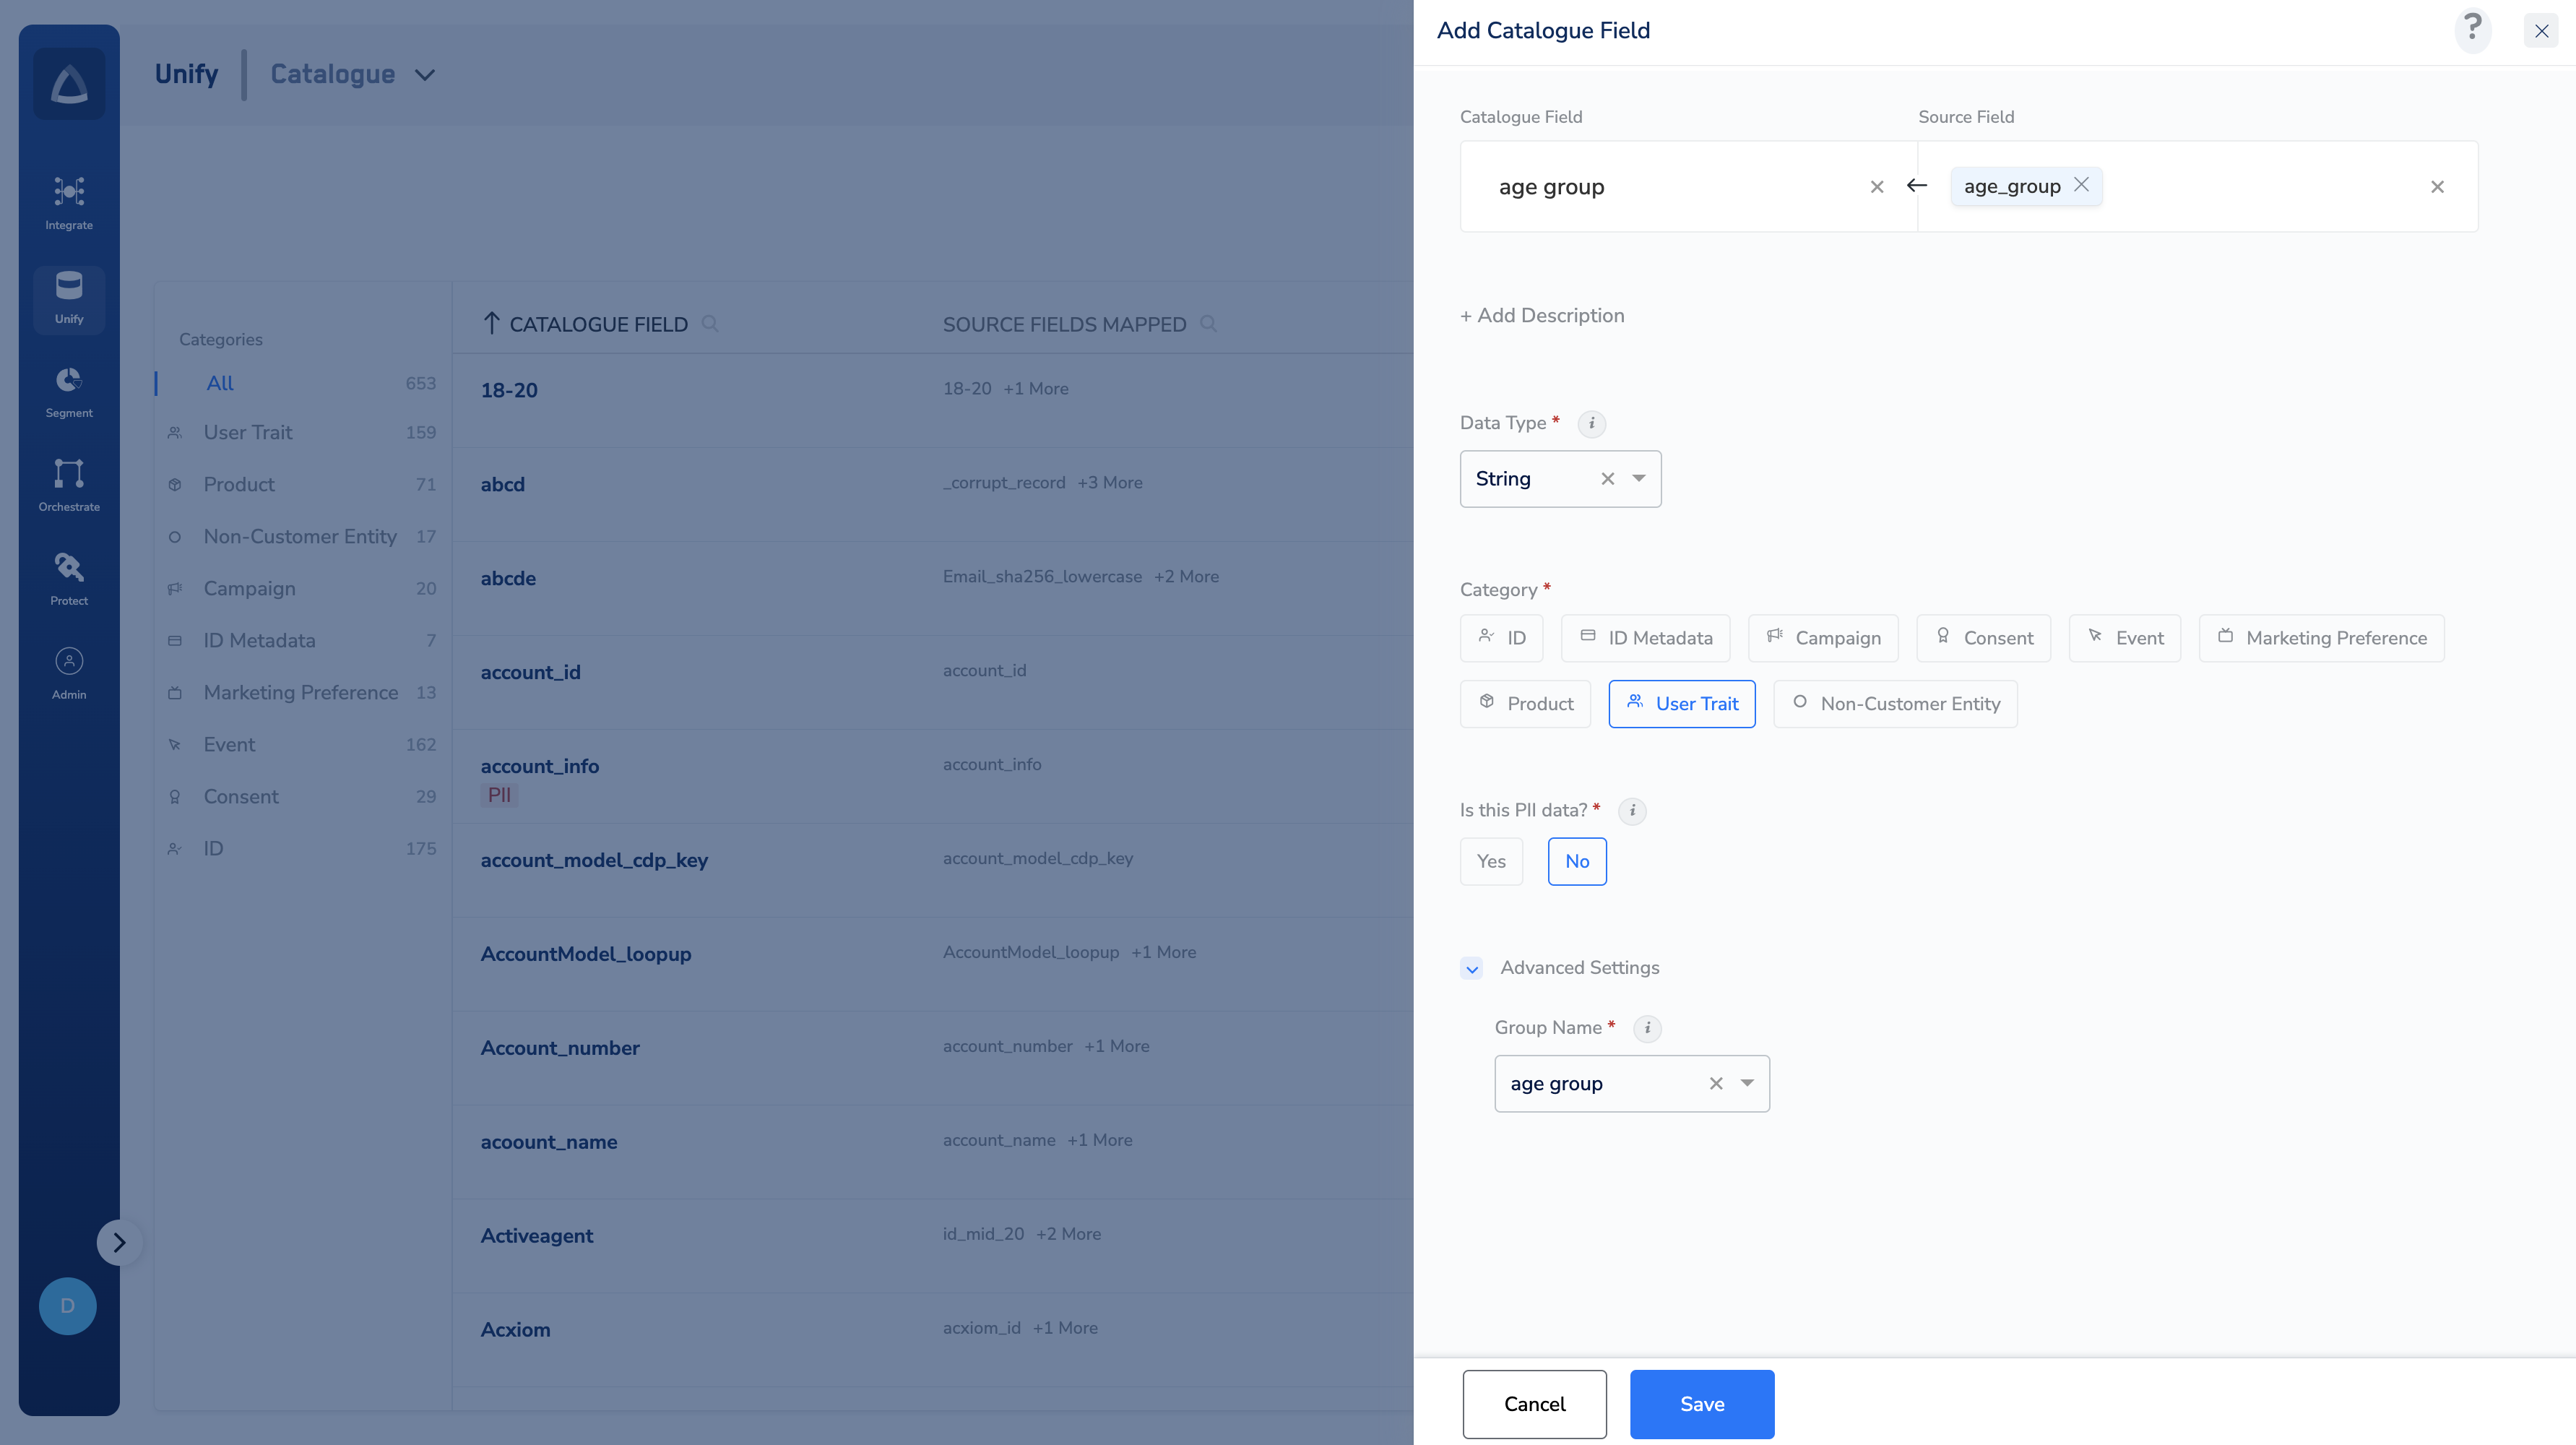
Enter a Catalogue Field. As you type, suggestions based on the existing Catalogue Fields appear. You can choose a suggested Catalogue Field or click +Add Catalogue Field to add a new field.
Map the Catalogue Field to its corresponding Source Field. Same as the above behaviour, you can choose a suggested Source Field or click +Add a new Source Field to add a new field.
Choose one of the following as the Data Type:
- String
- Integer
- Double
- Timestamp
- List of String/Integer/Double
Ensure that you consider the following points while selecting the
List Data Type:-
You can map both
Listand single-value source fields to theListtype catalogue field. Therefore, when a single value source field comes into the system for this Category, then the new data is upserted on the existing data without overwriting it. For example, if the source field is a single value field like “Product Name” and it is mapped toProdNamefield of the data typeListin the Catalogue, then any new value that comes into the system for the product name appends to the existing data in the format, {p1, p2, p3…}, preserving the previous entries. -
You can only map a source field of the data type
Listto a catalogue field of the data typeList. For example, if the source field is of typeList of String, then you can map it to onlyListtype attributes in the Catalogue field drop-down of the source mapping screen. -
When sharing source data containing
Listtype information, ensure that you use the correct format and avoid null values. Otherwise, it might lead to mapping issues or data being dropped during the data ingestion process. -
When mapping Profile attributes, you can either map a single value source field of any attribute type or a
Listof Profile attributes explicitly to the catalogue field. This enables you to efficiently store and update your customer data. For example, let’s say, a customer makes a single purchase in one instance and multiple purchases in another instance. In such scenarios, we allow appending of the purchase data to maintain a consolidated record of all their purchases in a unified location.
For Is this PII data?, choose Yes or No.
- When set to Yes, this field contains sensitive PII information of the user.
- When set to No, this field does not contain sensitive PII information of the user
Under advanced settings, a Group Name appears by default. You can choose a value from the drop-down menu or click +Add a new group to add a new group name.