Enter a Catalogue Field. As you type, suggestions based on the existing Catalogue Fields appear. You can choose a suggested Catalogue Field or click +Add Catalogue Field to add a new field.
Map the Catalogue Field to its corresponding Source Field. Same as the above behaviour, you can choose a suggested Source Field or click +Add a new Source Field to add a new field.
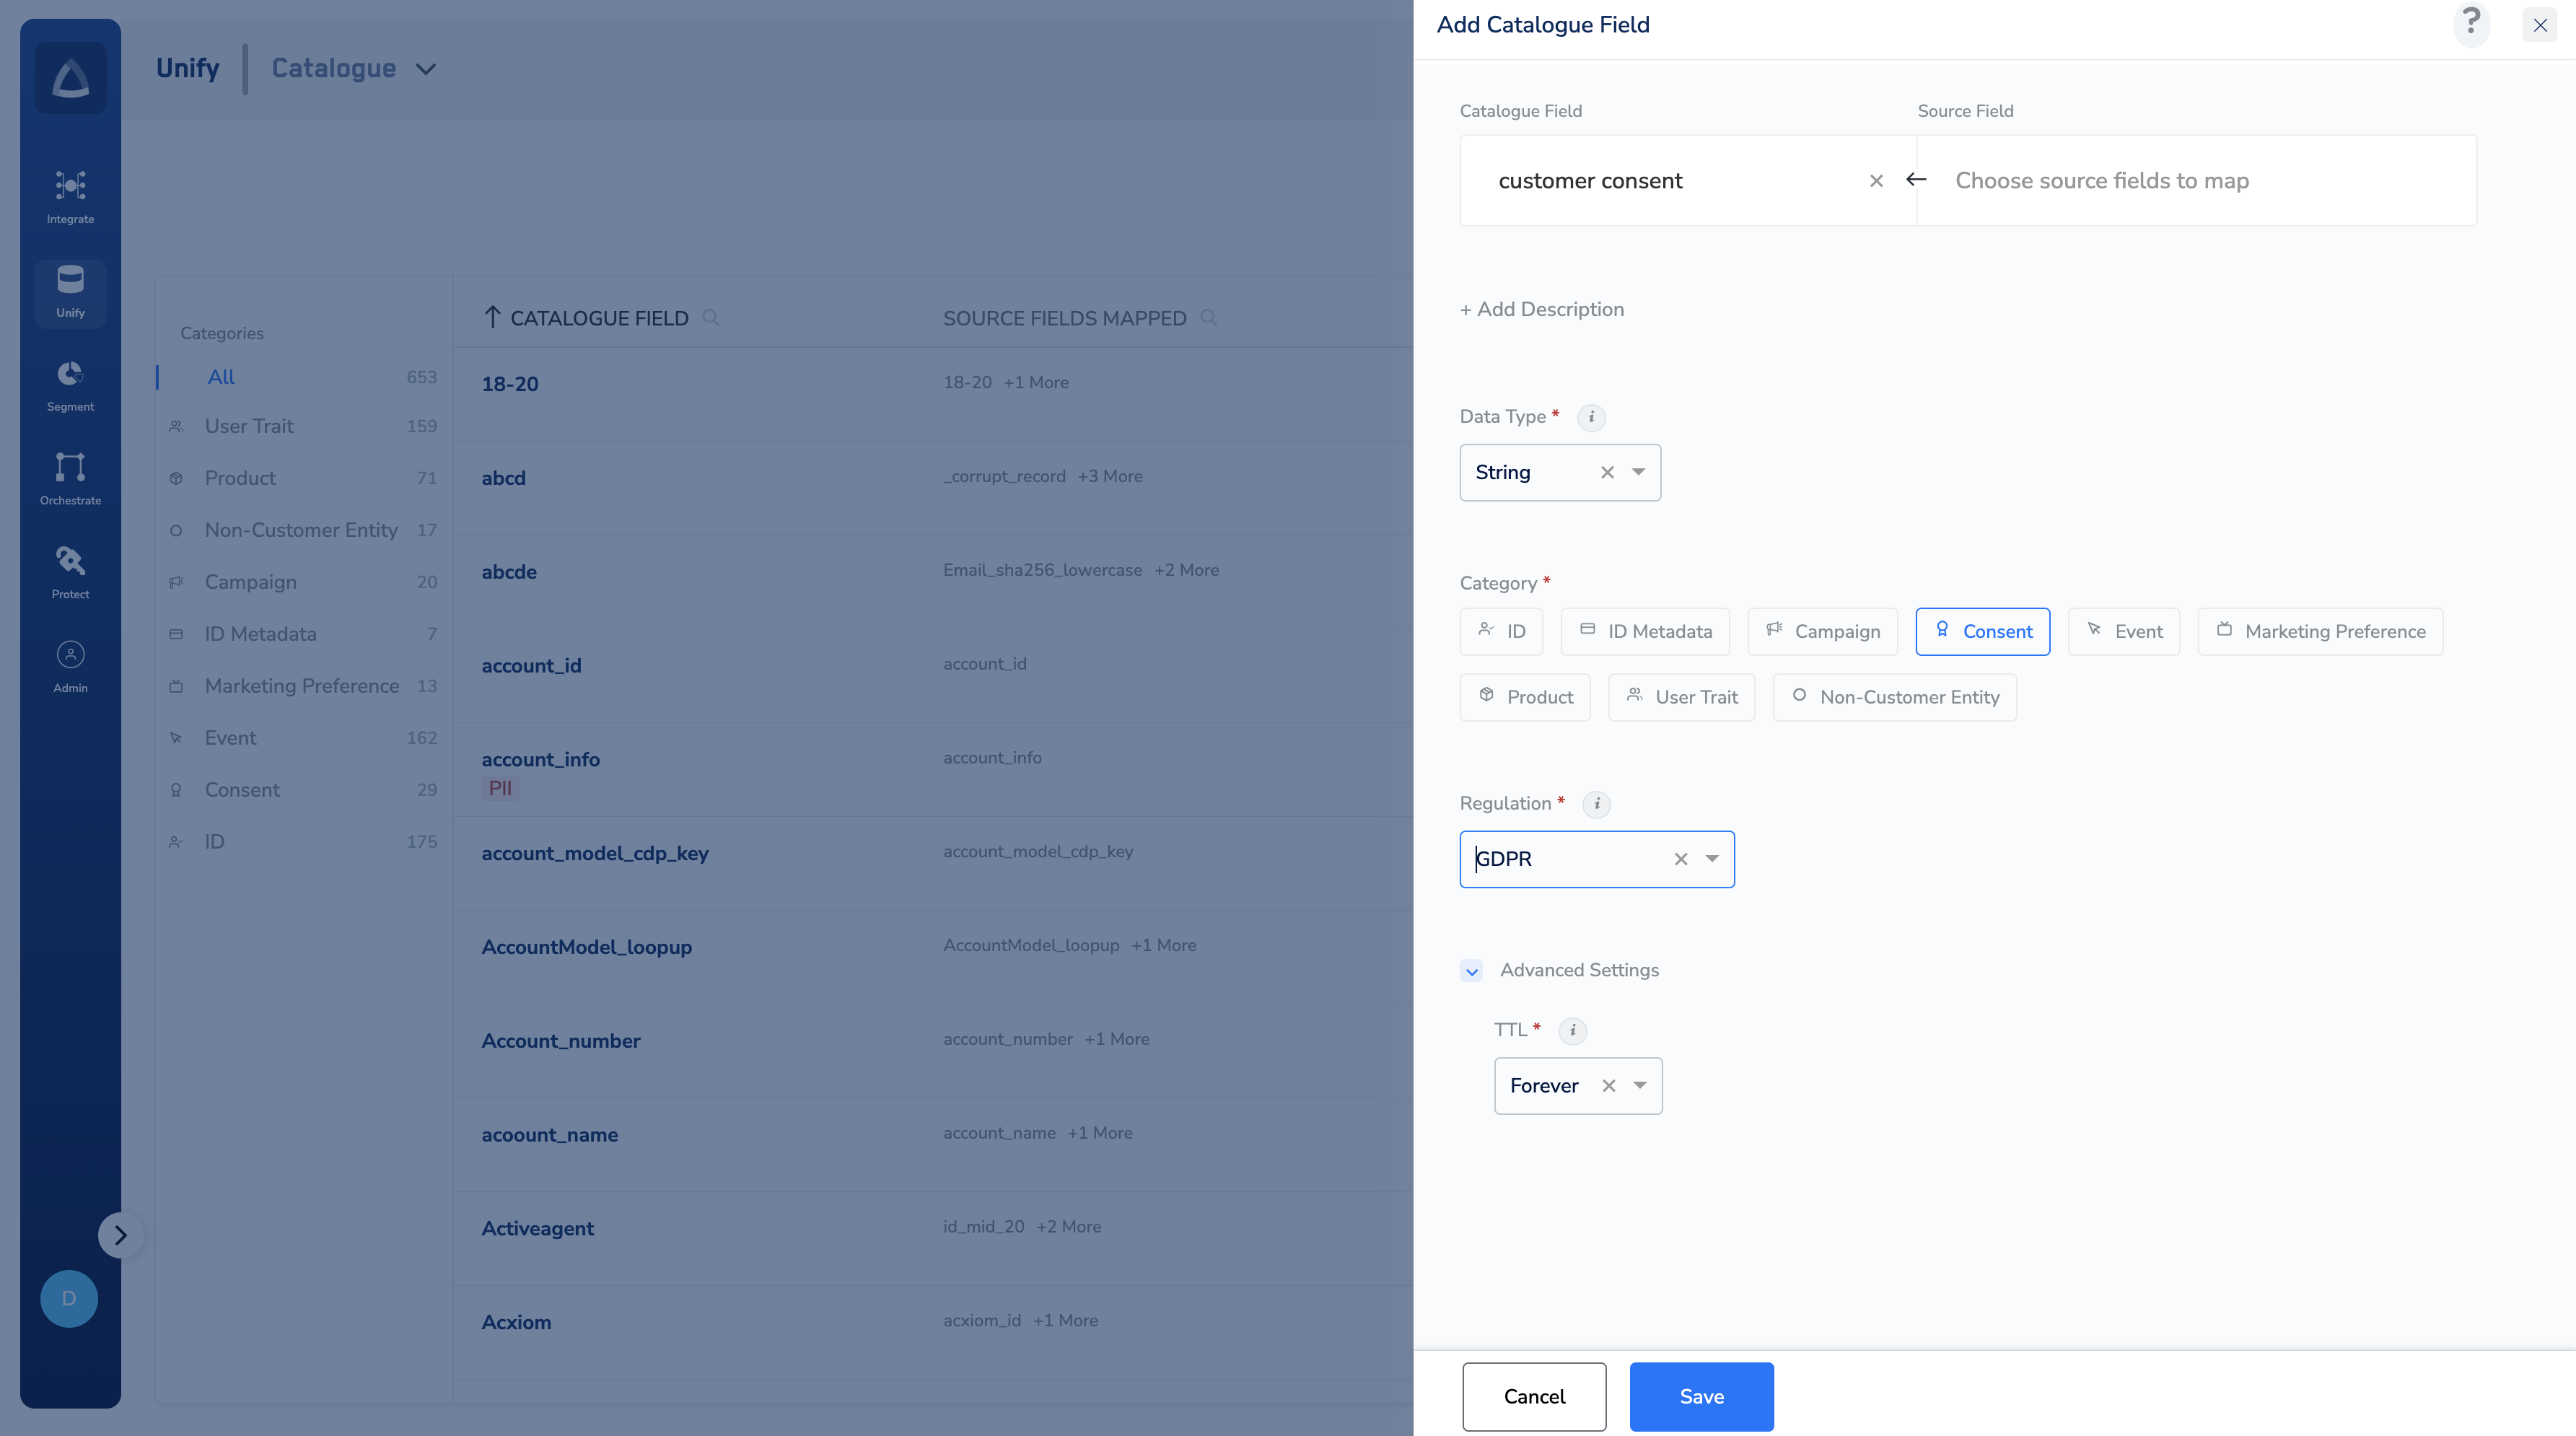
Choose String as the Data Type. Consent only stores Yes or No type of value. Therefore, the only Data Type allowed is String.
As per advanced settings, define the TTL for consent. Forever is the default value. You can choose the number of Days for TTL as per your requirement. A consent purpose maintains a timestamp property that gets updated every time a state is communicated. This is used to determine how long the value can be retained based on the TTL value.