Note:Refer to Cleverpush (Batch) Source to know about this source.
Prerequisites
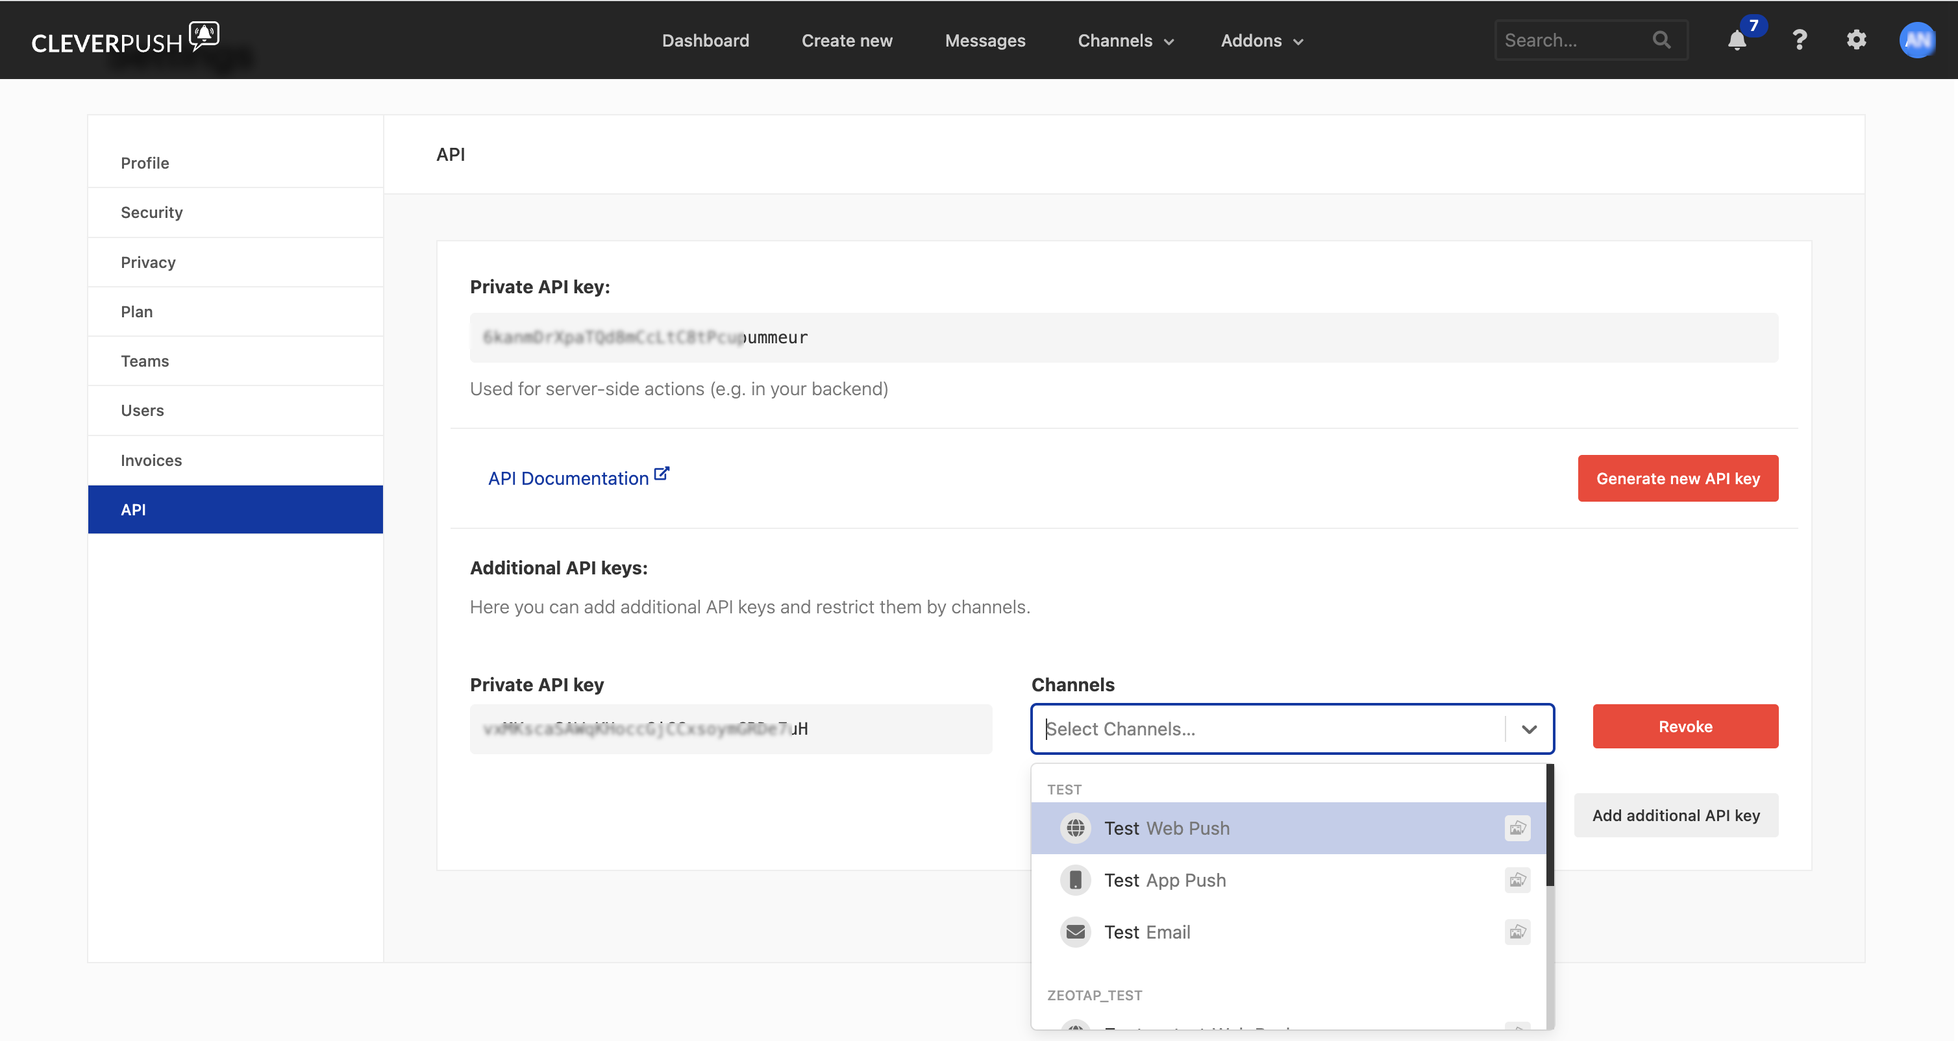
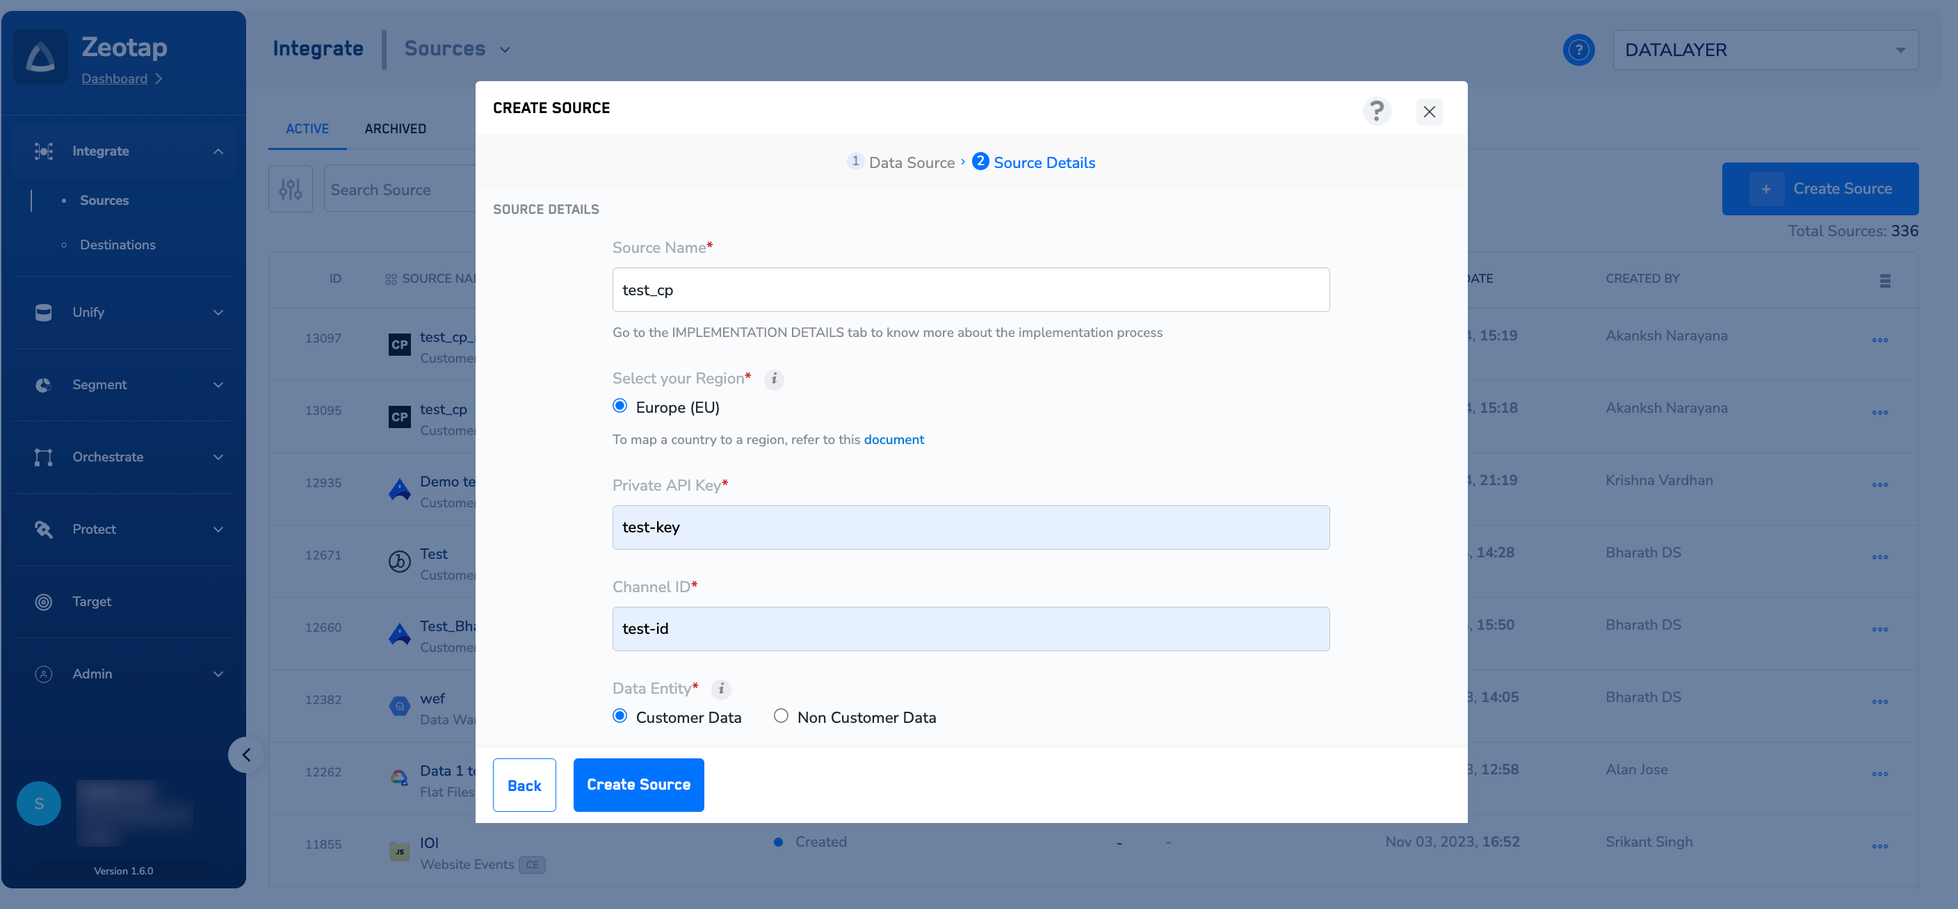
Ensure that you take care of the following prerequisites before creating a Cleverpush (Batch) Source:- Private API Key - A Private API Key is a unique identifier associated with your Cleverpush account that is used to authenticate and authorise access to certain features or APIs of Cleverpush. Perform the following steps to obtain the Private API Key from Cleverpush:
-
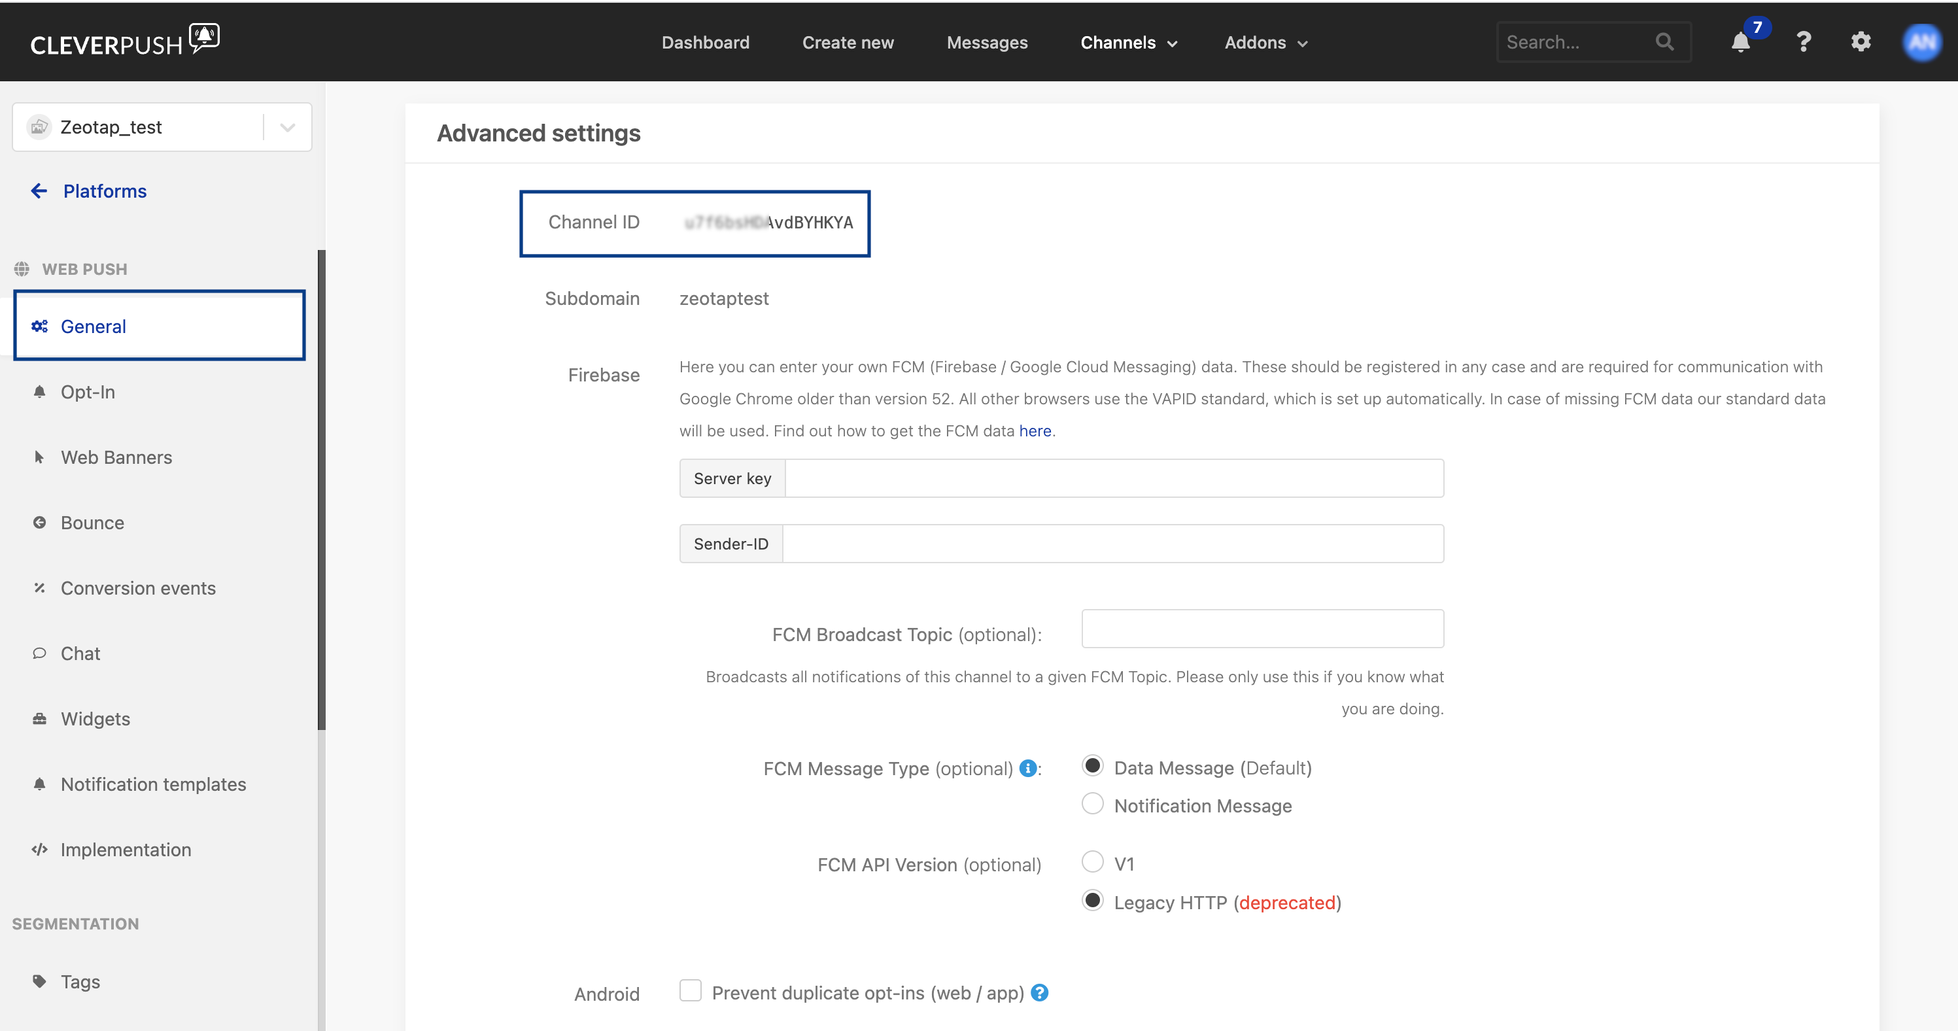
Channel ID - A Channel ID is a unique identifier assigned to the push notification channel that you create within Cleverpush. Perform the following steps to obtain the Channel ID in Cleverpush:
Under Channels, click the channel that you wish to use for sending push notifications. If the desired channel is not available, then you can create one by clicking Add Channel from the drop-down menu. For more information on how to create a channel in Cleverpush, refer here.
 Once the channel is created, you need to setup the platforms on which you want to send notifications. The following are the platforms that Zeotap CDP supports:
- Web Push
- App Push
- Email Push
Note:For more information about how to set up these platforms, refer here.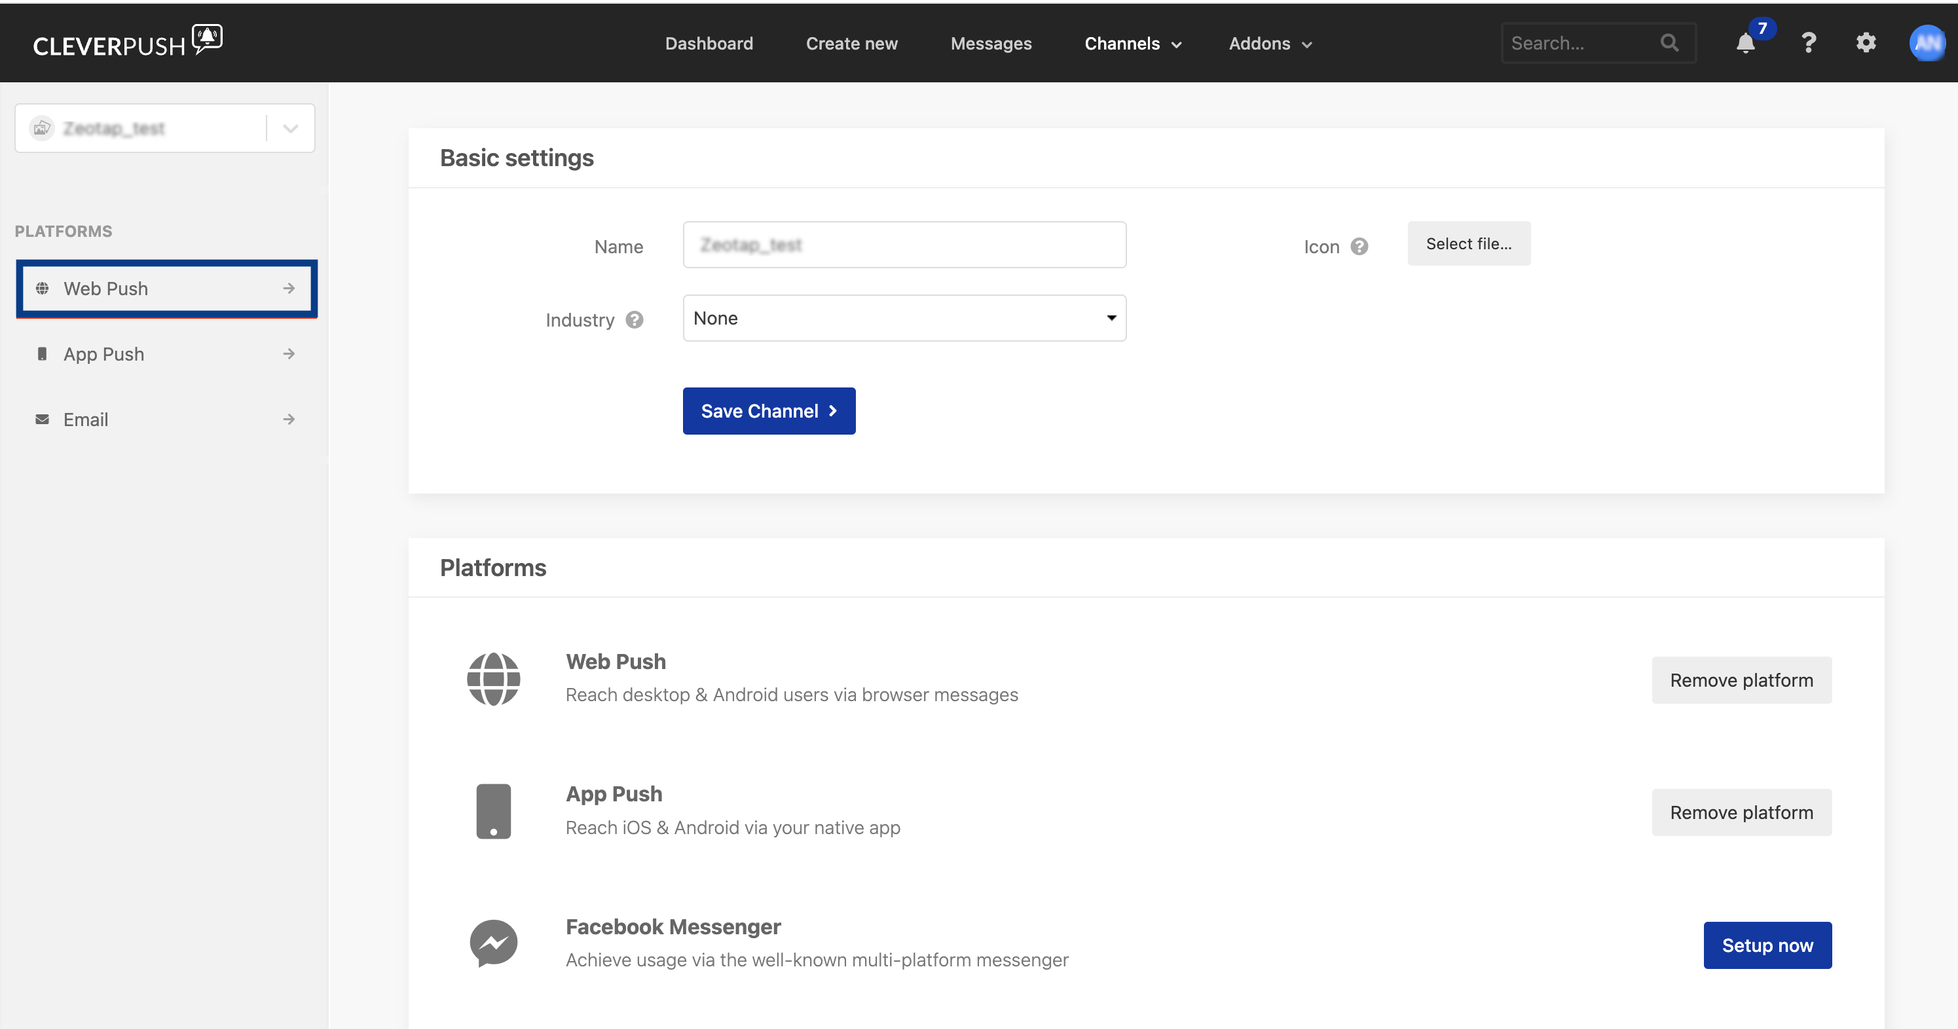
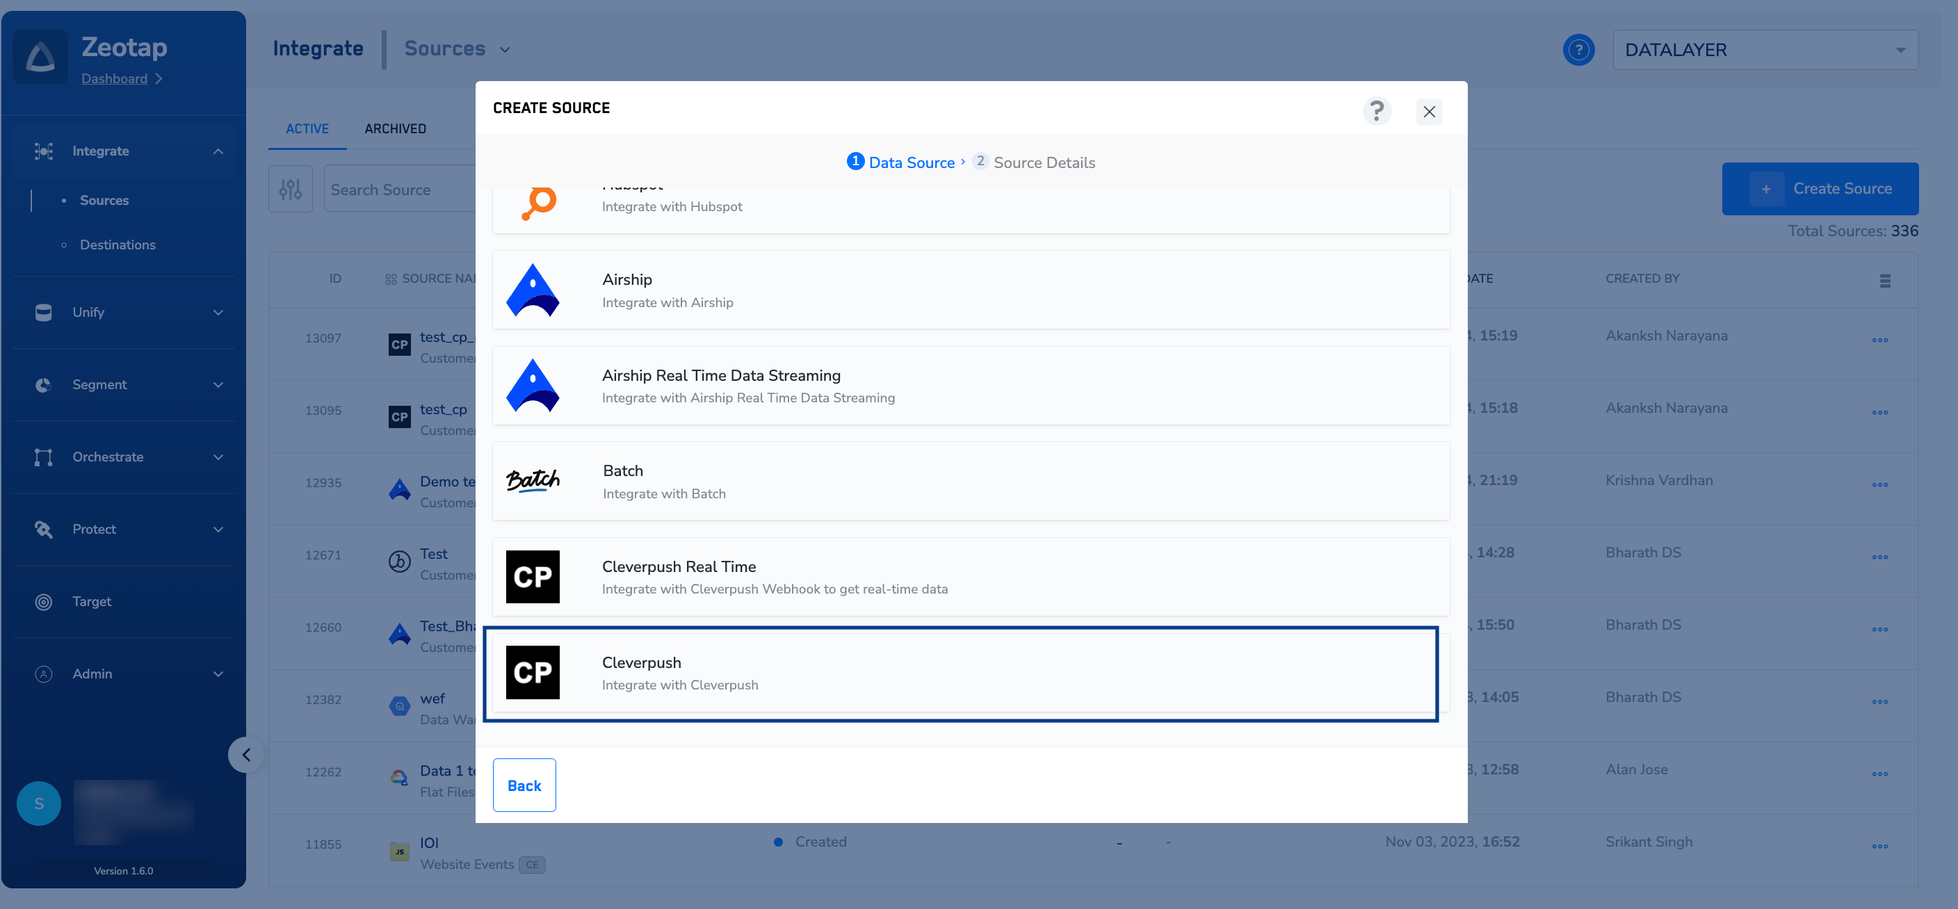
Create a Cleverpush (Batch) Source
Once you have all the necessary information mentioned above, perform the following steps to create a Cleverpush (Batch) source: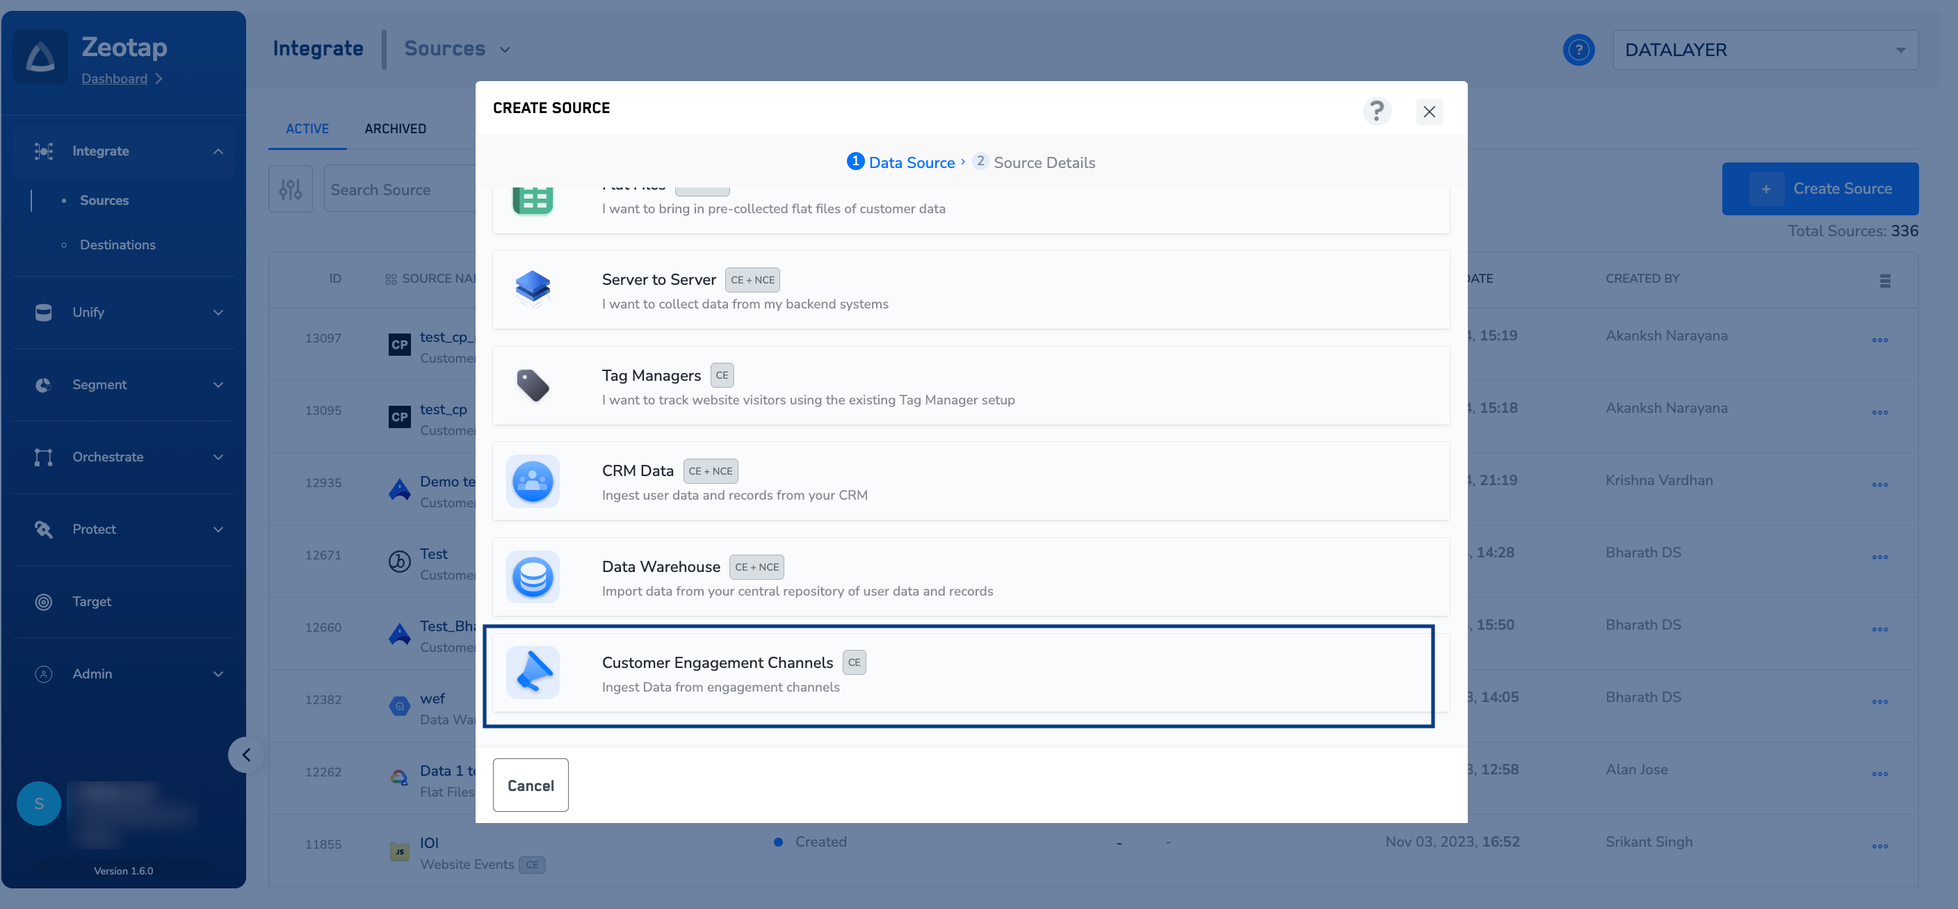
Under Data Entity, depending on the type of data that you want to ingest, choose either Customer Data or Non Customer Data and proceed with the source creation. To know more about Customer Data and Non Customer Data, refer here.
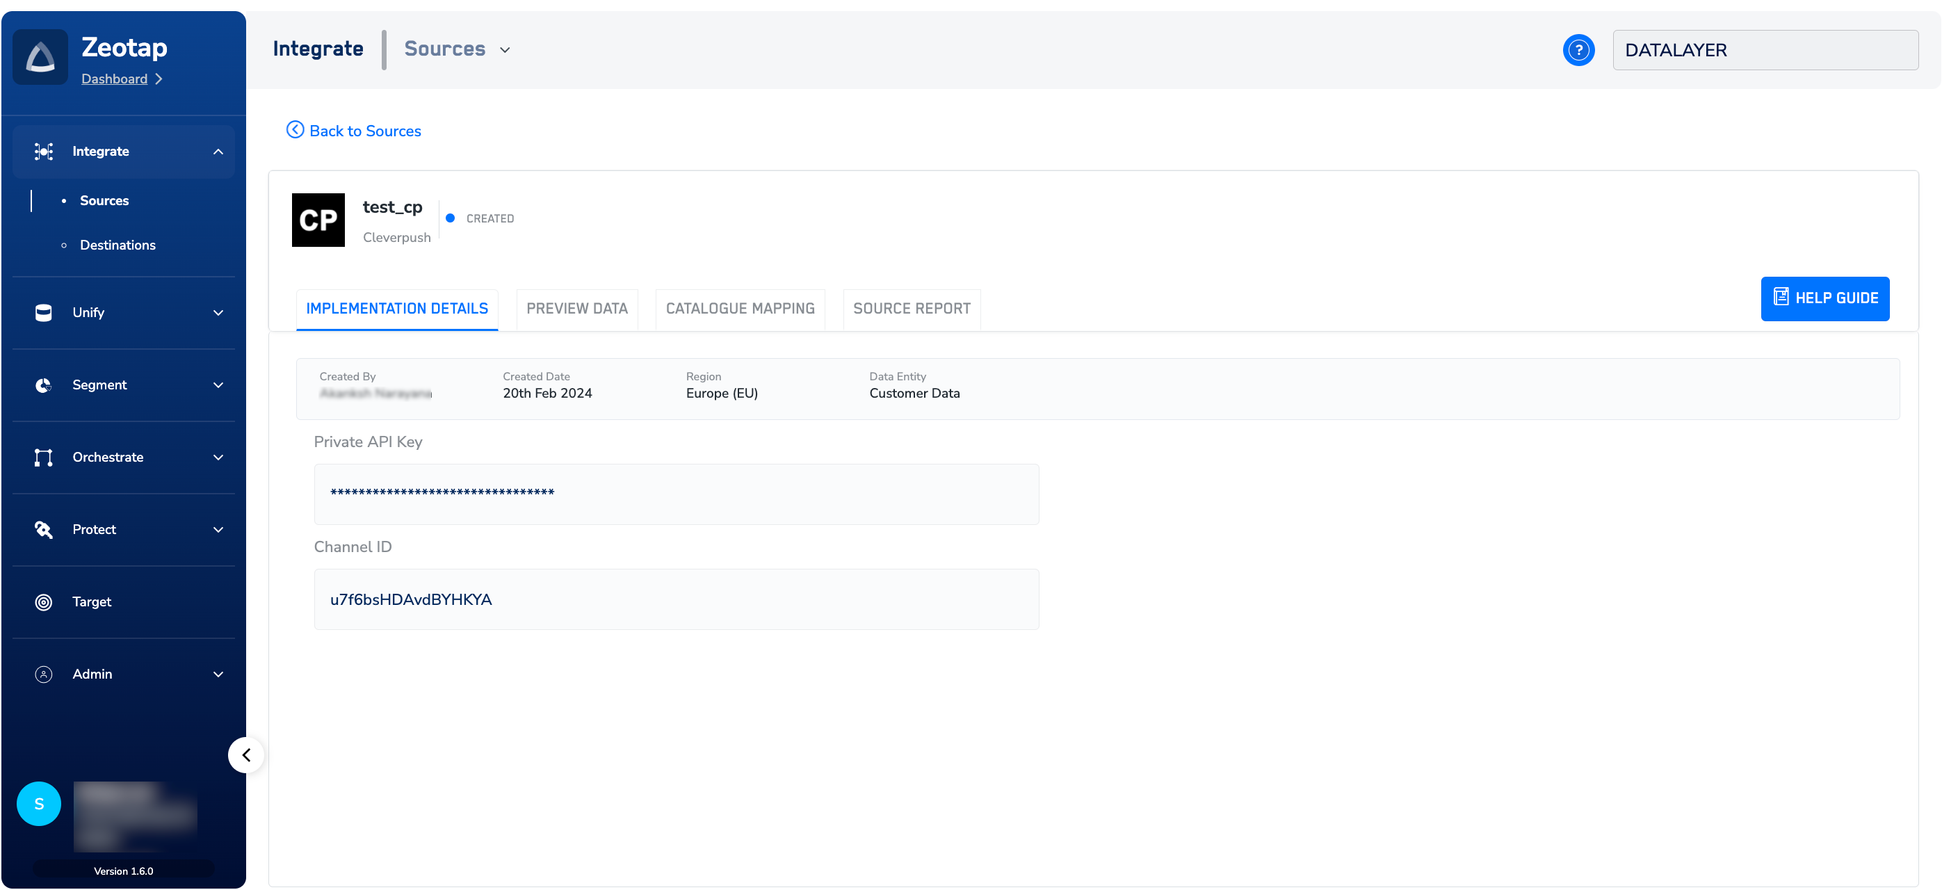
Note:Once the connection between Zeotap and Cleverpush is successfully established, you can view the data flowing into the system under the PREVIEW DATA tab. For further assistance to implement this source, reach out to your Zeotap POC.