Overview
Zeotap simplifies the data onboarding process by letting you connect directly to the source data residing in BigQuery through the Sources application, within Zeotap CDP. You can harness the Zeotap-Google BigQuery source integration to strengthen your data analytics capacities by enabling real-time insights. In addition to it, this integration also empowers you to analyse diverse datasets, create precise customer segments, curate personalised content and refine advertising strategies.Concepts
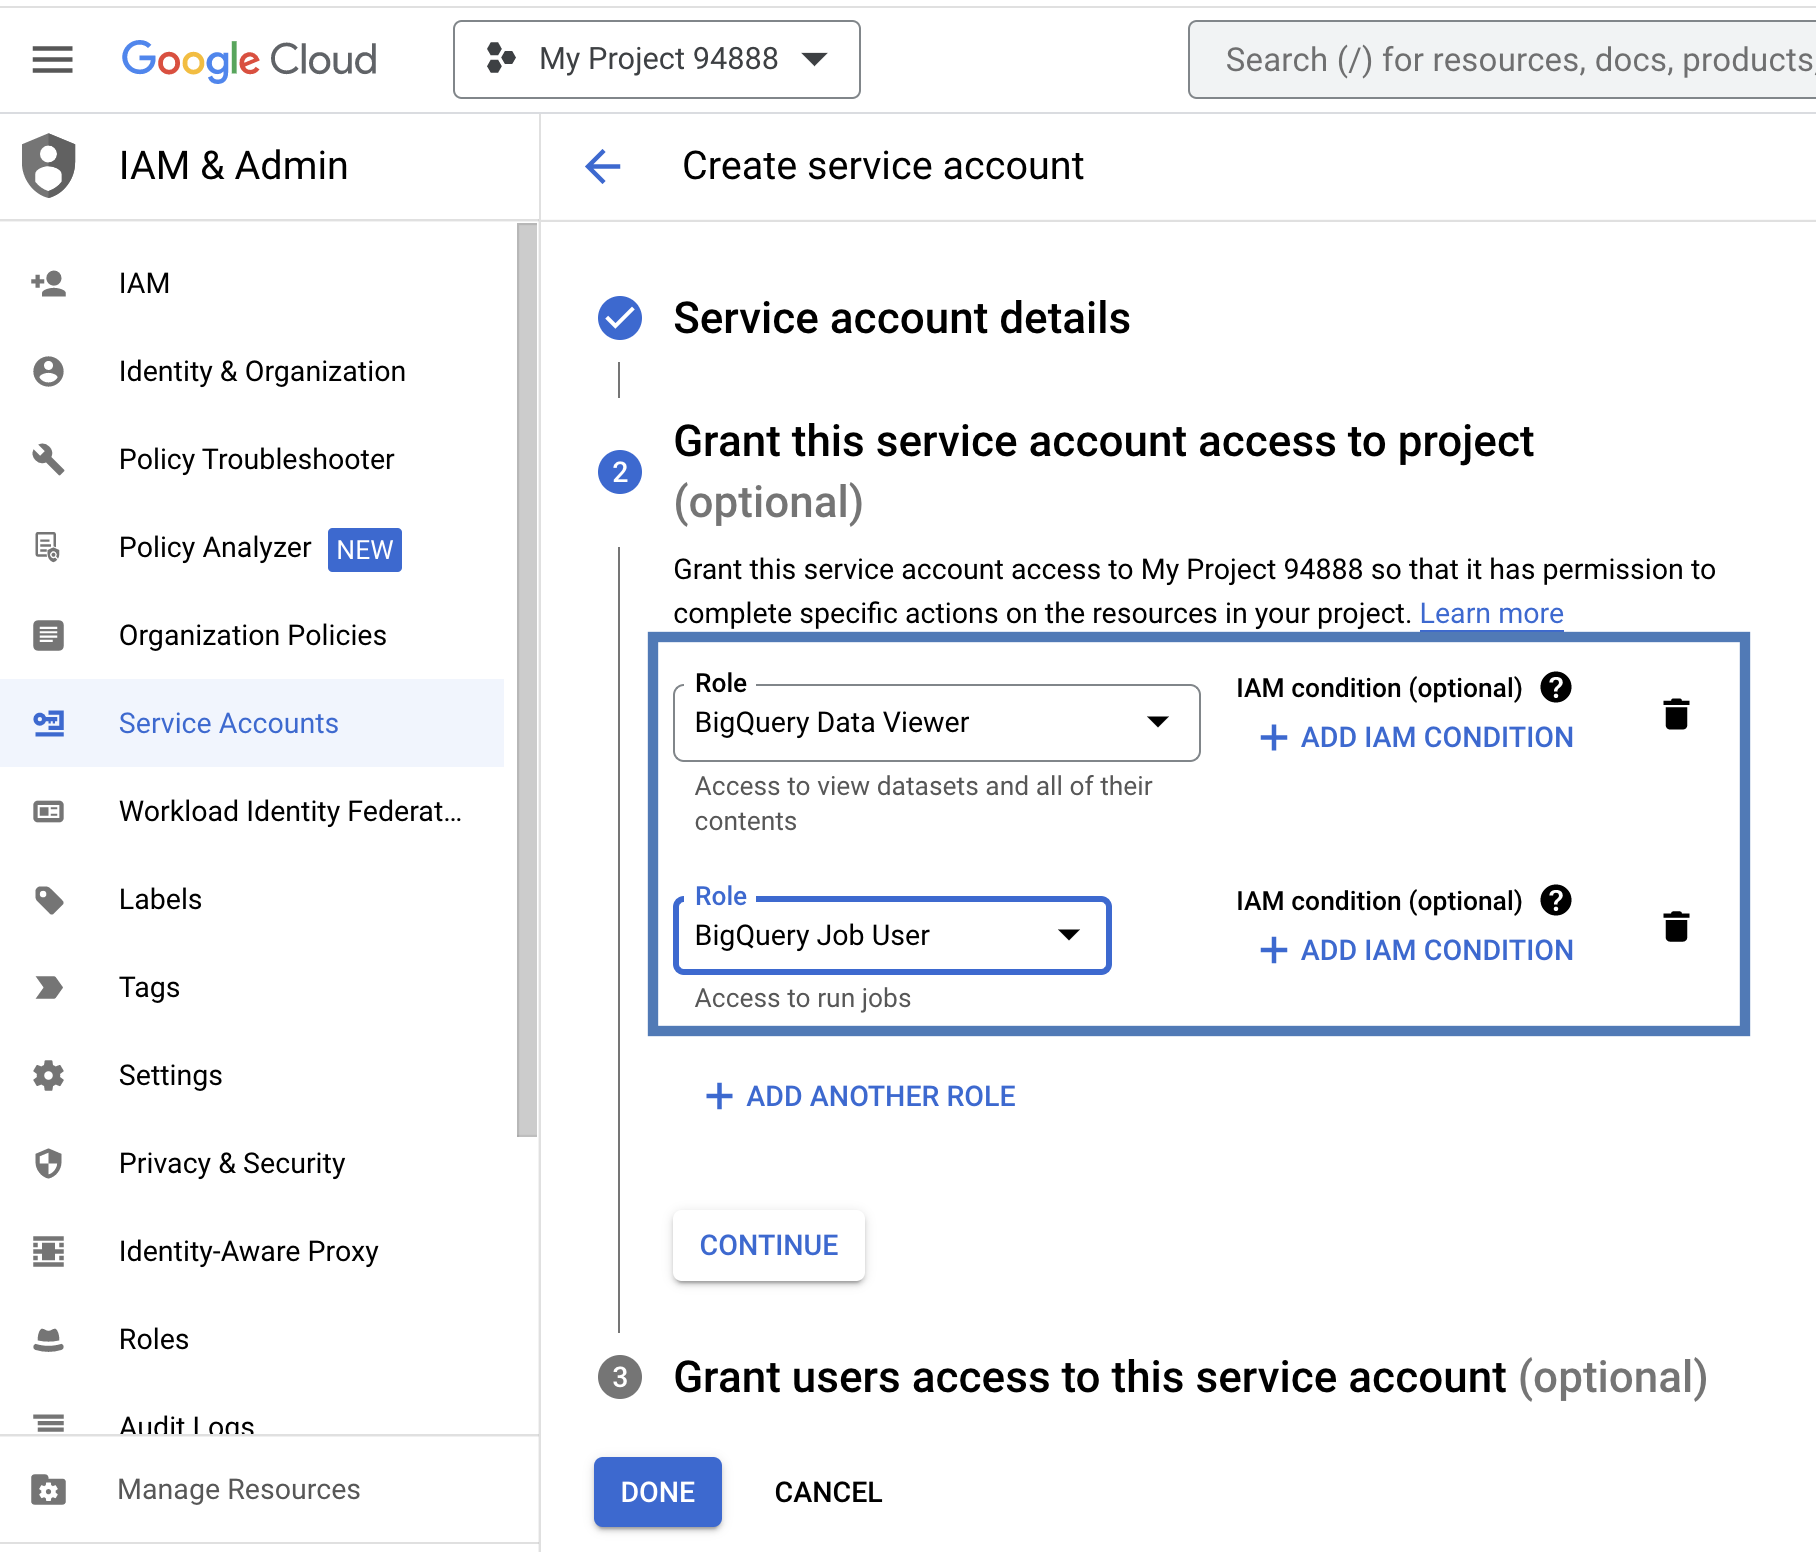
Ensure that you understand the following concepts before starting this integration:Service Account Owner
In Google BigQuery Source Integration, a Service Account Owner refers to a user account that has owner privileges for configuring and overseeing significant queries within the integration. This ownership entails the authority to view, modify and manage the data in Google BigQuery. The responsibilities of a Service Account Owner in Google BigQuery include performing administrative tasks, managing passwords and permissions, and configuring service accounts for integration with external data sources within the Google Cloud Platform (GCP).Data Entities
Zeotap supports the following two groups of data entities:- Customer Data — refers to a wide range of information, such as demographic, behavioural, product-related, derived and modelled information. This data is gathered from various brand interfaces, platforms, tools and services.
- Non-customer Entity Data — refers to data that is not directly tied to a user but to an attribute associated with the user. The most common forms of Non-Customer Entity Data are product catalogues, order data, feed data, campaign data, account data and so on. For more information on Data Entities supported by Zeotap CDP, refer here.
Prerequisites
Before you create a BigQuery source in the Sources application, note that you must have an account with BigQuery and the data that needs to be imported to Zeotap in that account. For that account, ensure that you have the following information readily available:- Source Name – This is the name you will see within the Zeotap, once you successfully create the source.
-
Region– This is the region where the data needs to be stored. Currently, Zeotap supports data ingestion in the following regions:
- EU – All EU countries’ data are ingested to the bucket provisioned for you in the EU region.
- UK – United Kingdom’s data are ingested to the bucket provisioned for you in the UK region.
- Sync frequency – Defines how often data is ingested from the source. Zeotap currently supports the following frequencies: Sync once, Every hour, Every 3 hours, Every 6 hours, Every 12 hours, Daily, Weekly and Monthly.
- Sync Time - When you choose Daily, Weekly, or Monthly as the sync frequency, you can specify the exact time for the sync to occur.
- Sync Period - Indicates whether the selected Sync Time is in the AM or PM.
- Sync Day - If Weekly sync is selected, you can specify the day of the week on which the sync should run.
- Monthly Sync date - If Monthly sync is selected, you can specify the day of the month on which the sync should run.
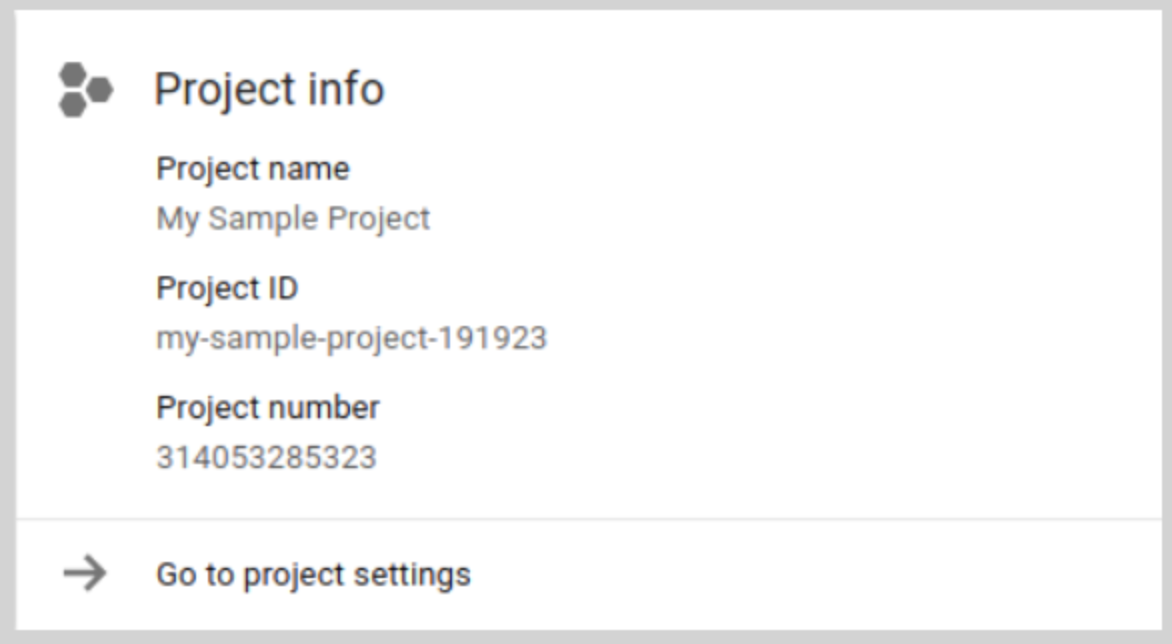
- Project ID – A Project ID is a unique string that differentiates your project from all others on Google Cloud. You can use the Google Cloud console to generate a Project ID. You can find the Project ID in the Google Cloud console Dashboard page. In the below example, the Project name is My Sample Project and the Project ID is my-sample-project-191923.
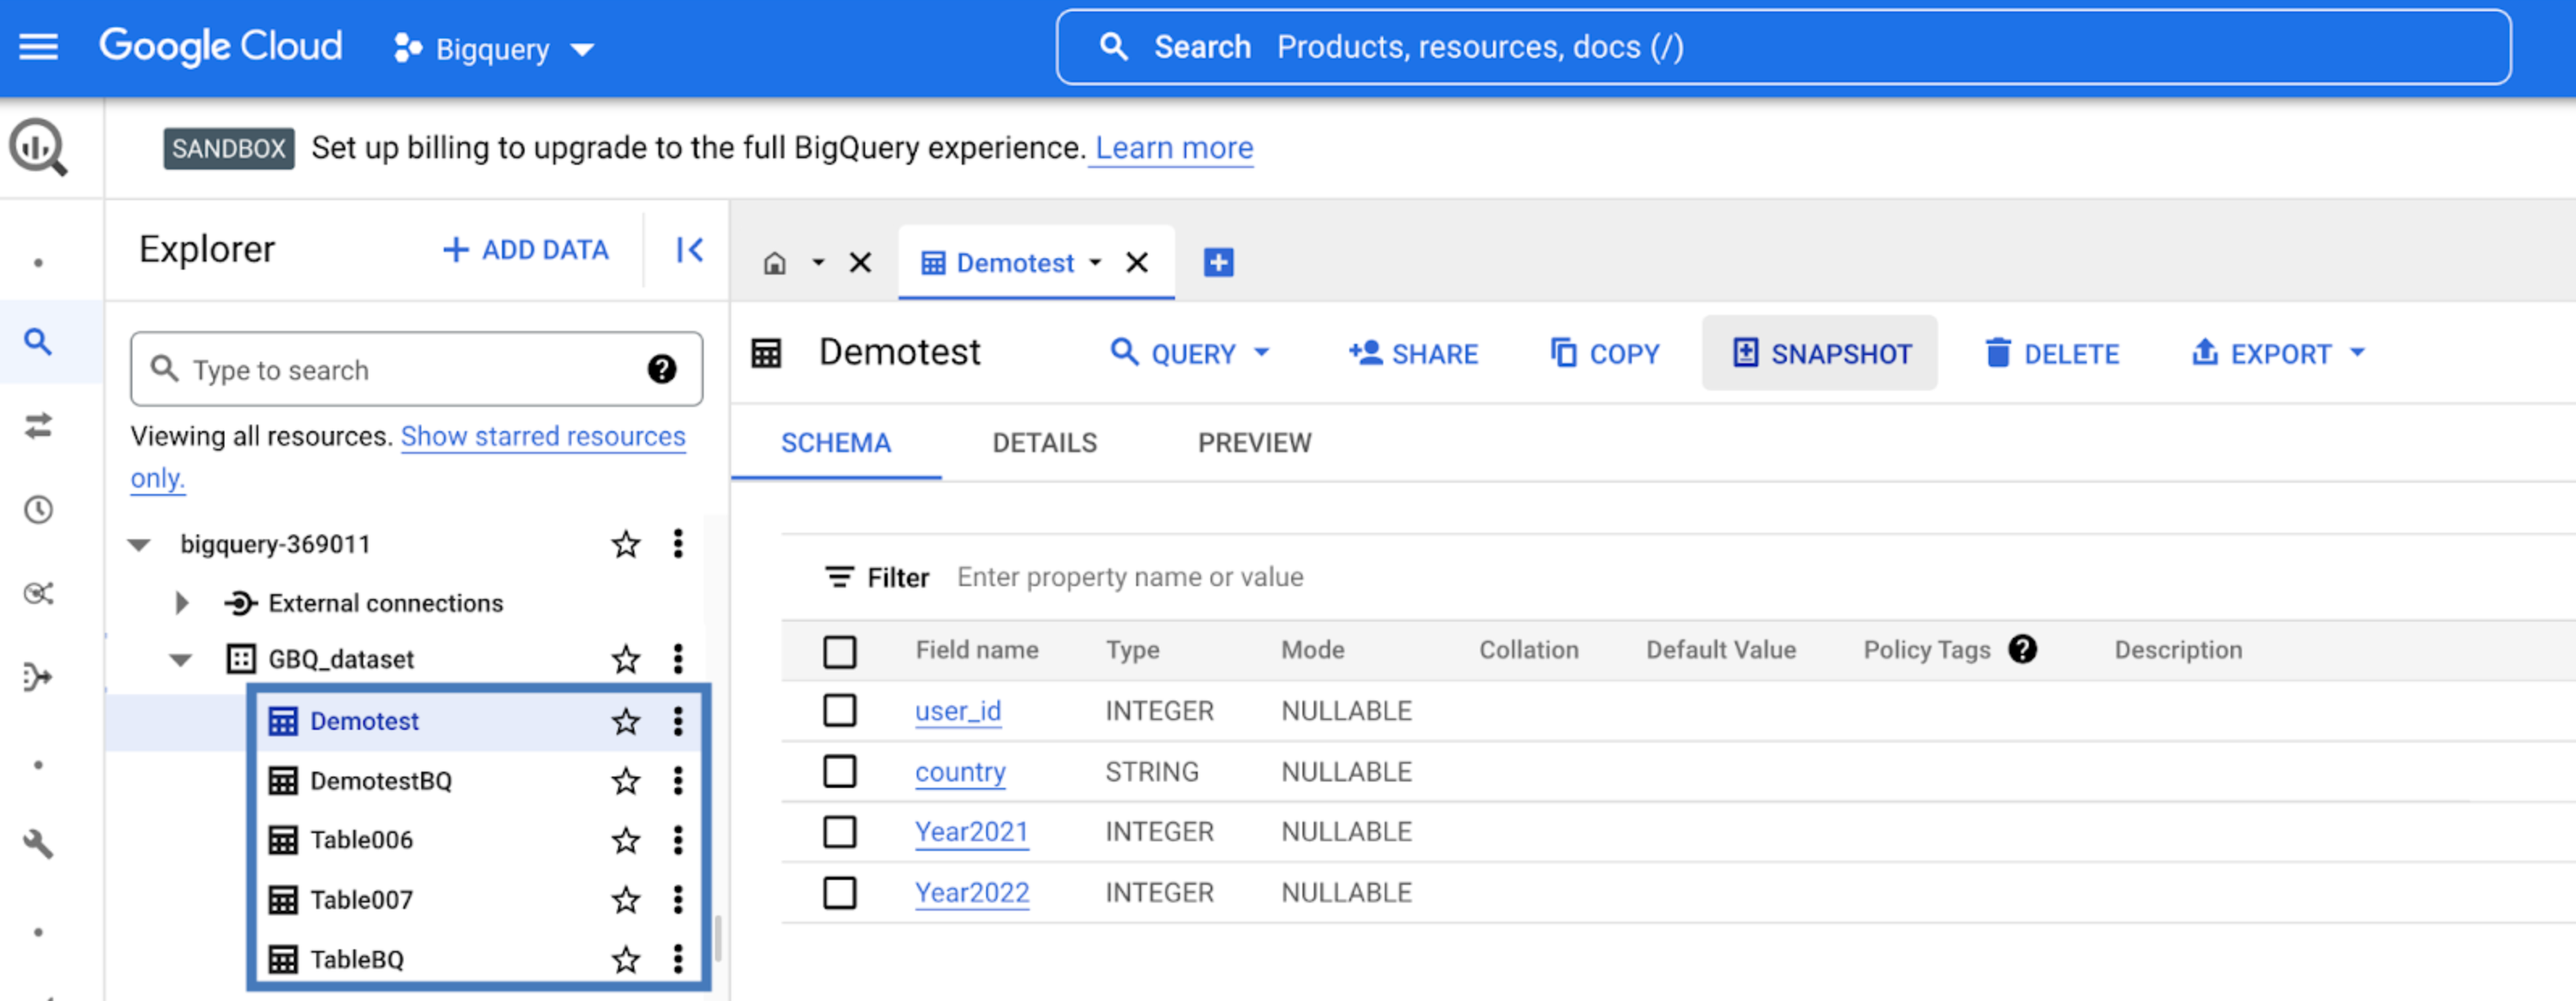
- Dataset – Datasets are top-level containers that are used to organise and control access to your tables and views. In the below example, the Dataset is GBQ_dataset.
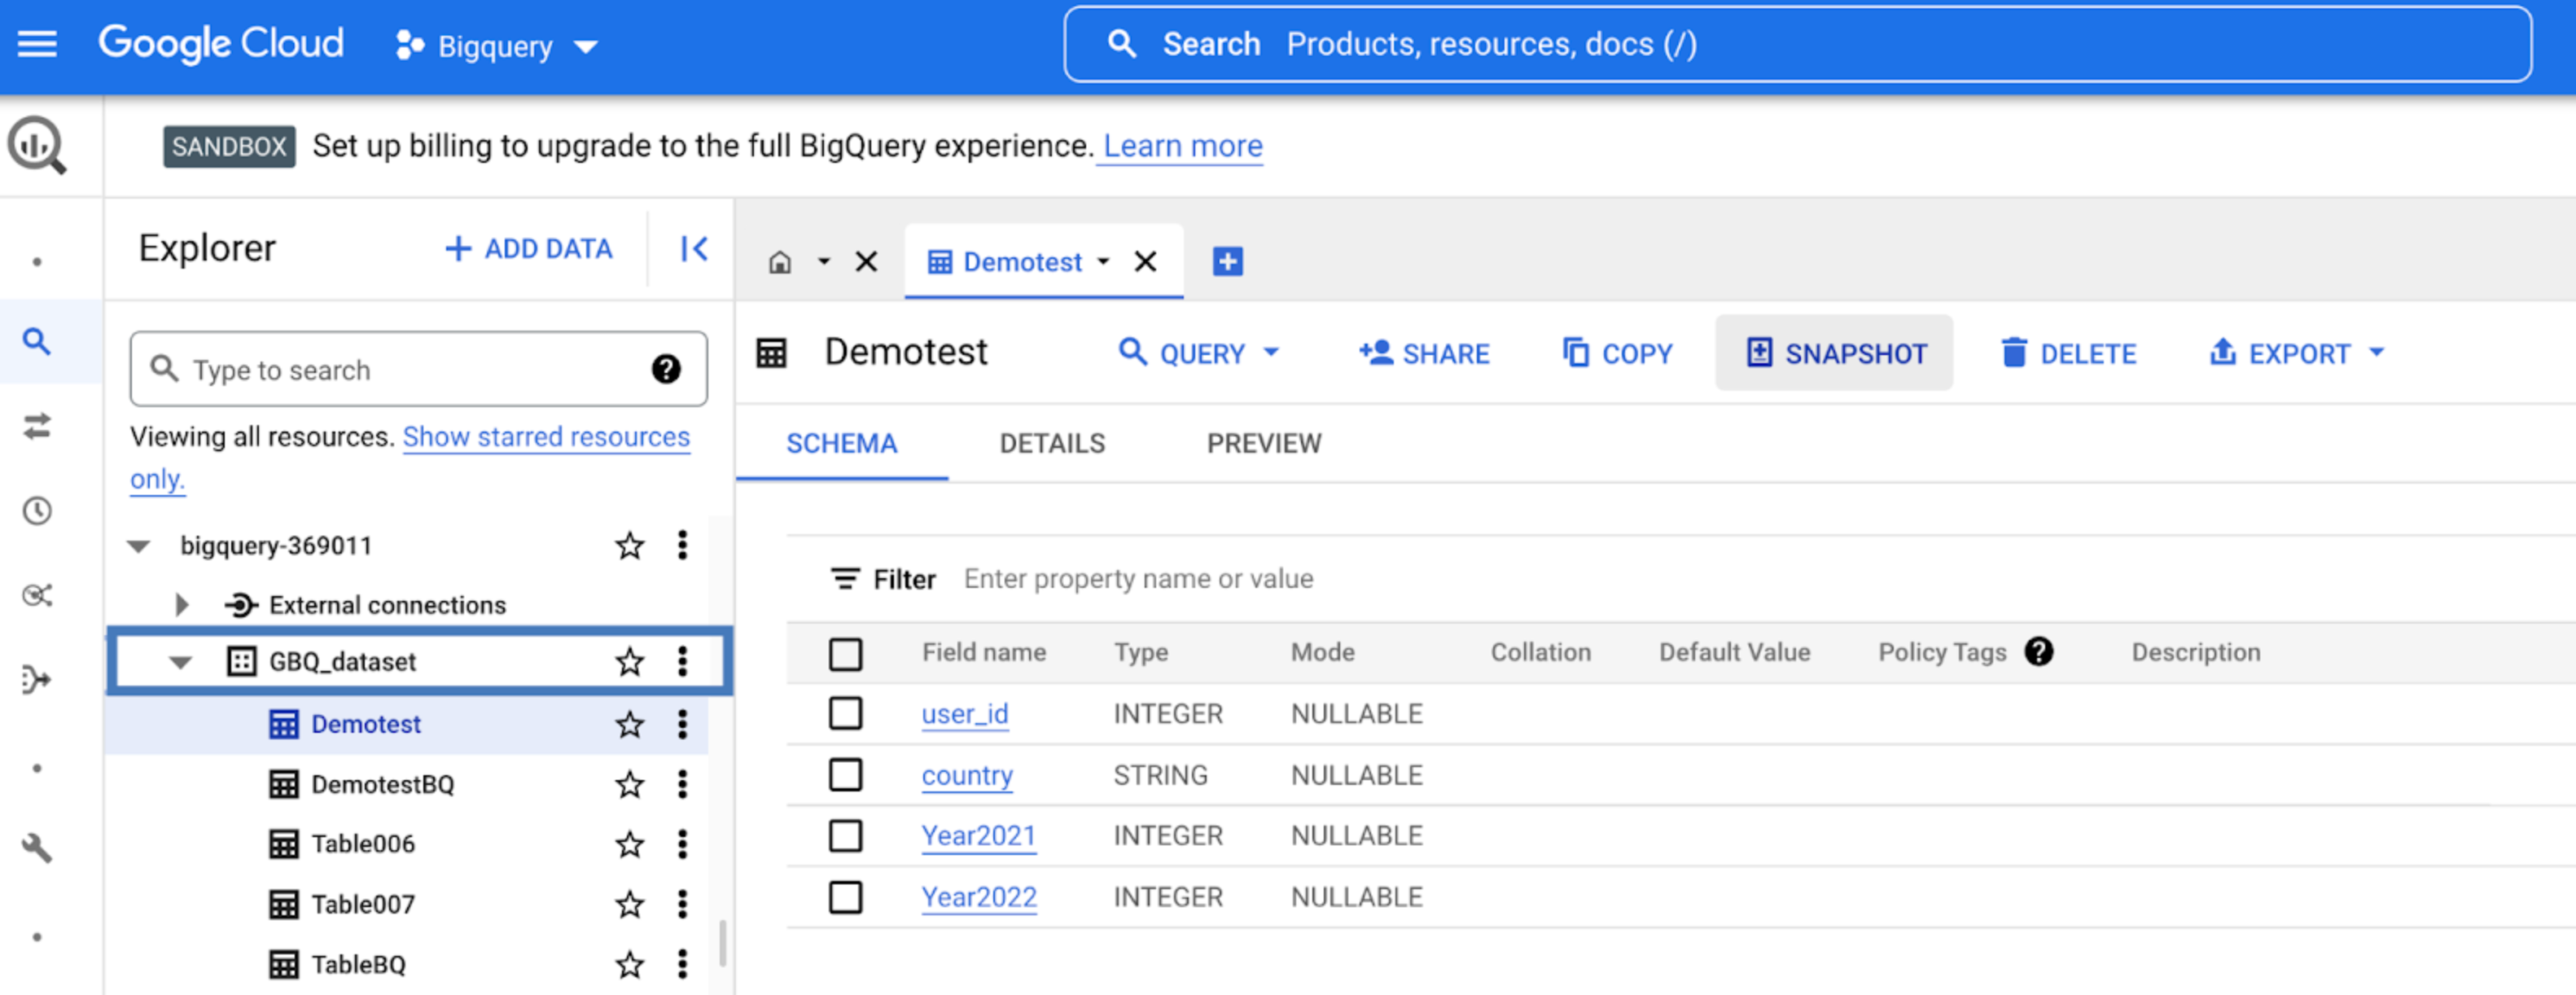
- Table – A BigQuery table contains individual records organised in rows. Each record is composed of columns/fields. Every table is defined by a schema that describes the column names, data types and other information. In the below example, the tables are Demotest, DemotestBQ, Table006, Table007 and TableBQ. Currently, we do not support tables with JSON column types.
-
Service Account Owner – Select the Service Account Owner based on your requirement. You can choose either Customer or Zeotap as the Service Account Owner. For more information about Service Account Owner, refer to Concepts.
- If you select Customer as the Service Account Owner, a section appears where you have to upload the JSON key file that you have created. Click + SELECT FILE to upload the JSON key file. To know about how to create a JSON key file, refer here.
- If you select Zeotap as the Service Account Owner, then you can directly proceed to the Data Entity selection step.
- Data Entity – Zeotap supports the following two groups of data entities. For more information about Data Entities refer to Concepts.
- Service Account Key JSON – The Service Account Key JSON is necessary to use a service account from outside of Google Cloud, such as on other platforms or on-premises. For information on creating a Service Account Key JSON on the Google Cloud console, refer here.
Code
Get Started
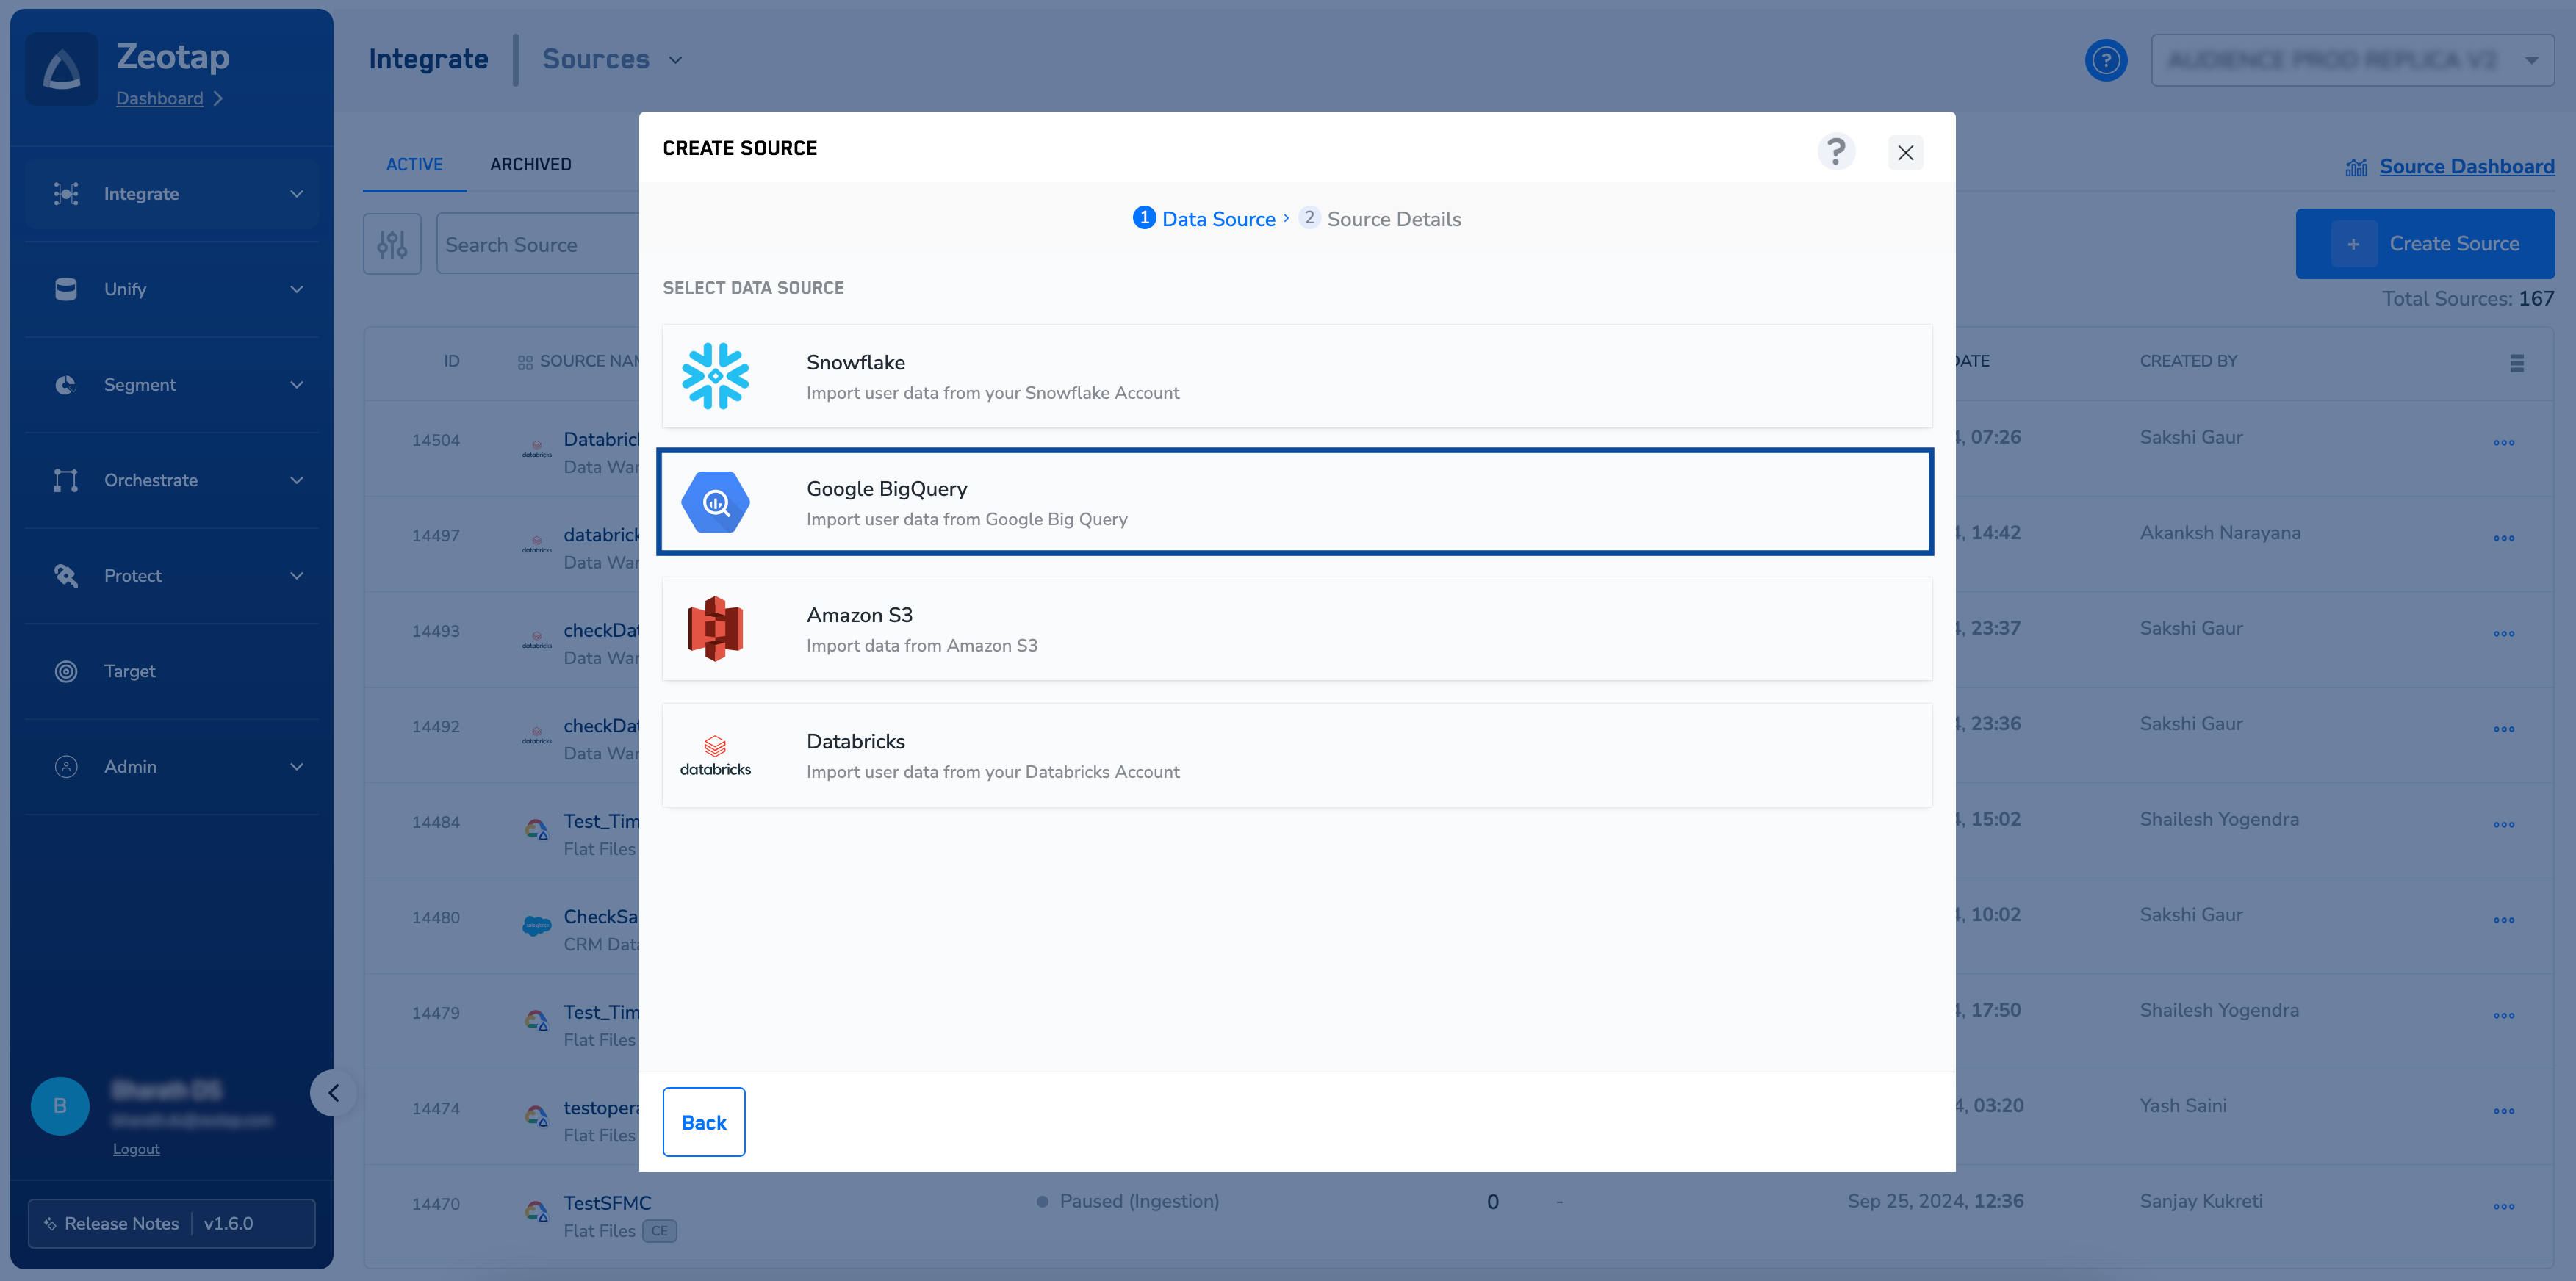
To import your data from BigQuery to Zeotap, follow the step-by-step instructions provided below.- Create a Google BigQuery Source within Zeotap CDP.
- Integrate the Created Source With the Google BigQuery platform.
Step 1 - Create a Google BigQuery Source Within Zeotap CDP
After you have obtained all the information mentioned in the Prerequisites section, perform the following steps to create a BigQuery Source within Zeotap CDP: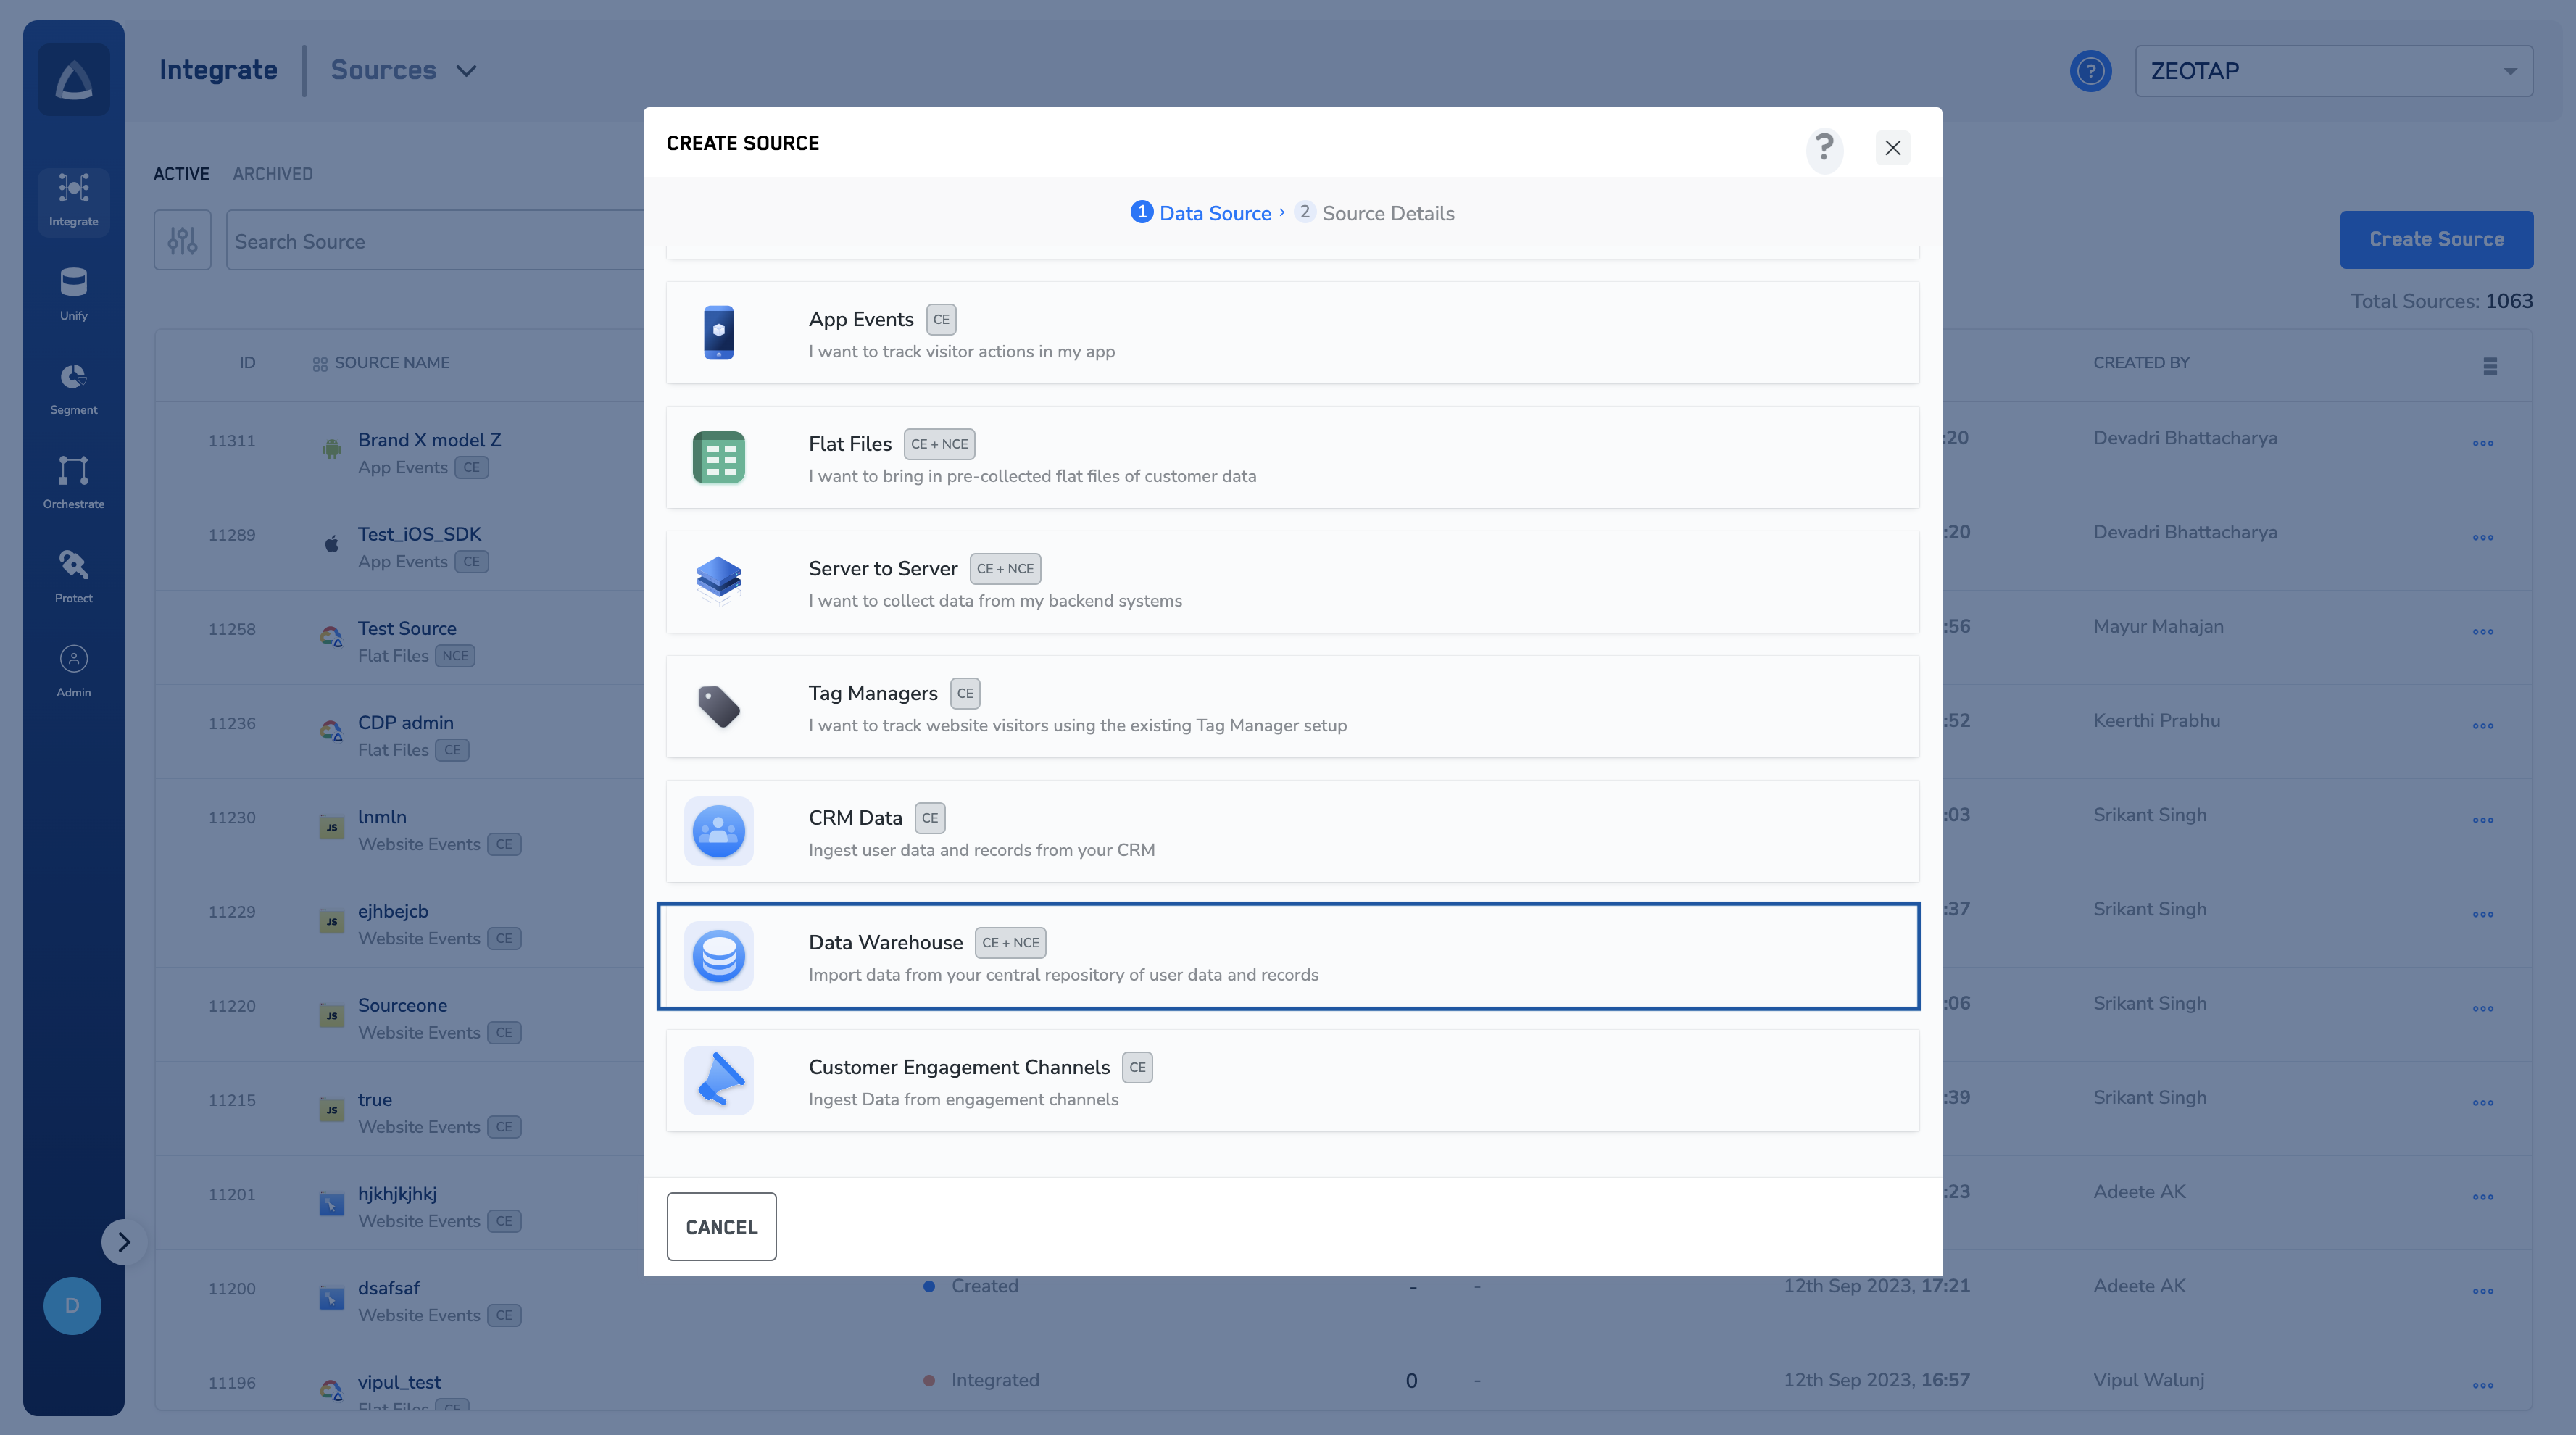
Enter the below information based on your BigQuery account. Note that the information about how to procure these details are mentioned in the Prerequisites section.a. Sync frequencyb. Project IDc. Datasetd. Table
Select the Service Account Owner based on your requirement. You can choose either Customer or Zeotap as the Service Account Owner.a. If you select Customer as the Service Account Owner, a section appears where you have to upload the JSON key file that you have already created. Click + SELECT FILE to upload the JSON key file. To know about how to create a JSON key file, refer here.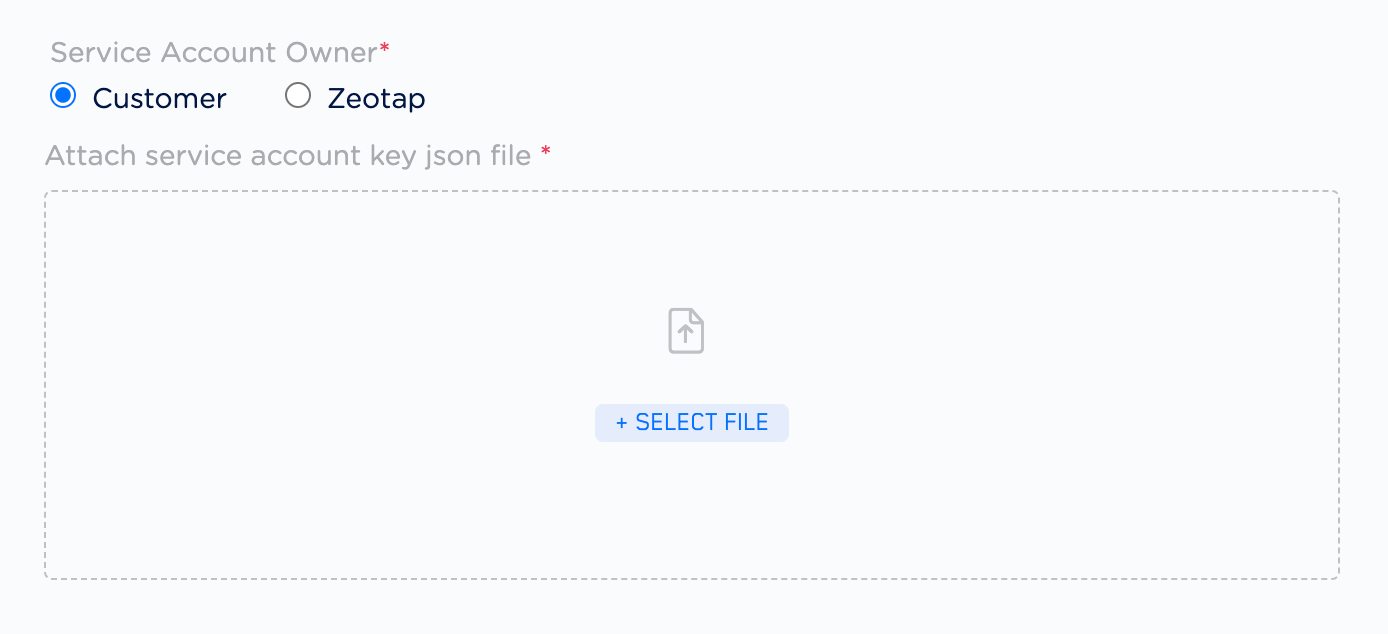
Under Data Entity, depending on the type of data that you want to ingest, choose either Customer Data or Non Customer Data and proceed with the source creation. To know more about Customer Data and Non Customer Data, refer here.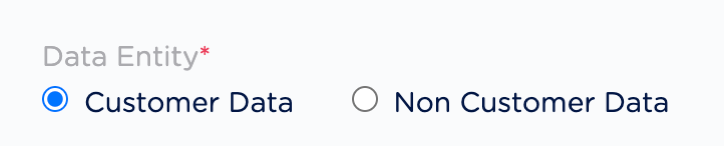
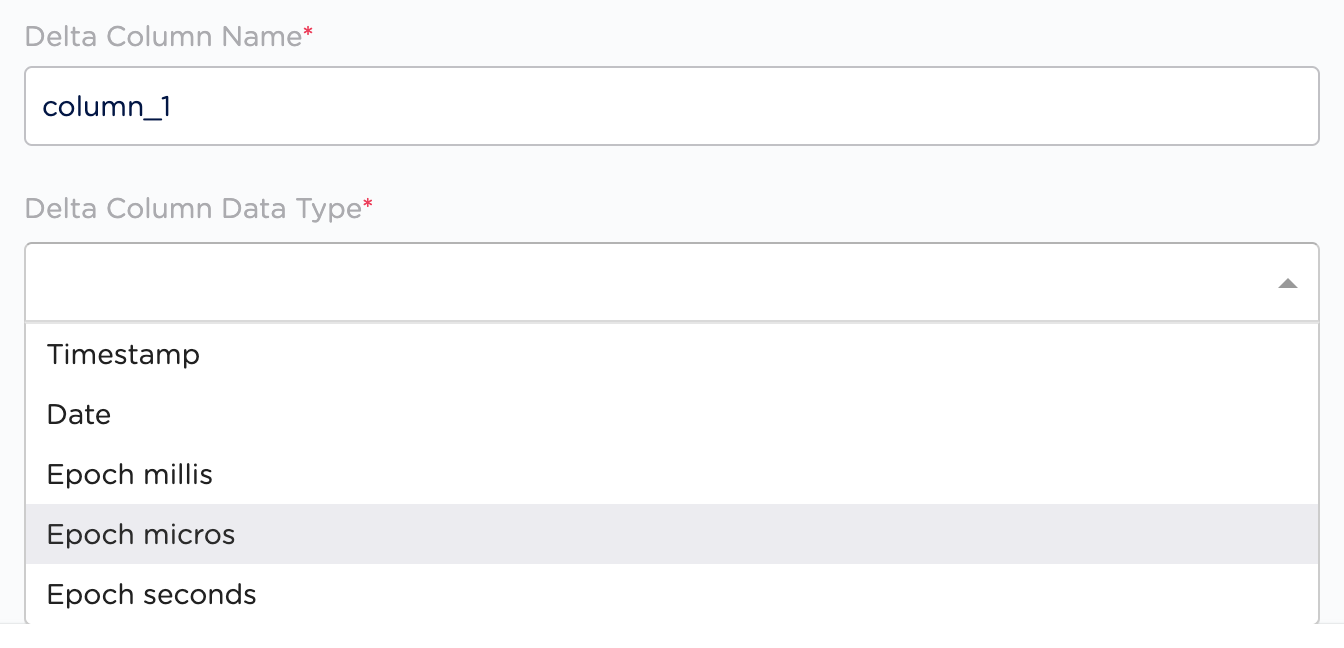
Under Delta Queries Selection, you can decide whether or not you want to consider deltas (data additions/changes) in a dataset for a specific time period based on the values of the timestamp column. Based on your requirement, select either true or false.
Step 2 - Integrate the Created Source with the Google BigQuery Platform
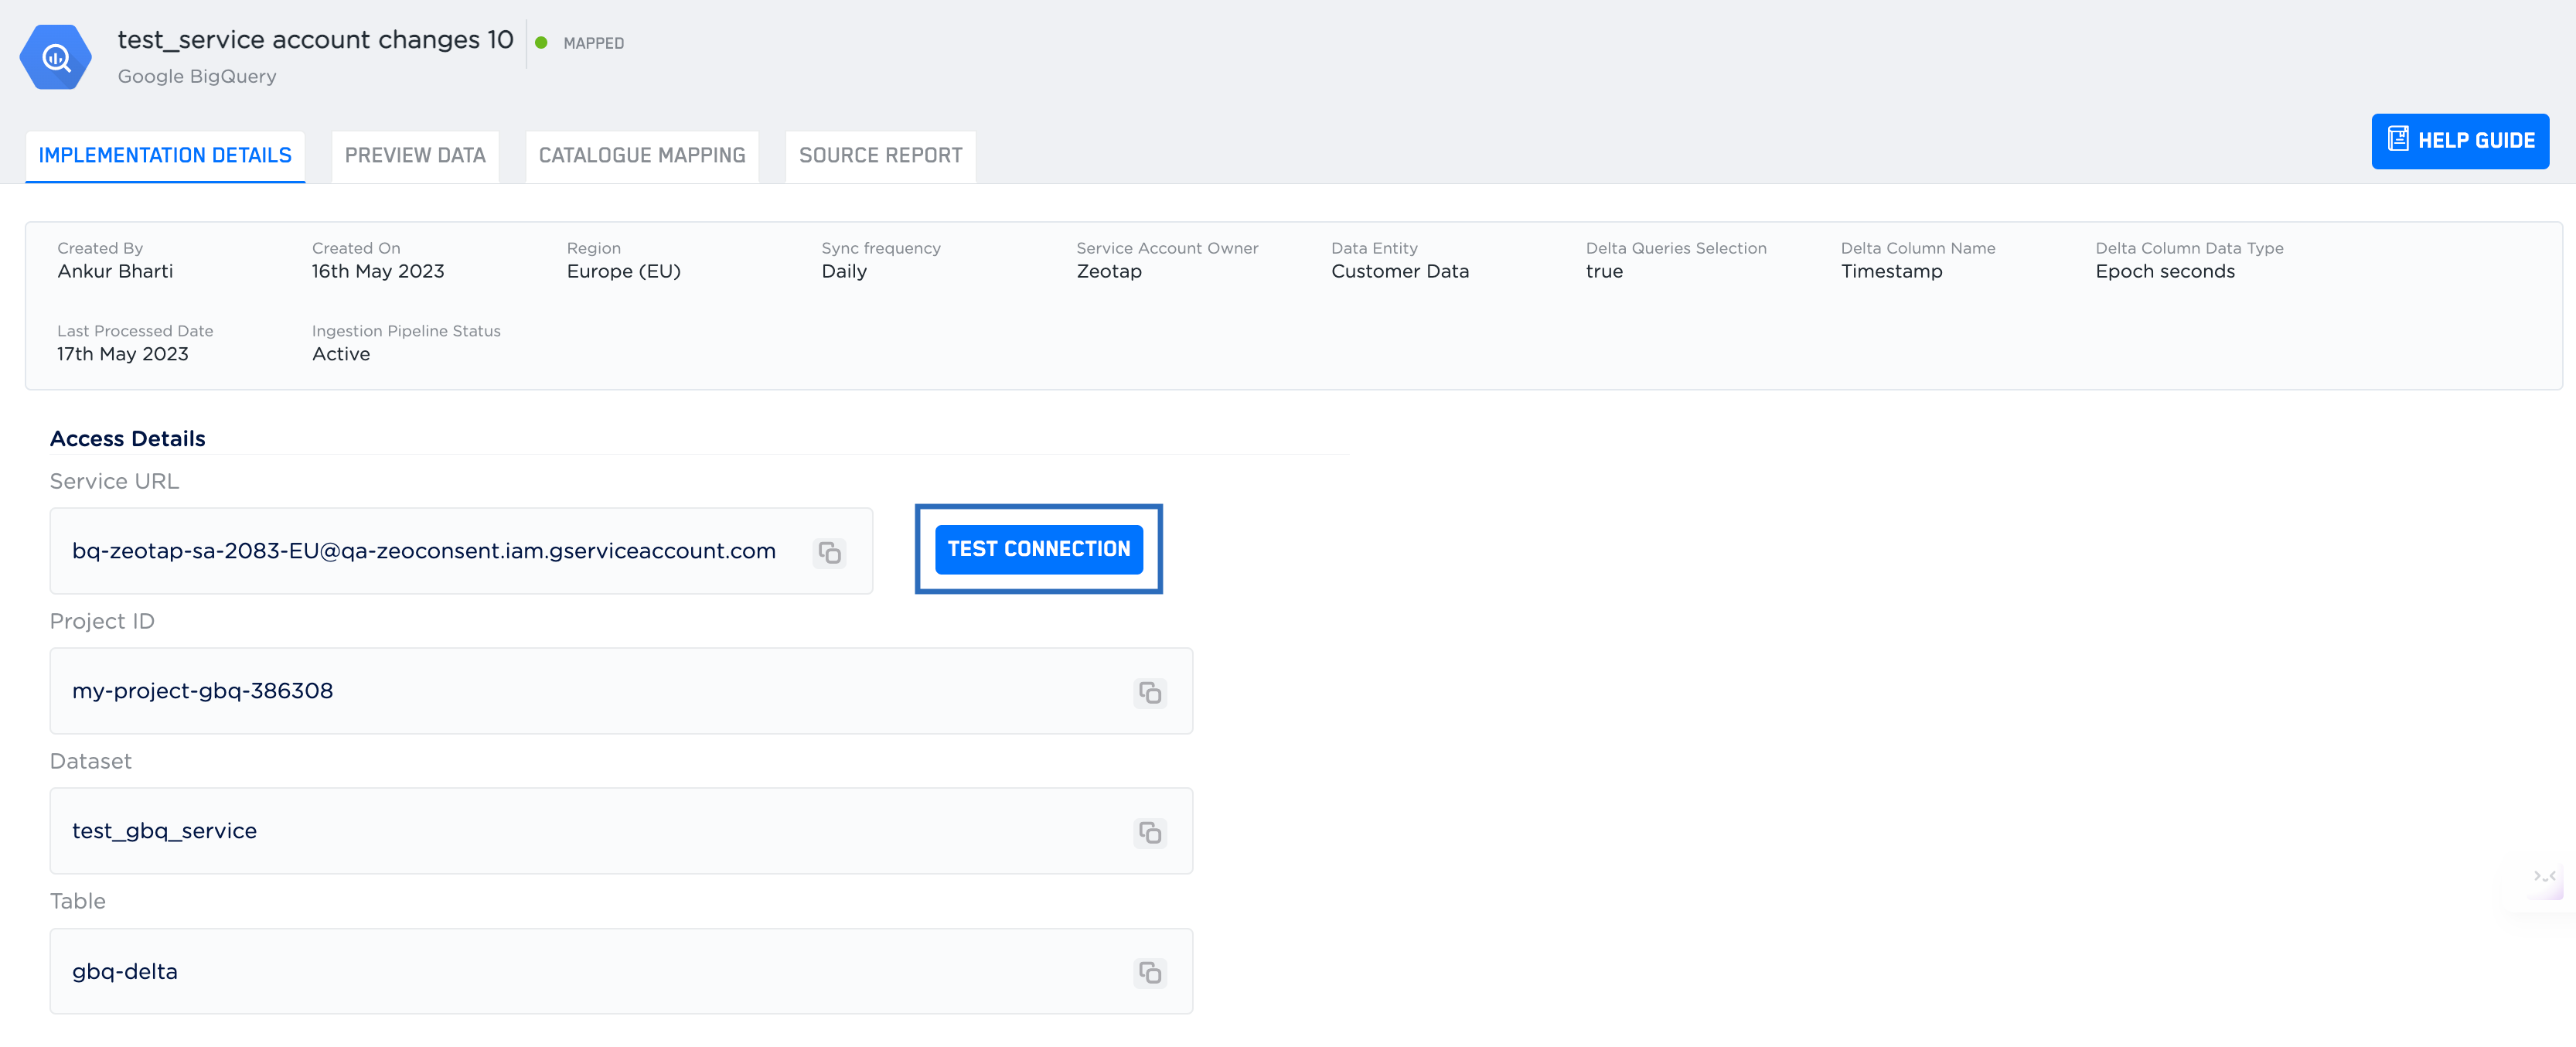
Upon successfully creating the source within Zeotap CDP, go to the IMPLEMENTATION DETAILS tab. Under this tab, you can find details about the created source based on the Service Account Owner selected.Scenario 1
If you have selected Zeotap as the Service Account Owner while creating the source, then perform the following steps to integrate the source with the Google BigQuery platform: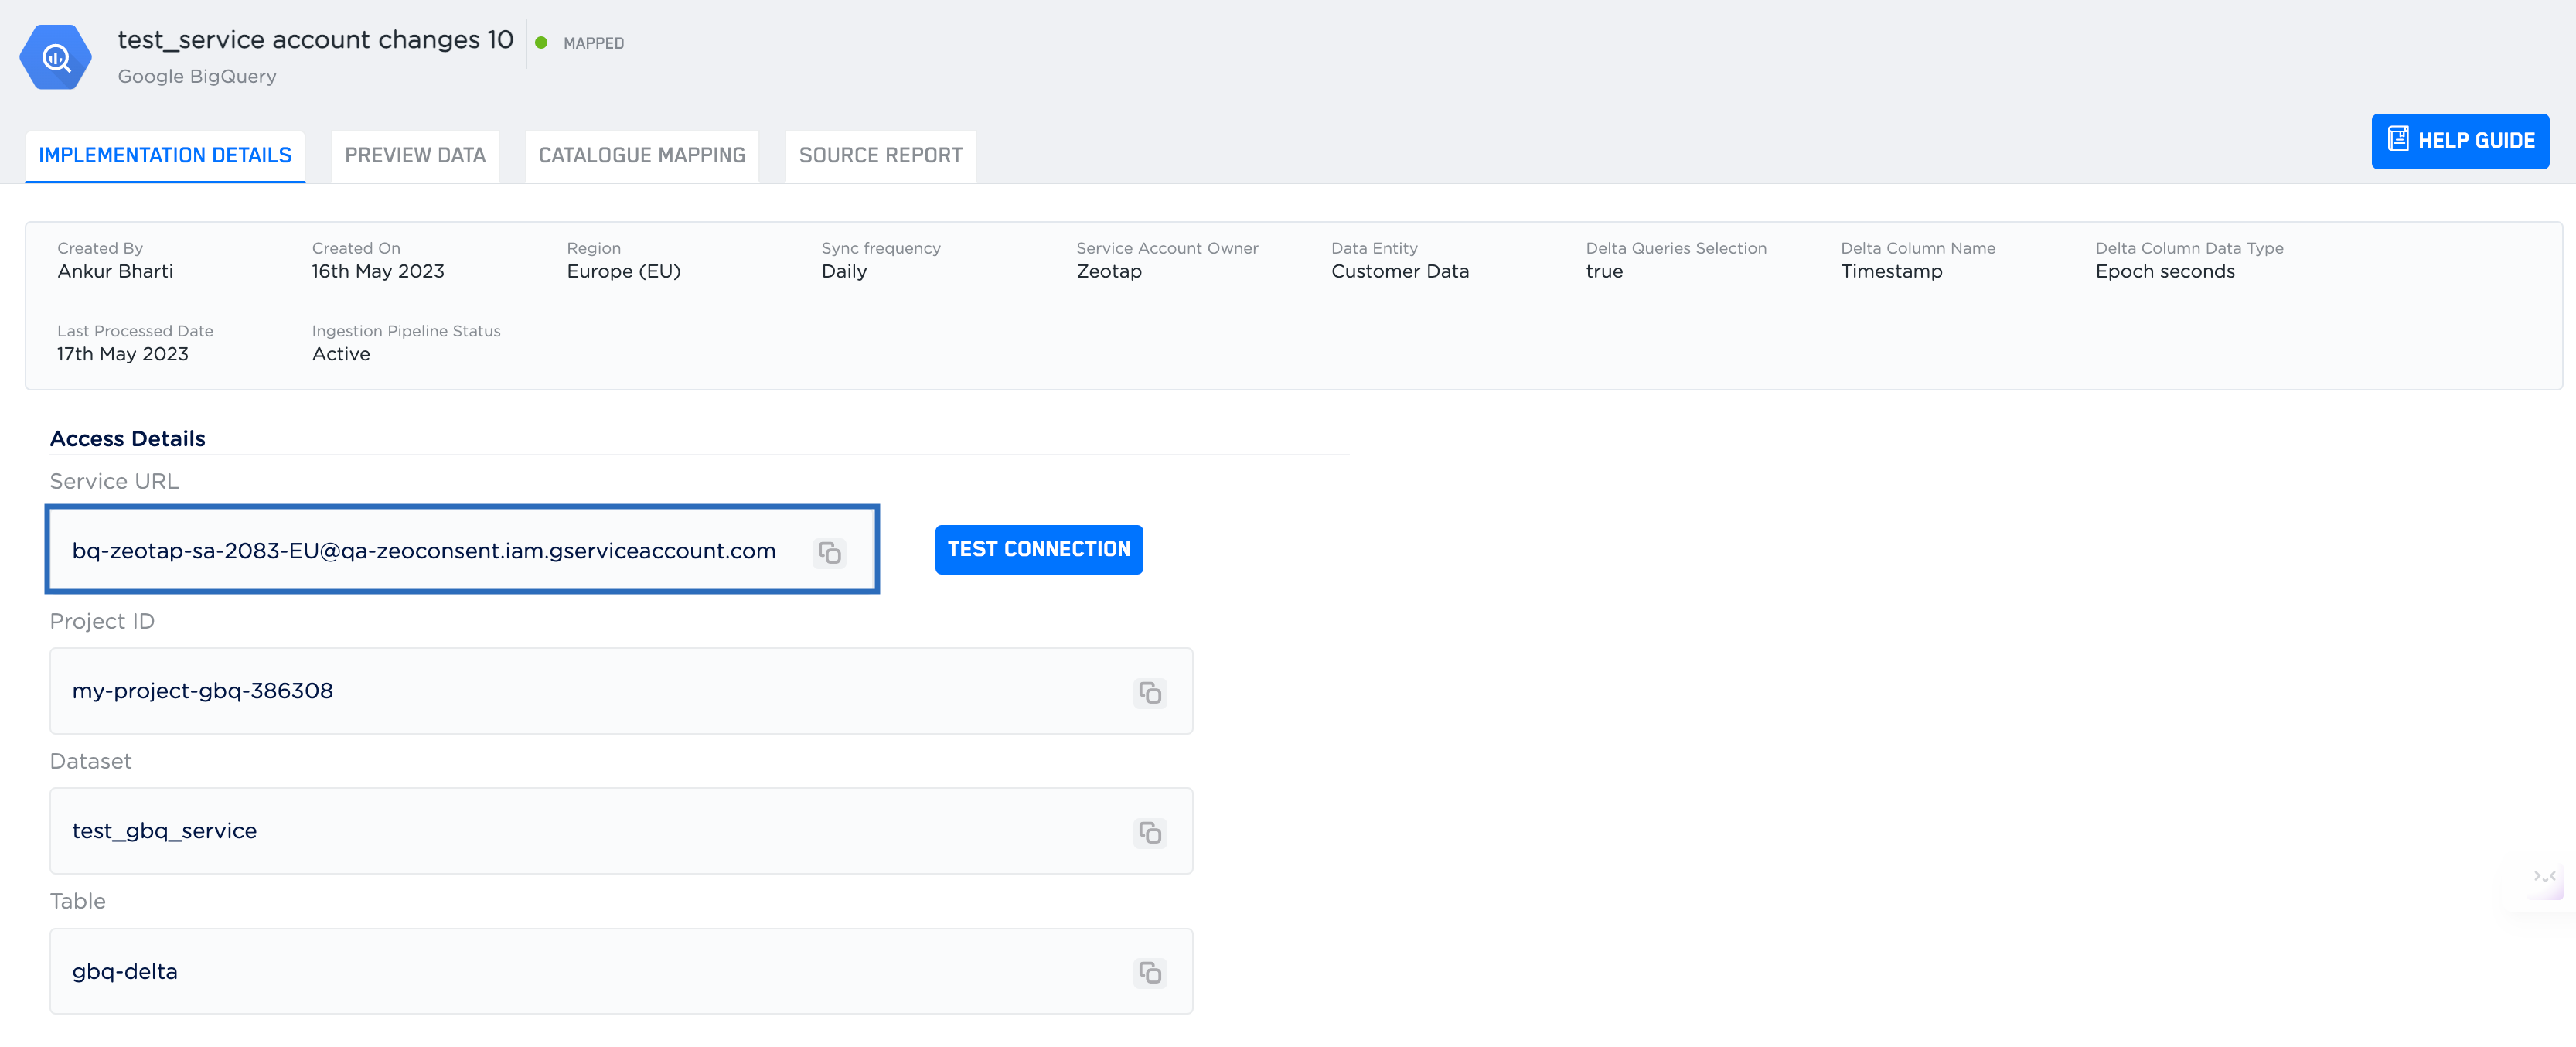
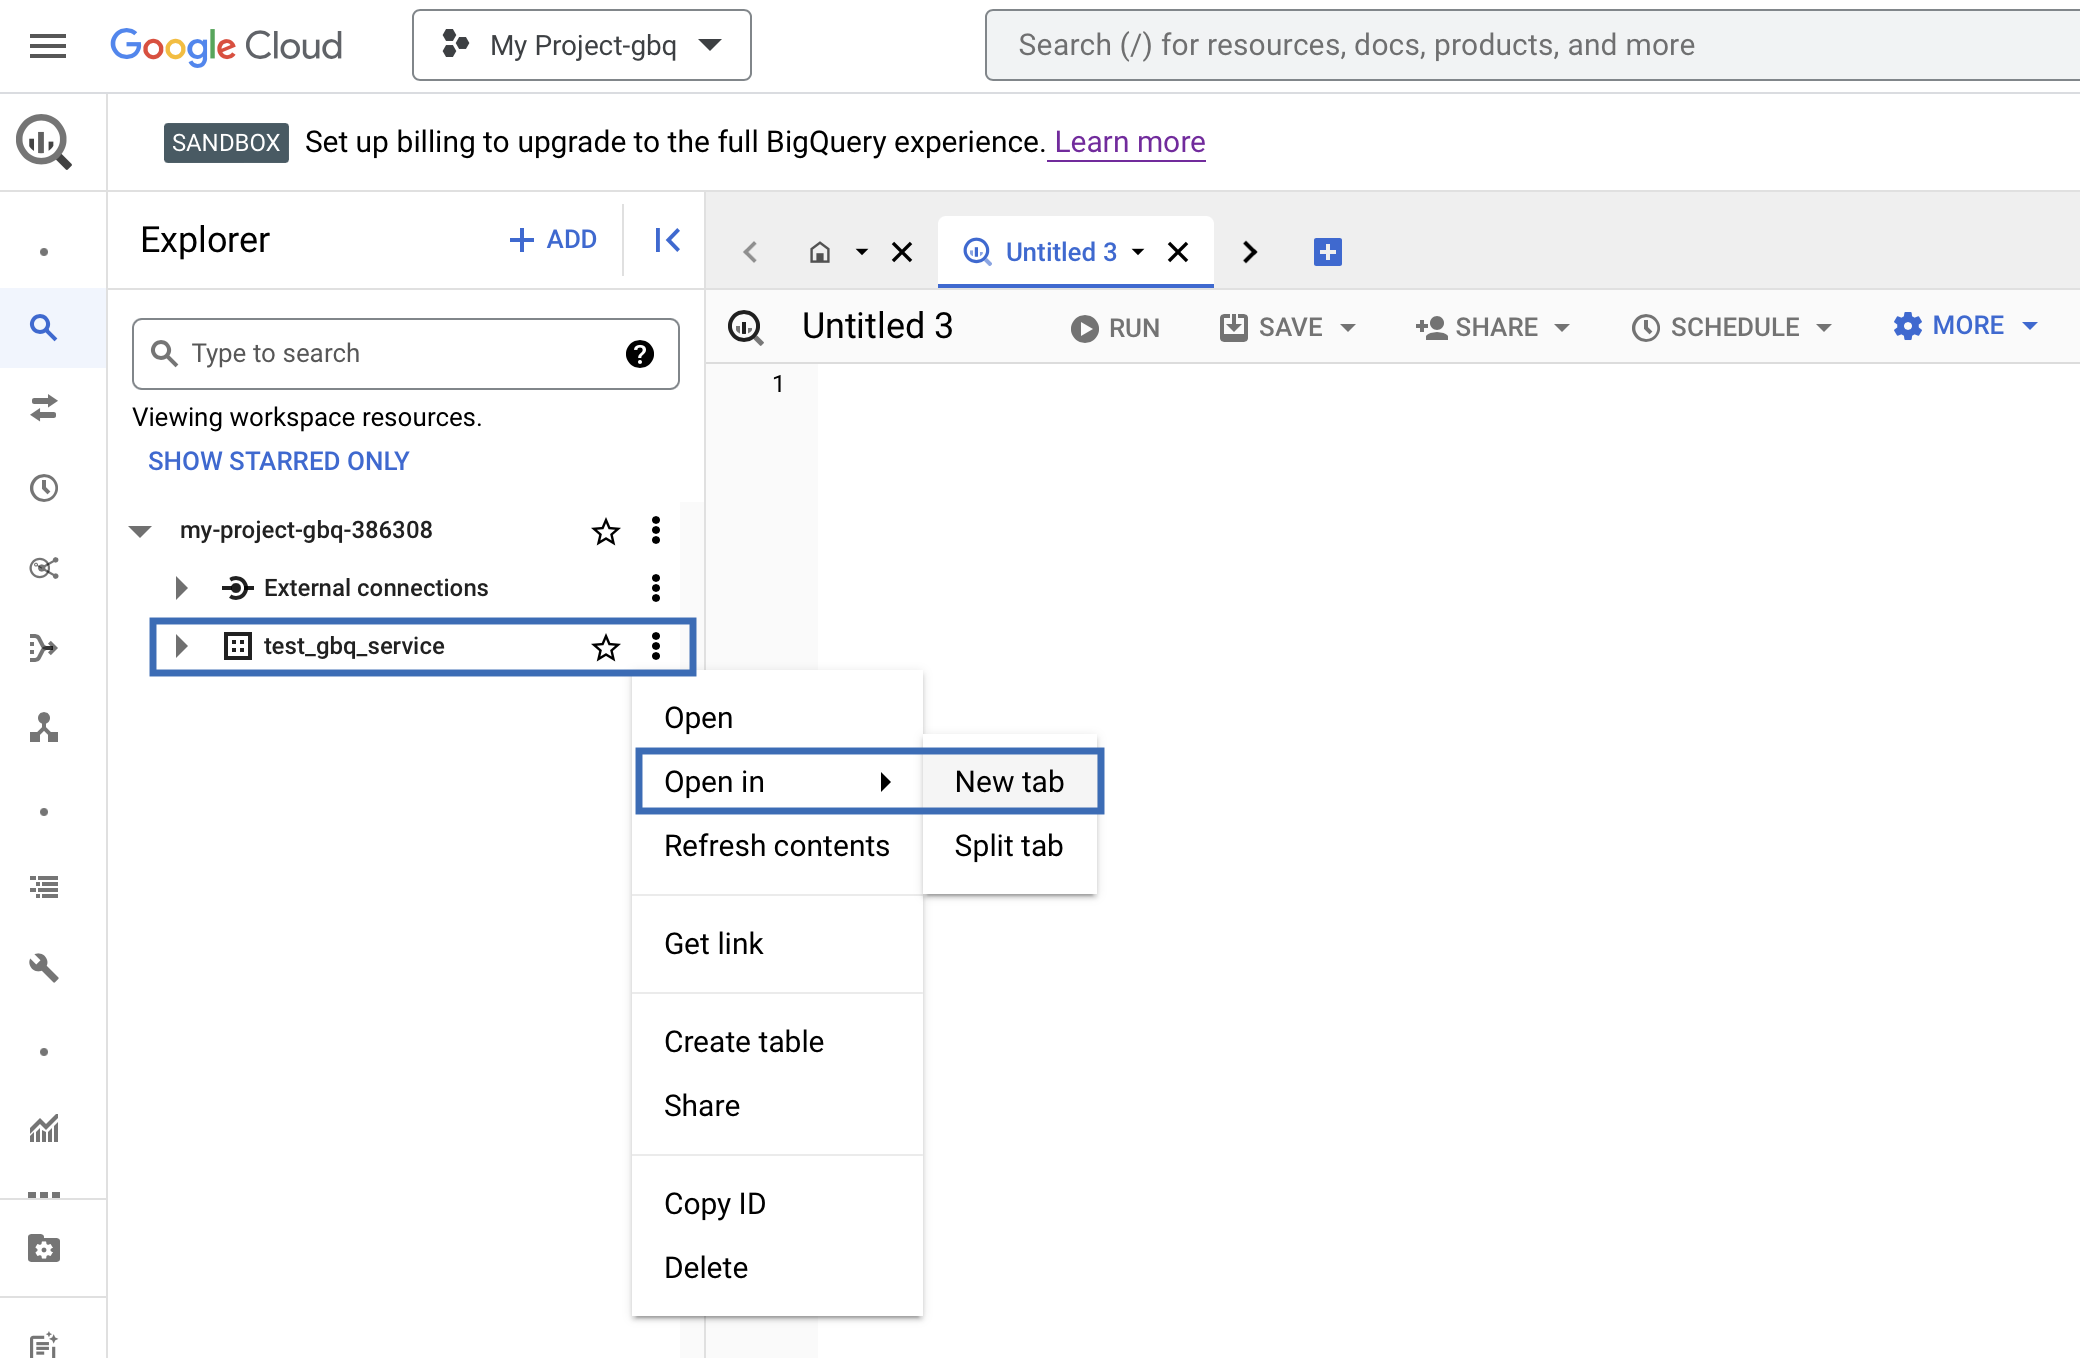
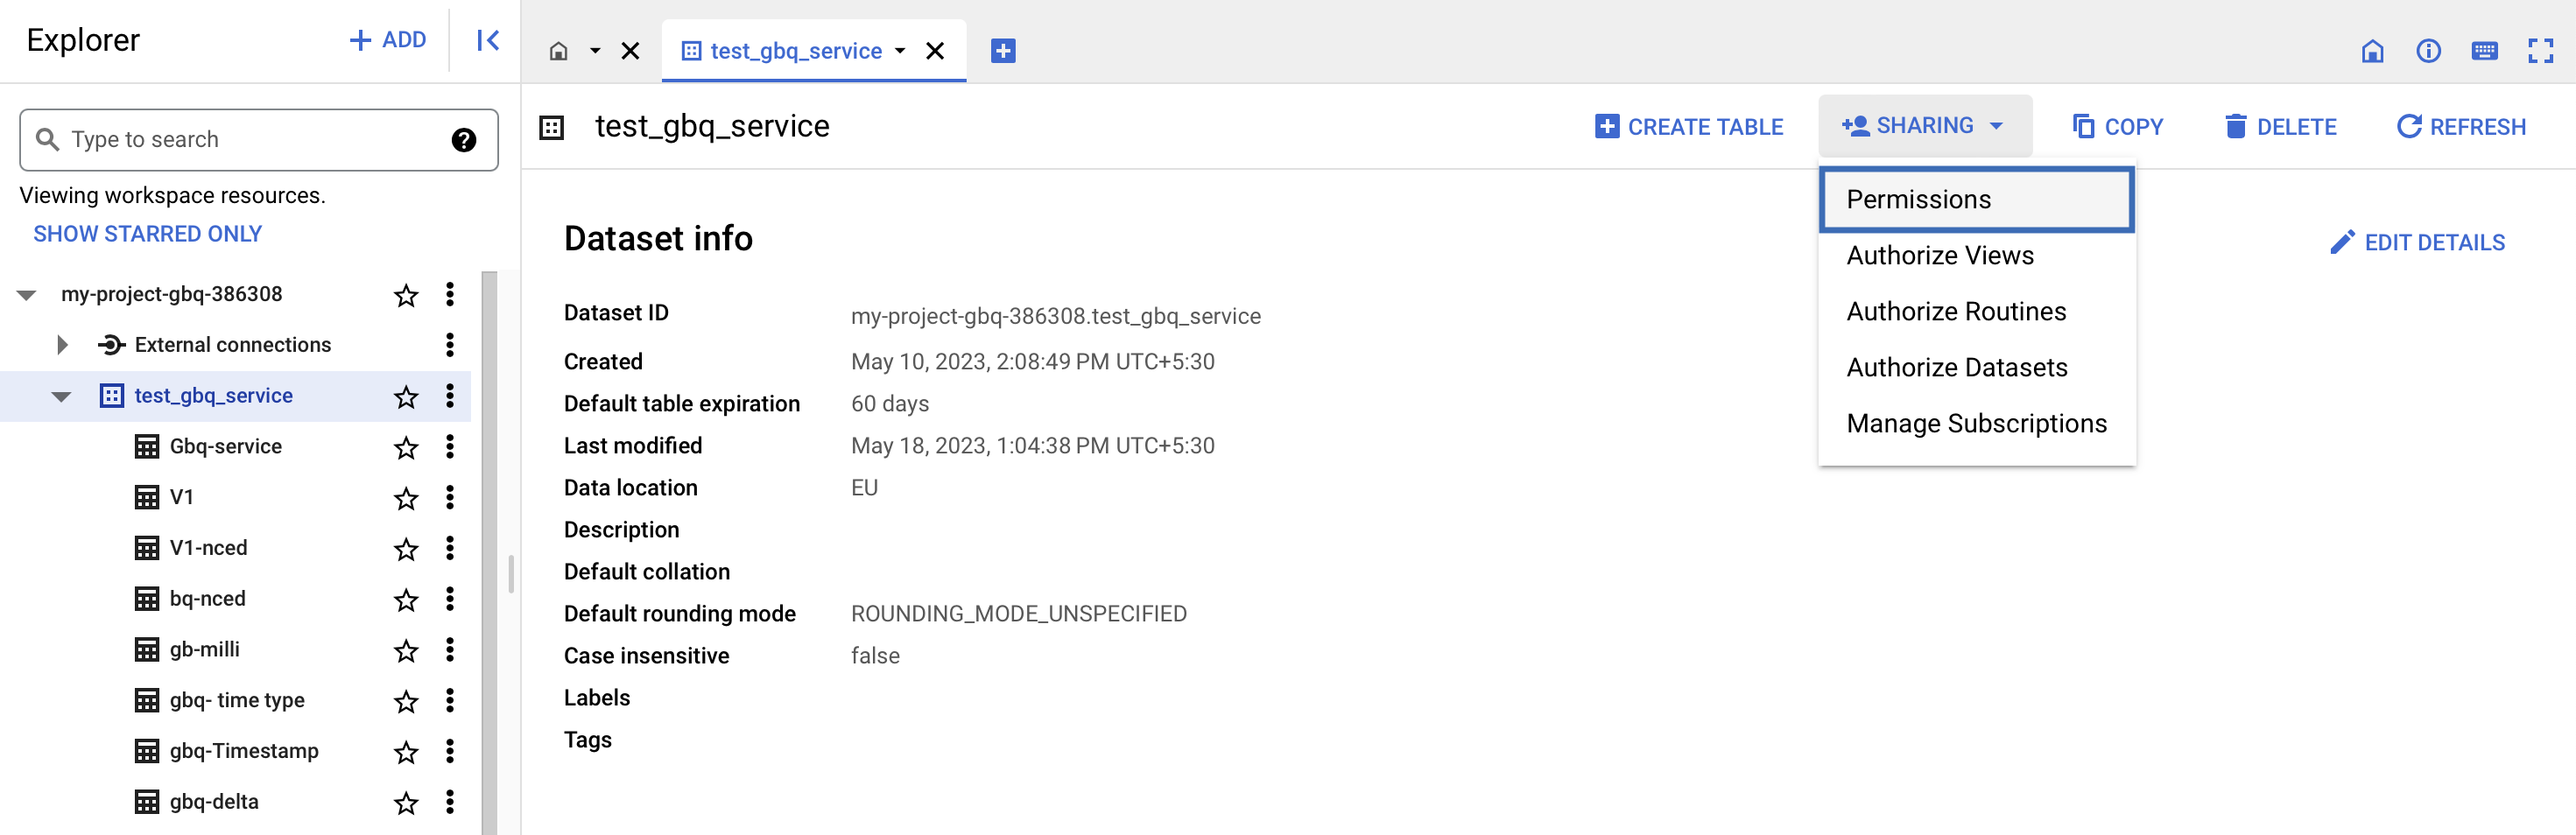
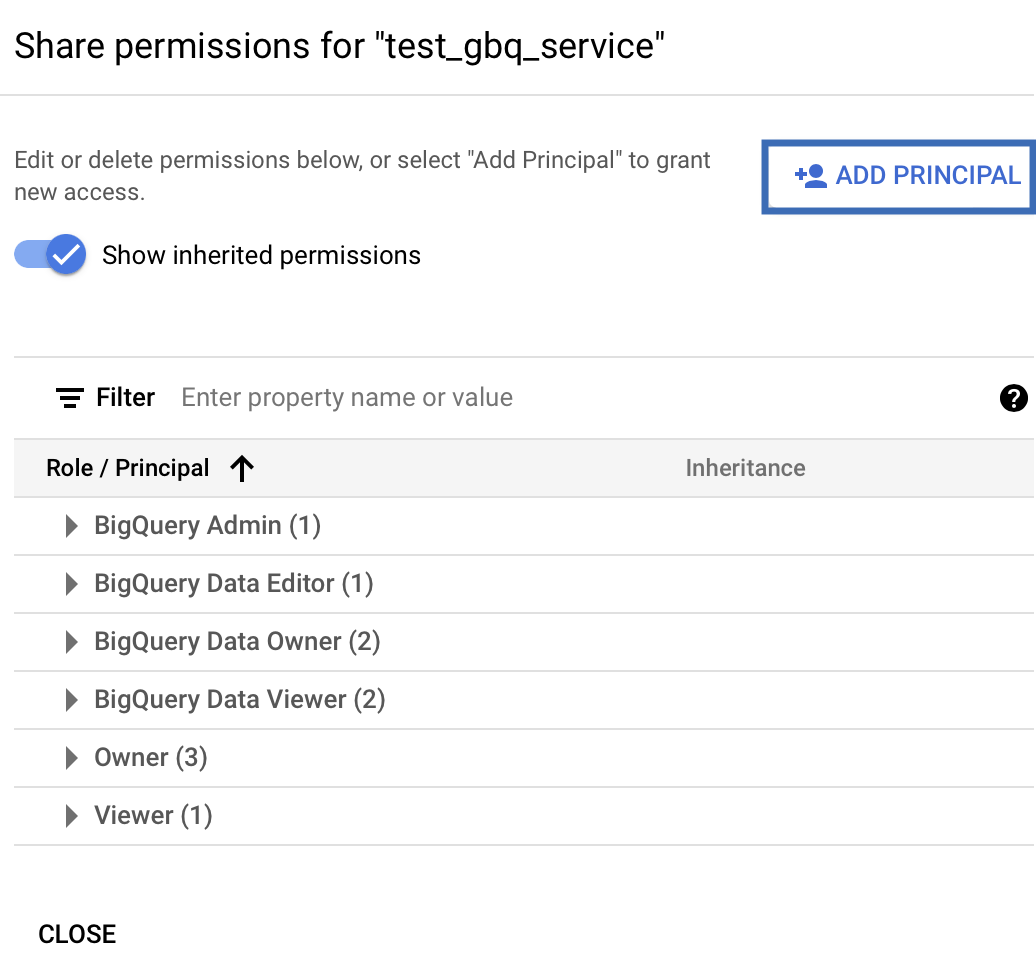
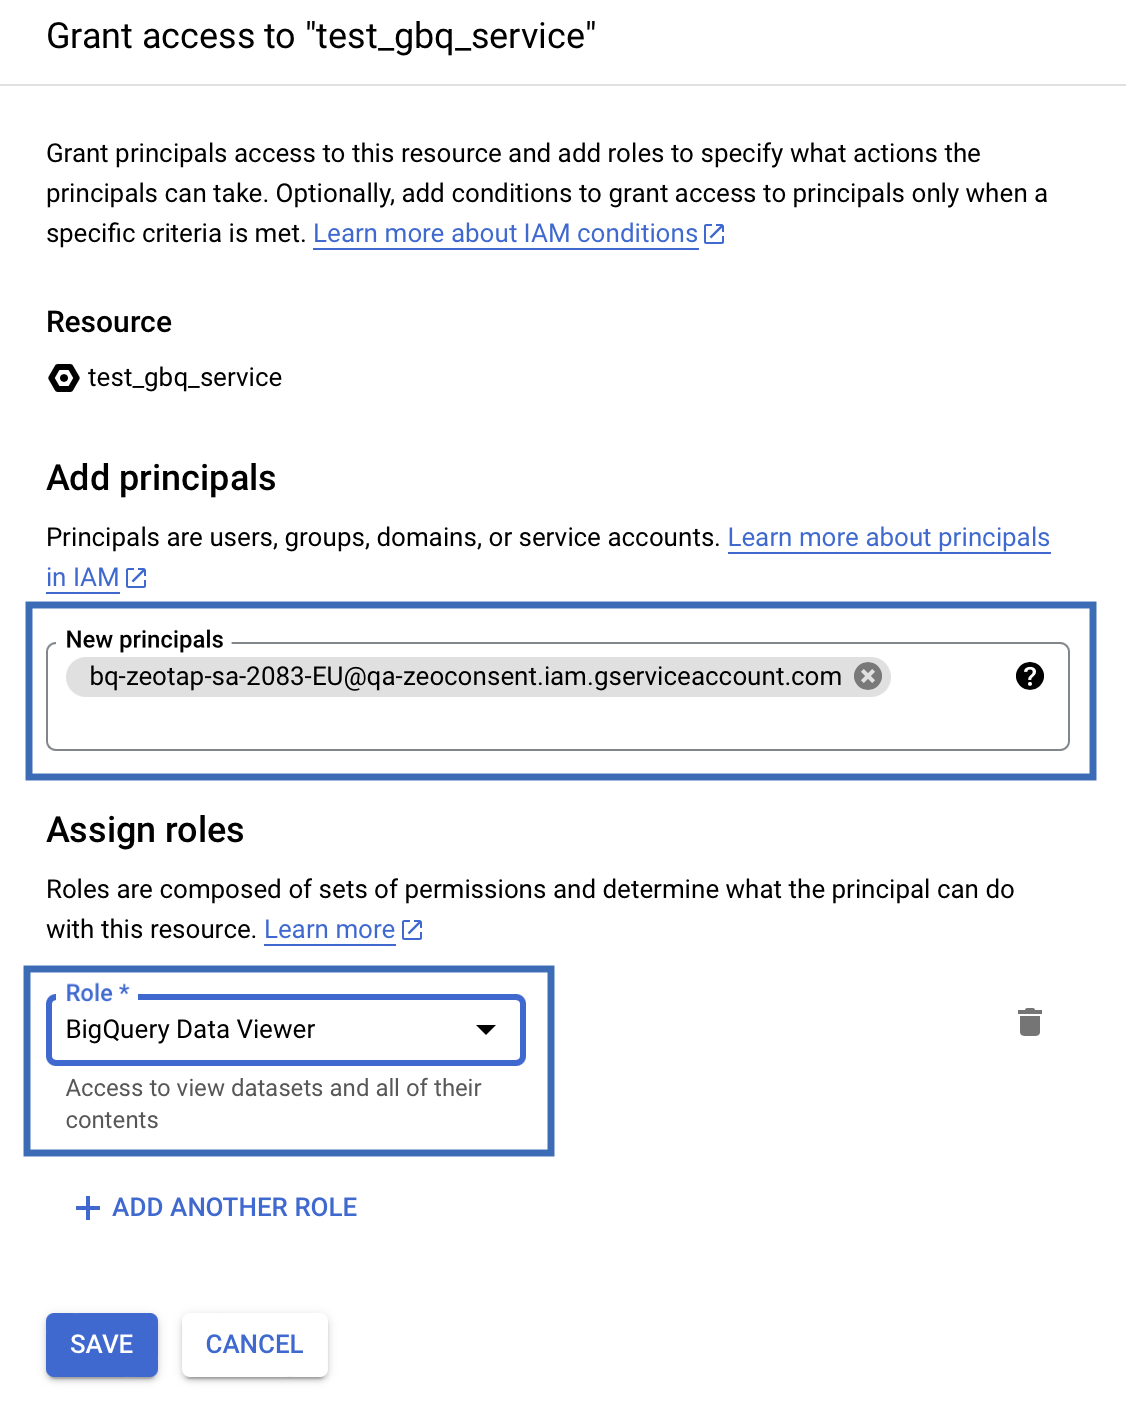
Under Add principals, in the New principals field, paste the Service URL that you have copied earlier.

Scenario 2
If you have selected Customer as the Service Account Owner while creating the source, then the IMPLEMENTATION DETAILS tab appears as shown in the image below. In this case, no additional steps are needed to integrate the source with the Google BigQuery platform.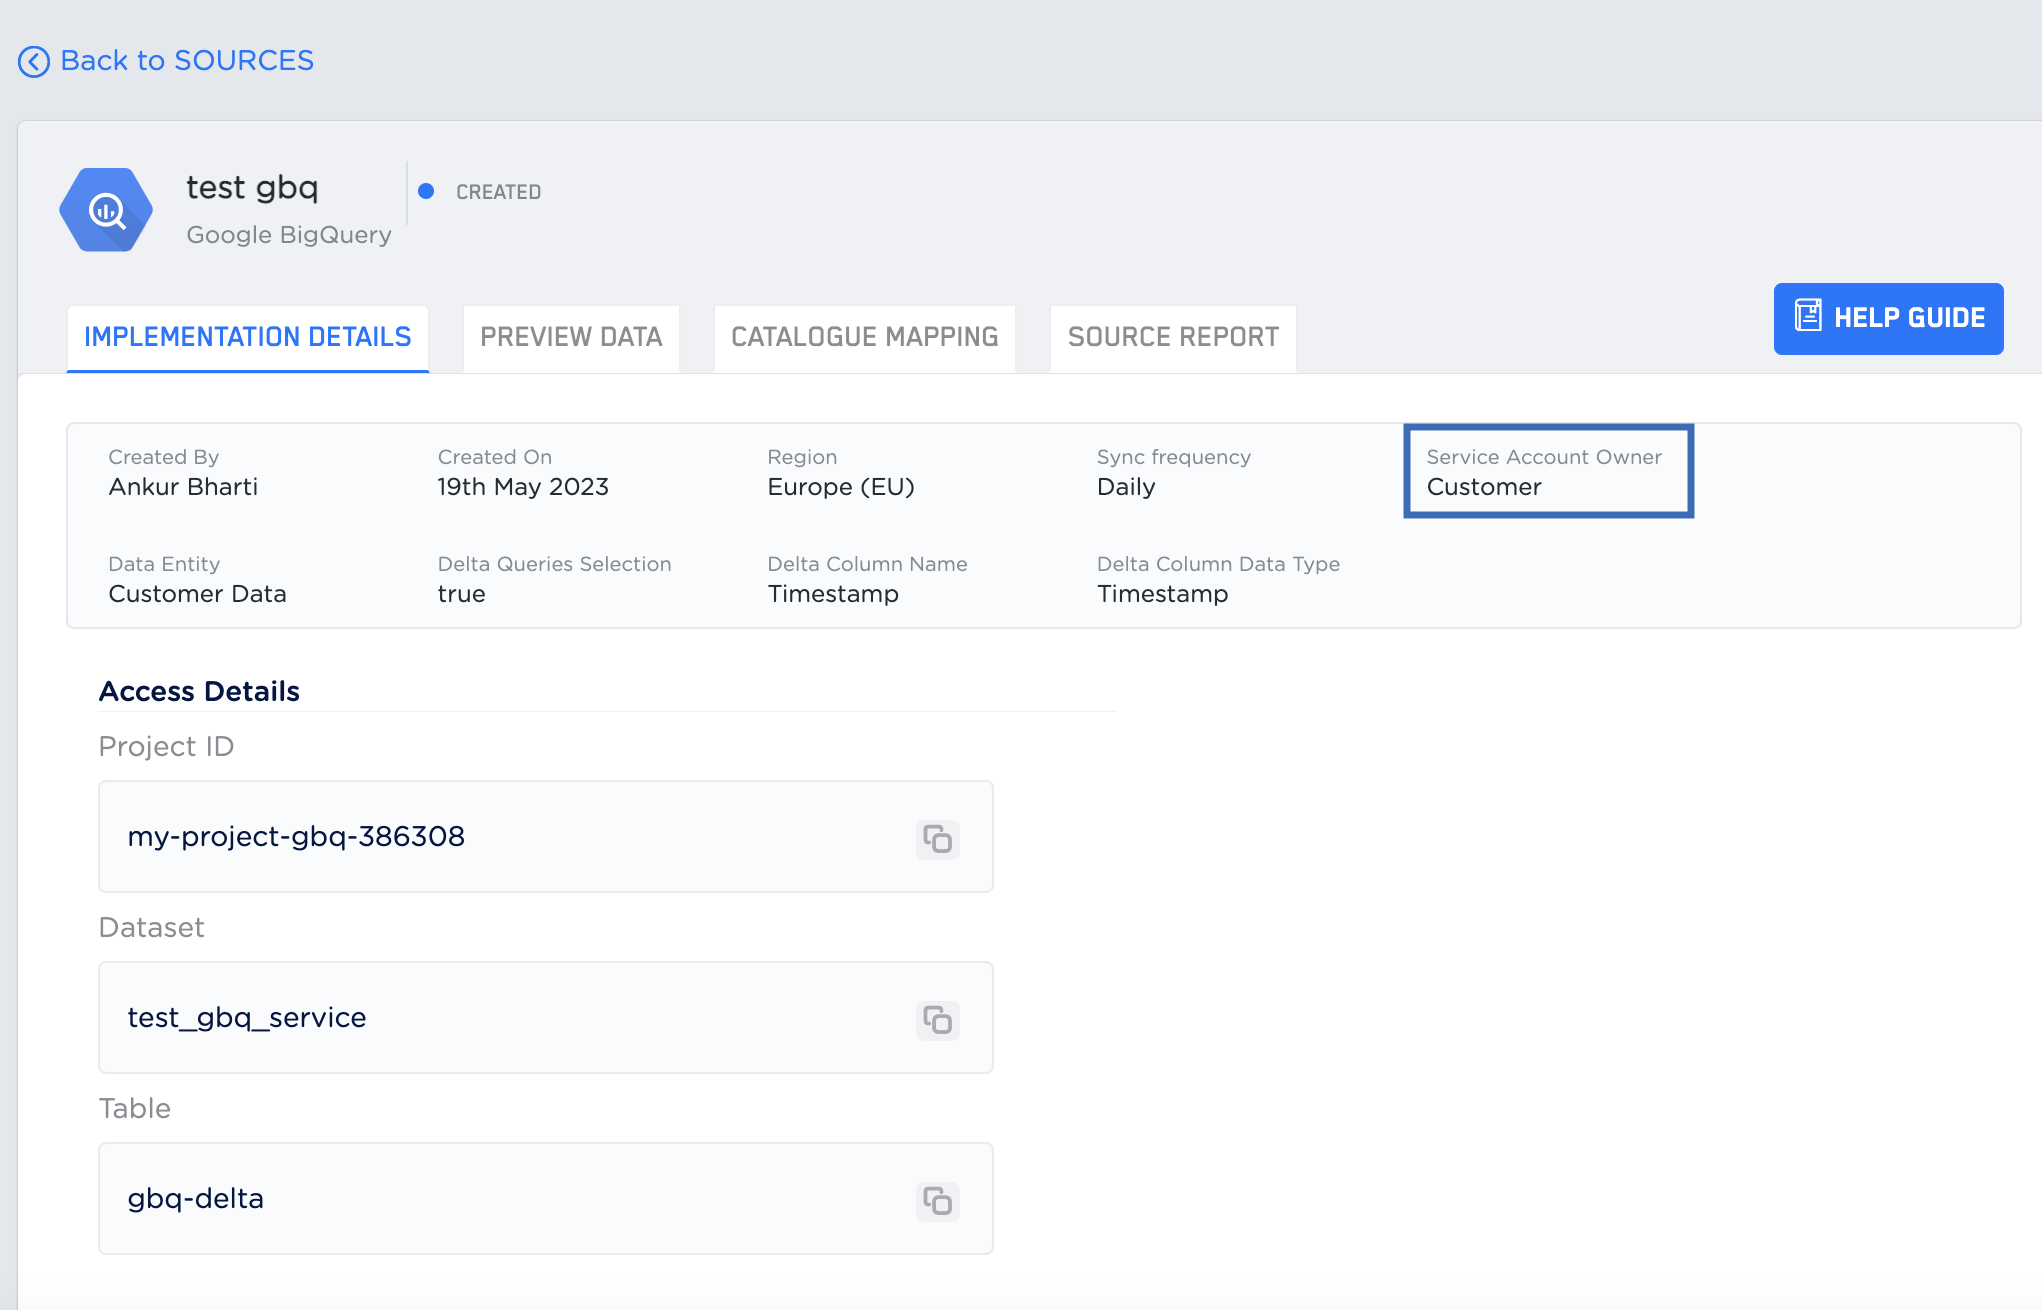
Related Topics
- For information about how to map the Catalogue for Customer Data (CE), refer here.
- For information about how to map the Catalogue for Non-Customer Entity (NCE) data, refer here.
- For information about how to add a Non-Customer Entity (NCE) attribute in the Catalogue, refer here.
- For information about Join Key Enricher and how to configure it, refer here.