Overview
Apache Kafka is an open-source distributed event streaming platform used by thousands of companies for high-performance data pipelines, streaming analytics, data integration, and mission-critical applications. By integrating Kafka with Zeotap’s Customer Data Platform (CDP), you can design and execute customer journeys based on real-time customer behavior using a centralized data streaming platform.Prerequisites
Following details are required while creating the Kafka source
1. Topic name
- This is the name of the topic in Kafka from which the data needs to be ingested into Zeotap.
2. Kafka Broker Host
- Check the Kafka broker configuration in the Kafka installation directory, typically in the server.properties file. Look for the listeners property, which specifies the broker’s hostname or IP address.
- Alternatively, ask the administrator managing the Kafka cluster.
3. Broker API Key and Secret
- If the Kafka broker requires authentication, these credentials are usually provided by the administrator or through the Kafka management interface of the cloud provider (e.g., Confluent Cloud, AWS MSK).
- For Confluent Cloud, you can find these in the “API Keys” section under the ” Cluster Settings” tab.
4. Consumer Group ID
- This is the identifier for a group of consumers that work together to consume messages from a Kafka topic.
5. Data format
- This is the format of data that is ingested. Currently AVRO and JSON format are supported.
- There would be additional details related to Schema when AVRO format is selected
6. Schema Registry URL
- This field is required only for AVRO data format.
- If using a schema registry, the URL is provided during the setup or can be found in the configuration settings of the Kafka deployment.
- For Confluent Schema Registry, the URL is typically listed in the “Schema Registry” section of the Confluent Cloud dashboard.
7. Schema API Key and Secret
- This field is required only for AVRO data format.
- Like the broker credentials, these are provided by the administrator or through the schema registry’s management interface.
- In Confluent Cloud, navigate to the “Schema Registry”, and then access the “API Keys” section to generate or view the credentials.
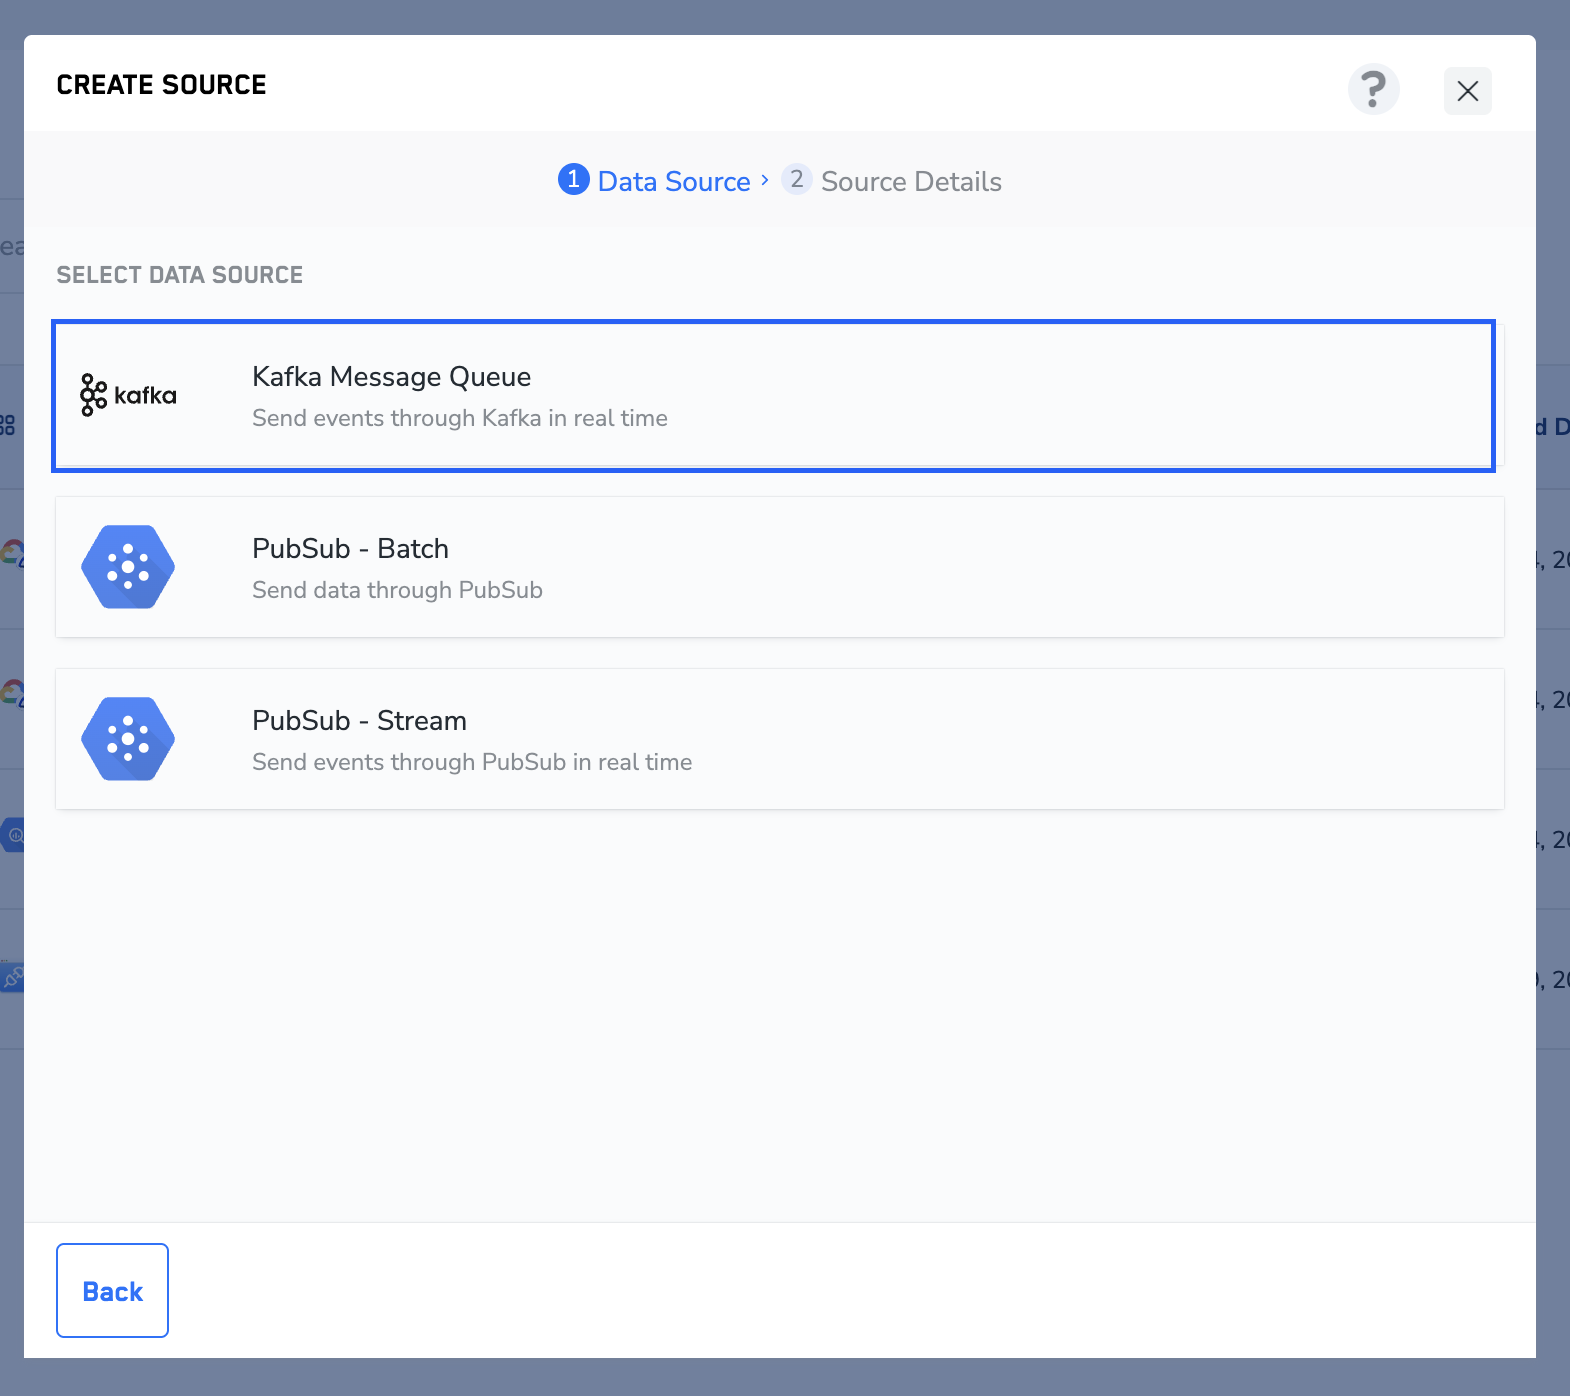
Steps to Create Kafka source
Perform the following steps to create a Kafka Streaming Source: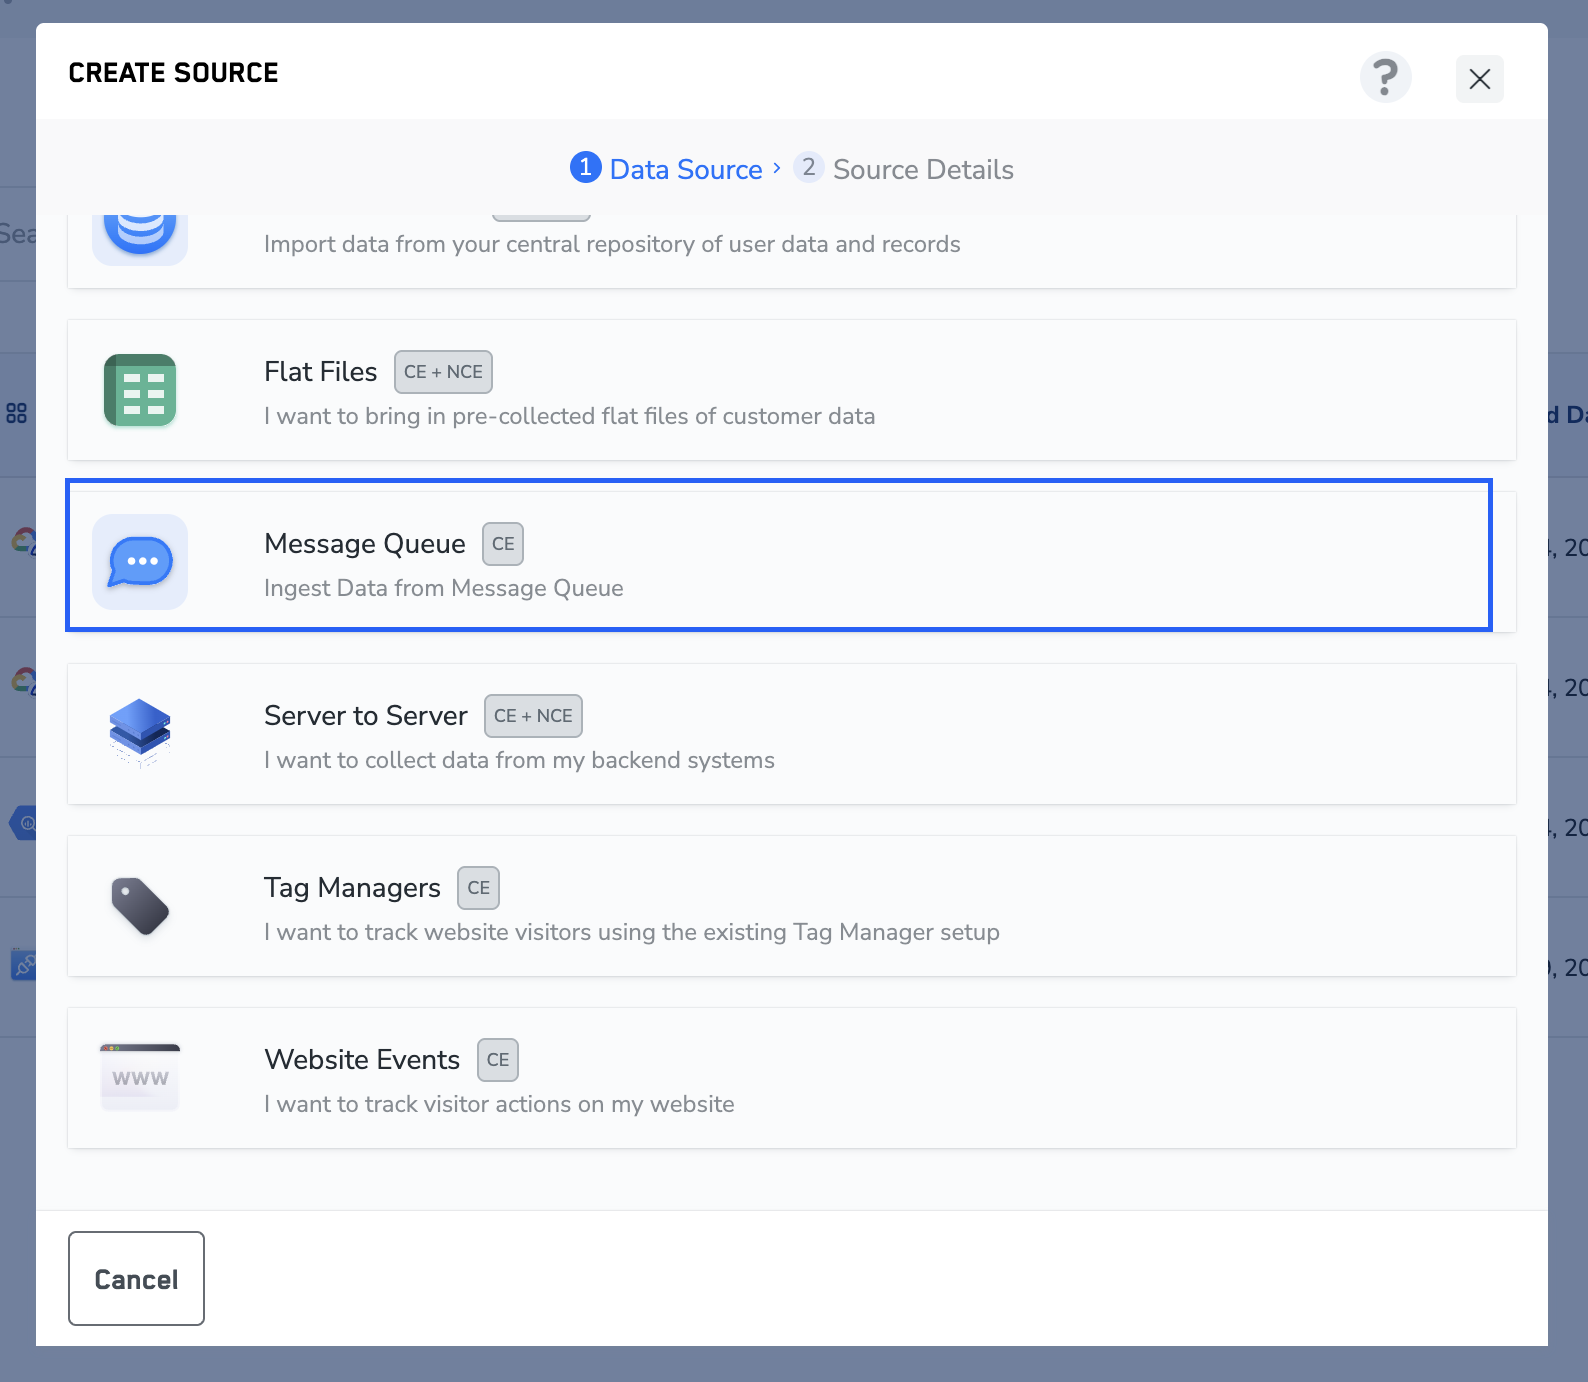
Under Data Entity, depending on the type of data that you want to ingest, choose either Customer Data or Non Customer Data and proceed with the source creation. To know more about Customer Data and Non Customer Data, refer here.
Enter the Topic name, Kafka Broker Host, Broker API Key, Broker API Secret and Consumer group ID obtained from your Kafka account as mentioned in the prerequisites section.
Select the format of data that will be sent from Kafka. The current support formats are AVRO and JSON.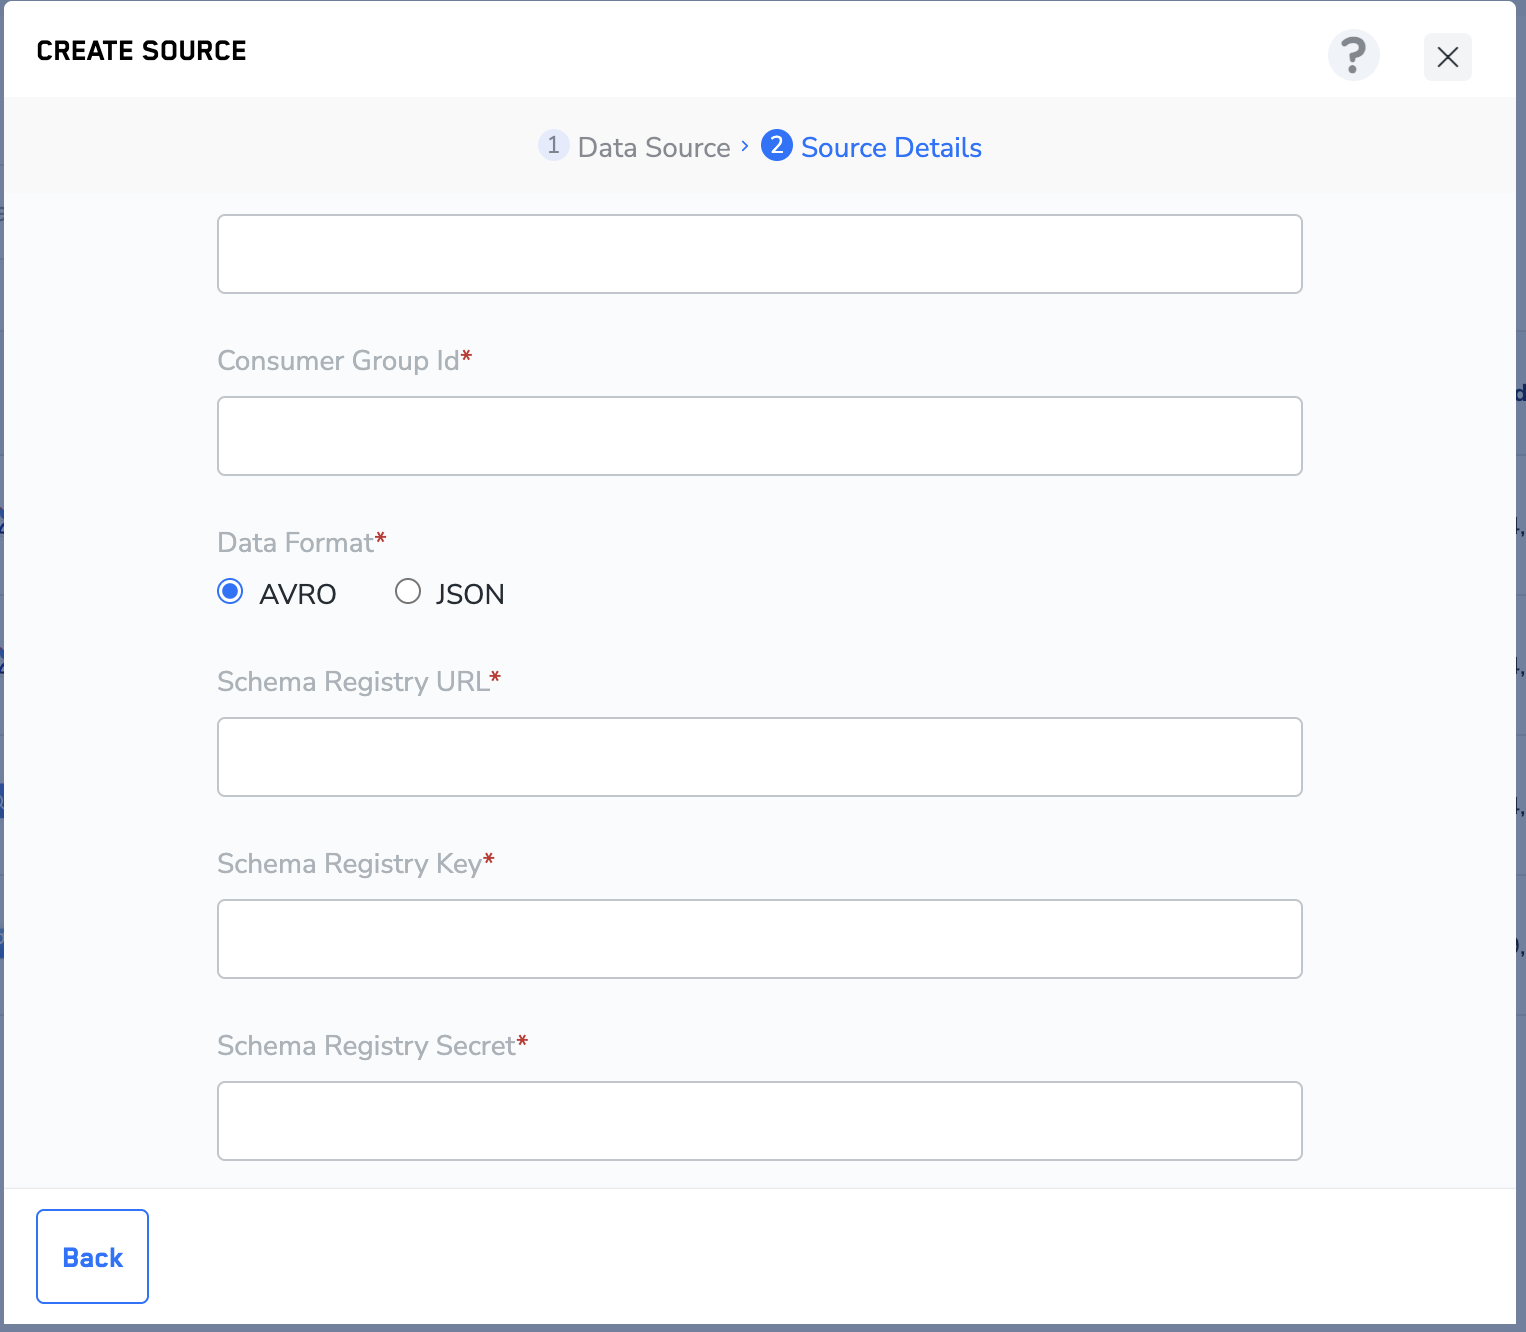
If AVRO format is selected, enter the Schema Registry URL, Schema Registry Key and Schema Registry Secret from your Kafka account.
Click CREATE SOURCE. Upon successful creation, all the fields that were entered while creating the source are displayed under the IMPLEMENTATION DETAILS tab along with all the important information related to the integration, as shown in the image below.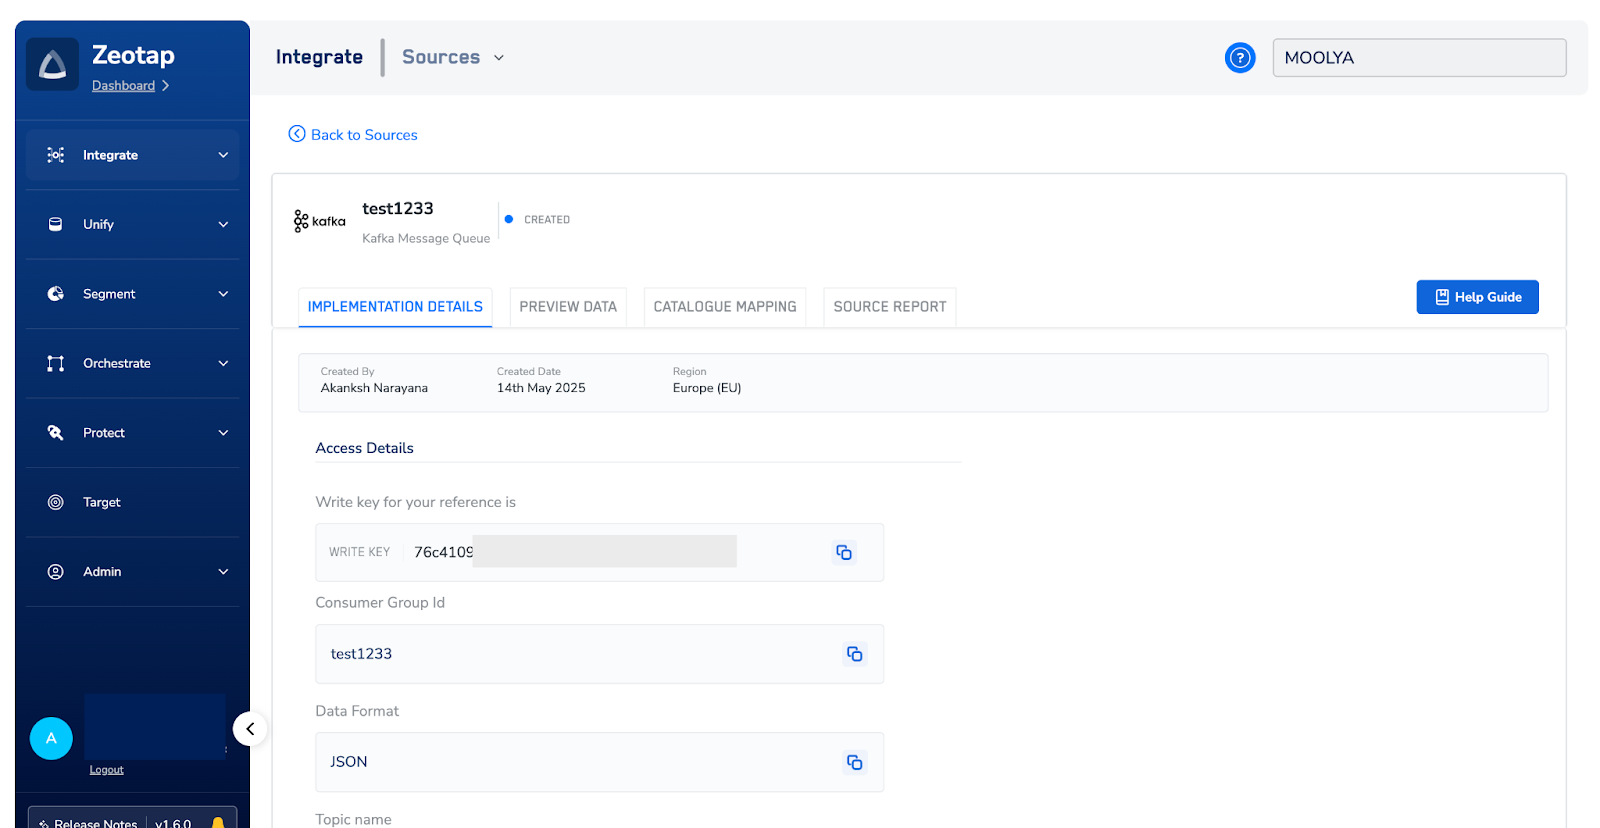
Once the connection between Zeotap and Kafka is successfully established, you can view the data flowing in into the system under the PREVIEW DATA tab.