Prerequisite
Before you create an Amazon S3 Source in Zeotap CDP, note that you must have an account with Amazon S3 and the data intended for import to Zeotap CDP resides within that account. Ensure that you have the details of the below components related to your Amazon S3 account before proceeding with this integration.Bucket Name
S3 Bucket Region
Folder
Access Token and Secret Access Token
Bucket Name
This is the name of your S3 bucket. You can obtain this information on your Amazon S3 account by navigating to Buckets. In the example shown below, test-adobe-s3-bucket is the bucket name..png?fit=max&auto=format&n=nvqTscX2rya8znmd&q=85&s=285e645295f67b8e7ed9880ed63f79fe)
S3 Bucket Region
This is the geographical location where the Amazon S3 storage is available. You can obtain this information by navigating to the Properties tab under the Amazon S3 bucket as shown in the image below..png?fit=max&auto=format&n=nvqTscX2rya8znmd&q=85&s=d4920504cf29017e61b52e67b48d80d6)
Folder
In Amazon S3, a folder serves as a logical container for organising stored objects within a bucket. In reality, there are no actual folders in Amazon S3. Instead, the folder concept is emulated by employing object key names containing slashes (”/”) to replicate a hierarchical arrangement. You can obtain this information from your Amazon S3 account by navigating to the Objects tab under the Amazon S3 bucket as shown in the image below..png?fit=max&auto=format&n=ROPrHg77hrORMuiL&q=85&s=6b21f4fa5854f281b445578813dcc048)
Access Token and Secret Access Token
These are the security tokens that provide secure access to your Amazon S3 resources. You can obtain the Access Token and Secret Access Token by navigating to the AWS IAM Credentials tab under Security credentials in your Amazon S3 account. Ensure that you have the following permissions to create Access token and Secret access token for your own IAM user:iam:ListAccessKeys – Allows listing the access keys for an IAM user.iam:CreateAccessKey – Allows creating new access keys for an IAM user.
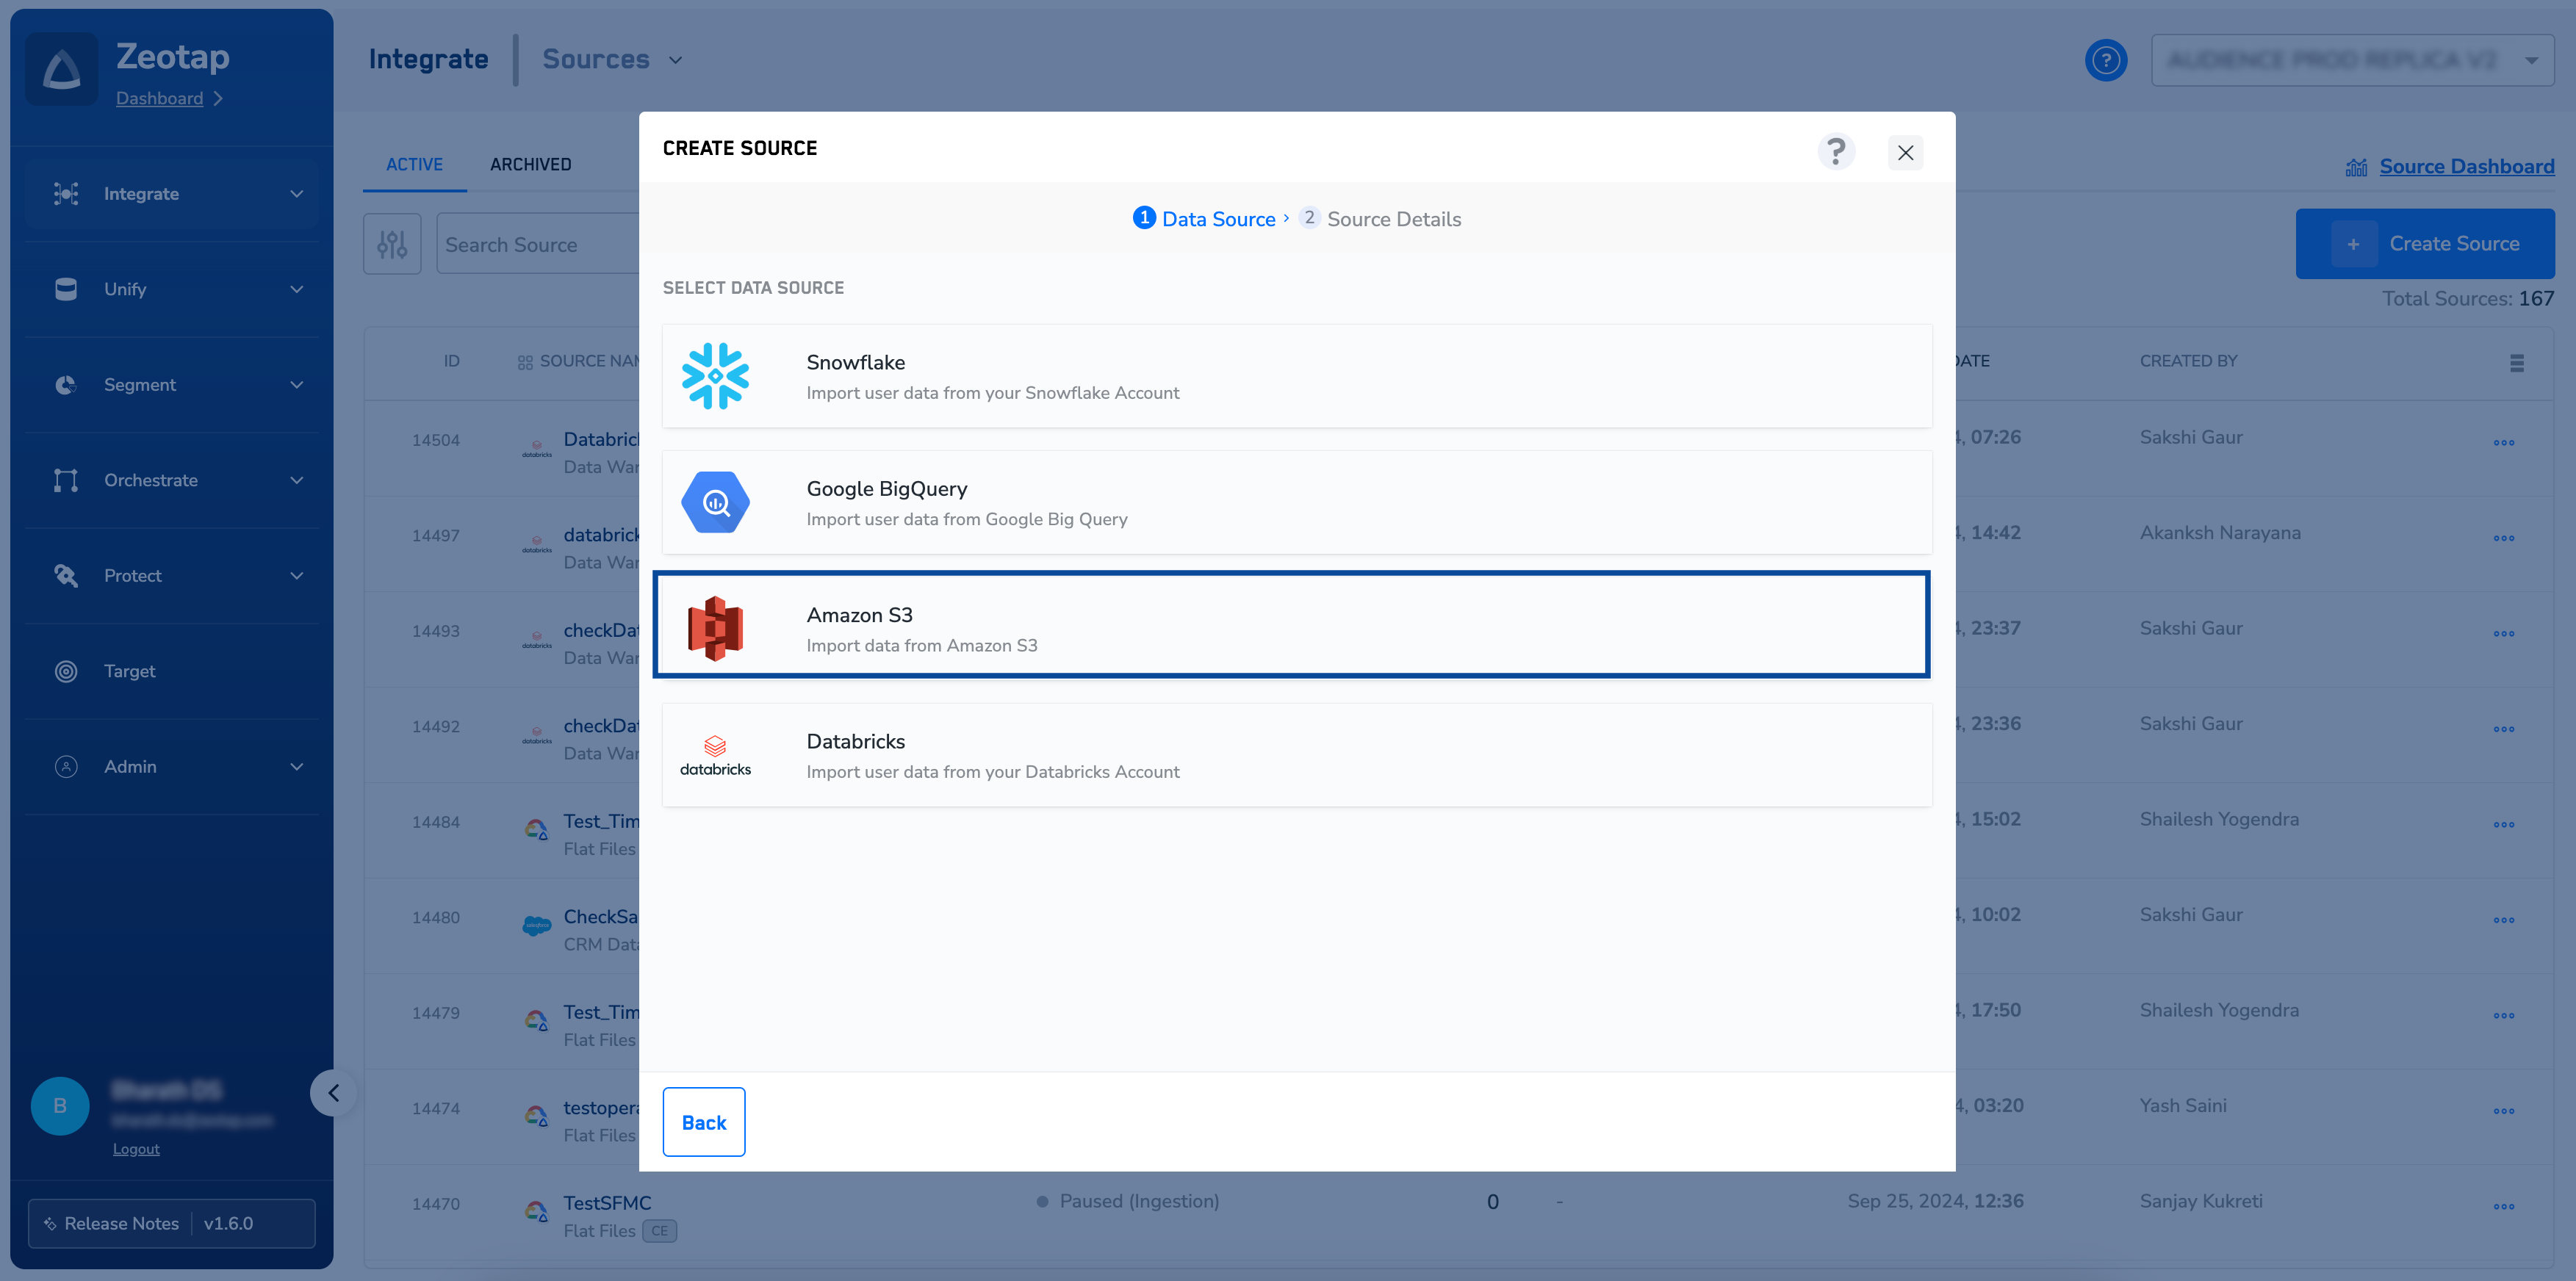
Create an Amazon S3 Source
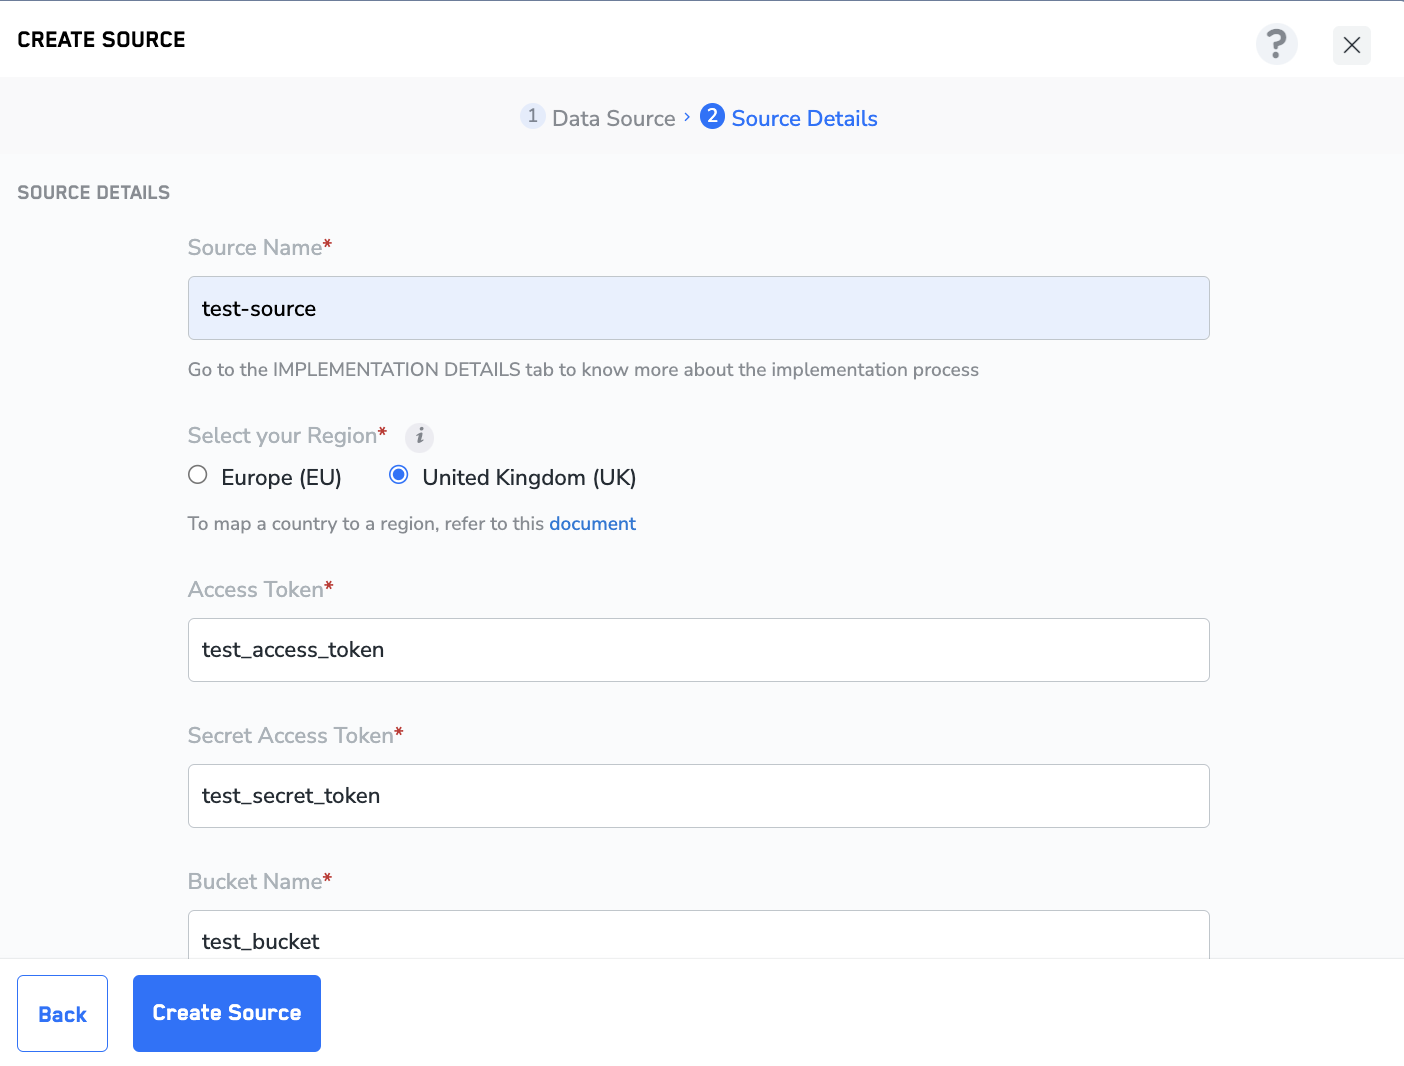
Once you have obtained the above details from your Amazon S3 account, perform the following steps to create an Amazon S3 Source in the Zeotap CDP App:.png?fit=max&auto=format&n=ROPrHg77hrORMuiL&q=85&s=146e94f6110f76970d52baf2ab1e964b)
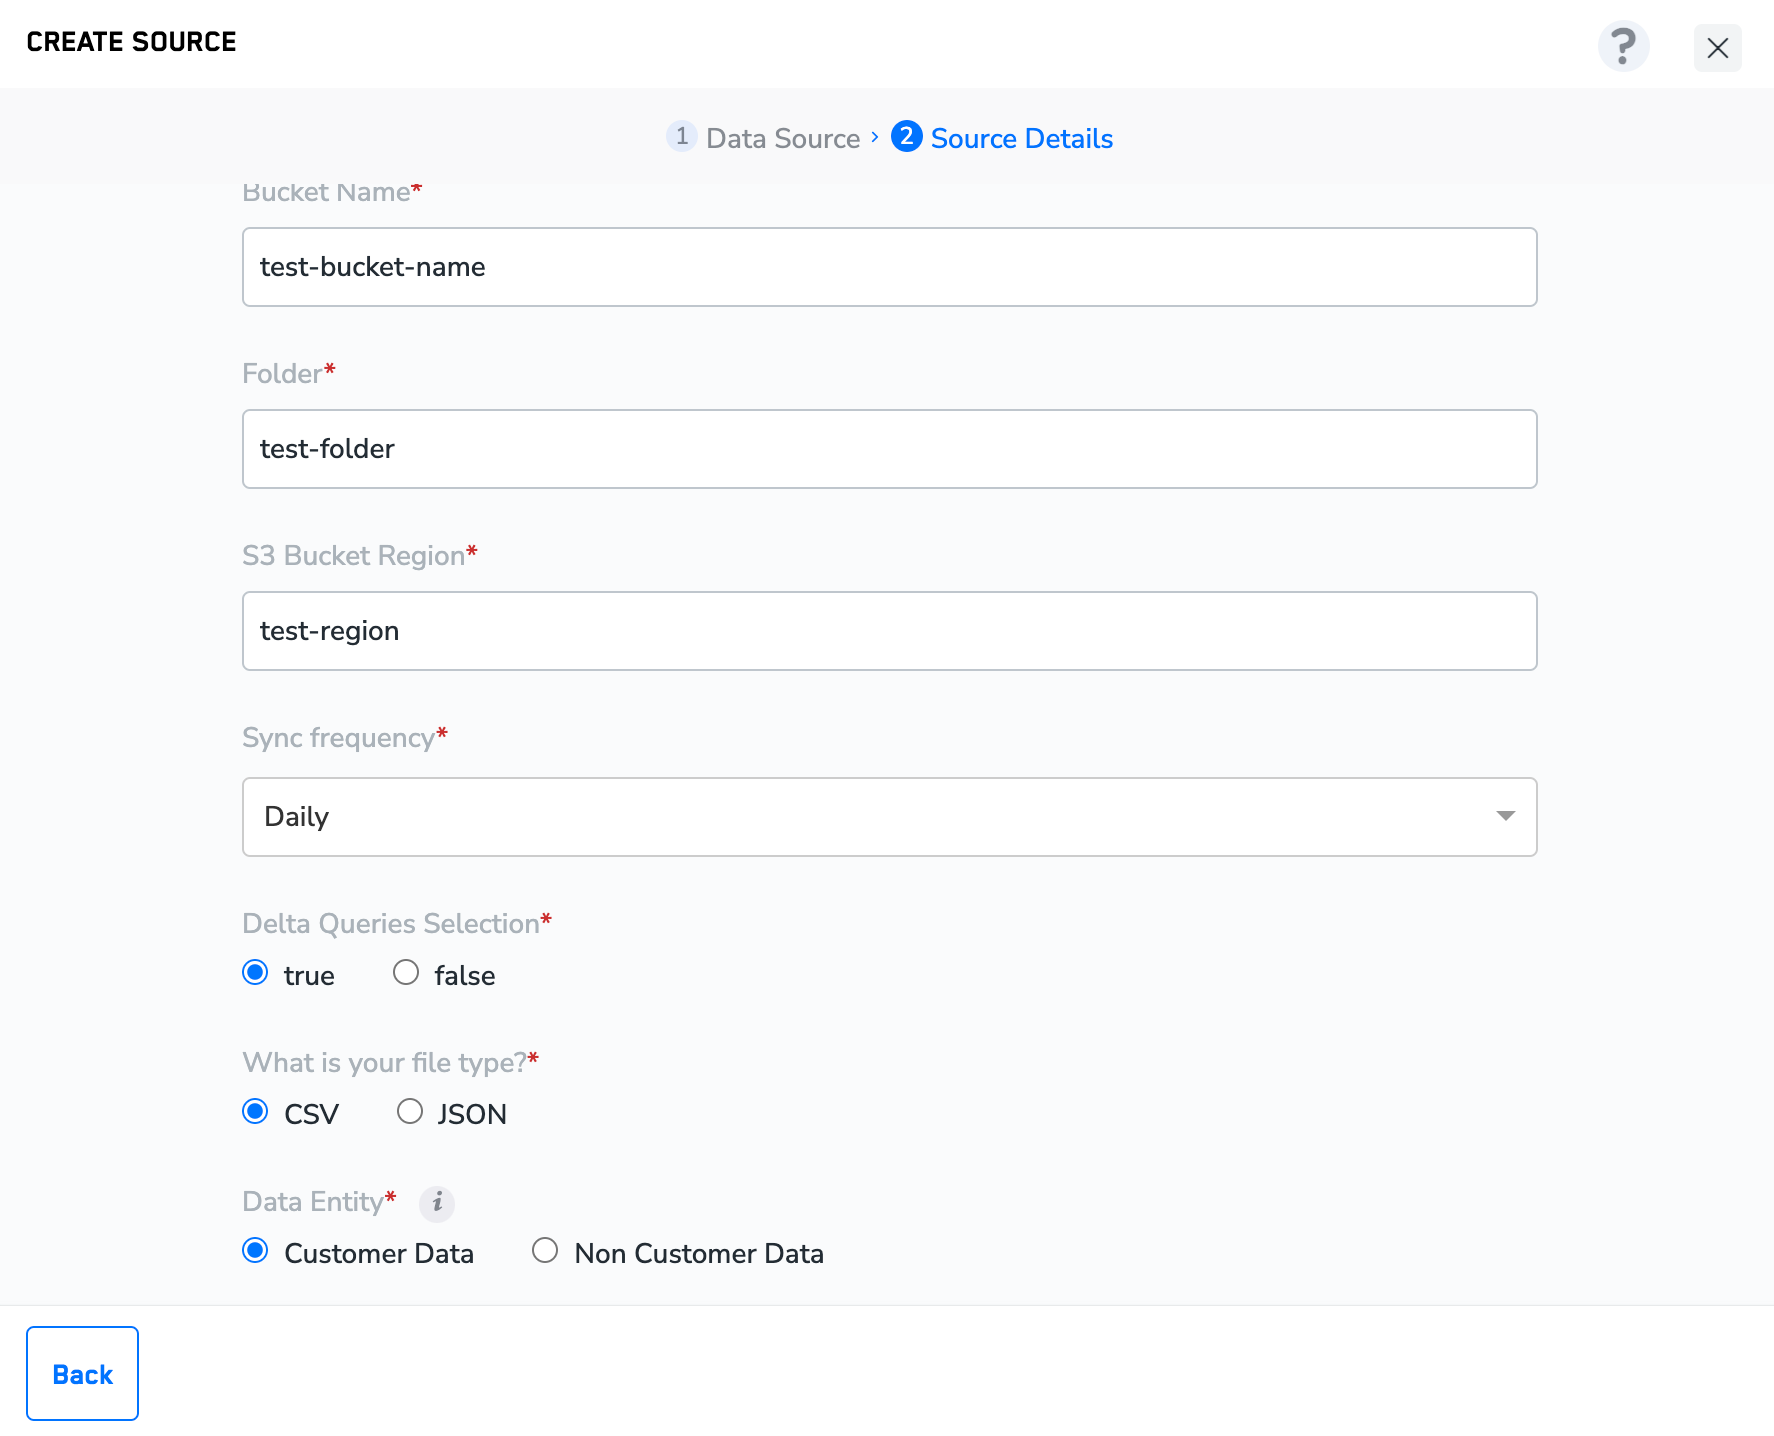
Enter the S3 Bucket Region associated with the bucket from which you want Zeotap CDP to fetch the data.
Choose the desired Sync Frequencyfrom the drop-down menu. Note that the first sync is initiated once you create the source. However, the subsequent syncs occur based on the sync frequency you choose. Currently, we support the following sync frequencies:a. Dailyb. Weeklyc. Monthly
Set Delta Query Selection to either true or false based on your requirement. If you click Yes, then Zeotap CDP fetches all the data that has been updated in your S3 bucket after the last data sync between your S3 account and Zeotap CDP.
Choose the file type from the drop-down menu. Currently, Zeotap CDP supports CSV and JSON formats.
Under Data Entity, depending on the type of data you want to ingest, choose either Customer Data or Non Customer Data and proceed with the Source creation. To know more about Customer Data and Non Customer Data, refer here.