Components of Databricks Source
Obtain the following components from your Databricks account before creating a Databricks source in Zeotap CDP:- Databricks Host
- Catalog Name
- Schema Name
- Table Name
- JDBC
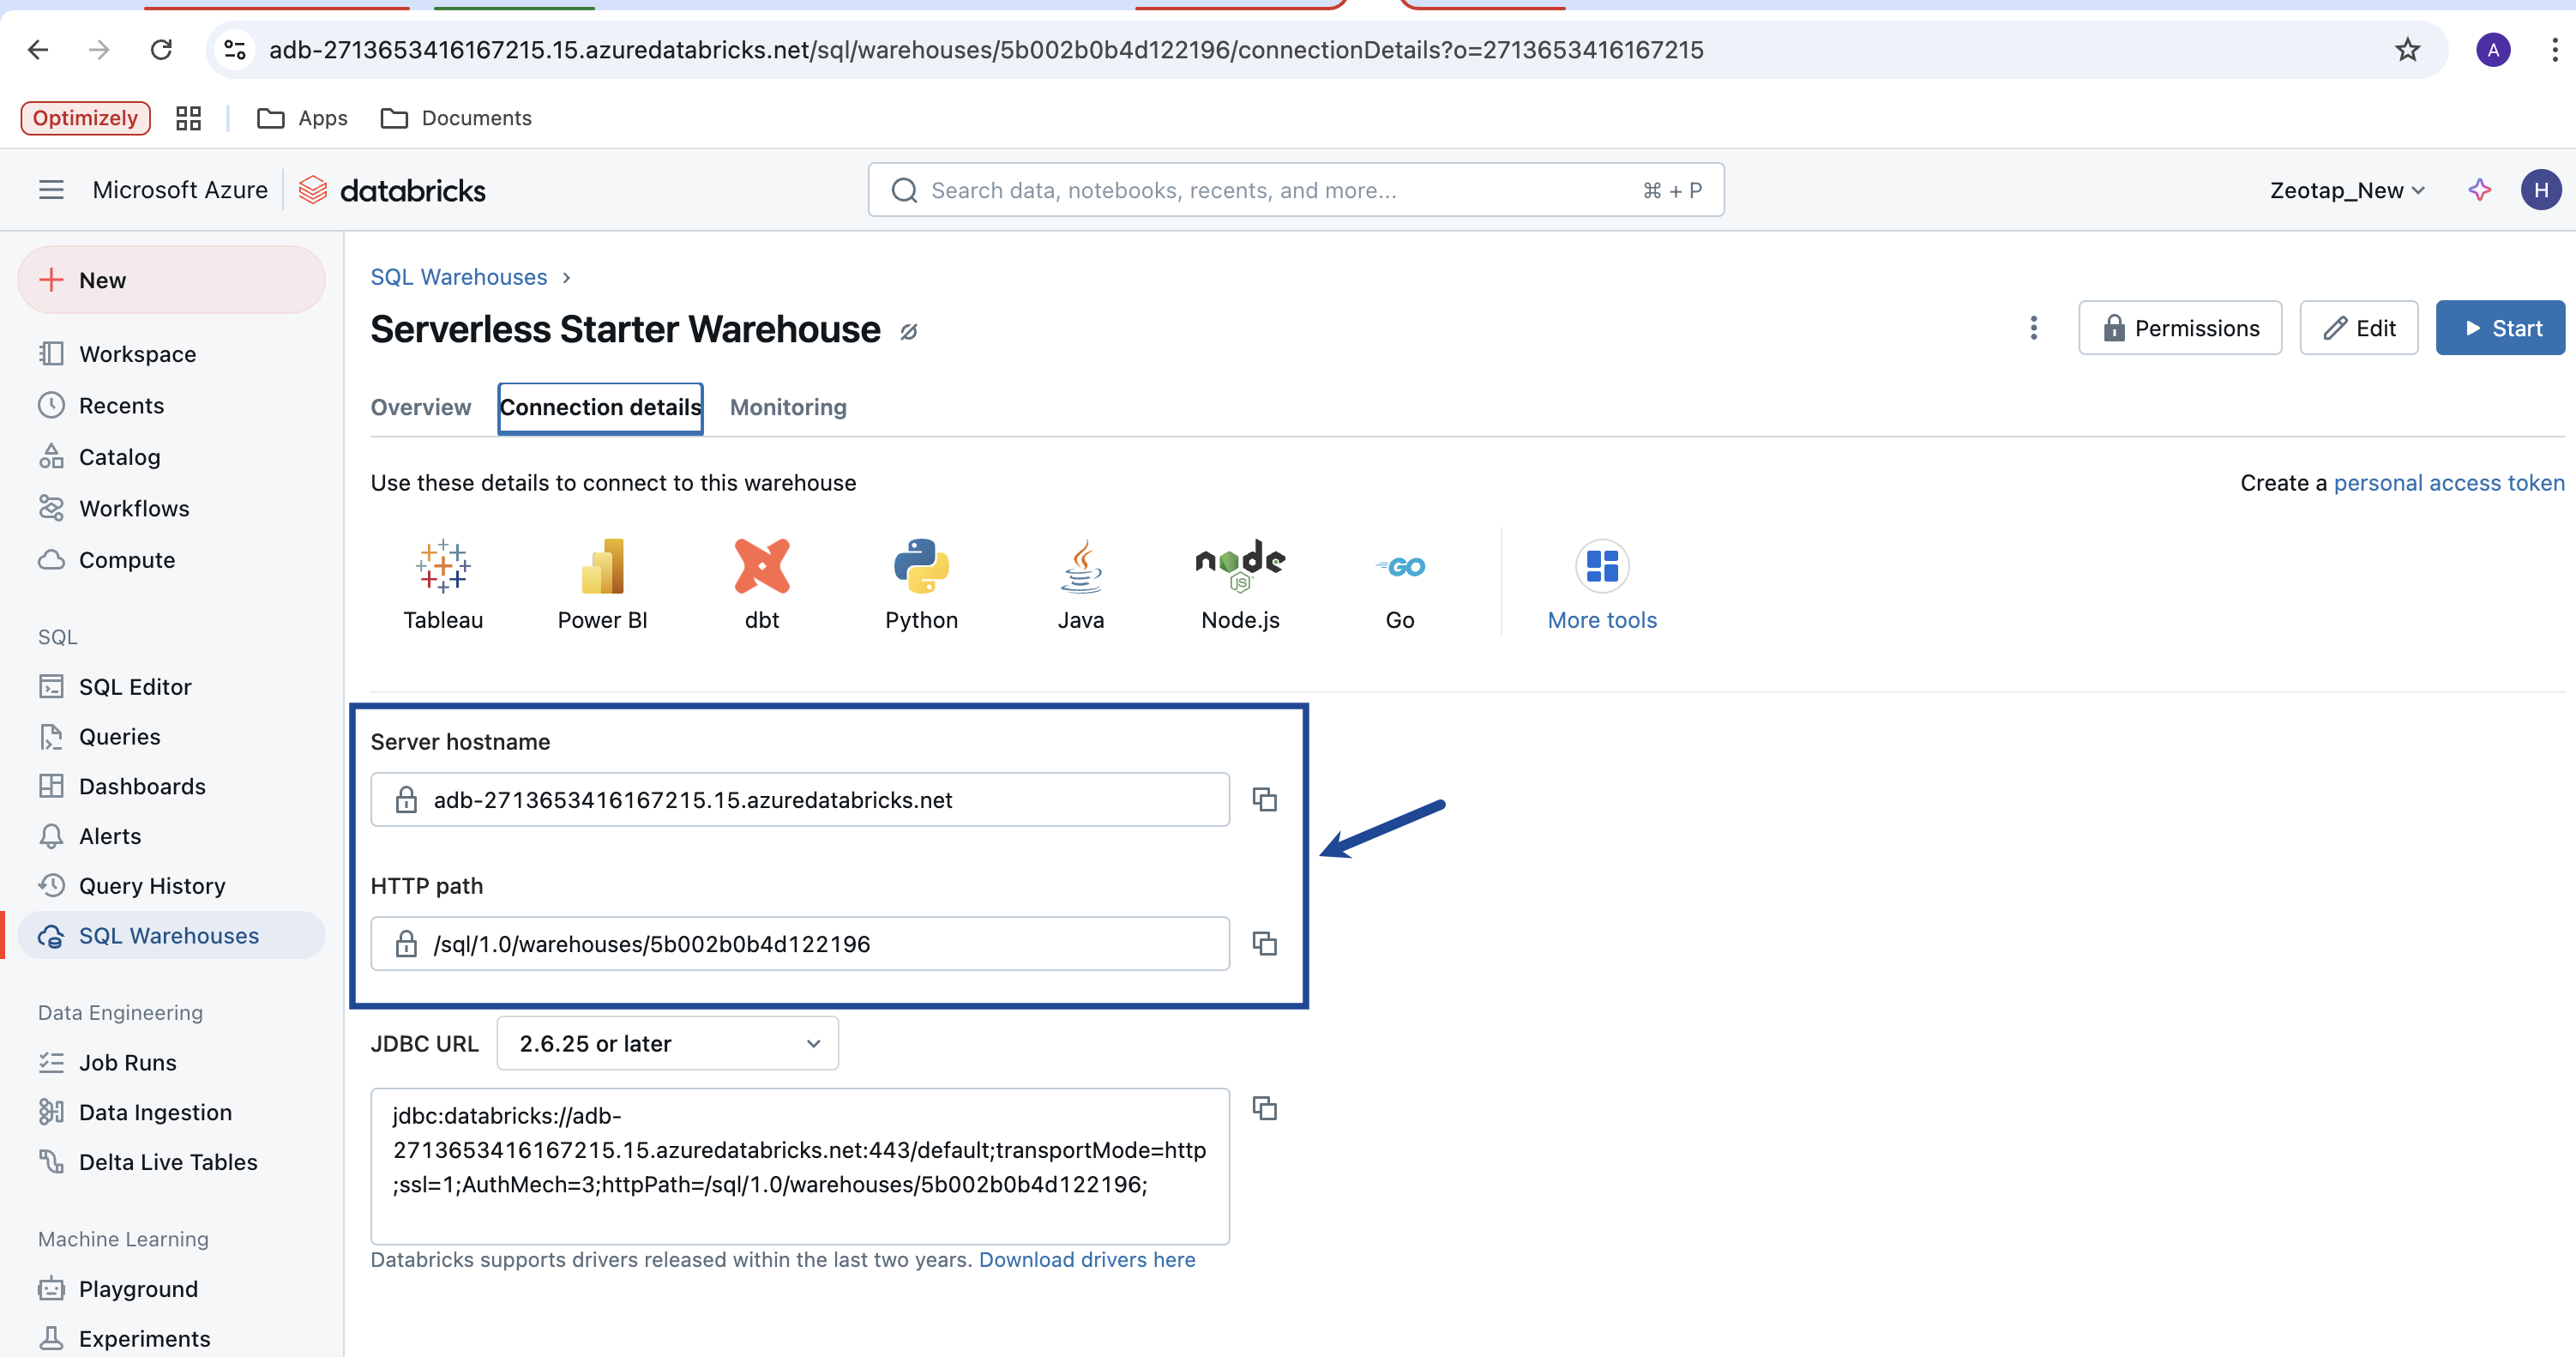
- HTTP Path
- Databricks Client ID and Client Secret
- Job based (Recommended)
- Cluster ID
- Warehouse ID
- Note - If you are ingesting more than 1M records, we recommend using the Job-based approach, as JDBC may encounter issues with large data volumes.
Databricks Host
Databricks Host is the unique URL assigned to your Databricks workspace. Host can be found in the url for the databricks account
Catalog Name
In Databricks, a catalog acts like a folder system. It organises schema/databases into a hierarchy, allowing users to group tables and views logically.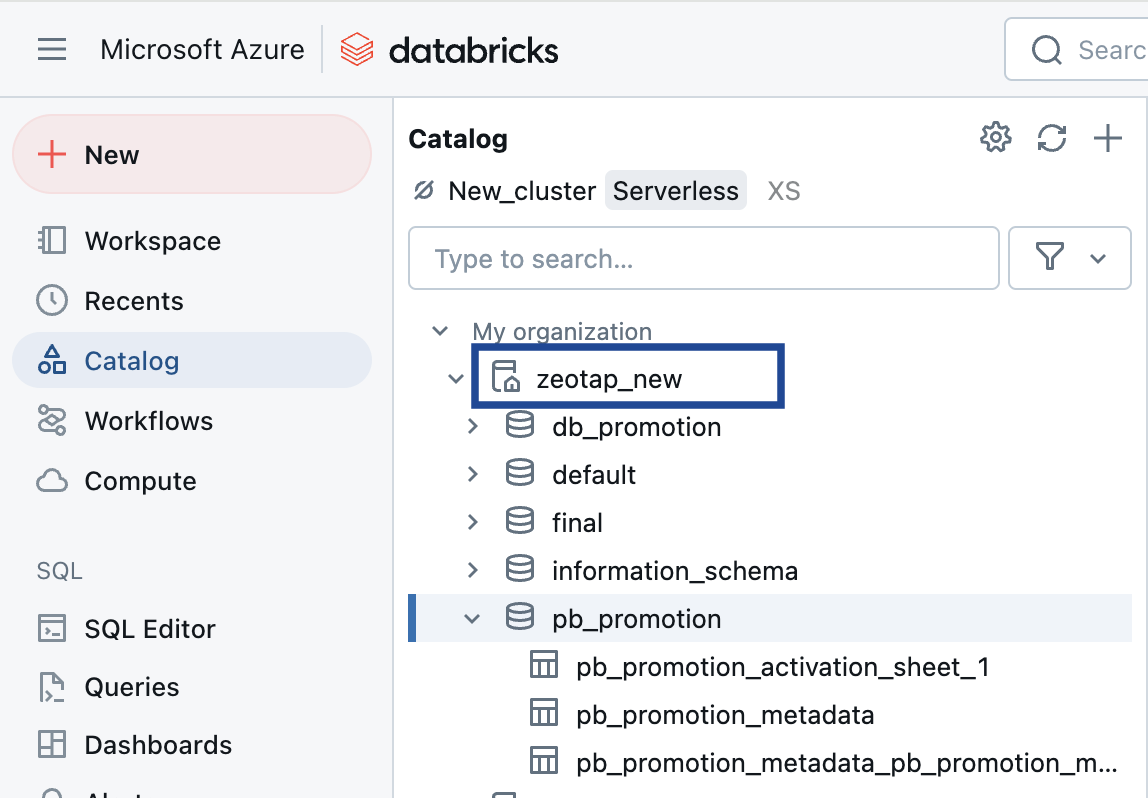
Schema Name
In Databricks, a schema is essentially a database that contains tables. It serves as a container for organising and managing related tables, providing a structured way to store and retrieve data.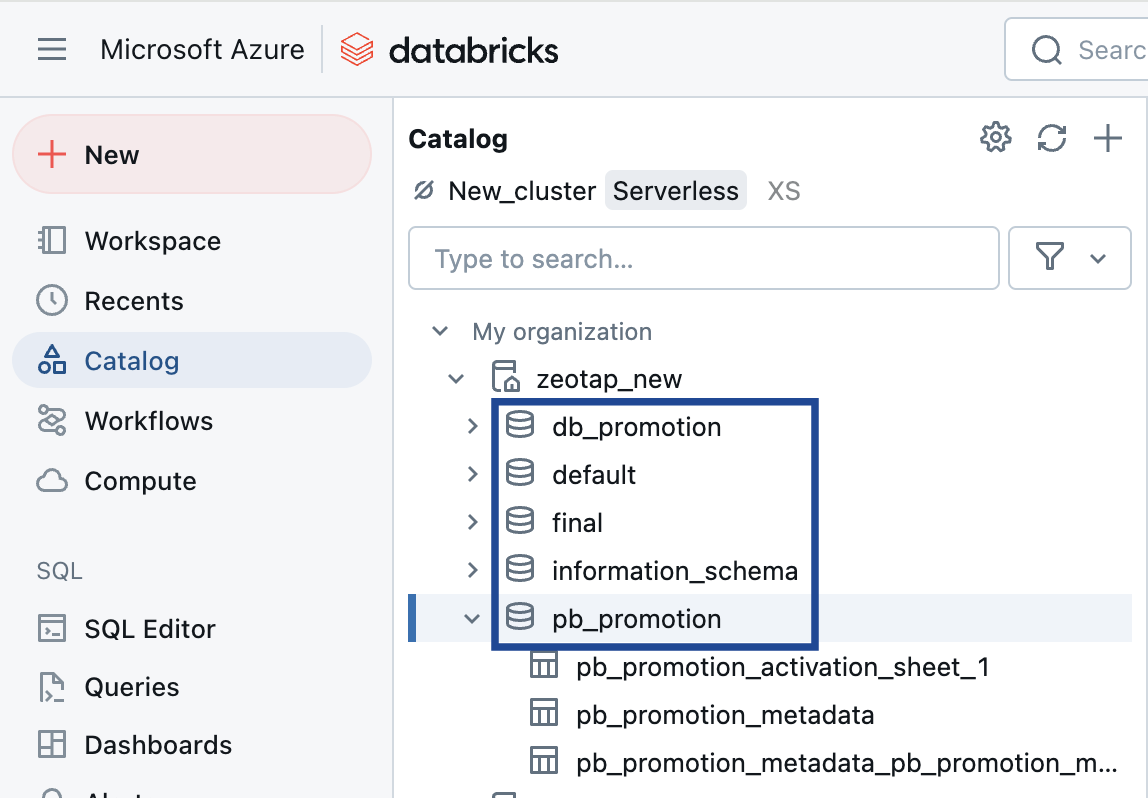
Table Name
This refers to the name of the table within the schema.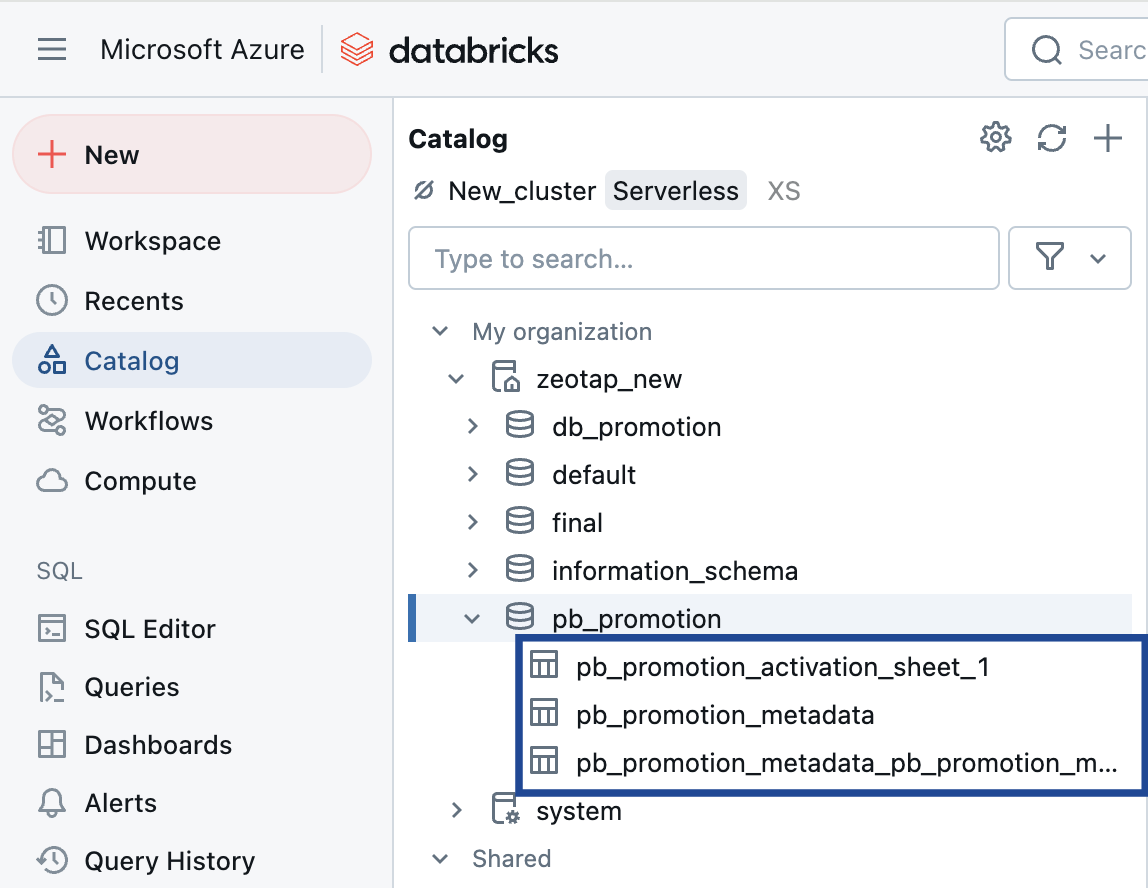
Prerequisites for JDBC Approach
Before proceeding with this integration, ensure that you mandatorily complete the following prerequisite steps mentioned in the Databricks documentation:1. Create a Service Principal
2. Assign Workspace-Level Permissions to the Service Principal
3. Create an OAuth Secret for the Service Principal
Databricks Client ID and Client Secret
Before you can use OAuth to authenticate to Databricks, you must first create an OAuth Client Secret, which can be used to generate OAuth access tokens. Note that a service principal can have up to five OAuth secrets. Account admins and workspace admins can create an OAuth secret for a service principal. For detailed steps about how to generate Client ID and Secret, refer to the Databricks documentation. This information is also outlined in the Prerequisites section above.HTTP Path
To locate the HTTP Path on Databricks, perform the following steps: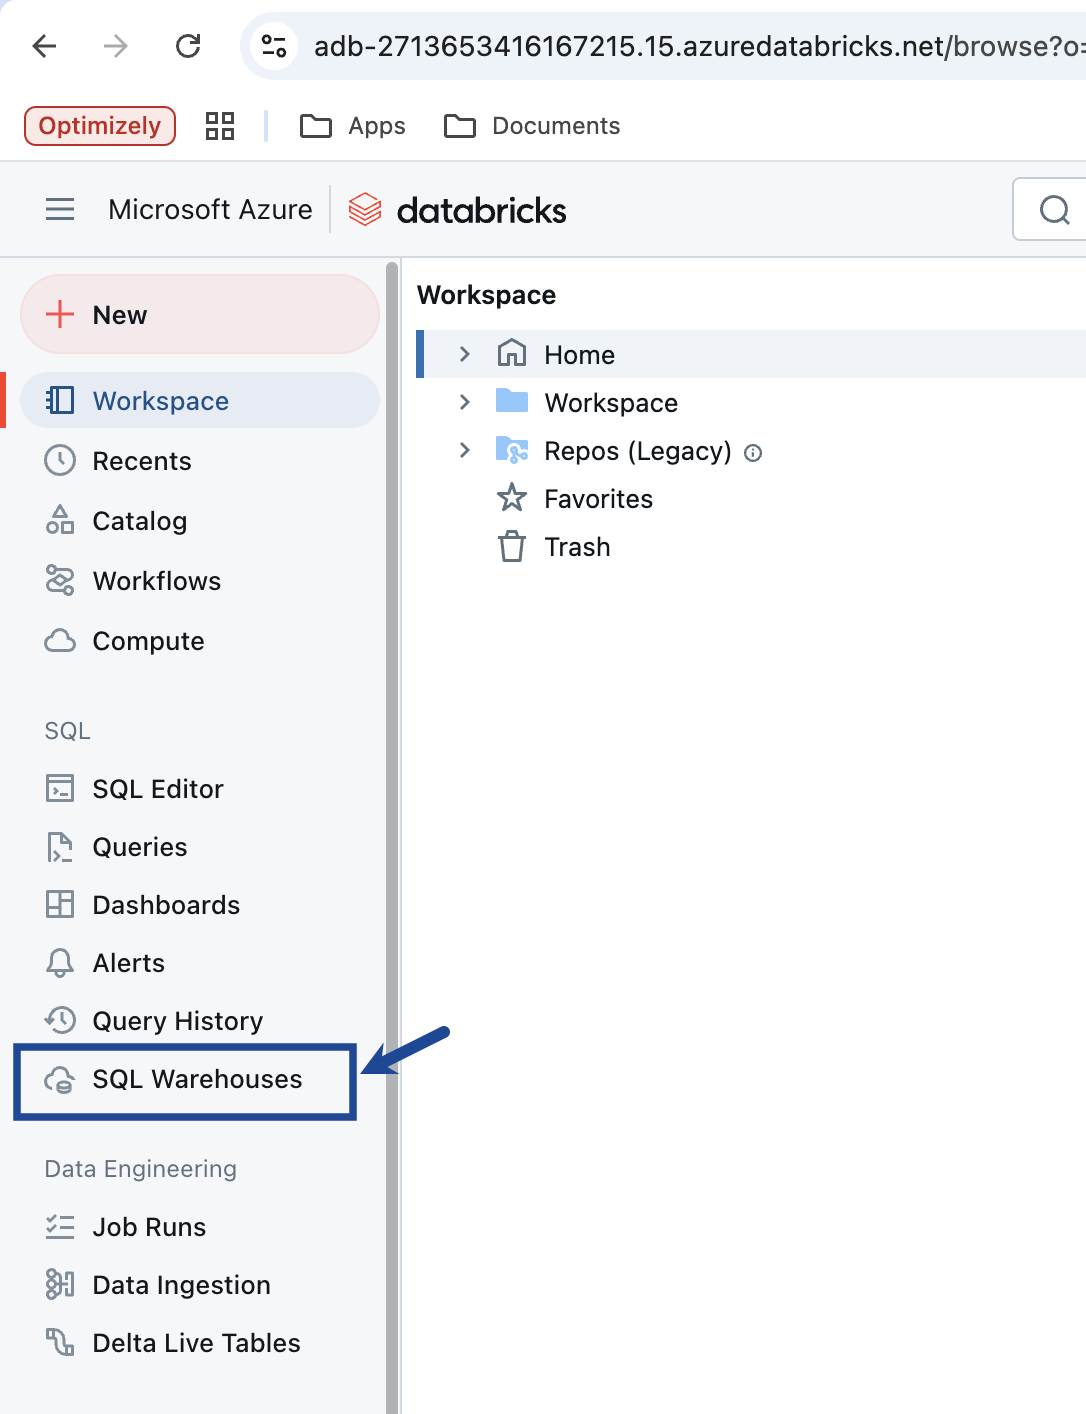
Click the desired SQL warehouse. If an SQL warehouse does not exist, then create one by clicking Create SQL Warehouse.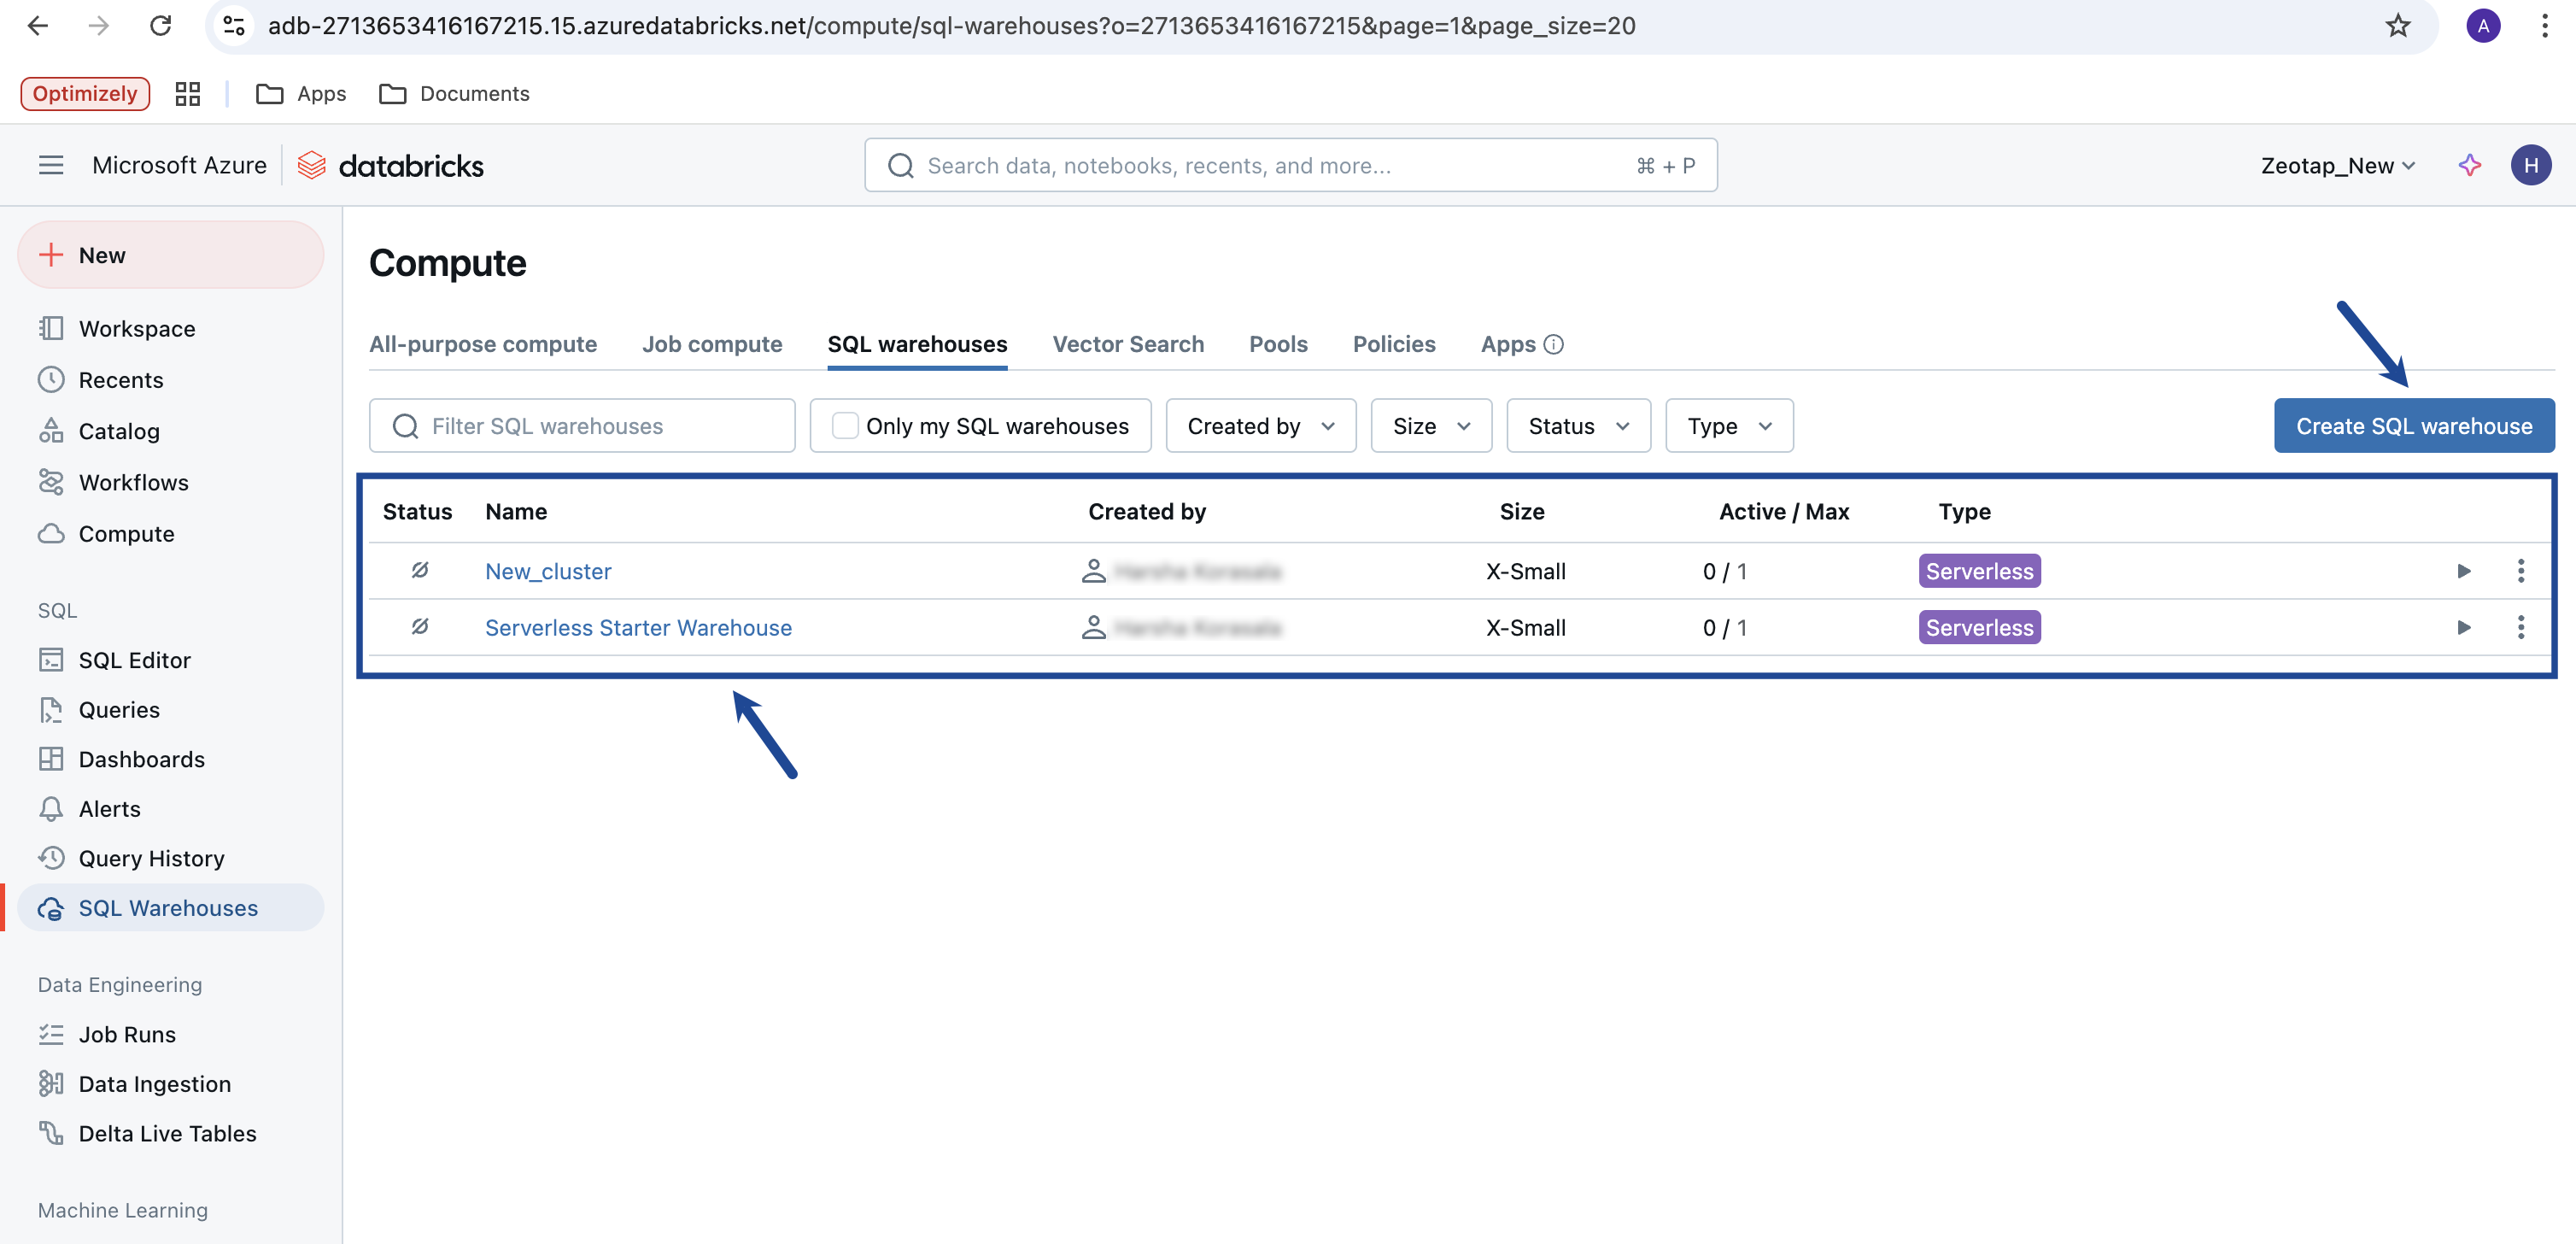
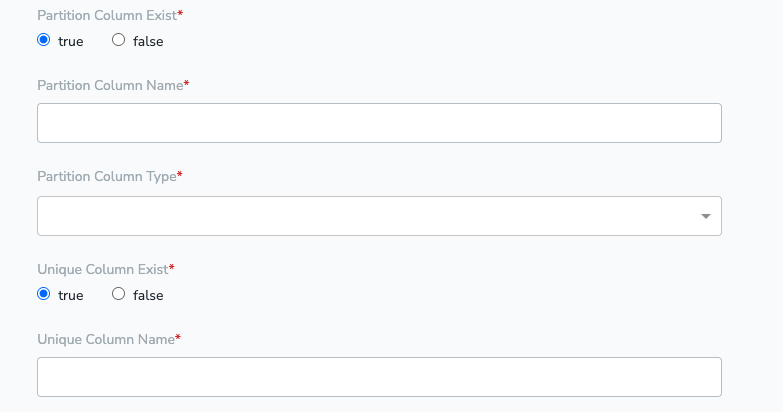
Partition Column
A partition column is a key used to organize large tables into smaller, logical groups. For example, data can be partitioned by date or region, so queries targeting a specific time range or location run much faster. If no Partition Column exists, use any Unique Column instead.Unique Column Fields
Unique column in the table, for which all the rows will have different value If partition column doesn’t exist we do the following operations- We will first create a temporary view, and run queries over that
- We will drop / delete the view, once we fetched all the data
Prerequisites for Job Based Approach
Access token
Access token can be generated by navigating to Settings → User setting → Developer → Generate new token
Cluster ID
Cluster id can be found in the compute → cluster name → automatically added tags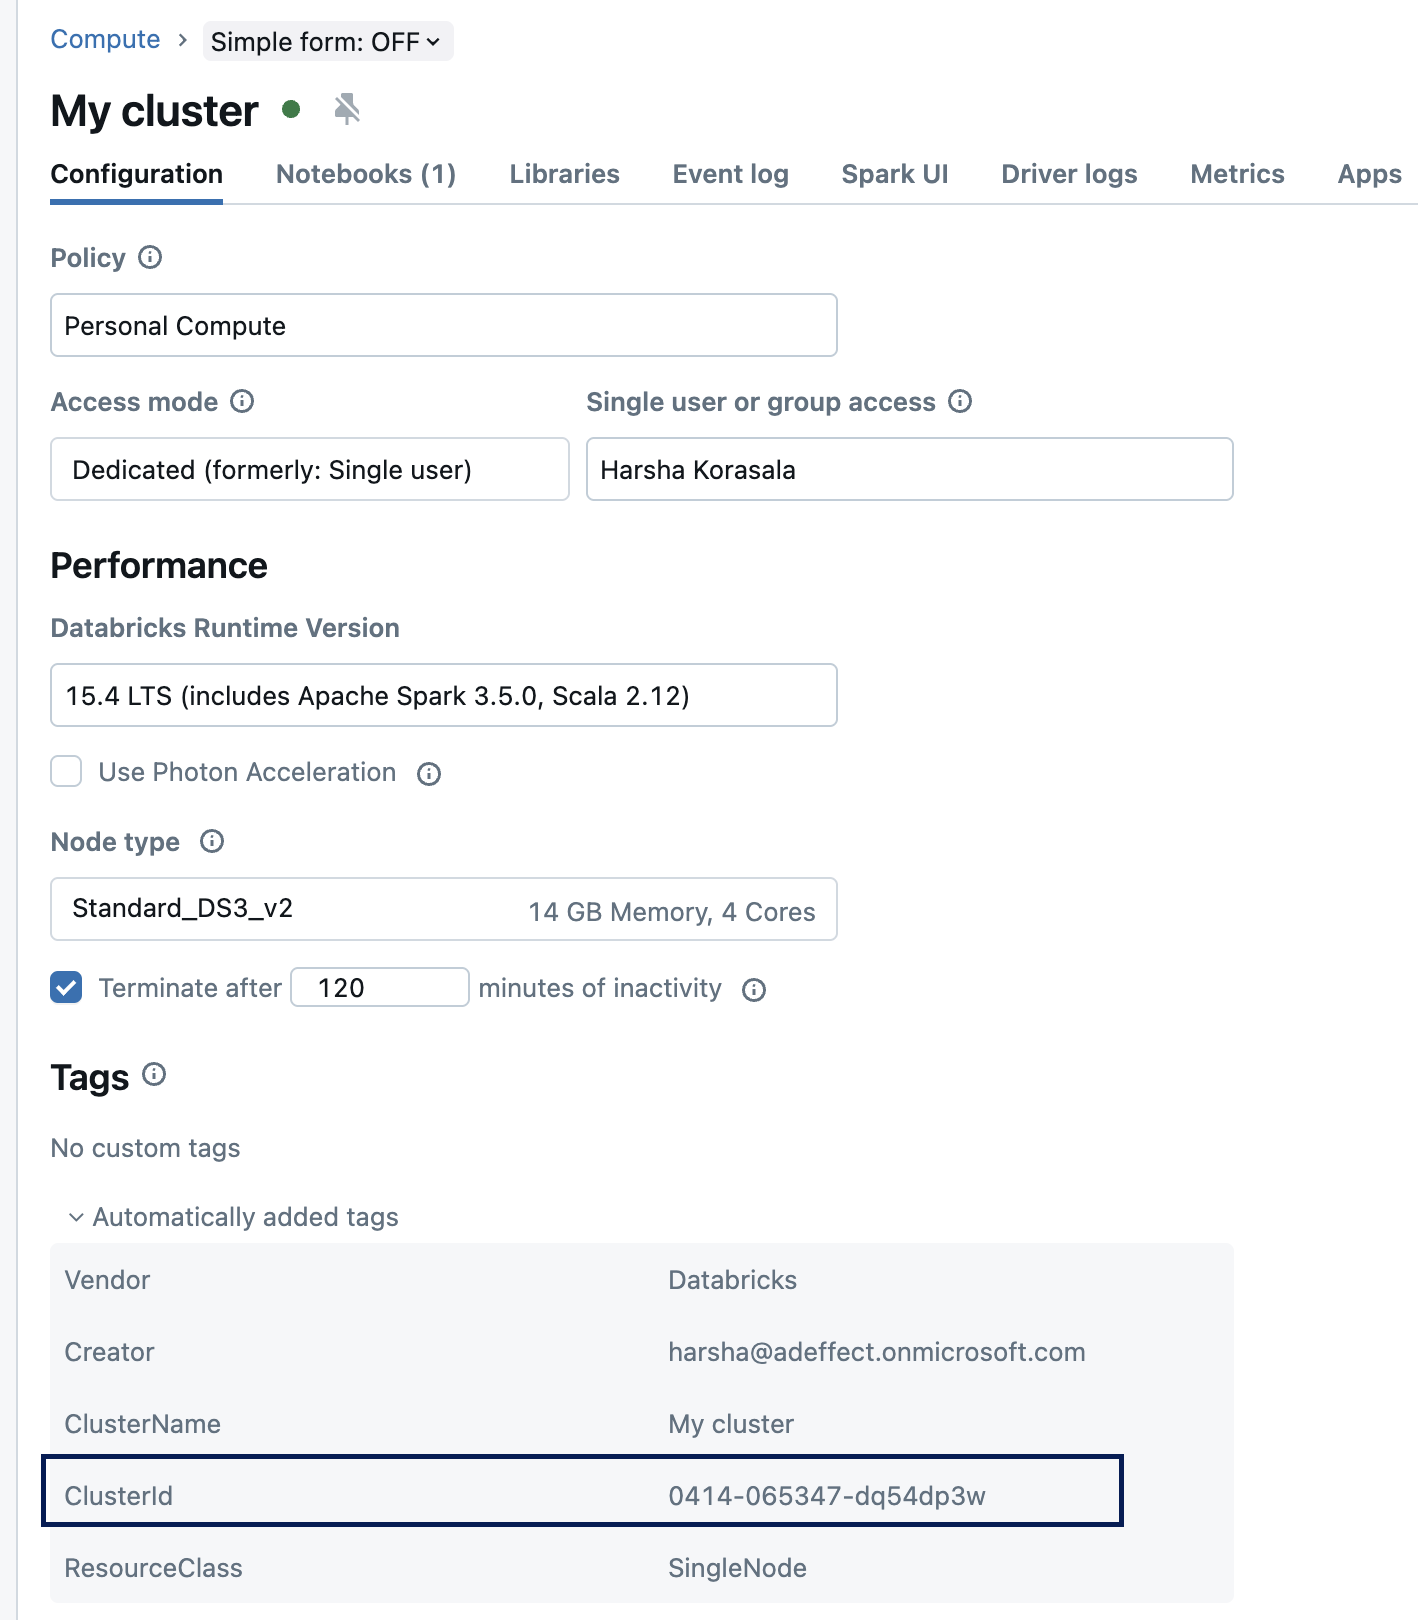
Warehouse ID
Warehouse ID can be found by navigating to SQL warehouses → Select warehouse → warehouse Id
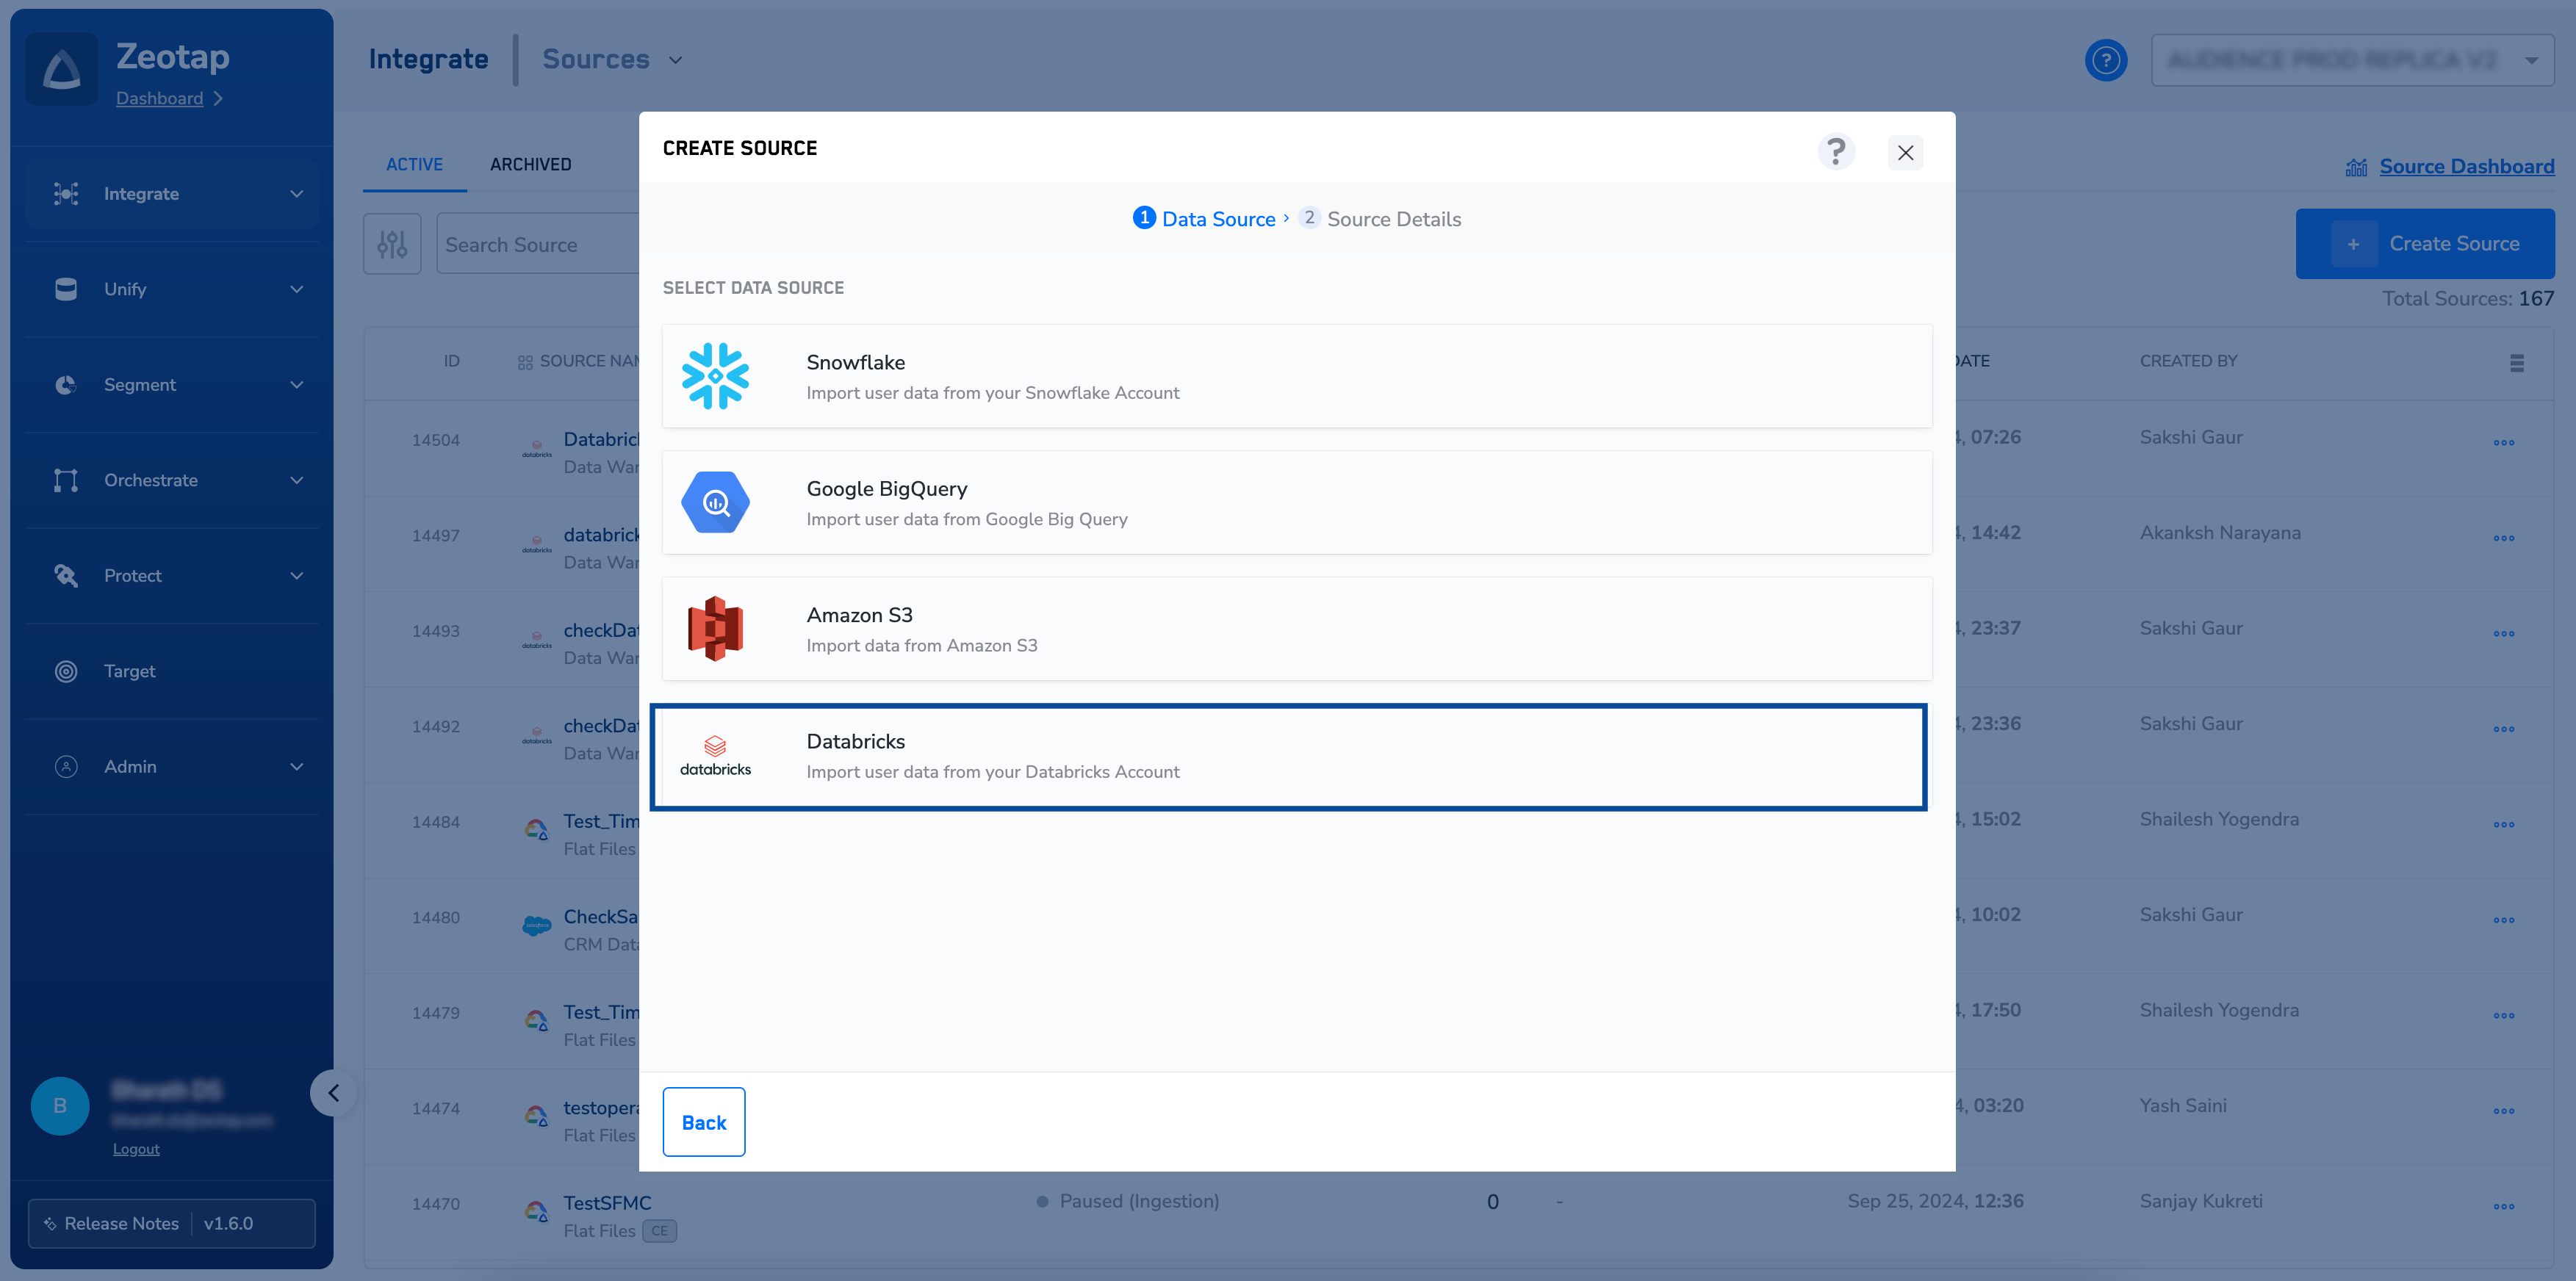
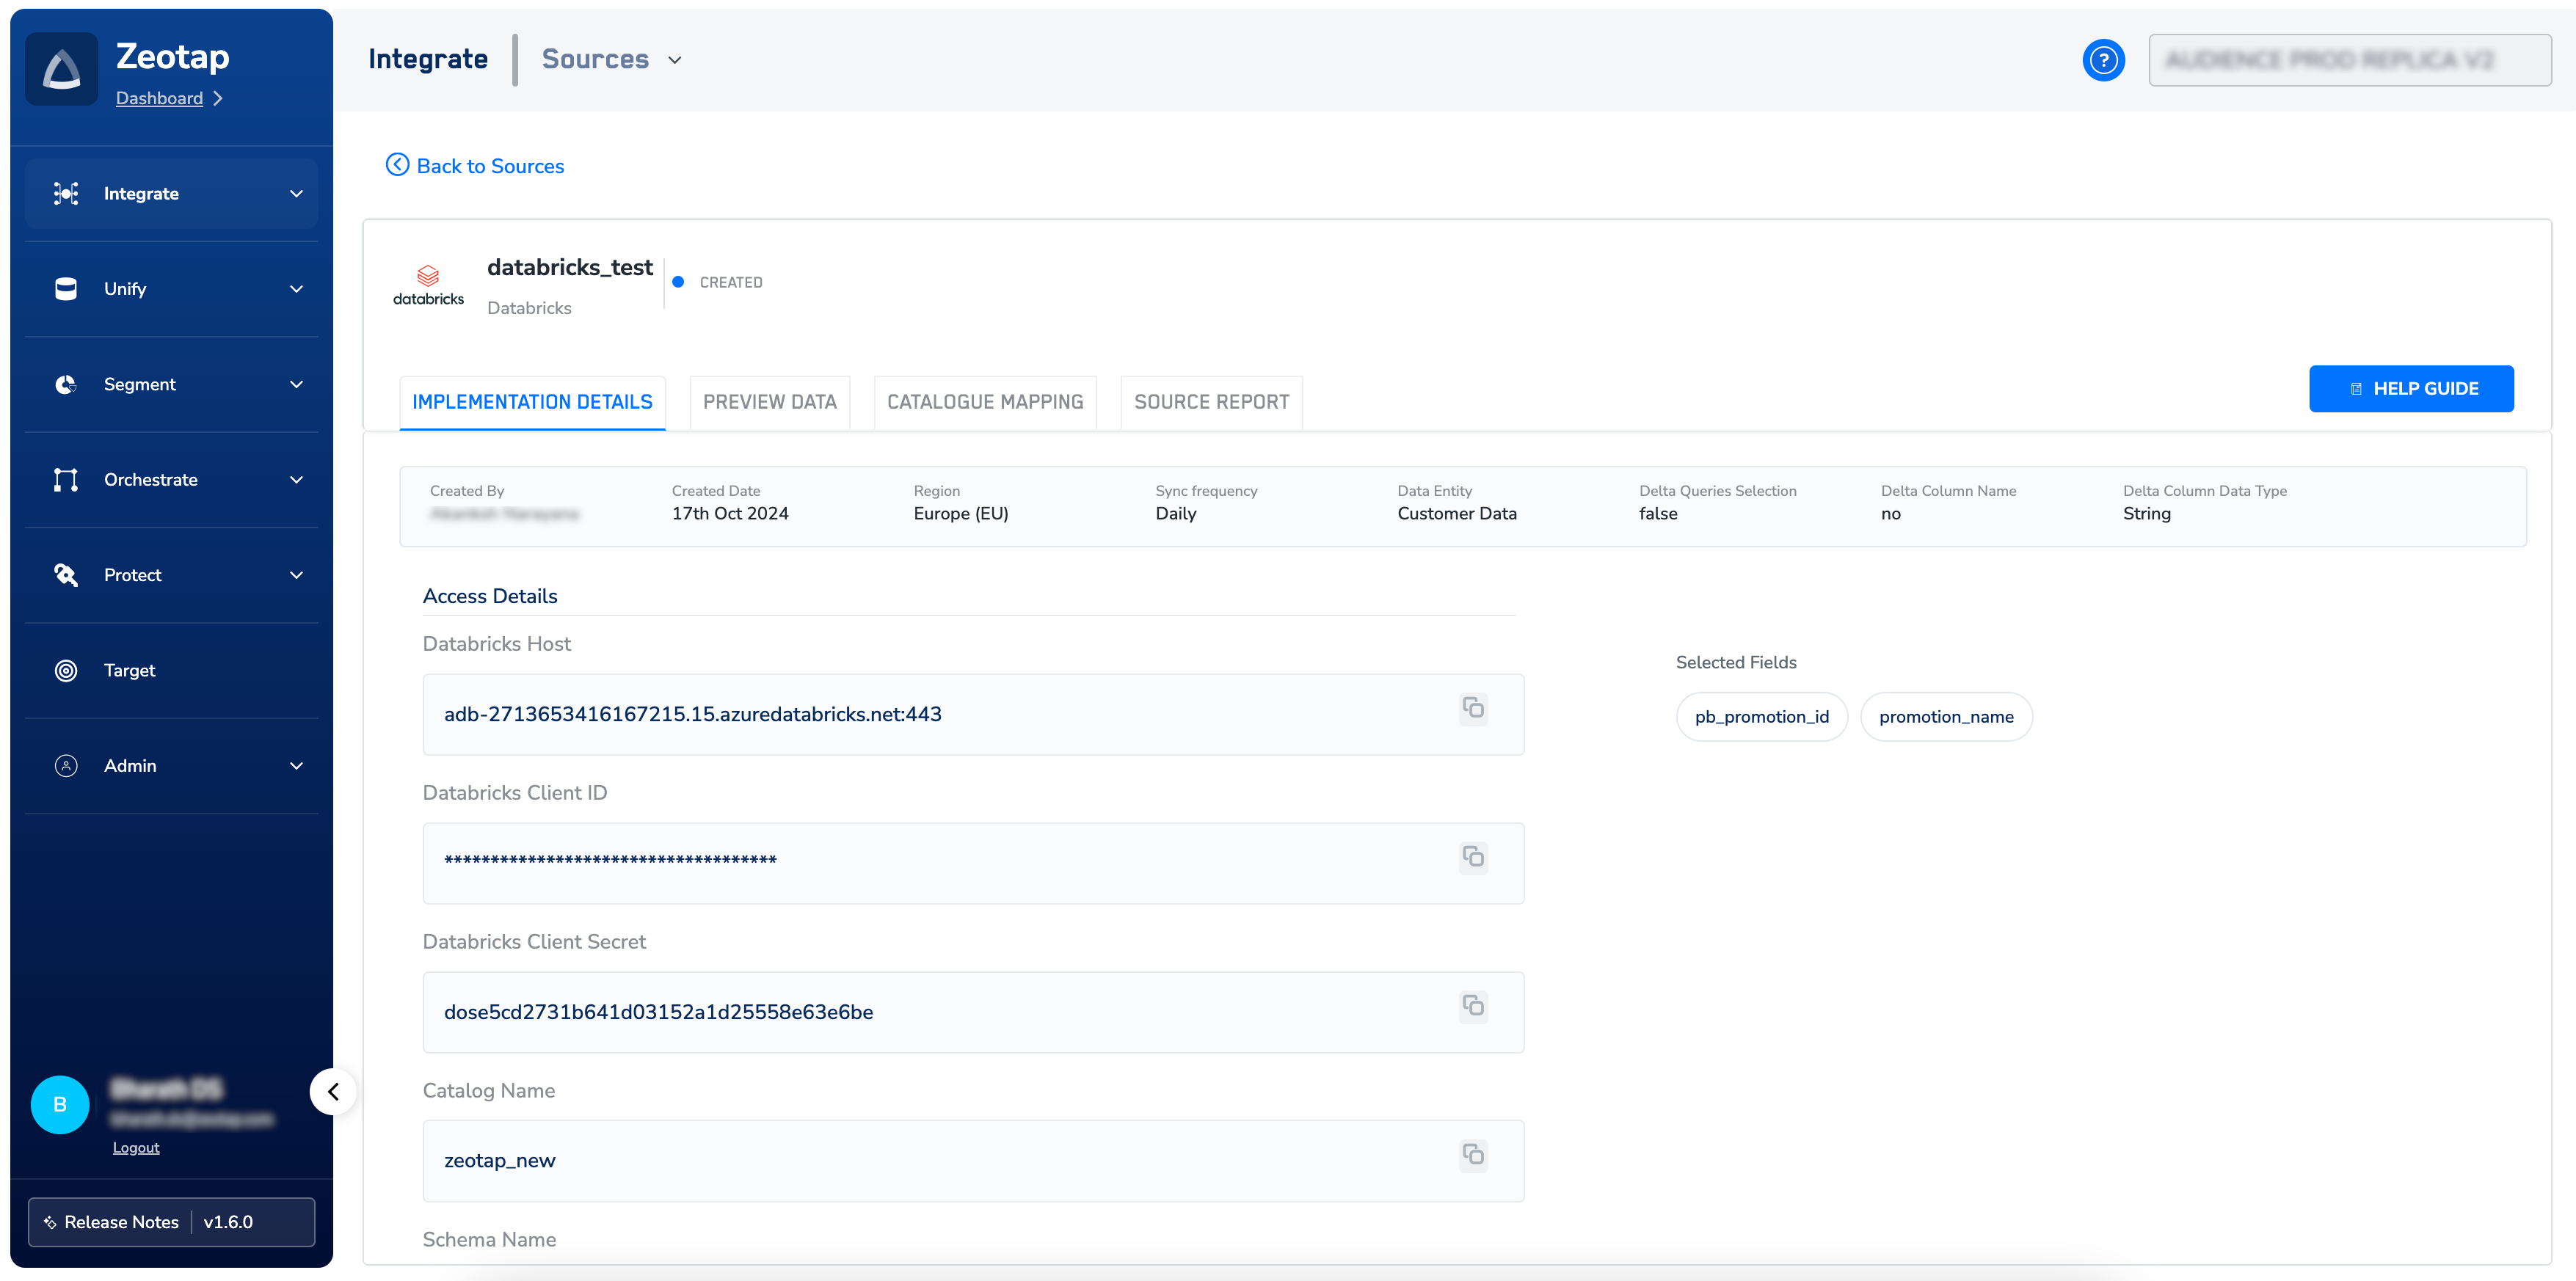
Create a Databricks Source
Once you have obtained the above details from your Databricks account, perform the following steps to create a Databricks Source in the Zeotap CDP App:.png?fit=max&auto=format&n=ROPrHg77hrORMuiL&q=85&s=146e94f6110f76970d52baf2ab1e964b)
Choose the Refresh Frequency from the drop-down menu.
The first data sync takes place once you create the source. However, the subsequent syncs take place based on the refresh frequency that you select. Currently, we support the following sync frequencies:a. Sync onceb. Every hourc. Every 3 hoursd. Every 6 hourse. Every 12 hours,f. Dailyg. Weeklyh. Monthlyi. Sync Time- When you choose Daily, Weekly, or Monthly as the sync frequency, you can specify the exact time for the sync to occur.ii. Sync Period- Indicates whether the selected Sync Time is in the AM or PM.iii. Monthly Sync date- If Monthly sync is selected, you can specify the day of the month on which the sync should run.
Provide the Catalog Name, Schema Name, and Table Name obtained as mentioned in the Components of Databricks Source section.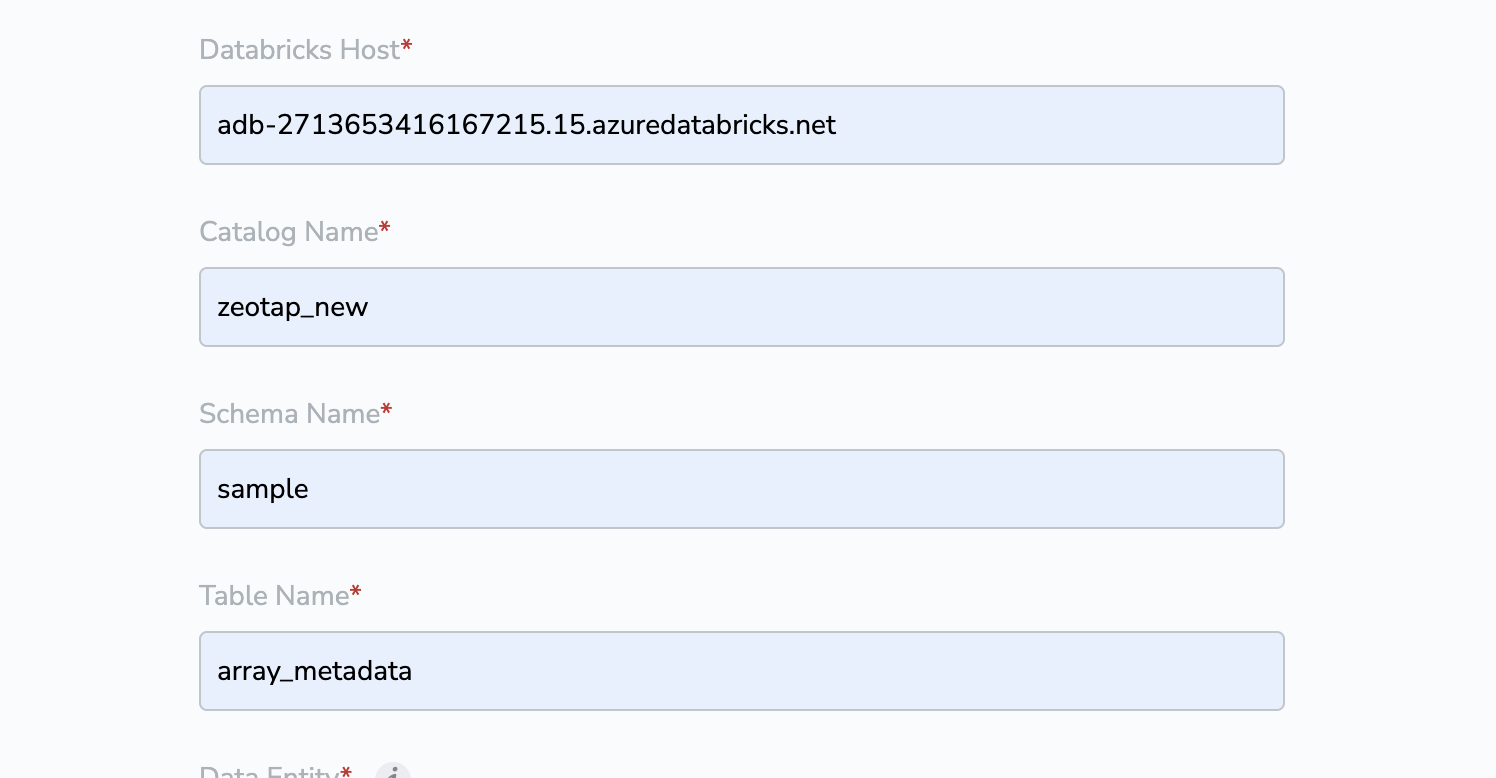
Under Data Entity, depending on the type of data you want to ingest, choose either Customer Data or Non Customer Data and proceed with the Source creation. To know more about Customer Data and Non Customer Data, refer here.
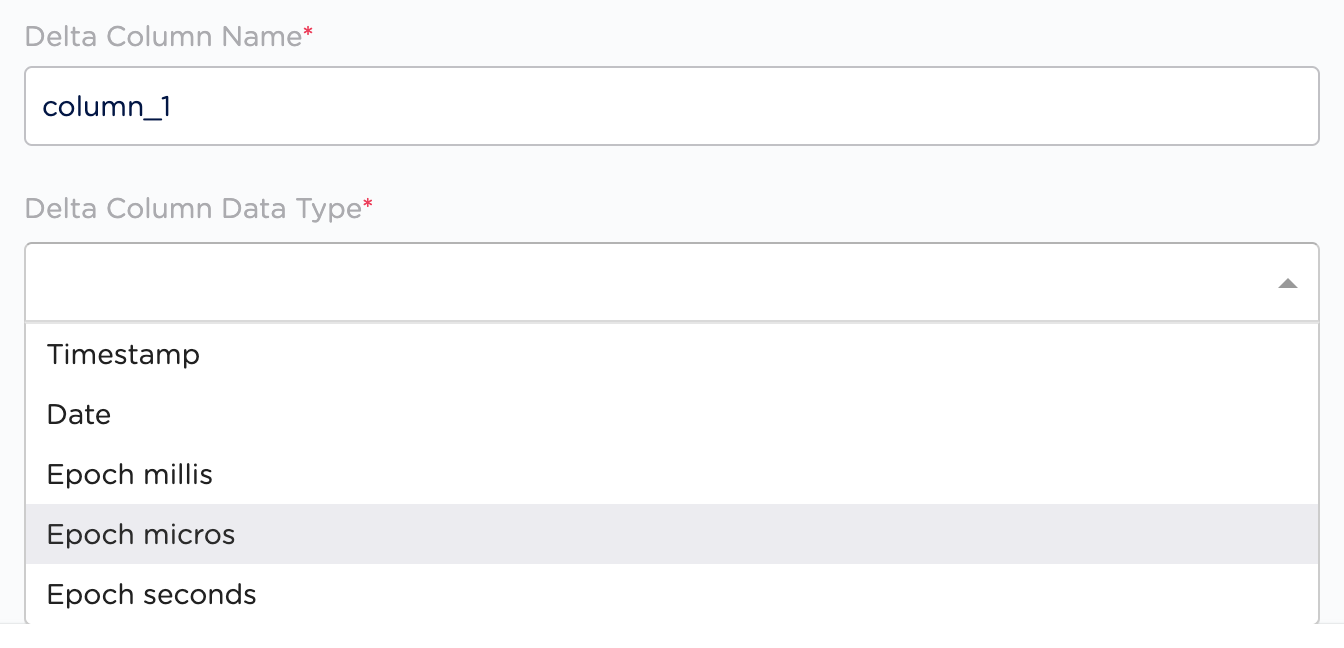
Under Delta Queries Selection, you can decide whether or not you want to consider deltas (data additions/changes) in a table for a specific duration based on the timestamp column. Based on your requirement, select either true or false.
Select the mechanism you want to use to pull the data. The currently supported options are JDBC and Job-based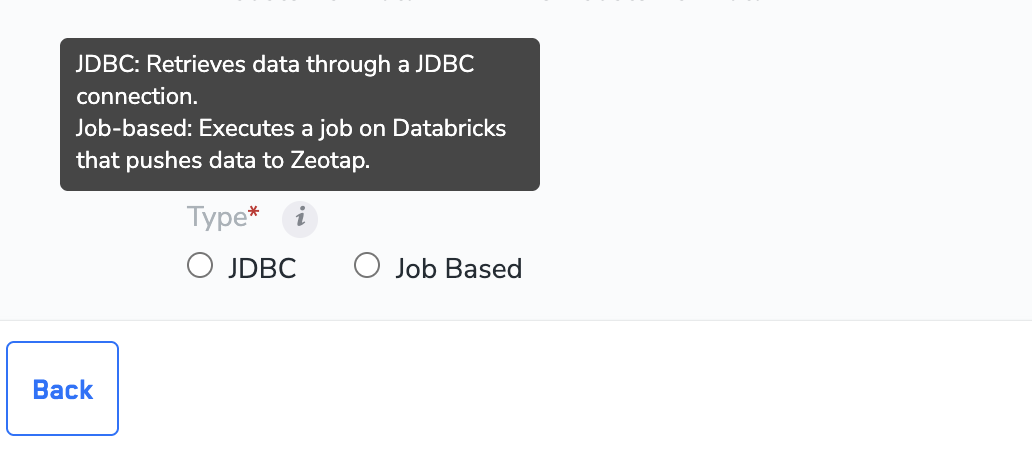
If you selected JDBC in the previous step, please enter the values for the fields below. You can refer to the Prerequisites for JDBC connection section for details on how to obtain these values.a. Client IDb. Client Secretc. HTTP Pathd. Partition Table Detailsi. Partition Column Nameii. Partition Column Typee. Unique Column Name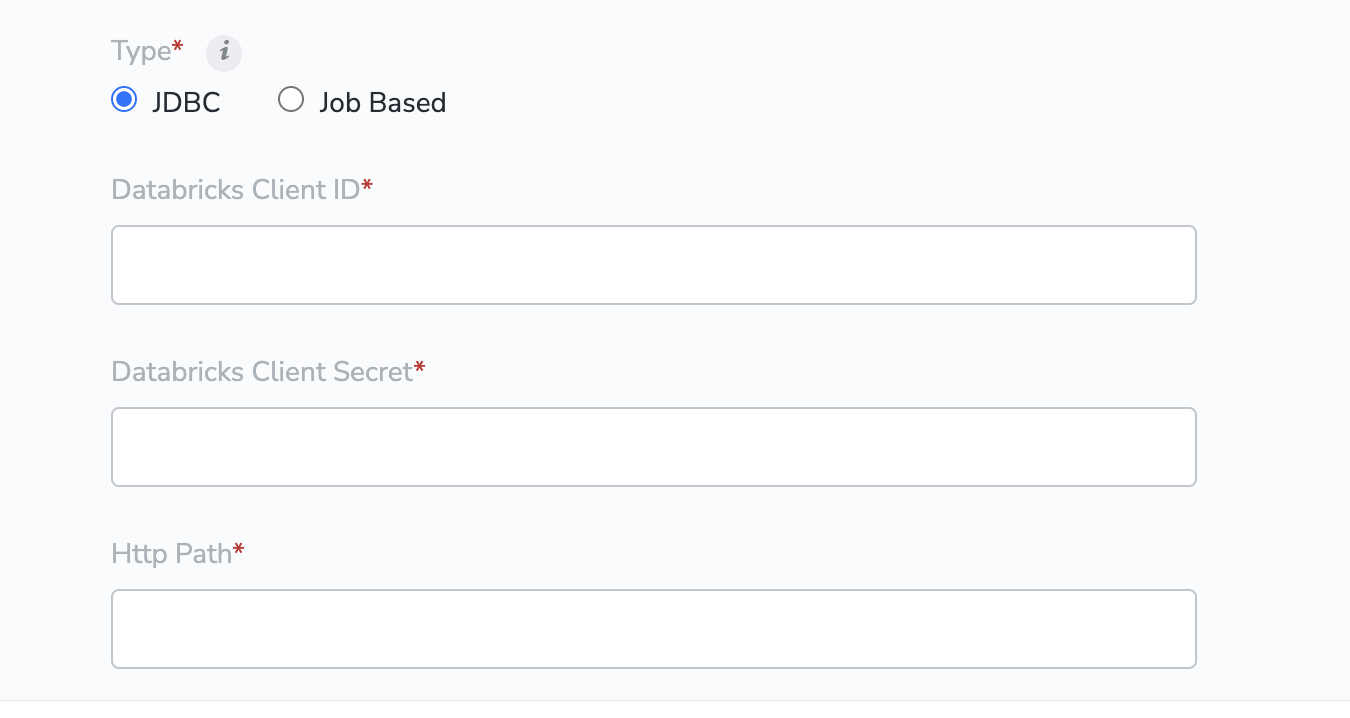
If you selected Job Based in the previous step, please enter the values for the fields below. You can refer to the Prerequisites for Job Based create-and-implement-a-databricks-source.md#h2_306711543section for details on how to obtain these values.a. Access Tokenb. Cluster IDc. Warehouse ID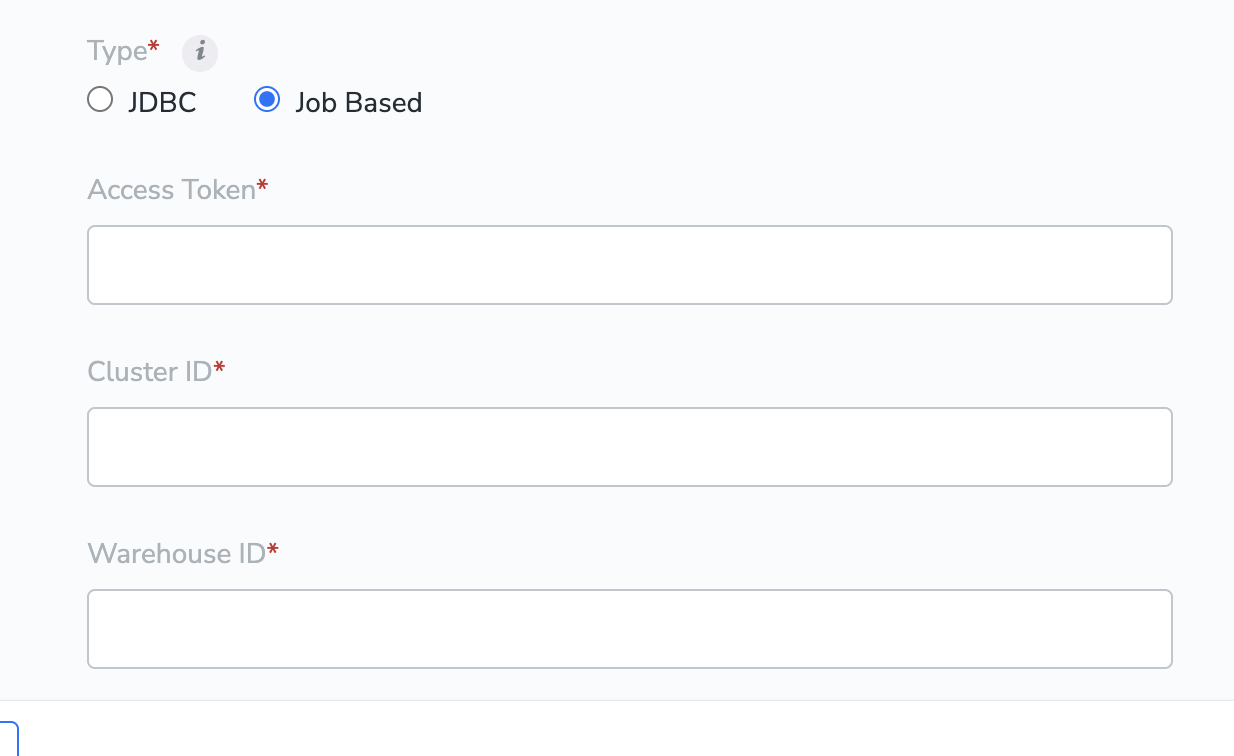
In the window that appears, a list of fields are displayed. You can select the desired fields using the check boxes. Use Select All to select all the fields available in your Databricks account. If you know the field names, you can select them after searching in the search box.
Note:The initial data transfer from Databricks to Zeotap CDP may take time, depending on the data volume. For assistance with Databricks source setup or other questions, reach out to the Zeotap support team at [email protected].