In the new window that appears, provide the following details:a. Enter a suitable name and description for the deletion rule in the respective fields.
b. Use the Frequency option to configure how often the deletion occurs. In addition, you can set the start and end date for the deletion rule. Currently, we support the following frequencies: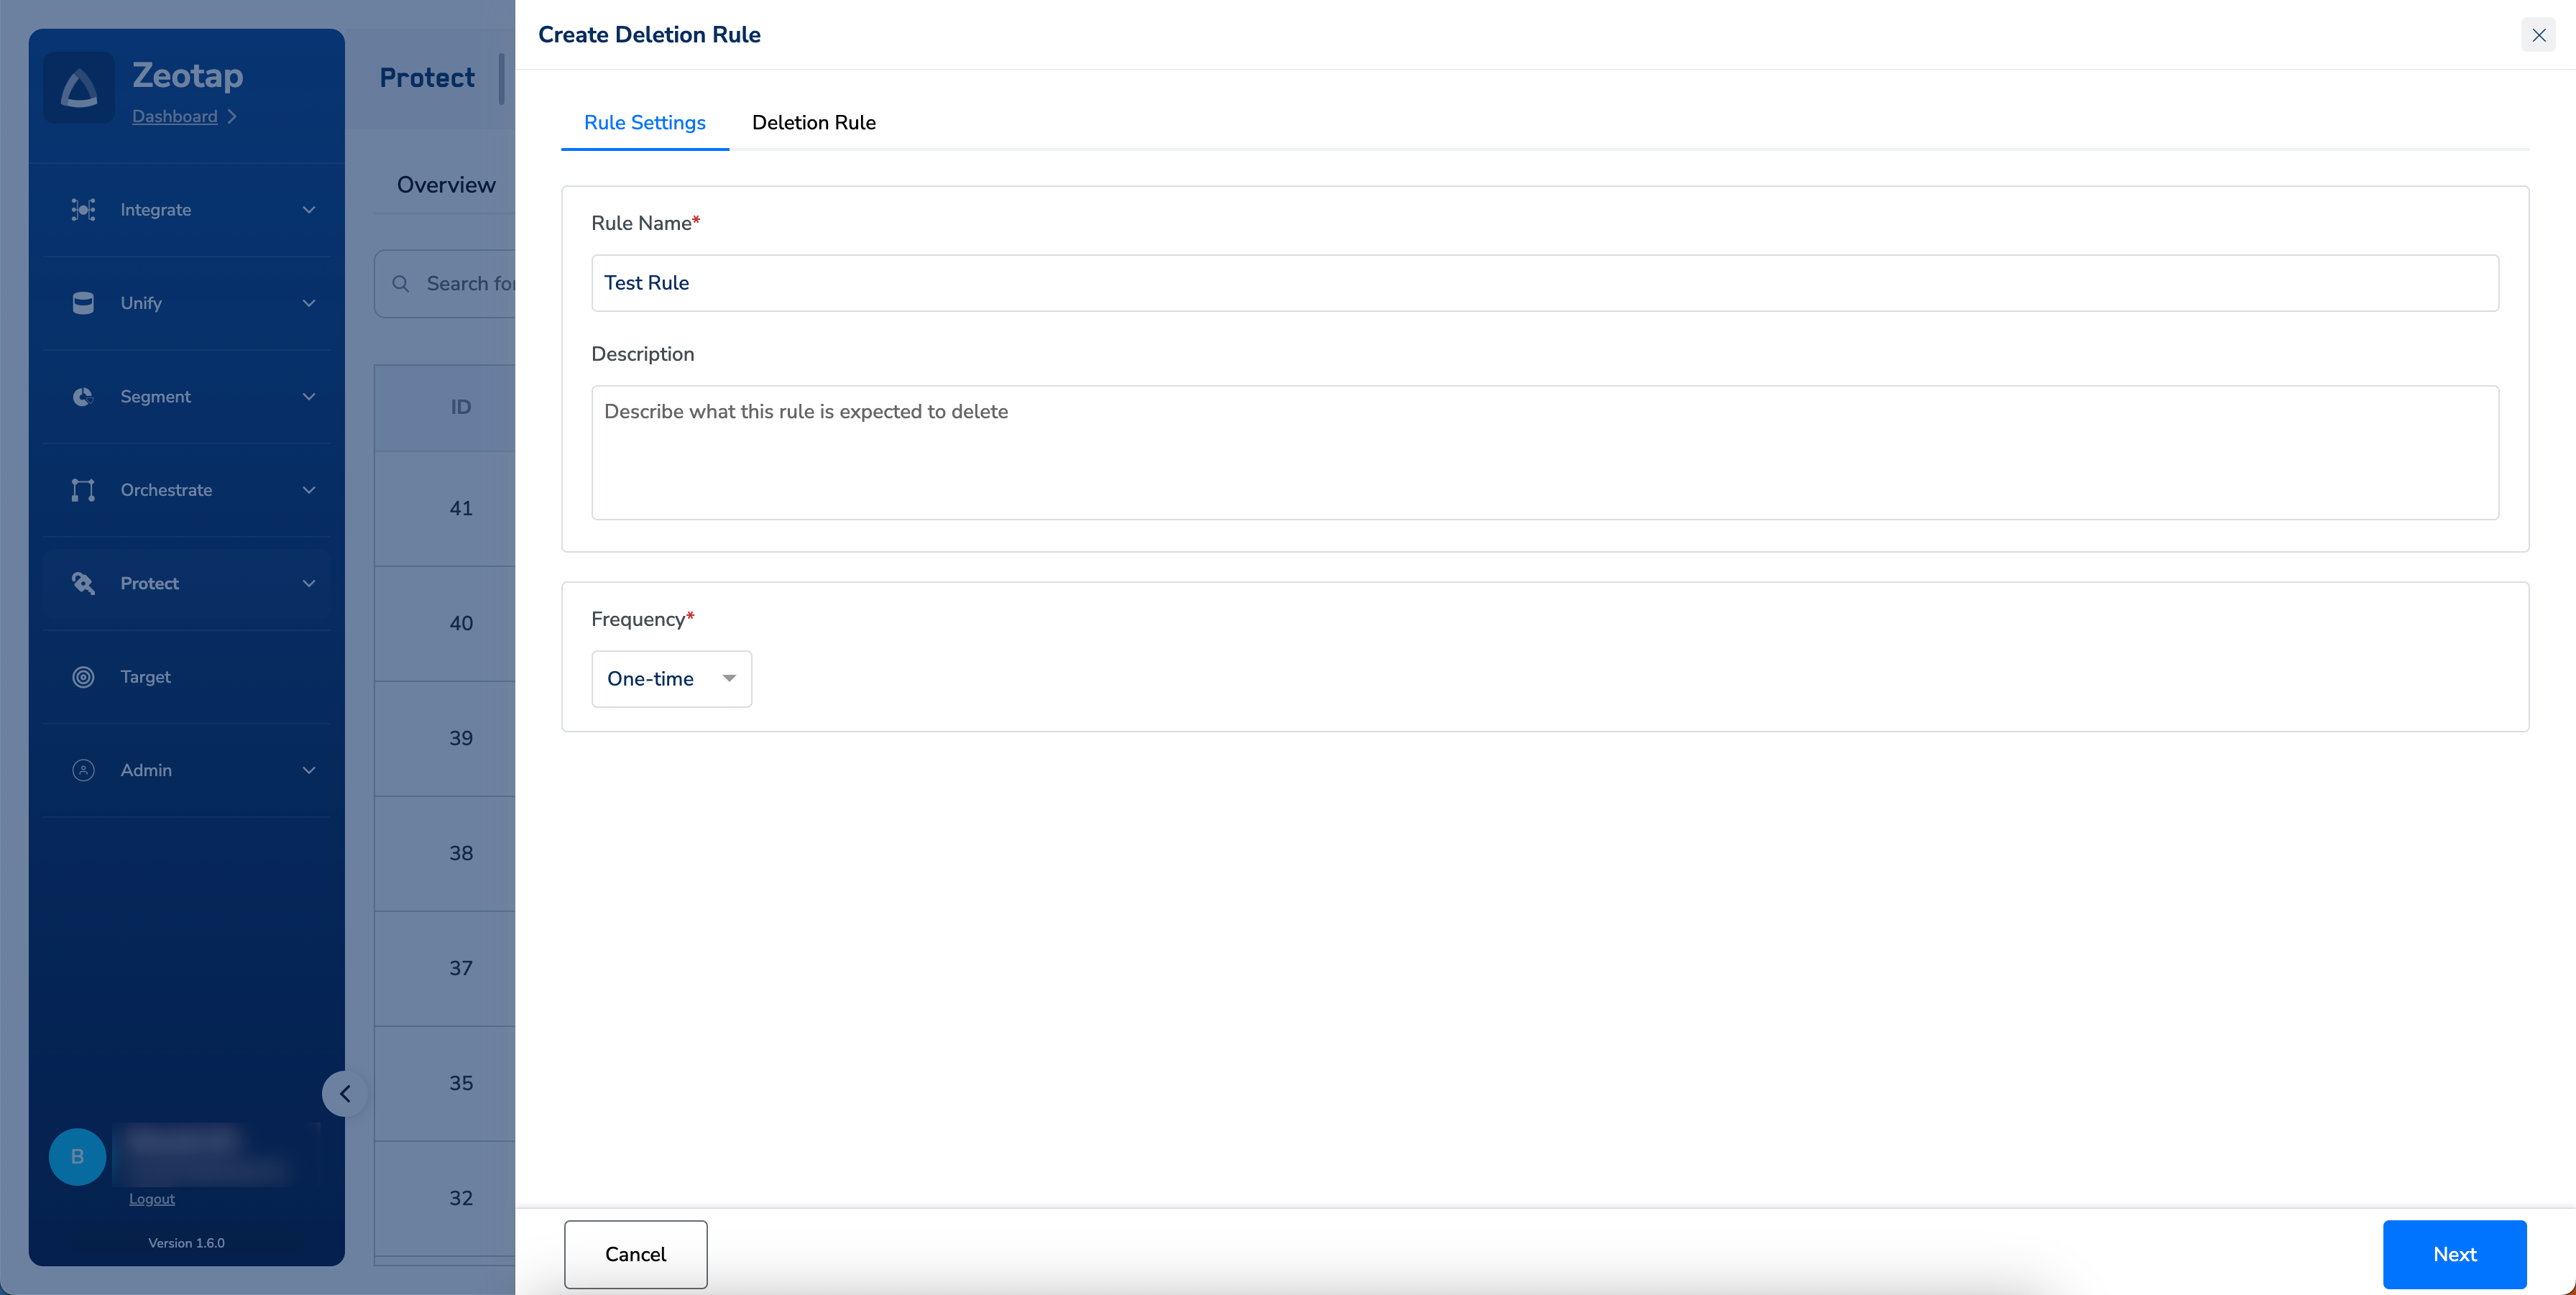
b. Use the Frequency option to configure how often the deletion occurs. In addition, you can set the start and end date for the deletion rule. Currently, we support the following frequencies:
- One-time
- Daily
- Weekly
- Monthly
Once you have configure all the settings on the Rule Settings tab, click Next to go the Deletion Rule tab.
Here, you can set criteria based on which the NCE records from the chosen source get qualified for deletion.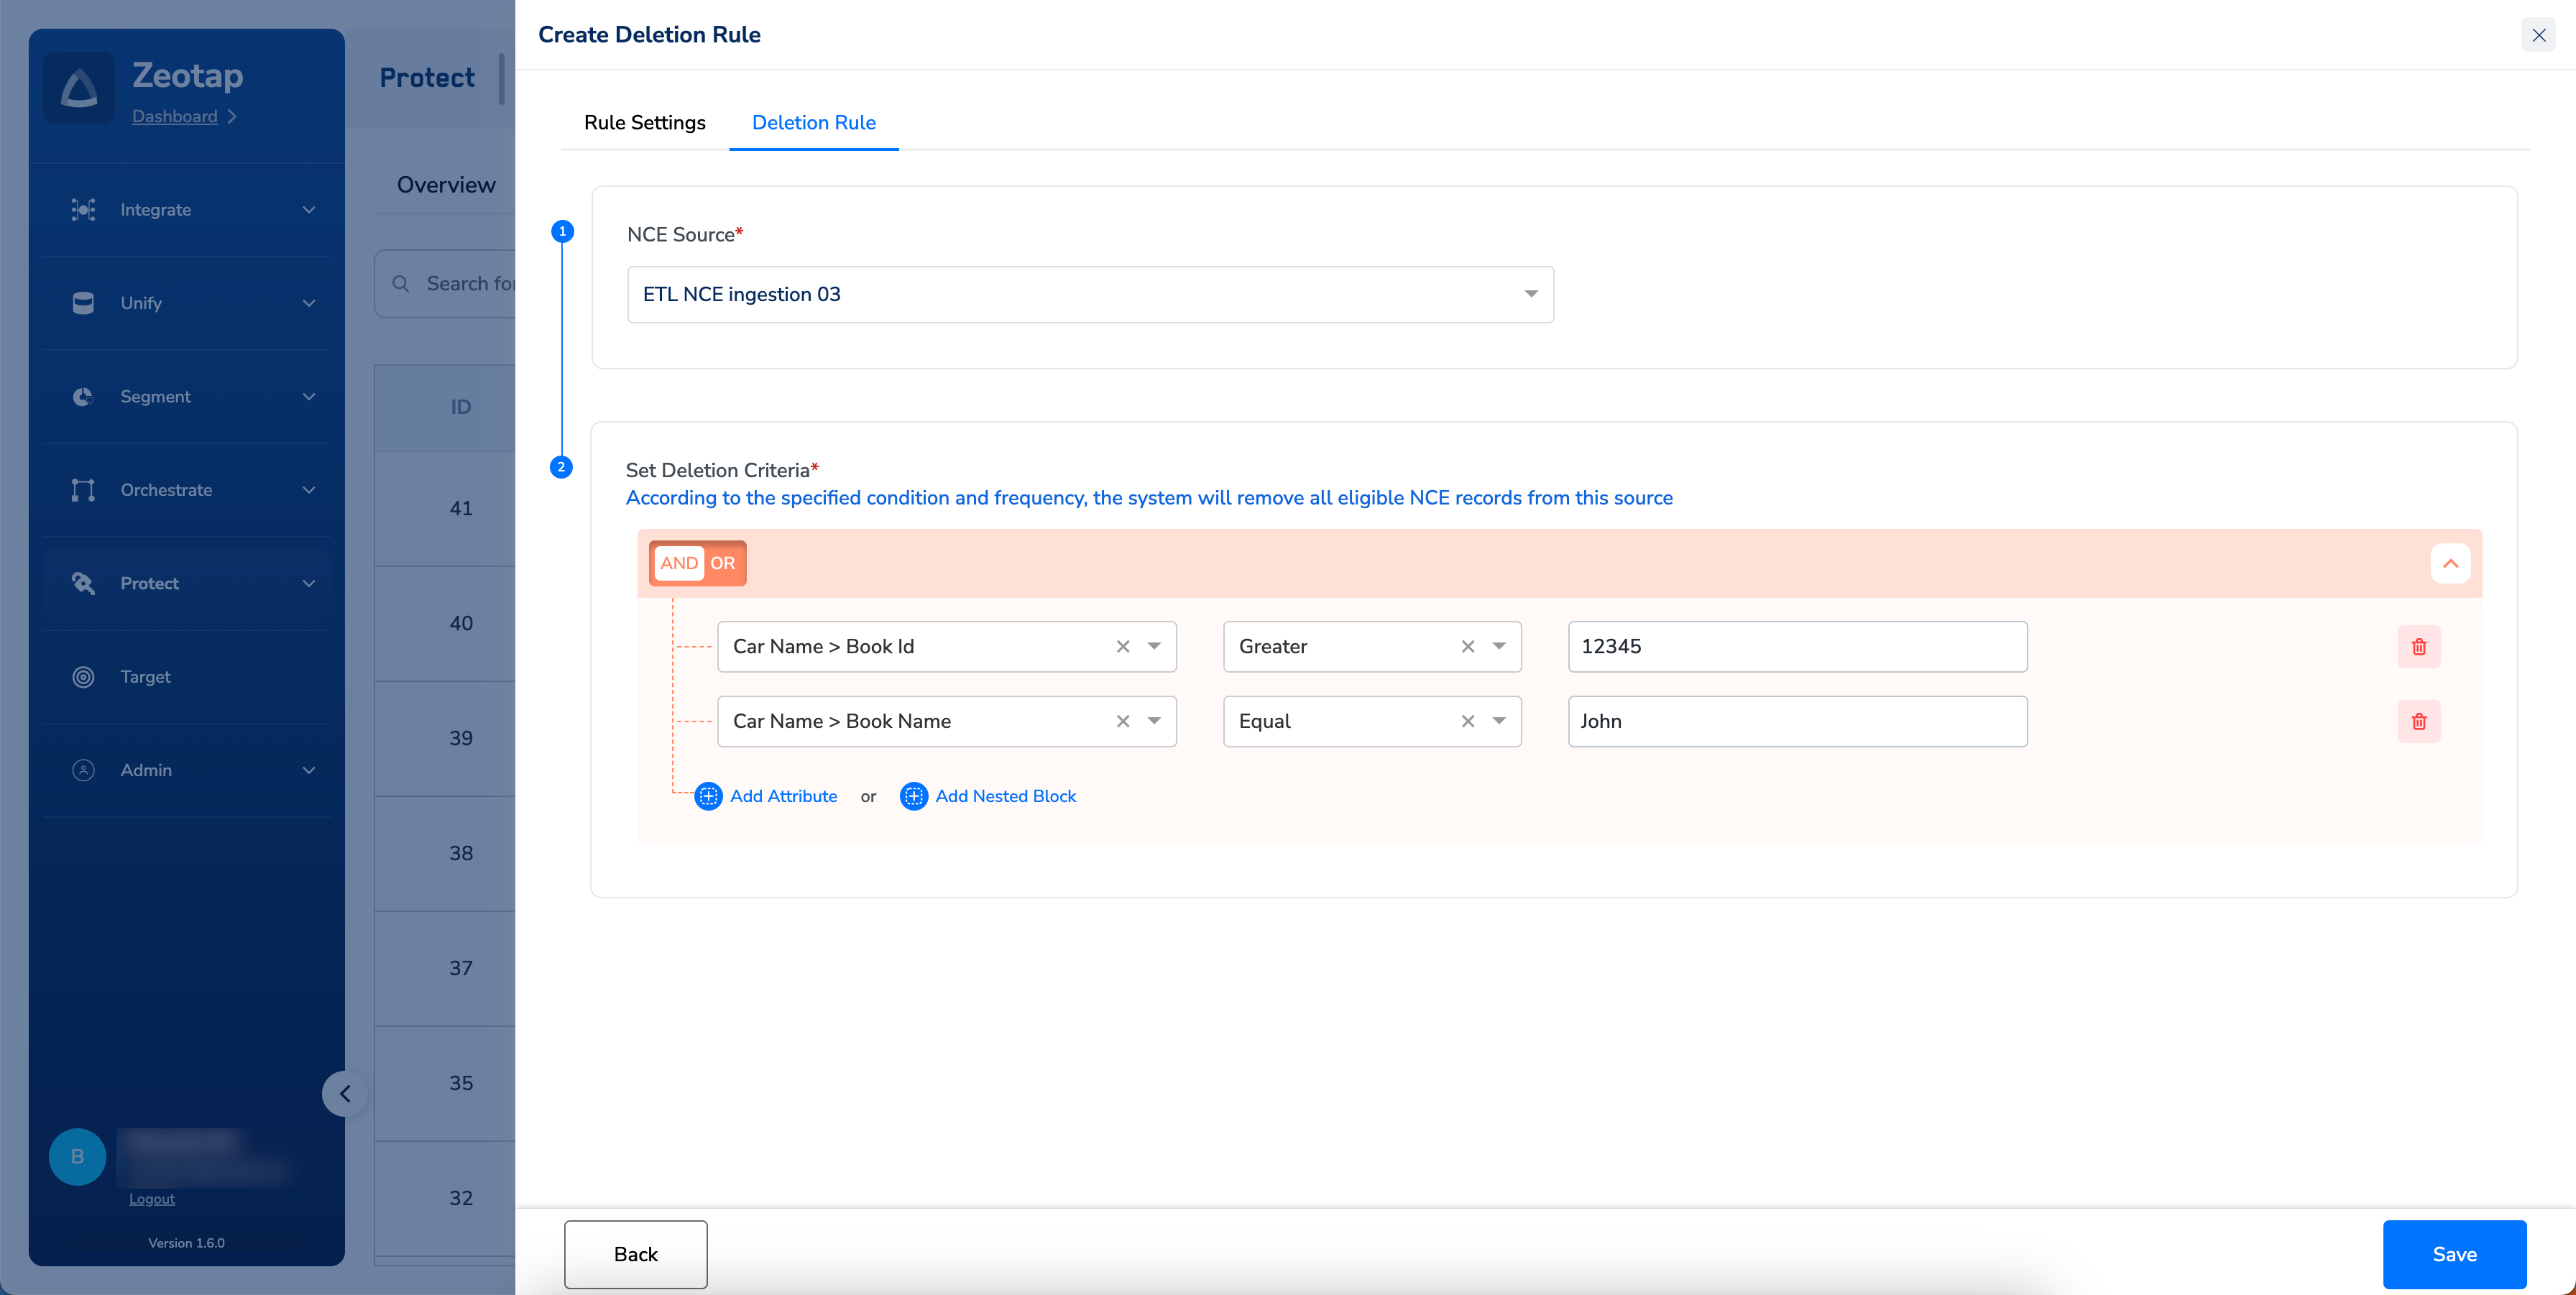
Click Save and confirm to create the deletion rule when prompted. This will permanently delete the qualified records/data from the system. Note that the deletion may take one hour to 10 days, depending on the volume of qualified data and the pipeline sequence
Note:The deletion process is irreversible. Ensure all necessary precautions are taken before triggering the deletion rule.