

Add a Node
To add a node, click the + at the point in the workflow where you want to insert it, and then choose the required action from the Choose an action menu — Add a Condition, Add a Delay, Create a Multi-branch Split, Create a True/False Split, or Send to Destinations.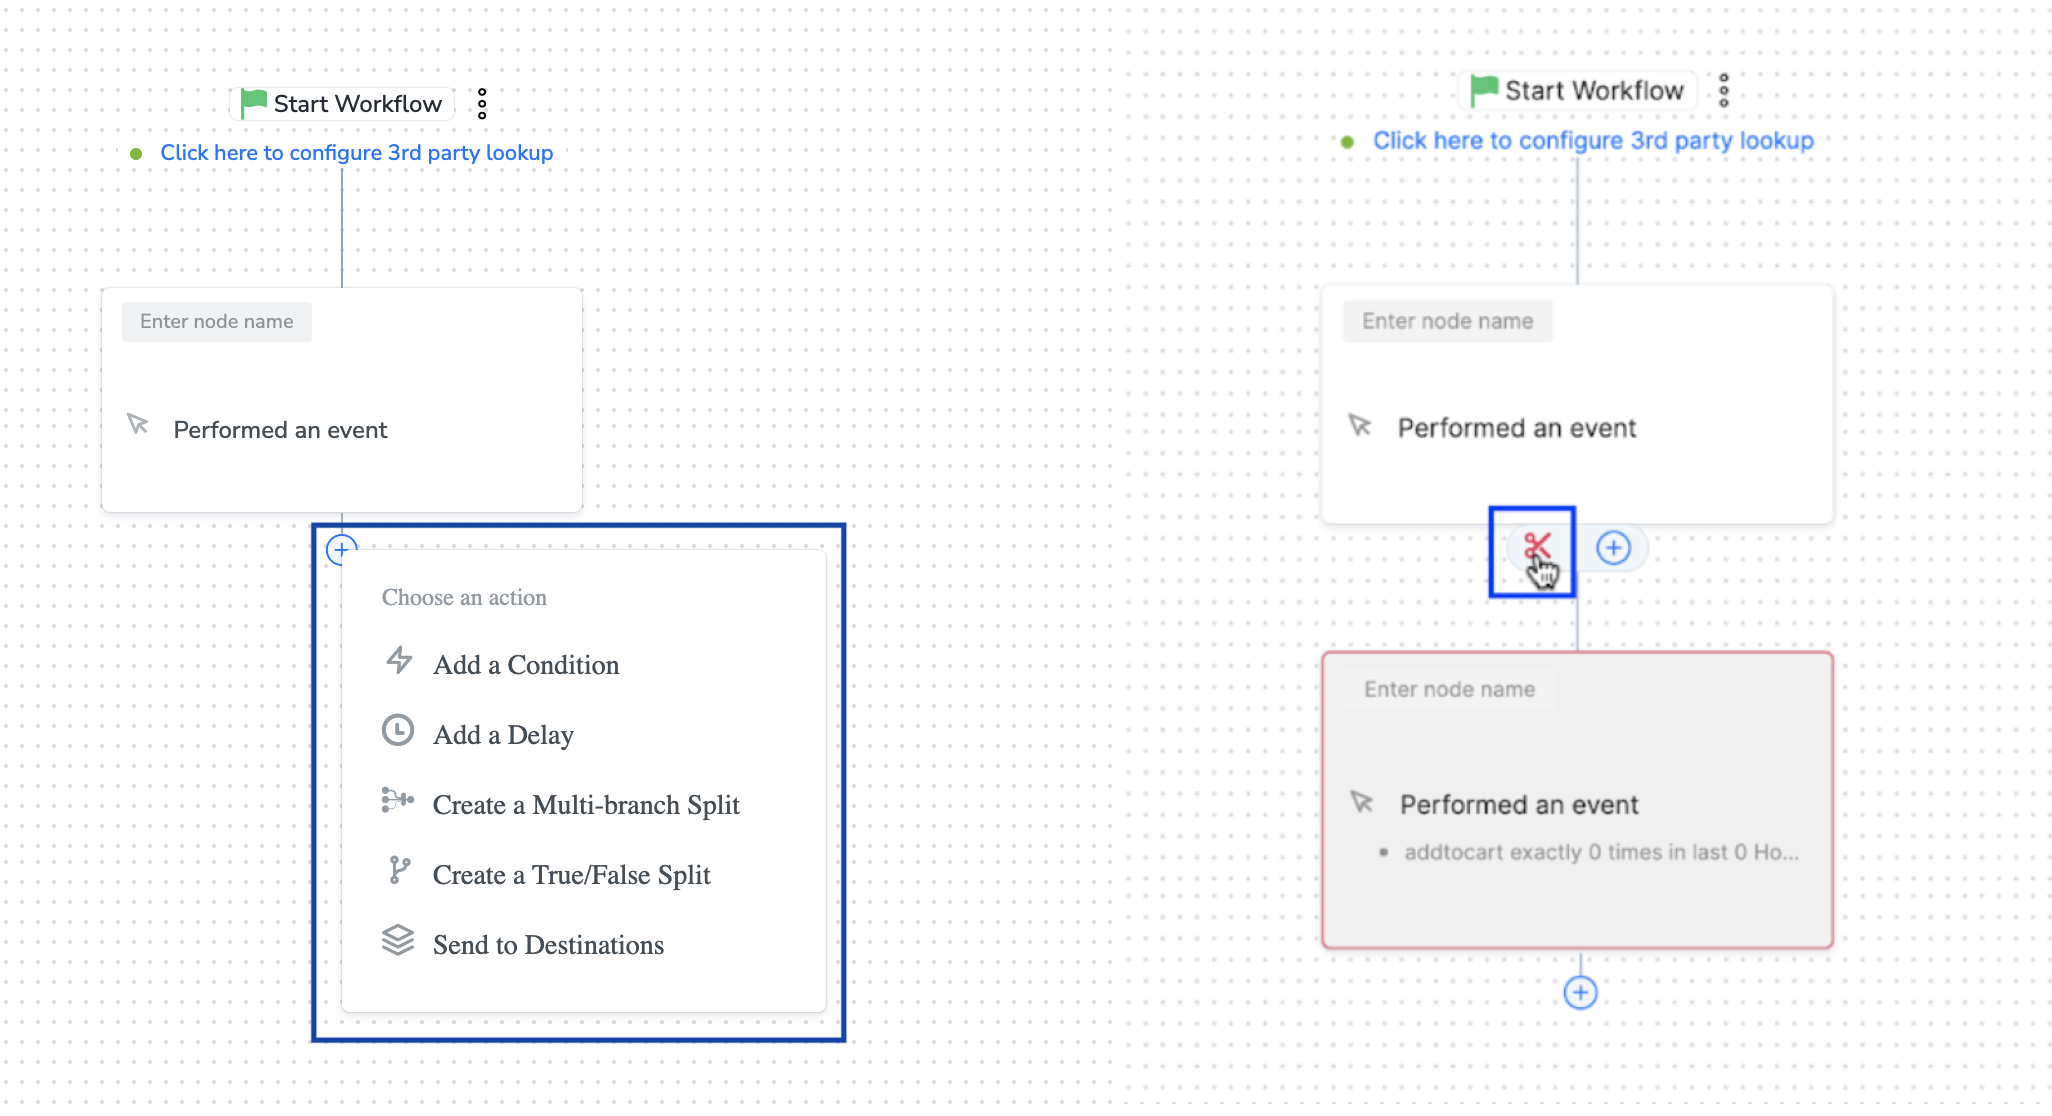
Delete a Node
When you delete a node, only that node is removed. The nodes that follow it automatically reconnect to the parent node, so the rest of the workflow definition is preserved.1
On the canvas, select the node you want to delete, and then click the red ✕ (delete) icon that appears at the top-right corner of the node.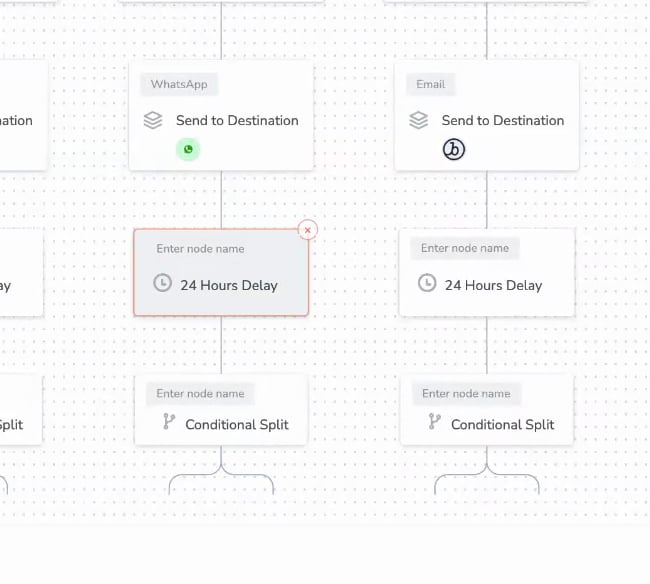
2
In the Are you sure you want to proceed? confirmation dialog, click Yes, Permanently Delete to remove the node. To keep the node, click Cancel.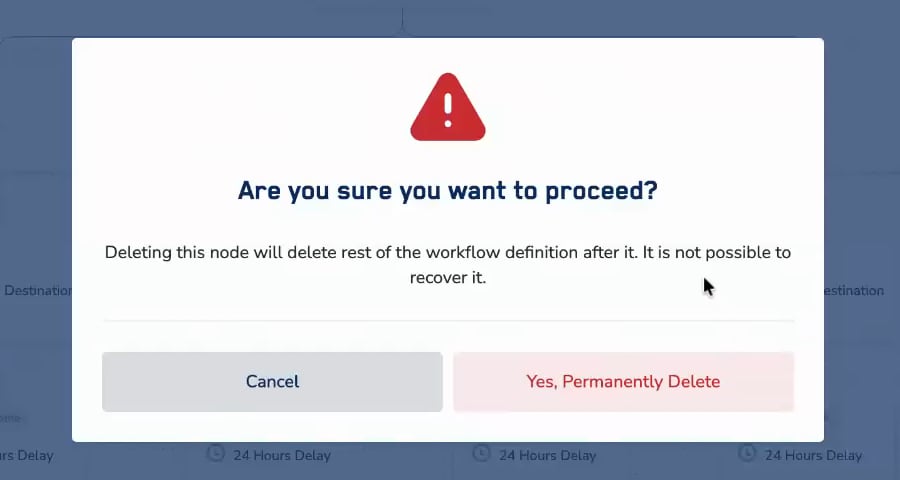
3
The node is removed and the following nodes reconnect to the parent node, preserving the rest of the workflow.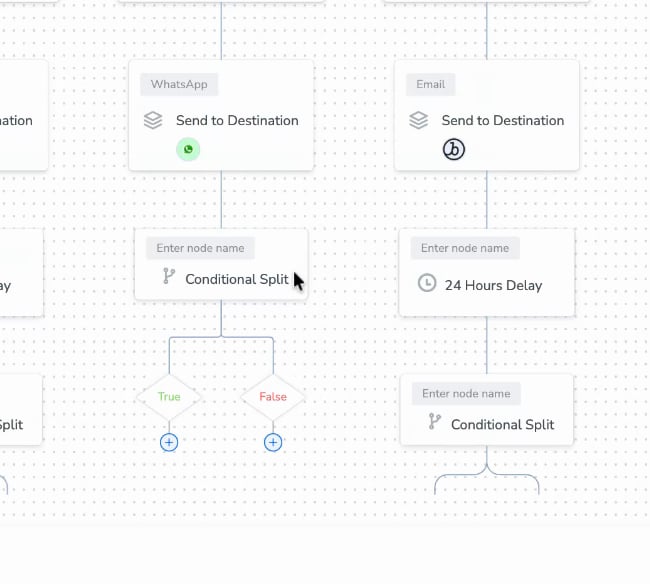
Delete a Branch
You can also delete an entire branch — a node along with all the nodes that follow it in that branch. Unlike deleting a single node, deleting a branch permanently removes everything below the point where you cut.1
Hover over the branch connector line (the line that joins two nodes) at the point where you want to cut. A snip (scissors) icon appears on the connector. Click the snip icon.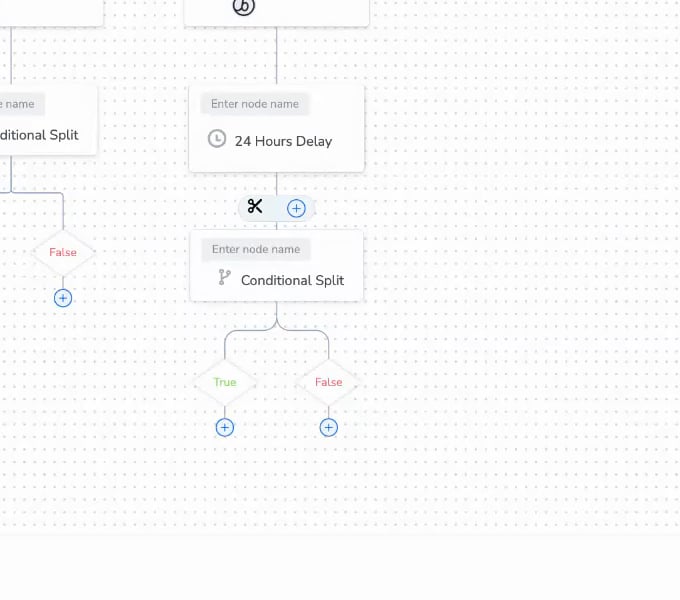
2
In the Are you sure you want to proceed? confirmation dialog, click Yes, Permanently Delete to delete the branch. To keep it, click Cancel.
Note:In case of a multi-branch split applied, you can delete the individual nodes that lie within the split. But, when you try to delete a multi-branch split, both the underlying individual nodes are deleted as well.